Processing Payroll Advances in Microsoft Dynamics GP
Here are the steps for payroll advance pay, recouping the funds, and tracking the advance amounts by employee in Microsoft Dynamics GP. Advanced pay could be used as employee loans, advance payment for employee travel, or any time an employee needs an advance in their pay.
Setting up the Advance pay:
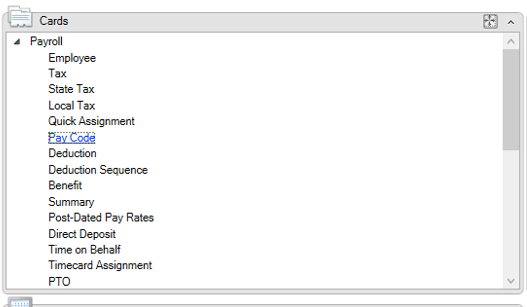
On the left side navigation pane select “HR & Payroll” to access the Payroll area.
On the “Cards” card select Pay Code to open the Employee Pay Code Maintenance window.
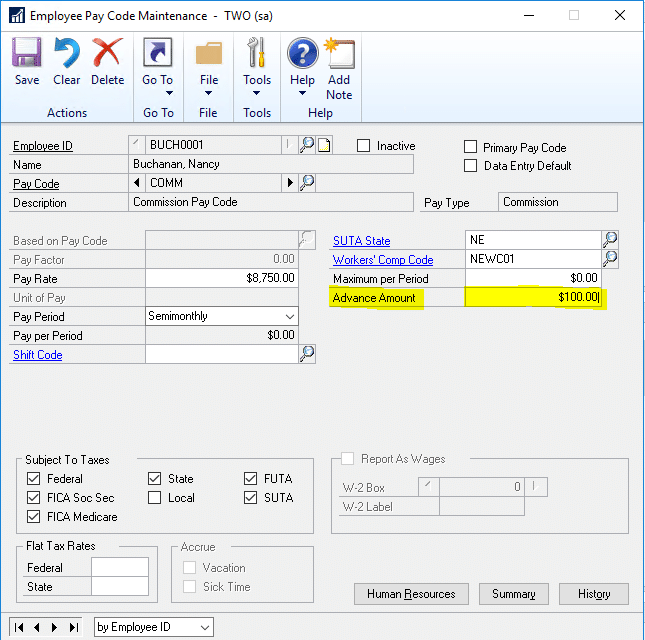
Within the Employee Pay Code Maintenance window:
- Select the Employee ID
- Select Pay Code: Salary or Commission
- Enter the advance amount to be paid to the employee
- Save and close the Employee Pay Code Maintenance window
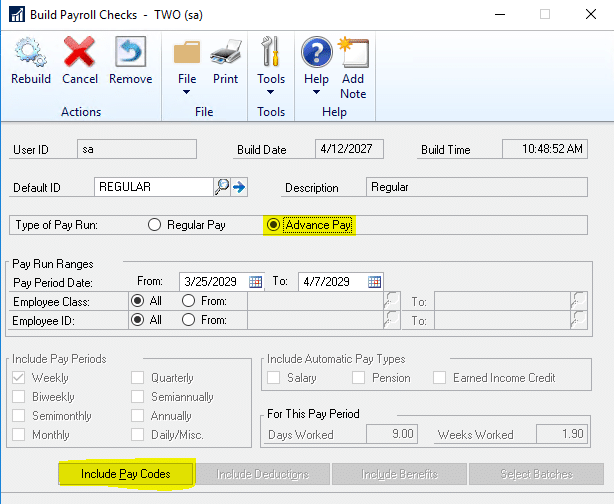
On the HR & Payroll area and Transactions card, select Build Checks.
- On the Build Checks payroll window select the radio button for Advance Pay.
- Select Include Pay Codes to include the pay codes to In this pay run.
- Select Build
- Within the HR & Payroll area, on the Transactions card, select Calculate Checks, select OK
- Back on the HR & Payroll area and Transactions card, select Print Checks
- Select print. It will open a prompt to calculate checks, select yes
- Select Print checks again and select Process
Steps to Recoup the Advance Pay funds from the employees’ payroll.
To recoup the funds, the payback must be set up. Below are the steps to set up the payback:
- Within Build Checks, Select Regular pay
- Select to appropriate pay period
- Select Salary in Include Automatic Pay Types
- Select Build
On the Transactions card Select Calculate checks, select OK.
This will show the amount being deducted towards the advance pay.
- Select Print Checks, again it will prompt to calculate.
- Select Print checks again and Process.
NOTE: When these steps are followed Dynamics GP will withdraw as much of the advance amount as possible. This could leave the employee with a $0 paycheck.
To ensure the employee gets a paycheck, with a deduction for the payback, a minimum net pay amount needs to be set up.
Within the HR & Payroll area, on the Cards card select Employee.
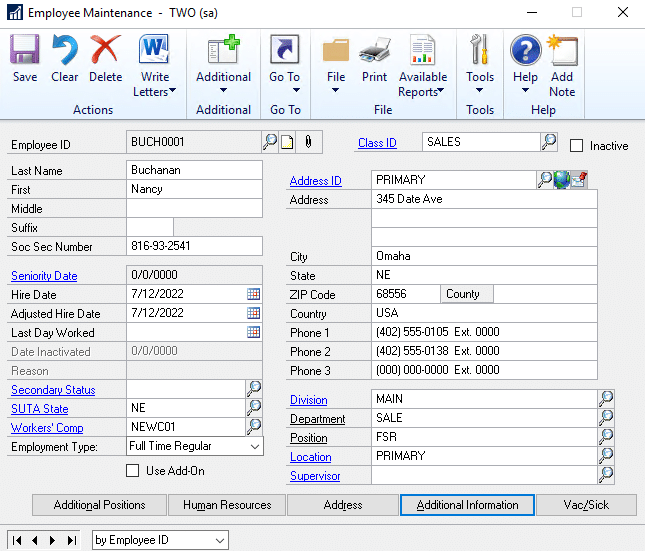
- Select the employee IDS
- Select additional information.
On the Minimum Net Pay, line enter the amount the minimum amount the employee can be paid.
To track the advance pay amounts, on the Payroll card select Pay Code.
- Select the employee ID.
- Select pay code Salary or Commission then select Summary.
- The Advance Taken field shows the amount of remaining owed by the employee.
Under the terms of this license, you are authorized to share and redistribute the content across various mediums, subject to adherence to the specified conditions: you must provide proper attribution to Stoneridge as the original creator in a manner that does not imply their endorsement of your use, the material is to be utilized solely for non-commercial purposes, and alterations, modifications, or derivative works based on the original material are strictly prohibited.
Responsibility rests with the licensee to ensure that their use of the material does not violate any other rights.