Account Schedules in Business Central for Financial Reporting
Do you want to get an insight into the financial data stored in your chart of accounts in Business central (BC)?
If so, Account Schedule (AS) is the tool to use.
AS will analyze the figures in GL and compare GL entries with GL Budget entries. The result of this comparison will then be displayed as charts in the Role Center or as reports such as Income Statements and Balance Sheets. BC has some sample account schedules that you can use right away. This allows users to set up their own rows and columns to specify the figures to compare.
How to Use Account Schedule
- A major function of AS is that it provides a place for calculations that cannot be made directly in the chart of accounts, such as creating subtotals for groups of accounts.
- AS provides capability for general ledger entries and general ledger budget entries to be filtered by parameters like debit amount and net change.
- You can also compare two or more account schedules and column layouts by using formulas which allows you to:
- Create customized financial reports
- Create as many account schedules as needed, and
- Set up various report layouts and print the reports with the current figures
Create a New Account Schedule
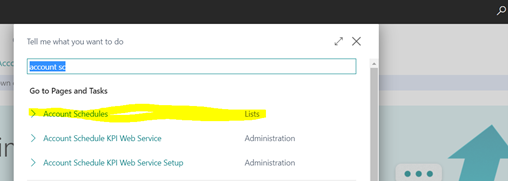
- Choose the search icon, enter Account Schedules, and then choose the related link.

Note: Ensure to open the one under "List", not under "Report and Analysis."
2. On the Account Schedules page, choose the New action to create a new account schedule name.
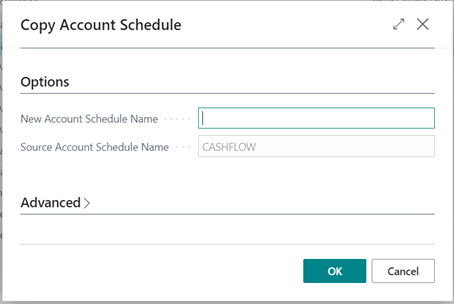
Alternatively, you can choose the Copy Account Schedule from the "Process" menu, fill in the two fields, and choose the OK button.
3. Fill in the fields as necessary. In the Default Column Layout field, select an existing layout. You can edit it later if you want.
4. Choose the Edit Account Schedule from the process menu.
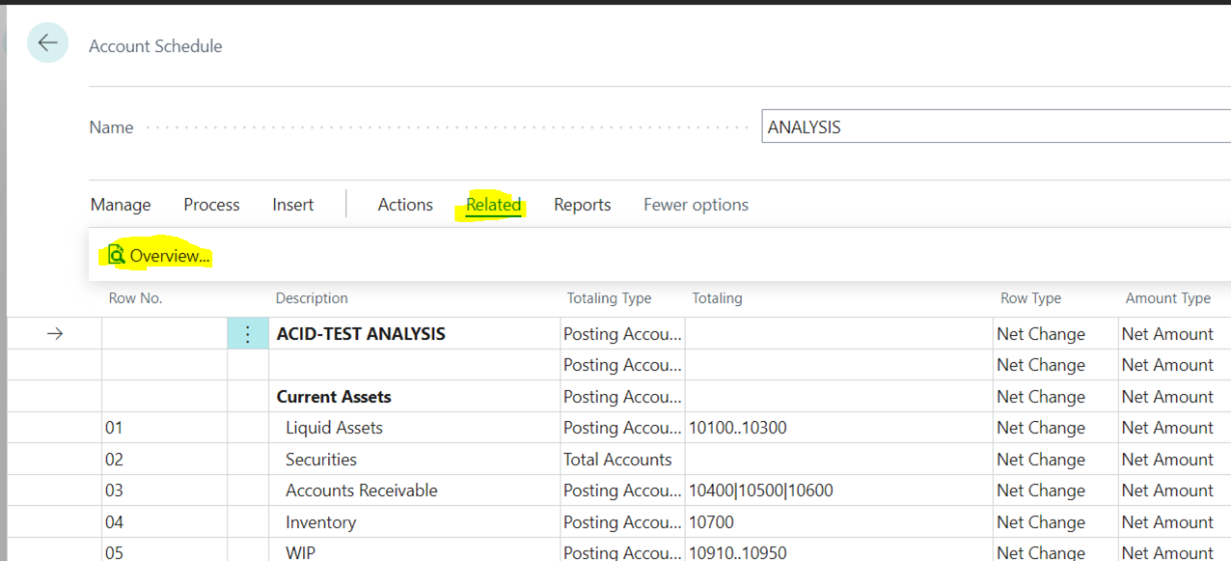
5. Create a row for each financial element you want to appear in the report, such as one row for current assets and another for fixed assets. For inspiration, see existing account schedules in the CRONUS demonstration company.
6. Choose the Overview action to see the resulting financial report.
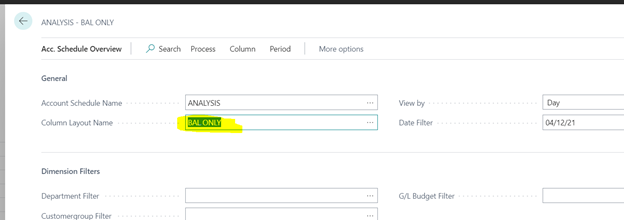
7. On the Acc. Schedule Overview page, in the Column Layout Name field, select another column layout to see the financial data by other parameters.
8. Finally, click on the OK button.
Questions?
Stoneridge Software is here to help! Please get in touch with us if you have any questions.
Under the terms of this license, you are authorized to share and redistribute the content across various mediums, subject to adherence to the specified conditions: you must provide proper attribution to Stoneridge as the original creator in a manner that does not imply their endorsement of your use, the material is to be utilized solely for non-commercial purposes, and alterations, modifications, or derivative works based on the original material are strictly prohibited.
Responsibility rests with the licensee to ensure that their use of the material does not violate any other rights.


