Copying Data into a New Legal Entity in Dynamics 365 for Finance and Operations
Sharing data between companies is usually a huge conversation during an implementation.
What data should we share?
What data can we share?
How do we share it?
Those are some of the typical questions. I want to use this article to discuss a couple of the options to replicate or share data cross companies in Dynamics 365 for Finance & Operations.
Cross-Company Data Sharing
What is Cross-Company Data Sharing in Dynamics 365 for Finance & Operations (D365FO)? This is a slick new feature where you can share Reference and Group data. You can share a table at any time you want, and it will replicate the data to the companies that you want and keep the fields in sync if you make changes in any company.
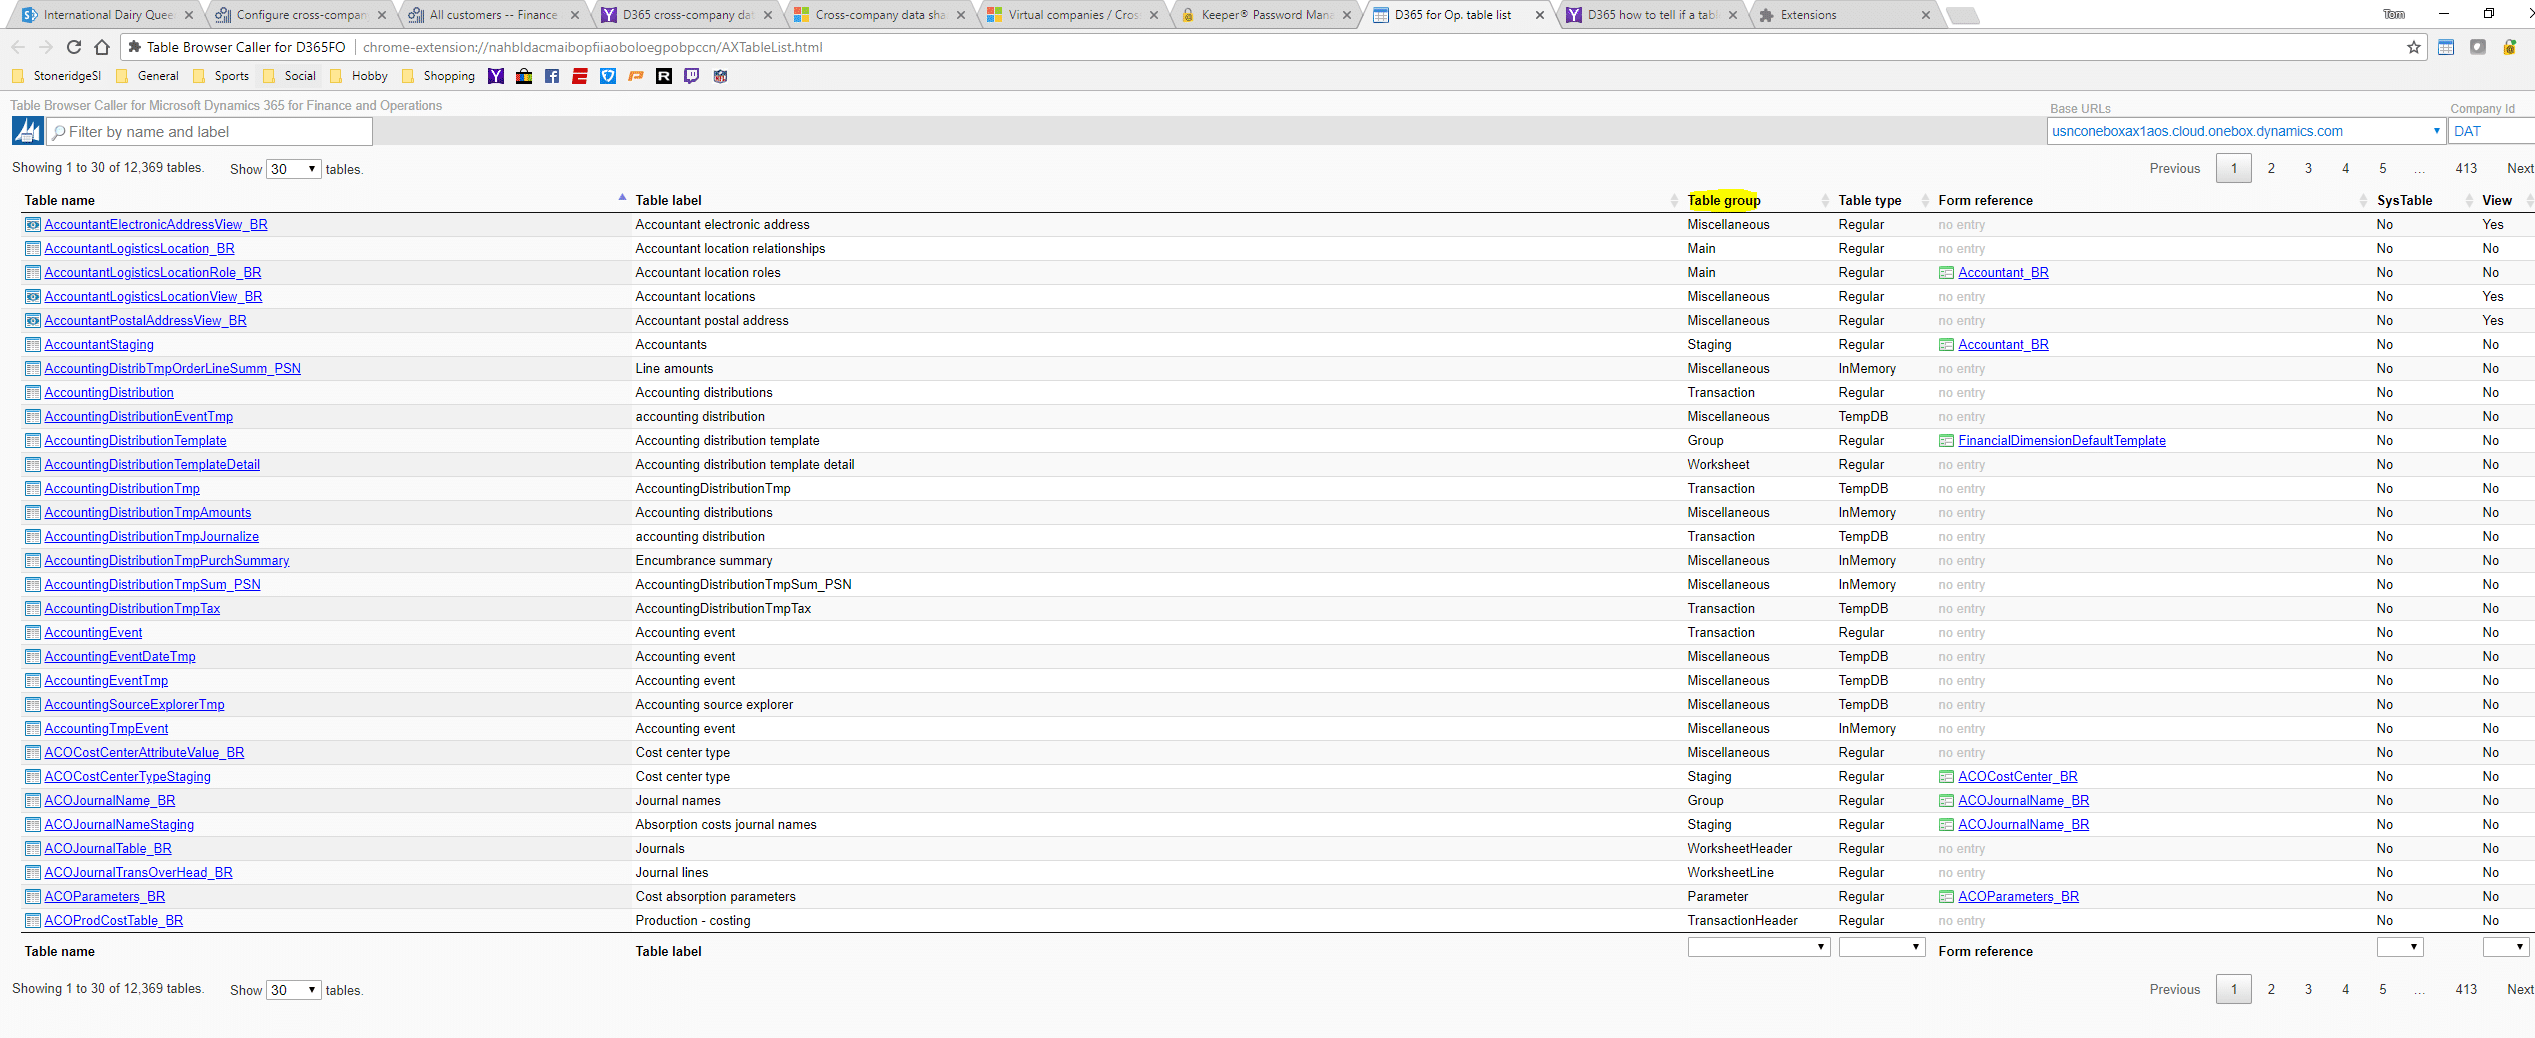
The question is how do I know if a table is considered a reference or group table? That’s a simple answer, it’s a property on tables called TableGroup. If a table has a tableGroup value of Reference or Group it can be shared. Any other TableGroup outside of Reference or Group cannot be shared using this feature according to Microsoft documentation.
If you’re not familiar with the AOT in Visual Studio to find the TableGroup property, you can download a Chrome extension called: Table Browser Caller for D365FO which will give you a view of all the tables and their tableGroup property to see what tables you have available to you for sharing.
Thus far I love the cross-company data sharing feature because if you remember back to previous versions of AX, you had virtual companies to share data.
Virtualization is more of a sharing concept than Cross-Company Data Sharing as cross-company data sharing is replicating the data automatically while virtual companies allowed you to pick a table to share and which companies you want to share it with and those companies would then use the virtual company’s dataAreaID in that table that you shared. So, when a new record was added it would only add one record with the virtual companies dataAreaID and the companies you added to this virtual company would look up data using the virtual company dataAreaID rather than the company’s own dataAreaID.
One problem with virtualization was that it was a bugger to virtualize if you already had company-specific data as you’d lose it essentially because once you virtualized the business logic would simply start looking for the new virtual dataAreaID in the tables you shared. With cross-company data sharing you don’t have this problem as it will simply replicate what data that is already present to other companies – Woohoo! This is a big win for cross-company data sharing.
The question you are probably going to ask is: How do you share master data?
There isn’t a convenient answer for that yet as you cannot share customers, vendors, etc… using cross-company data sharing because their tables don’t fall into the Reference or Group tableGroups. However, from what I understand it’s on the roadmap to have a master data sharing feature in D365 at some point.
When you configure cross-company data sharing you will see tables such as CustTable or VendTable as tables that you can select but once you select one you’ll get the error: Table XYZ is a Main Table as specified by the table group and may not be shared.
I’m going to bring up a couple alternative options to share or replicate master data in this article but prior to doing that let’s go through a simple example of cross-company data sharing.
Cross-Company Data Sharing Example: How to Share Customer Groups
1. Navigate to: System Administration > Setup > Configure Cross-Company Data Sharing.
2. Click the +New button.
- Enter a Name: Test Customer Group
3. In the Companies which share this records in these tables pane, click the +Add button.
- Add all the companies you want to Share these tables with.
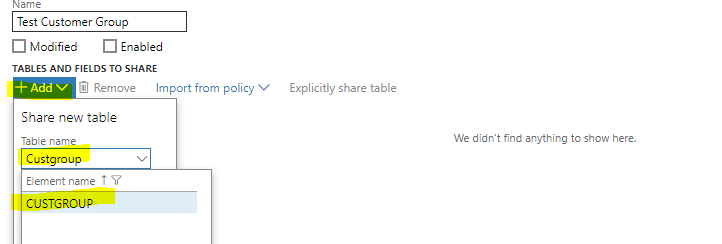
4. Under Tables and Fields to Share, Click +Add
- Enter CustGroup in the Table Name field.
- Click the Add table button.
5. The CustGroup table should be added to the list of tables that you want to share. Expand CustGroup and you’ll see the fields that D365FO is suggesting share by default. Mark any field that you want to share or un-share.
6. Now we have our setup complete, all that is left to do is simply enable sharing.
- Click Enable at the top.
- Click Yes.
Prior to sharing the data, I had customer groups setup in USMF but the other company (12) did not have any prior to sharing the data. After I enabled sharing if I go into company 12 I can see that I have customer groups.
Sharing Data through Data Entities
Right now, there aren’t too many glamorous options to share master data and keep it in sync. So we can walk through how you can at least get the data out of a company and replicate it very easily to another company or companies. Keeping it in sync is a different story…
To copy data to another company you can use the Data Management workspace and there is an option in that workspace called: Copy in Legal Entity.
This is a very simple procedure, at an elevated level you:
- Pick your source company
- Pick the companies to copy data to (Target companies)
- Pick which data entities you want to use to copy data.
- Press the copy into legal entity button.
If you think about this, if you are going to copy master data from 1 company to another a prerequisite would be that both companies are configured the same. For instance, if you copy a customer that is in customer group 10 but customer group 10 doesn’t exist in your target company, you’re going to have problems.
Let’s walk through a quick example!
Copy into Legal Entity Example
1. Navigate to Workspaces > Data Management.
- Click Copy into Legal Entity
2. Enter the following:
- Group name: Customer Test
- Descriptions: Customer Test
- Data Project Operation Type: Copy into Legal Entity
- Source Legal Entity: Pick the source company
Note: What we know now is that I’ve picked the USMF as the source company, so we’ll be exporting data from this company to import into other companies.
3. Define the Destination Legal Entities
- Click the Select Existing button.
- Pick the companies you want to copy data to.
- Click Add Selected.
Note: We can see above that I chose two legal entities to copy data to.
4. Add entities to the Selected Entities section.
- Click +Add Entity
- In the Entity Name field select Customers V3.
- Click Add.
5. You should now have a line on the Selected Entities tab. If you want to filter which customers are copied, click the Filter icon on the line.
6. Once you have defined your filter, simply click Copy to Legal Entity at the very top of the form and your data will copy to the companies you have specified.
7. If all your configuration is the same between the companies you tried to copy to, your customers should have come through.
Note: The customers V3 entity has some complications with the use of invoice accounts, etc…. Where depending on the timing of your import it may fail because for example a customer account doesn’t exist quite yet that you are trying to assign as an invoice account.
If you are running into complications with this, you can use the following two entities as a replacement for the customer entity:
- Customer Definitions – Creates a generic customer account
- Customer Details V2 – Defines the detailed information about your customer accounts.
Under the terms of this license, you are authorized to share and redistribute the content across various mediums, subject to adherence to the specified conditions: you must provide proper attribution to Stoneridge as the original creator in a manner that does not imply their endorsement of your use, the material is to be utilized solely for non-commercial purposes, and alterations, modifications, or derivative works based on the original material are strictly prohibited.
Responsibility rests with the licensee to ensure that their use of the material does not violate any other rights.


