How to Change the Default Model in Visual Studio for Dynamics 365
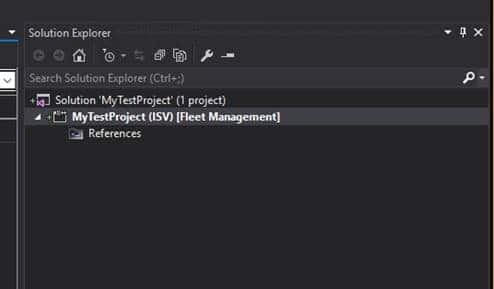
I ran across an interesting find today. Did you know you have the ability to change the default model associated with your Visual Studio dev environment? This was a helpful find for me and it should be for you too. Whenever I created a new solution/project in Visual Studio, my default model was Fleet Management. Most of the time I would remember to change this to the correct model. On occasion, I would forget and only remember when I was unable to add an AOT element outside of the Fleet Management model to this project.

Here's how to change the default model in Visual Studio for Dynamics 365:
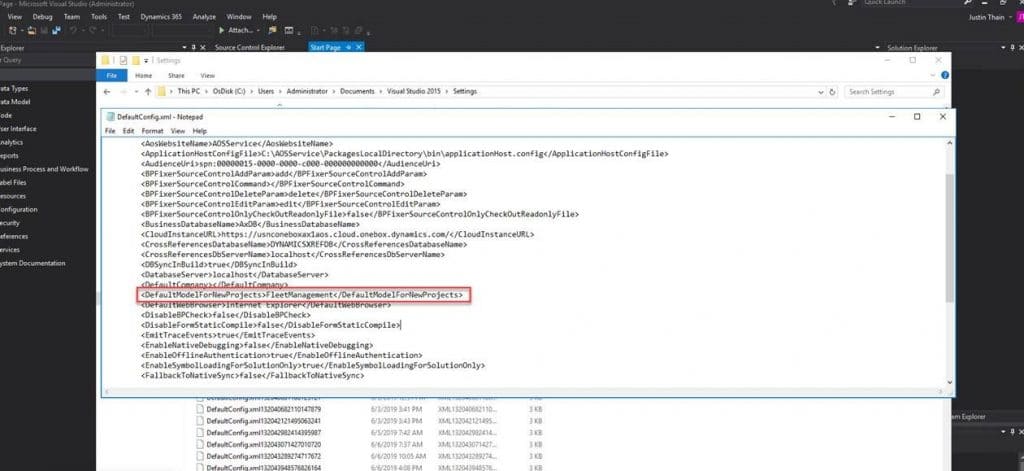
1) On your dev box, locate the settings folder for Visual Studio by going to C:\Users\Administrator\Documents\Visual Studio 2015\Settings.
2) In the settings folder, edit the DefaultConfig.xml file.
3) Open the XML file with notepad, searched for element DefaultModelForNewProjects, and changed it to the desired model.
4) Once the file has been saved and Visual Studio is closed and reopened, all projects will be created in the model you specified in the default config file.
Check out more blogs about using Visual Studio here.
Continue to receive tips on Dynamics 365 Finance and Operations by subscribing to our blog. If you have questions at any time about Visual Studio or Dynamics 365, please reach out to our experts at Stoneridge Software.
Under the terms of this license, you are authorized to share and redistribute the content across various mediums, subject to adherence to the specified conditions: you must provide proper attribution to Stoneridge as the original creator in a manner that does not imply their endorsement of your use, the material is to be utilized solely for non-commercial purposes, and alterations, modifications, or derivative works based on the original material are strictly prohibited.
Responsibility rests with the licensee to ensure that their use of the material does not violate any other rights.


