How to Enable All Fields on a Table for Editing But Lock Specific Columns in Dynamics 365
If you want to make all views editable for a specific table but lock certain columns so they cannot be changed from view in Dynamics 365, you can follow a series of steps.
- In Dynamics 365, enter Advanced Settings
- Click Settings > Customizations
- Click Customize the System
- Under Entities select the table you want to make views editable
- Click the Controls tab
- Click Add Control..
- Scroll down and select “Power Apps grid control”
- Click Add
- Click the Web radio button
- Select the Power Apps grid control and scroll down the list of property items to Enable editing
- Click the edit button and change to Yes
- Close Entities
- Create a new Javascript file (*.js) (Visual Studio, Notepad++, etc)
- Create the javascript code using the following:
function onRecordSelect(exeContext) { //debugger; var _formContext = exeContext.getFormContext(); var disableFields = ["name","msdyn_company"]; lockFields(exeContext, disableFields); } function lockFields(exeContext, disableFields) { var _formContext = exeContext.getFormContext(); var currentEntity = _formContext.data.entity; currentEntity.attributes.forEach(function (attribute, i) { if (disableFields.indexOf(attribute.getName()) > -1) { var attributeToDisable = attribute.controls.get(0); attributeToDisable.setDisabled(true); } }); } - Replace the green highlighted text with the field schema names you want to lock on all views
- Each name is in quotes and separated by a comma ["name","msdyn_company"]
- Save the file as a .JS file
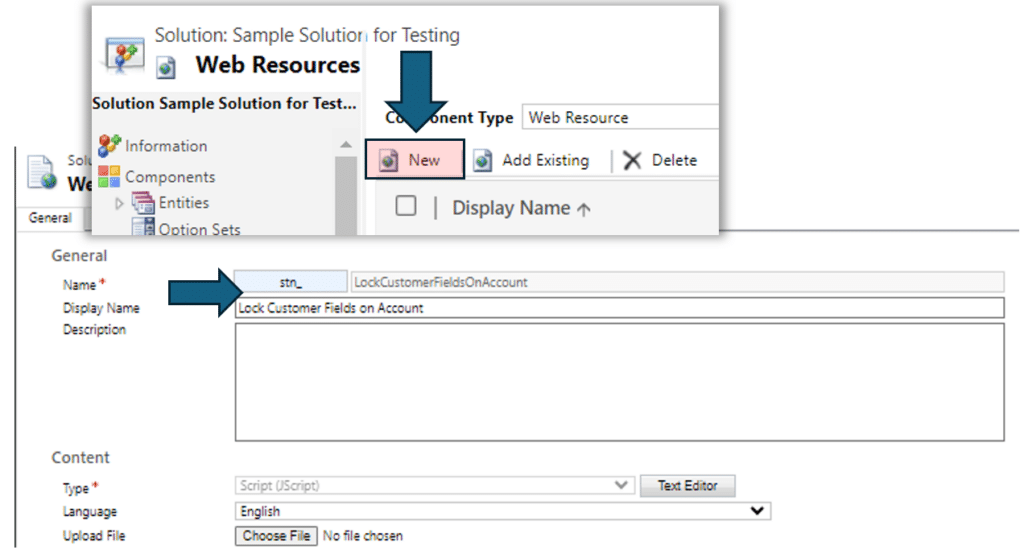
- In a solution, Create a new web resource
- Enter a Name and Display Name
- Choose Script (Jscript) as the Type
- Click Choose File and select the JS file created earlier.
- Click Save
- Click Publish
- In your solution, open Entities and click the entity again (I am using the Account entity as an example)
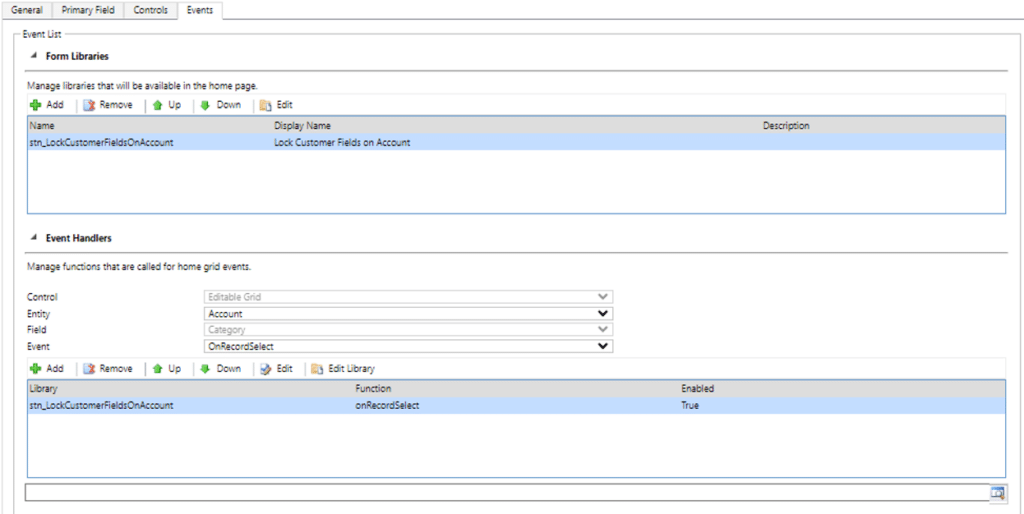
- Click Events
- Under Form Libraries, click add
- Add the new web resource created earlier
- Under Event Handler, change the Event to OnRecordSelect
- Click + Add
- Choose the new library from the list
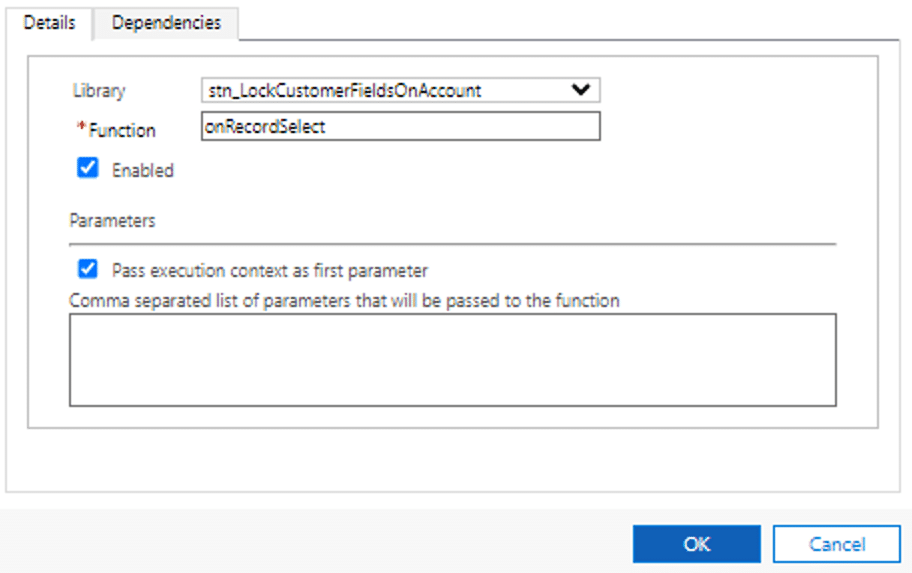
- Enter the Function name as show in the image below
- Click the Pass execution context as first parameter
- Click OK
Reach out to Stoneridge Software to Learn More About Optimizing Dynamics 365
No matter which Dynamics 365 solutions you are running, Stoneridge experts can help you customize and optimize it so it works for your business' specific needs.
Under the terms of this license, you are authorized to share and redistribute the content across various mediums, subject to adherence to the specified conditions: you must provide proper attribution to Stoneridge as the original creator in a manner that does not imply their endorsement of your use, the material is to be utilized solely for non-commercial purposes, and alterations, modifications, or derivative works based on the original material are strictly prohibited.
Responsibility rests with the licensee to ensure that their use of the material does not violate any other rights.


