Tips to Create a Personal Dashboard in Dynamics 365 for Customer Engagement (CRM)
Have you set up your personal dashboard in Dynamics 365 for Customer Engagement yet? Once you have a customized dashboard set up, it will become a vital tool in using Dynamics 365 CRM. Dashboards can be personalized to include the information important to each user, which could be information from within CRM or even from outside sources.
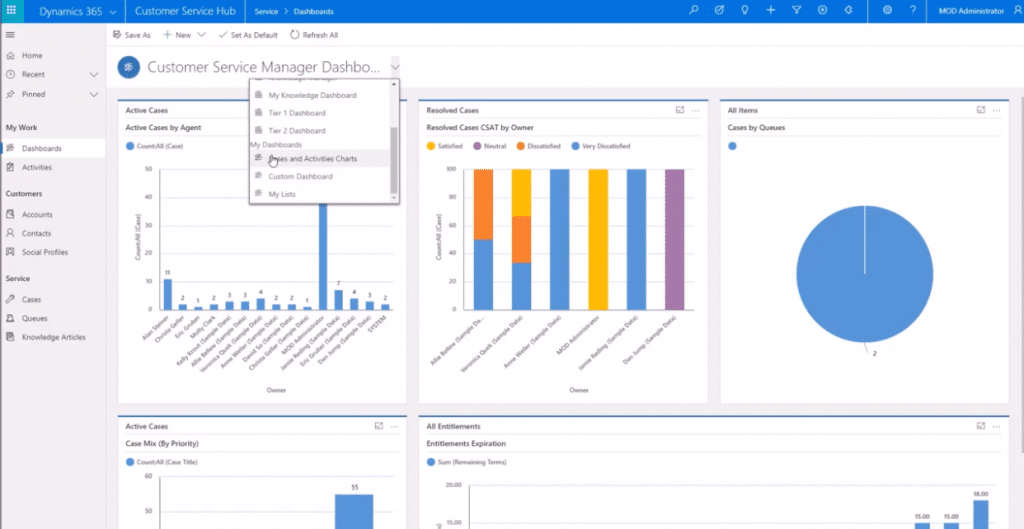
Users are not restricted to one view. As shown in the image below, users can set up a variety of different personalized views that can be easily changed depending on the information the user wants to see.

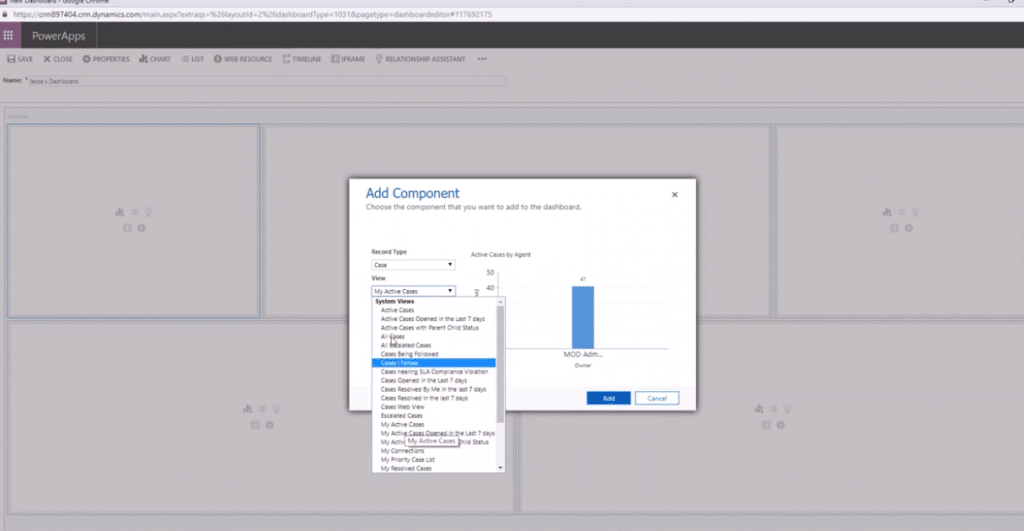
To create a dashboard, select ‘new’ and then choose from one of the layout options.
The layout chosen isn’t a permanent selection, as each column and row can be edited and changed individually from within the dashboard customization window. This gives users the freedom to truly create their own personalized look and feel.
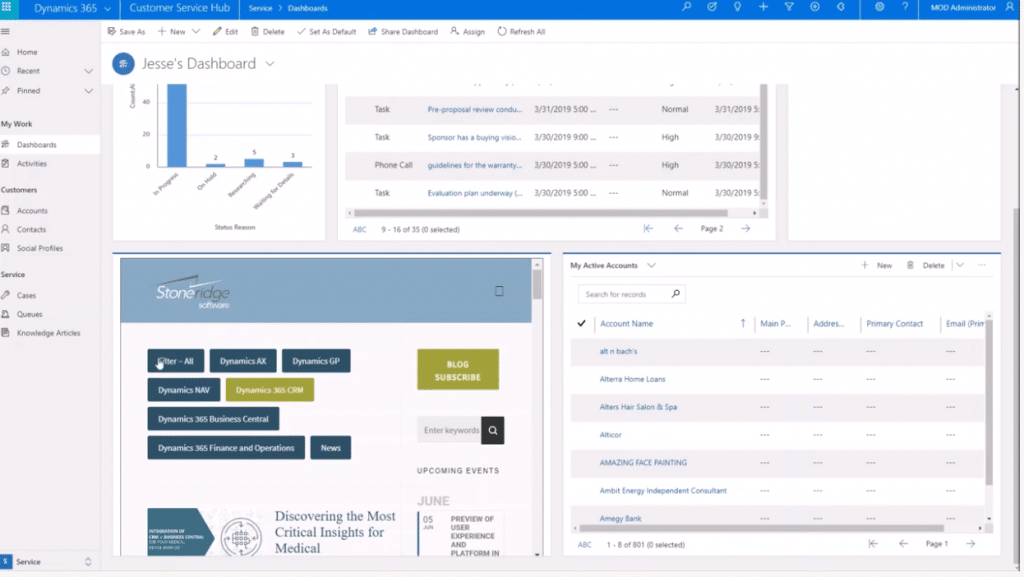
In each different area, you can select a component like chart, list, relationship assistance, iframe, or web resource. Most people will insert charts and lists, but the other options can help with making suggestions, activities and tasks that are due, and more. Iframes will allow you to include websites that you frequently visit or other sources of information.
Once all your components are added, you’ll have a personalized view of the data that you pulled from within the system, or from outside sources. This view will give you the information you’re looking for, all in a single location.
From this screen, you can set the dashboard as your default view so it appears each time you log into Dynamics 365. You can also share the dashboard with other users in your organization.
For a full tutorial on how to set up personalized dashboards, watch the video here. If you have questions or would like more information, please reach out to the team at Stoneridge Software.
This video will show you how to easily create a personalized dashboard in Dynamics 365 Customer Engagement (CRM).
You'll learn:
- How to select different dashboards and views
- How to create a new dashboard and add cases, activities, lists, websites, and more
- How to set a default customized dashboard
- How to share a dashboard with team members
Under the terms of this license, you are authorized to share and redistribute the content across various mediums, subject to adherence to the specified conditions: you must provide proper attribution to Stoneridge as the original creator in a manner that does not imply their endorsement of your use, the material is to be utilized solely for non-commercial purposes, and alterations, modifications, or derivative works based on the original material are strictly prohibited.
Responsibility rests with the licensee to ensure that their use of the material does not violate any other rights.


