Using Mail Merge Macro in Dynamics GP
One way to automate the manual entry process is to use a Mail Merge Macro in Dynamics GP. This method will allow the user to enter data into a spreadsheet and then create a macro to input the data into any Window. This method requires some advanced Microsoft Office expertise and can be problematic if the data in the spreadsheet is not set up properly, however, it will be much faster than manually typing all records into the Window.
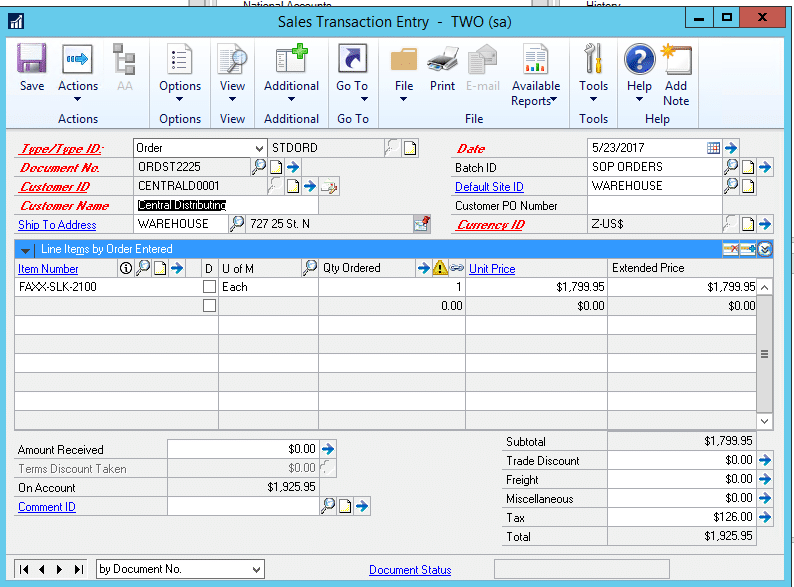
The following example only references the Sales Transaction Entry Window. Although it is possible to enter multiple Tab data all in one macro, it only increases the likelihood of data errors. It is also important to populate all lookup tables prior to the Mail Merge process. NOTE: All data in the import spreadsheet MUST match the exact spelling of the data in each of the corresponding lookup tables. Be careful and make sure that there are no hidden spaces at the end of a record. This Macro is based on opening each sales record and refreshing the Tax Information as an example.
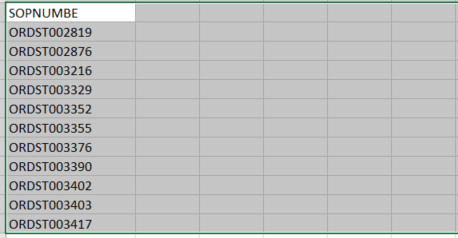
A spreadsheet with column headers that match each field name should be used, an example is shown below:
The above sample spreadsheet an example.
Step 1:
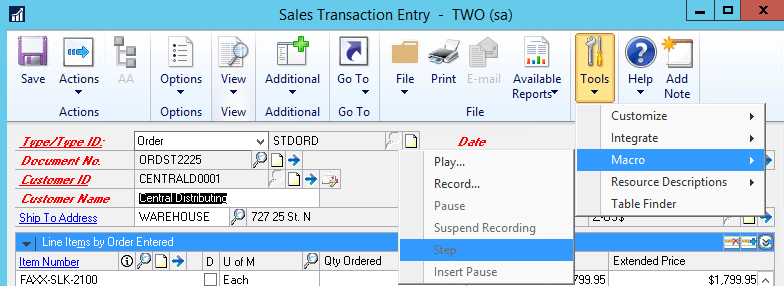
Create a Dynamics GP Macro that will show the data entry into all of the fields that match the data entry spreadsheet. Open the Sales Transaction Entry window then click Tools> Macro> Record.
Then immediately begin the data entry process starting at the Document No. field use the Tab key to switch from one field to the next. As soon as the data entry is complete for the document, then click Tools> Macro> Stop. Save the Macro file with a name and location that can be easily located.
Step 2:
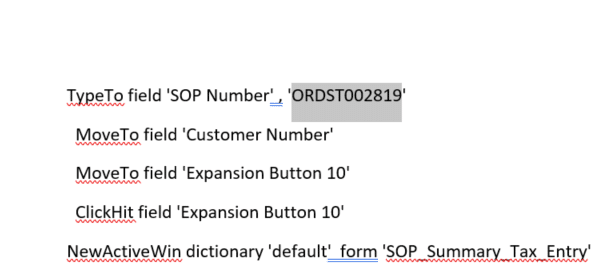
Open the text of the Macro in Microsoft Word. Below is an example of what the macro may look like:
# DEXVERSION=16.00.0034.000 2 2
CheckActiveWin dictionary 'default'  form 'SOP_Entry' window 'SOP_Entry'
  TypeTo field 'SOP Number' , 'WEBQTE001710'
  MoveTo field 'Customer Number'
  MoveTo field 'Expansion Button 10'
  ClickHit field 'Expansion Button 10'
NewActiveWin dictionary 'default'  form 'SOP_Summary_Tax_Entry' window 'SOP_Summary_Tax_Entry'
  CommandExec dictionary 'default'  form 'SOP_Summary_Tax_Entry' command 'Default Button_w_SOP_Summary_Tax_Entry_f_SOP_Summary_Tax_Entry'
# Resetting these defaults will delete all current entries.  Are you sure you want to delete the existing entries?
NewActiveWin dictionary 'default'  form DiaLog window DiaLog
  ClickHit field OK
NewActiveWin dictionary 'default'  form 'SOP_Summary_Tax_Entry' window 'SOP_Summary_Tax_Entry'
  CommandExec dictionary 'default'  form 'SOP_Summary_Tax_Entry' command 'OK Button_w_SOP_Summary_Tax_Entry_f_SOP_Summary_Tax_Entry'
NewActiveWin dictionary 'default'  form 'SOP_Entry' window 'SOP_Entry'
ActivateWindow dictionary 'default'  form 'SOP_Entry' window 'SOP_Entry'
  CommandExec dictionary 'default'  form 'SOP_Entry' command 'Save Button_w_SOP_Entry_f_SOP_Entry'
  MoveTo field 'SOP Number'
Notice that each of the steps in the macro represents the movement to a field and the data that was entered. The goal is to program Microsoft Word to recognize the data entered as a column in the import spreadsheet.
Step 3:
The first line of the macro must be deleted temporarily. The first line is a header that can only appear as the first line of the macro.
The following instructions apply when using MS Word 2016.
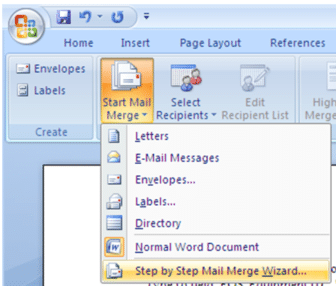
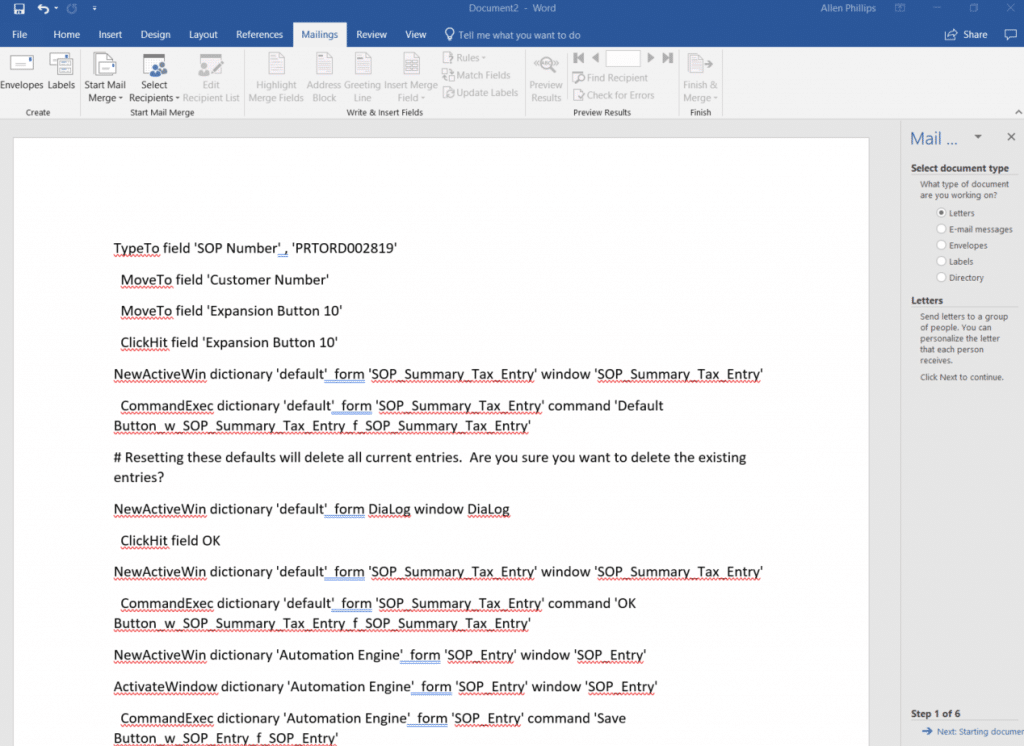
Click the Mailings menu then click the Start Mail Merge button and select Step by Step Mail Merge Wizard
Select the document Type of Directory then click Next: Starting Document.
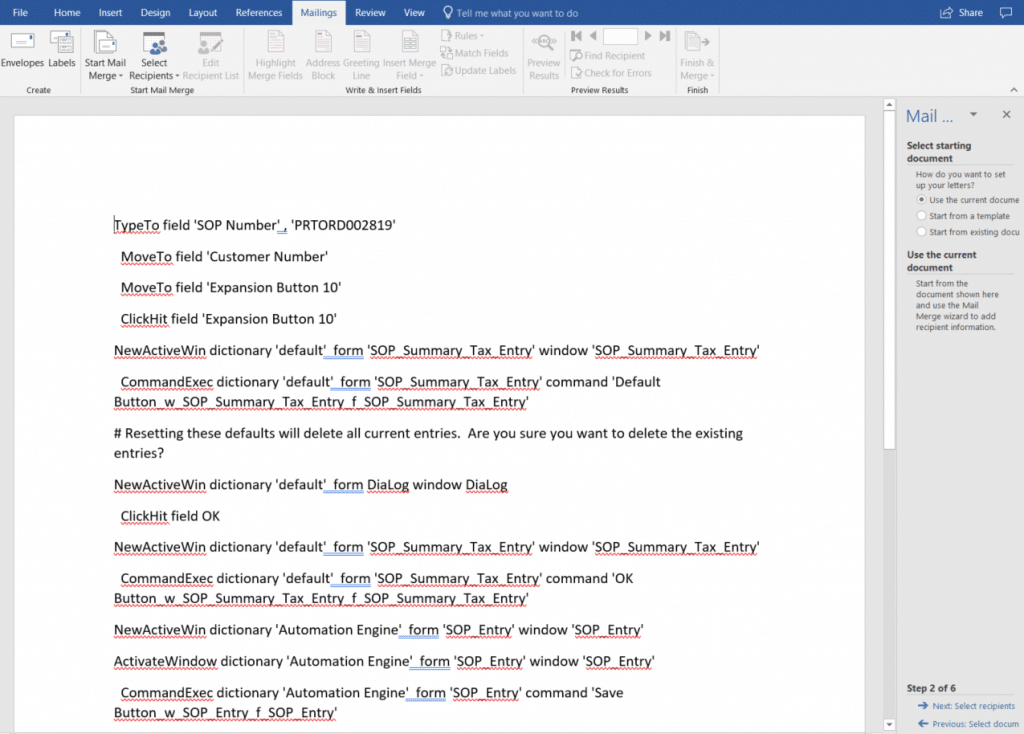
Select Use Current Document then click Next: Select recipients.
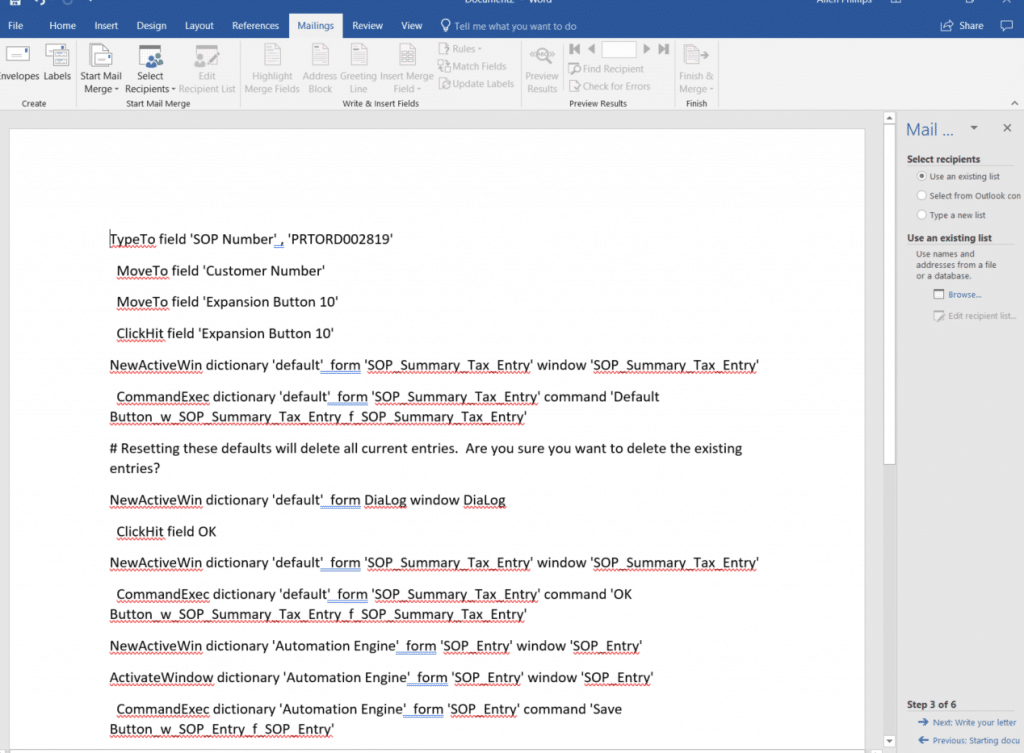
Select Use an existing list then click the browse button.
Browse to the location of the Excel spreadsheet that contains the import data.
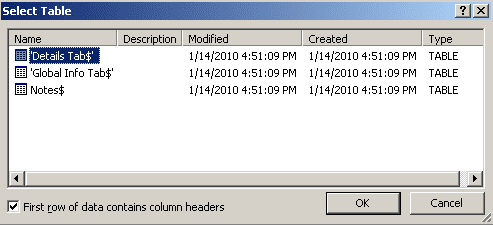
Each worksheet of the spreadsheet will appear on the list. Select the appropriate worksheet then click OK. Note the checkmark for the First Row of data contains column headers.
The column headers and the data from the worksheet will appear in the list.
After the spreadsheet has been selected, Click Next: Write Your Letter
Highlight the Document No. data then click More Items
Select Document No. from the Insert Merge Field list, then click the Insert button then Close the Insert Merge Field window.
Then click Next: Preview your directory
The first record from your import spreadsheet will be entered into the document.
If the records are not accurate, then repeat the steps above to try and locate the problem.
Click Merge To New Document…
Select All or a range of records to merge then click OK
It is necessary to paste the first line of text from the macro into the top line of the new document:
Finally, save the document as a plain text document.
Rename the document using a suffix of .mac for example TaxUpdate.mac
The final Step is to open Dynamics GP then Open the Sales Transaction Entry window and select Tools > Macro > Run and run the TaxUpdate.mac file that has just been created.
After the Macro runs successfully, all records will be in the database. If there is an error, then the line on which the error occurred will be displayed in the error message as shown below:
If an error is encountered, it will be related to the data on the line indicated. Make the necessary data correction and rerun the macro.
NOTE: Records can only be imported once so if records were successfully imported, then they will need to be removed from the macro before attempting to run it again.
Under the terms of this license, you are authorized to share and redistribute the content across various mediums, subject to adherence to the specified conditions: you must provide proper attribution to Stoneridge as the original creator in a manner that does not imply their endorsement of your use, the material is to be utilized solely for non-commercial purposes, and alterations, modifications, or derivative works based on the original material are strictly prohibited.
Responsibility rests with the licensee to ensure that their use of the material does not violate any other rights.


