How to Process Returns in Dynamics 365 Field Service
Dynamis 365 Field Service provides the ability to process returns via return merchandise authorization (RMA) and return to vendor (RTV.)
In Dynamics 365 Field Service, sometimes organizations that install parts and equipment need the ability to process returns of a product. Field Service supports return to warehouse, return to vendor, and change of equipment ownership. In this blog, we'll walk through the steps in creating an RMA return.
How to Create a Return Merchandise Authorization
1. Open the Field Service App
2. Navigate to Inventory > RMAs
3. Click +New to create a new RMA
The RMA Number will be randomly generated. Other required fields should be populated. Processing Action in this example is set to Return to Warehouse so the item is returned to inventory and the specific warehouse noted on the RMA.
4. Click Save
5. Click the Products tab
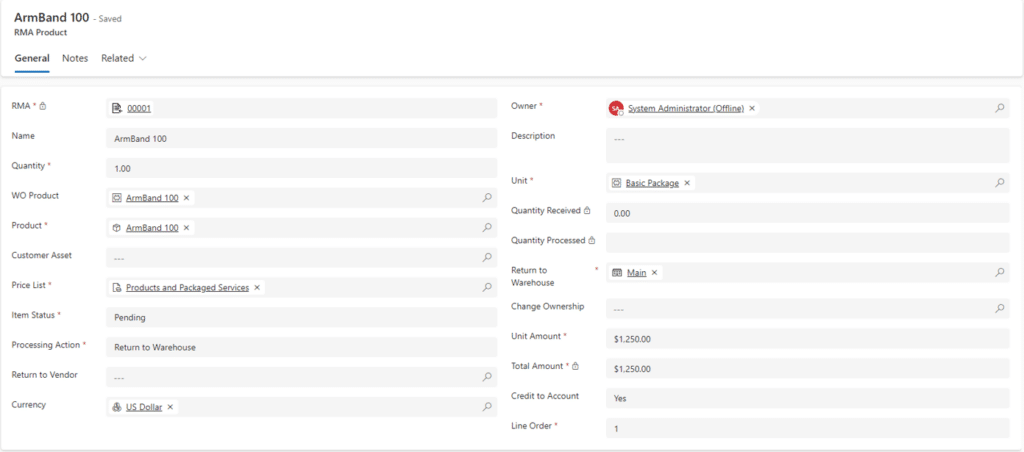
6. Click +New RMA Product to create an RMA Product
7. Populate the required fields (Product, Quantity, Return to Warehouse)
If the returned product is associated with a Work Order indicated on the RMA, select the WO Product.
8. Click Save
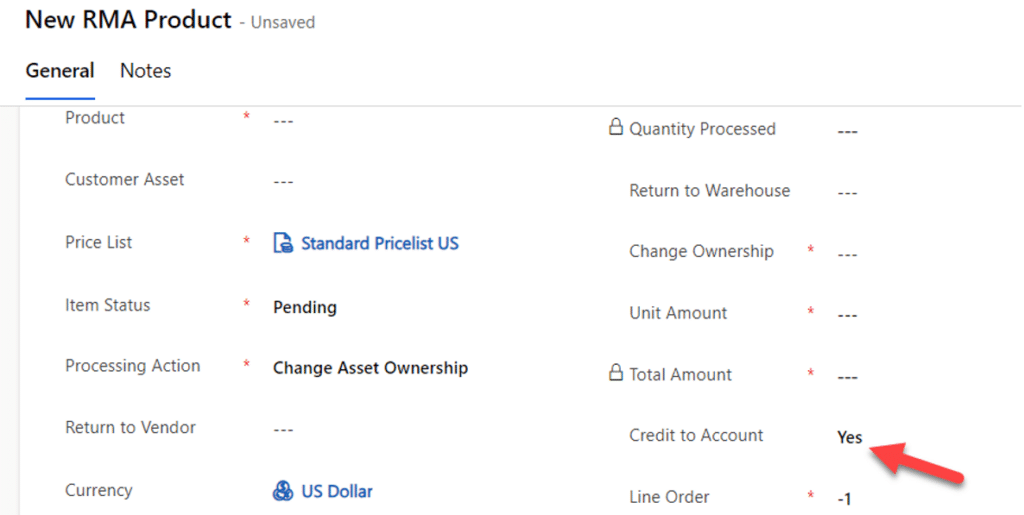
Credits can be issued to a customer by setting Credit To Account to yes when creating an RMA product.
How to Create a Return Merchandise Authorization Receipt
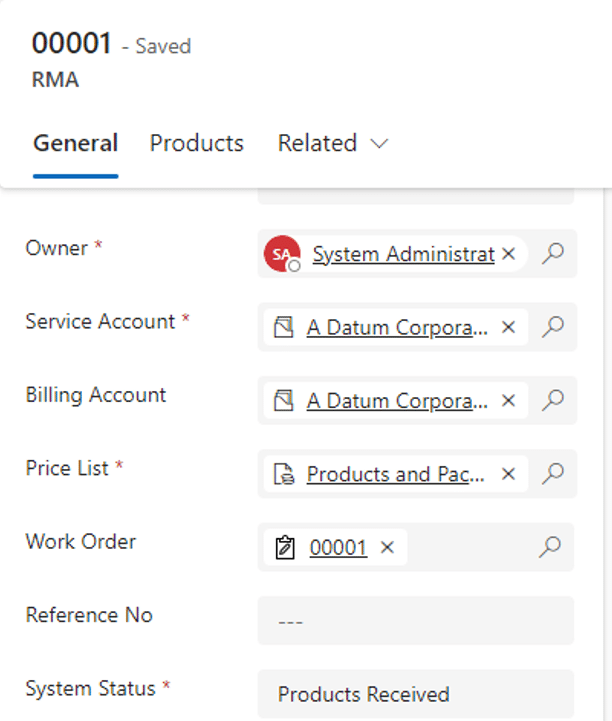
When a product is received, an RMA Receipt can be created indicating the product has been brought back into inventory. When that happens, the related RMA record will be changed to Products Received, and the RMA Product will be changed to Received and indicate the Quantity received.
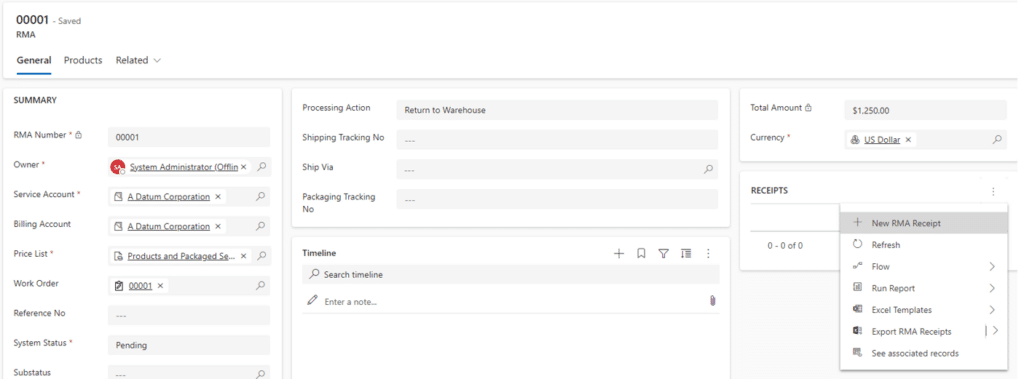
1. On the General tab of the RMA, click +New RMA Receipt
2. Enter a Name and update the Date Received if necessary
3. Click Save
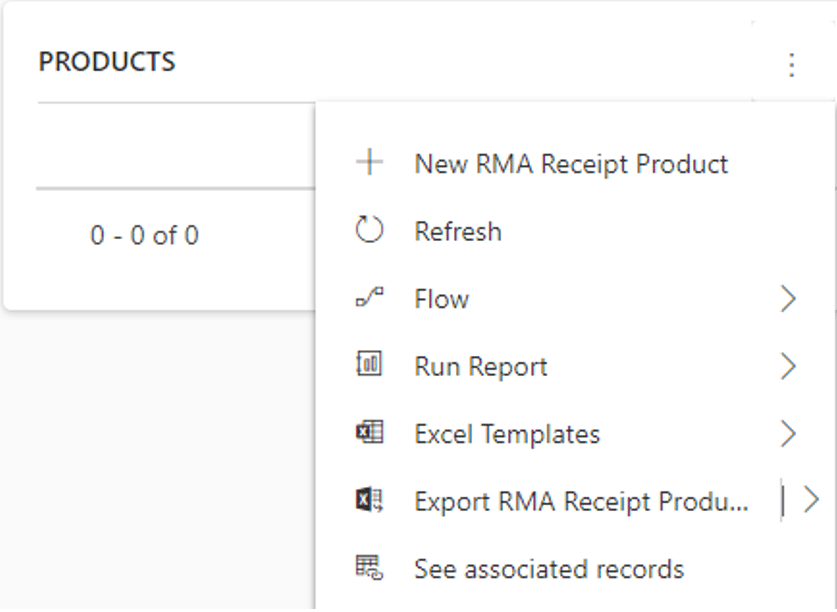
4. Under the Products Section, click +New RMA Receipt Product
5. Select the RMA Product and enter the Quantity
6. Click Save and Close
The related RMA System Status changes to Products Received and the associated RMA Product shows the Quantity Received and Item Status is Received.
Issuing a Credit Memo
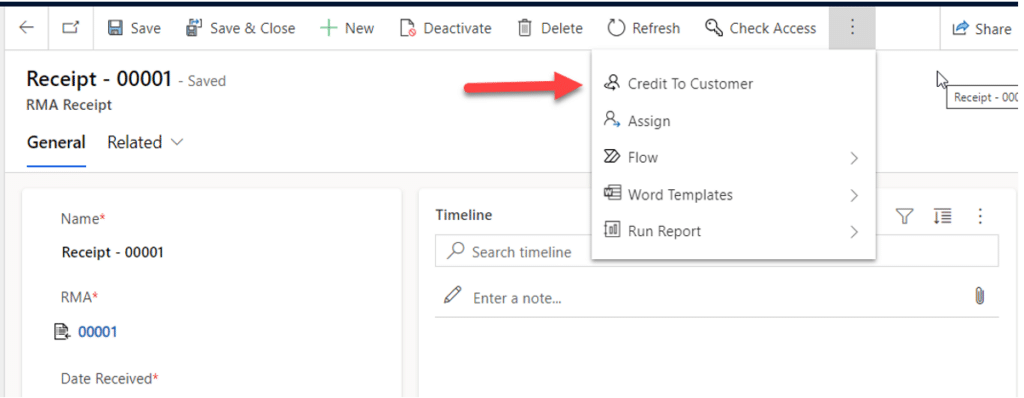
Issuing the credit memo is done via navigating to the RMA receipt and selecting Credit to Customer from the command bar, this generates an Invoice for the Customer that is specified as the Service Account on the RMA. The invoice can then be accessed by navigating to the related Invoice tab on the customer's Account record.
1. On the RMA Record, open the RMA Receipt record from the sub-grid on the General tab
2. Click Credit to Customer
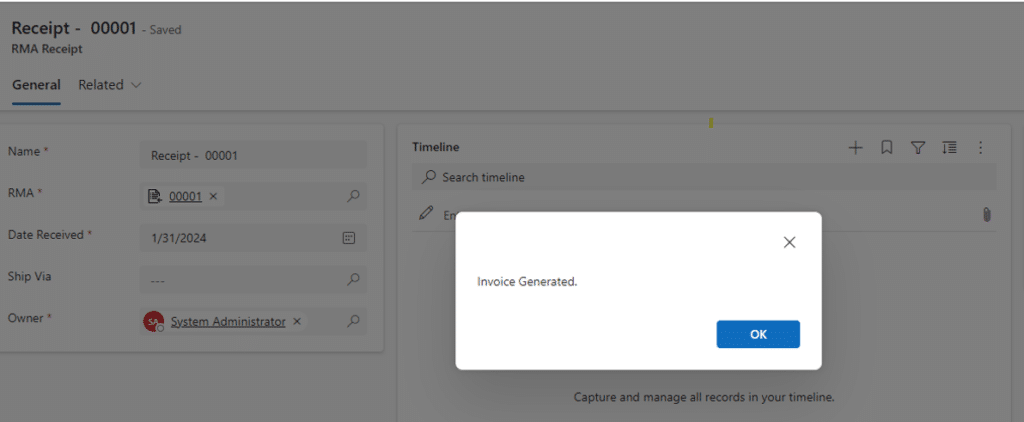
3. Wait for the Invoice Generated message
4. Click OK
5. To view the Invoice, return to the RMA record
6. Open the Service Account record
7. Click the related Invoices tab
Want to Learn More About Dynamics 365 Field Service?
Get in touch with the team at Stoneridge. Our team can help you navigate the tools in Dynamics 365 Field Service to ensure you are optimizing your processes.
Under the terms of this license, you are authorized to share and redistribute the content across various mediums, subject to adherence to the specified conditions: you must provide proper attribution to Stoneridge as the original creator in a manner that does not imply their endorsement of your use, the material is to be utilized solely for non-commercial purposes, and alterations, modifications, or derivative works based on the original material are strictly prohibited.
Responsibility rests with the licensee to ensure that their use of the material does not violate any other rights.


