Implementing Modern Themes in Model-Driven Power Apps
Applying modern themes in model-driven apps is a very effective way to refresh your Power Apps environment.
These themes bring a contemporary look to your applications and offer a greater level of customization and styling options than classic themes. Shifting to modern themes aligns your app's appearance with your organizational branding, improves user experiences, and ensures your apps look up-to-date to match their modern functionality.
Why It’s Time to Put Modern Themes into Place
In this blog, we'll explore the changes Microsoft introduced in Wave 1 and highlight the differences between classic and modern themes. You'll also learn how to build and apply modern themes in your Power Apps environment, ensuring your apps look polished and professional. Lastly, we'll provide a few resources to help you continue optimizing your app's design.
Wave 1 Update: A Fresh New Look for Model-Driven Power Apps
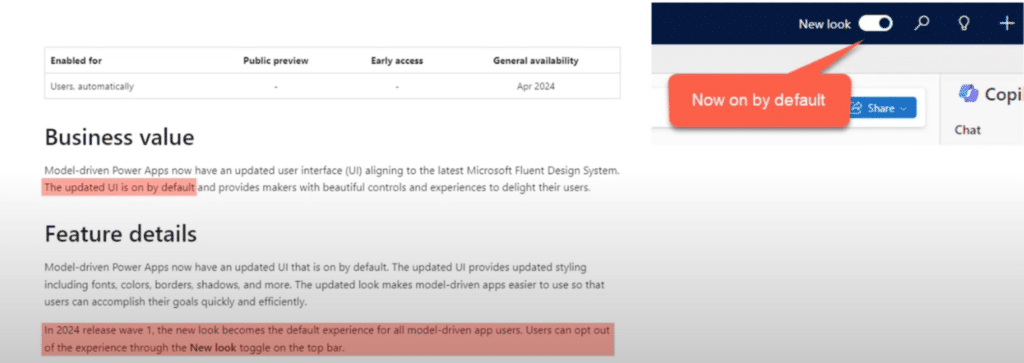
The Wave 1 update, which went live on April 22, 2024, in North America, brought new changes to the appearance of model-driven apps. One of the most notable updates is that the new look is now enabled by default. You’ll notice the toggle switch at the top right of your screen, allowing you to revert to the classic view if needed. However, with the modern themes available, this new look provides a clean, refreshed interface that can be further enhanced to align with your branding and design preferences.
Differences Between Classic and Modern Themes
Classic and modern themes offer different capabilities and limitations, especially when applied to the new look introduced in Wave 1. Here is a high-level summary:
Classic Themes
- Applicability: Do not apply to the new look.
- Solution Awareness: Not solution-aware, meaning they must be recreated for each environment.
- Customization: Allow custom logos and adjustments to the header color, accent colors, and more.
- Configuration: Managed directly within the Advanced Settings area.
Modern Themes
- Applicability: Only apply when the new look is enabled.
- Solution Awareness: Solution-aware, allowing themes to be set and promoted across different environments.
- Customization: Cannot support custom logos and only affect the header; no adjustments to accent colors.
- Configuration: Applied through an XML web resource, offering a more programmatic approach to theme management.
Understanding these differences helps you choose the right theme type based on your app’s needs and the look you want to achieve.
Building a Custom Modern Theme
Now that we've covered the basics, let's dive into how to build your own modern theme. Follow this step-by-step guide, complete with screenshots to make the process easy to understand.
Create a Solution
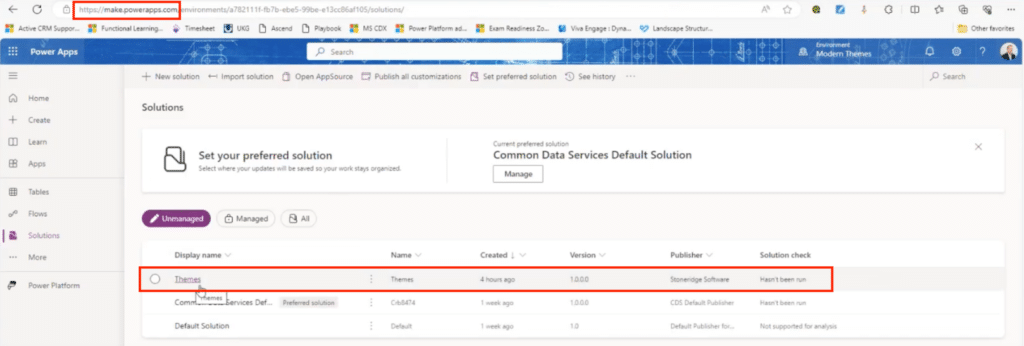
Start by navigating to make.powerapps.com. Here, you'll create a new solution where your theme will reside. For this demo, I’ve created a solution called "Themes."
Choose Your Method
There are two main methods to create a theme:
- Manual XML File: You can manually create an XML file based on the documentation. This approach requires a solid understanding of the necessary components.
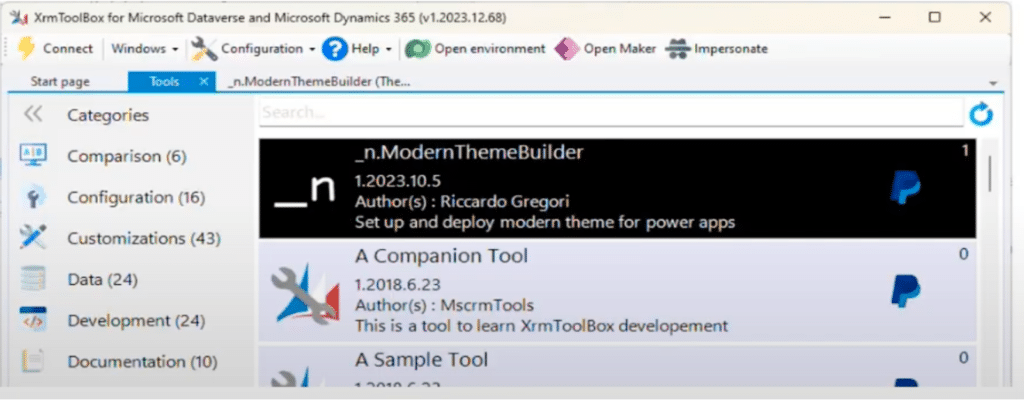
- XrmToolBox: A more user-friendly option is to use the XrmToolBox, which includes a tool called the Modern Theme Builder and allows you to build your theme graphically. If you don’t have XrmToolBox, you can download it from XrmToolBox.com.
In this blog, we'll focus on the second method.
Build Your Theme Using XrmToolBox
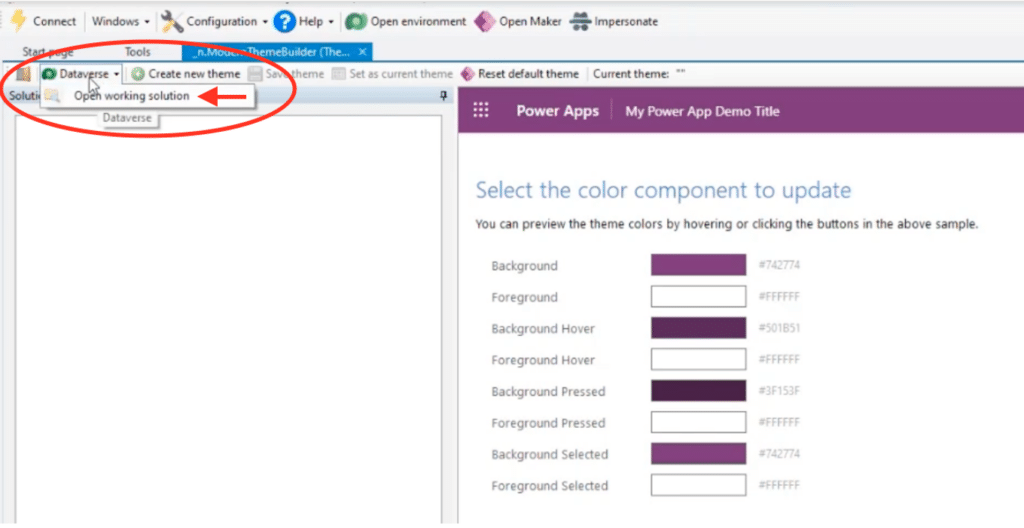
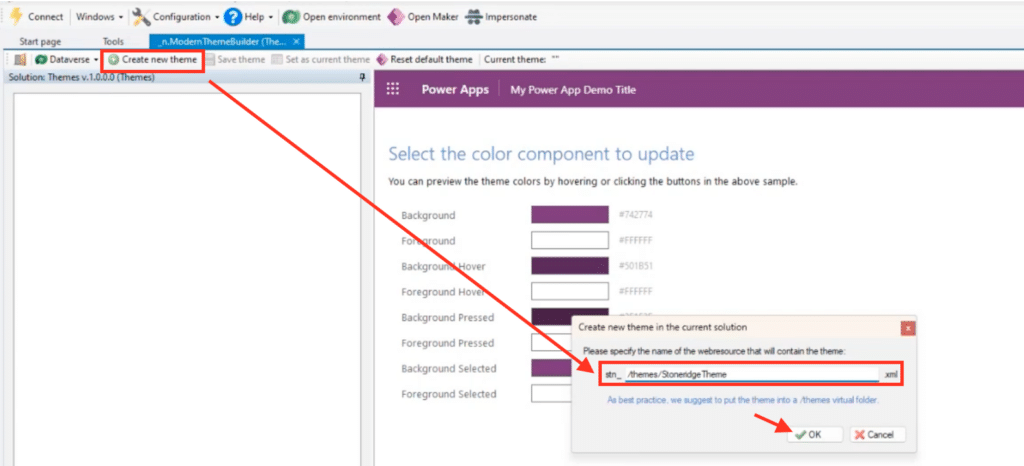
Connect to your environment in XrmToolBox and open the Modern Theme Builder tool. Open your working solution and create a new theme, naming it appropriately (e.g., "Stoneridge Theme").
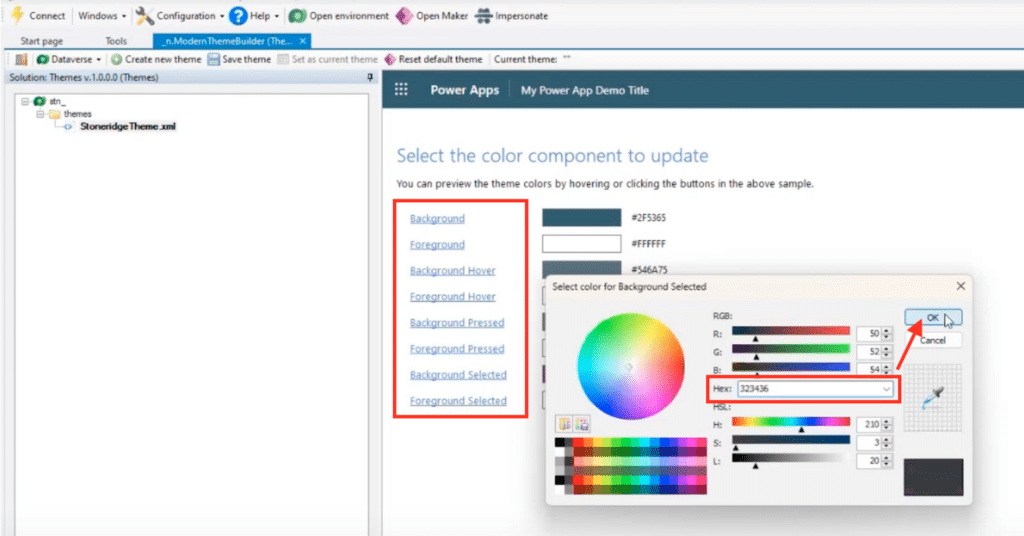
Customize the theme by adjusting colors for elements like the navigation bar, hover states, and selected states. You can use your brand's color codes to ensure consistency.
Save and Add to Solution
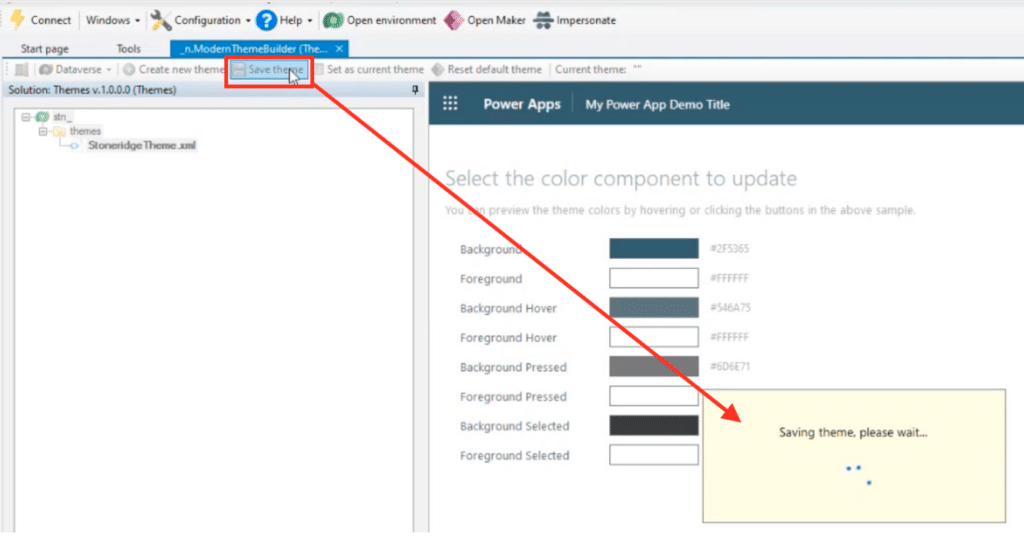
Save your theme within XrmToolBox. This will create a web resource in your solution named after your theme (e.g., "Stoneridge Theme").
Return to your solution in Power Apps and verify that the web resource has been added.
Apply the Theme
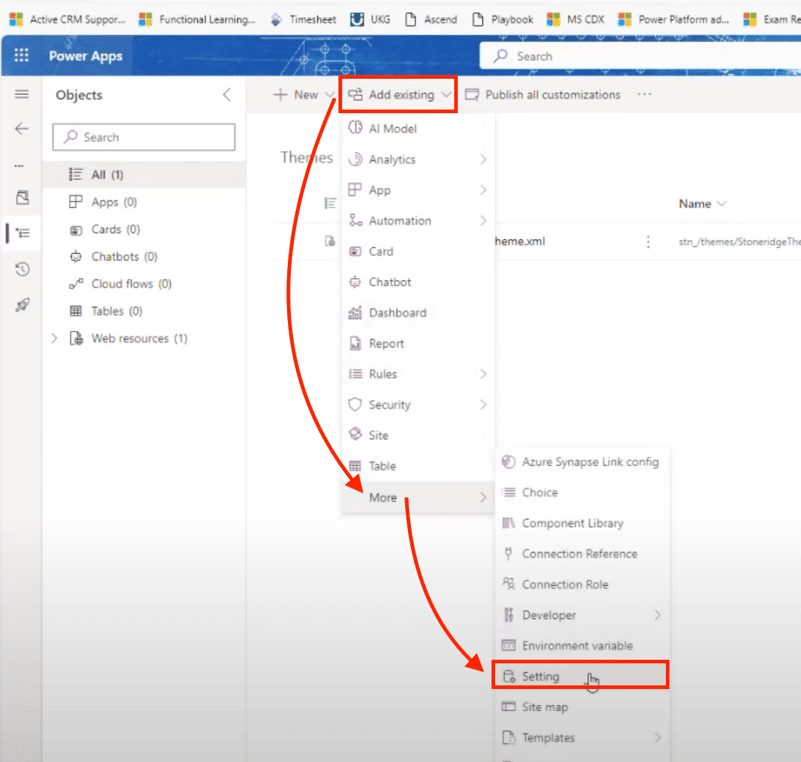
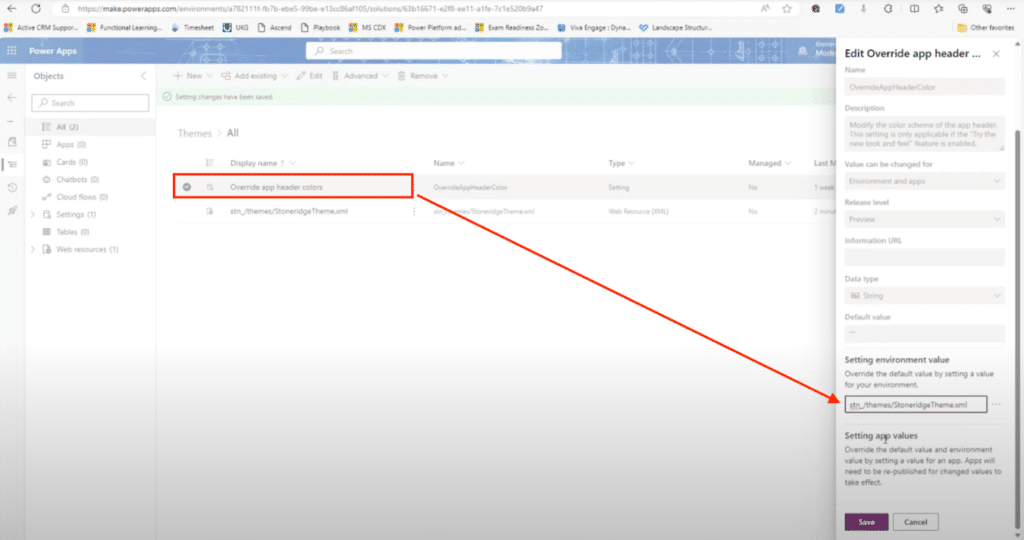
In your solution, add an existing setting by selecting "Add Existing" > "Setting" and searching for "Override App Header Colors."
Choose the setting called "Override App Header Colors," not the one with "Web Resource" in the name, and add it to your solution.
Edit the setting and add a new environment variable. Insert the URL of your web resource, save it, and then publish your changes.
Verify the Theme Application
Perform a hard refresh (Ctrl + F5) in your environment. You should see your new theme colors applied to the header and navigation areas.
If you want to apply the theme to custom apps, you can do so by entering the web resource URL in the appropriate setting for each app, and then republishing the app.
And that's it! You now can successfully create and apply a custom modern theme to your model-driven app.
Want to Learn More About Optimizing Your Power Apps Experience?
If you're interested in learning more about modern themes or need assistance with customizing your model-driven apps, don’t hesitate to reach out to Stoneridge Software. Our team of experts is here to help you get the most out of your Power Apps experience, ensuring your solutions are both functional and visually appealing.
Contact us today to take your app customization to the next level.
Under the terms of this license, you are authorized to share and redistribute the content across various mediums, subject to adherence to the specified conditions: you must provide proper attribution to Stoneridge as the original creator in a manner that does not imply their endorsement of your use, the material is to be utilized solely for non-commercial purposes, and alterations, modifications, or derivative works based on the original material are strictly prohibited.
Responsibility rests with the licensee to ensure that their use of the material does not violate any other rights.


