


An AI Architect’s Step-by-Step Guide to Building Business Central Agents in Copilot Studio with MCP
If you’ve ever tried to connect Copilot Studio to Business Central, you know the old process required a lot of moving parts: exposing APIs, creating topics, testing each connection, and managing tokens. All the security keys that prove who you are and what you can access.
It worked, but it took planning and patience.
With Model Context Protocol (MCP), that process becomes much simpler.
MCP changes how agents connect to Business Central (and other systems) by introducing a standardized way to define connection points — each describing what data is available and what actions are allowed. Instead of building separate topics or flows for every possible question, you configure these capabilities once, and the agent can dynamically choose the right one based on the user’s request.
In this post, I’ll walk you through how to set up MCP step by step and show you what to expect the first time you test it. If you’re comfortable navigating Business Central and Copilot Studio, you’ll be able to follow along without needing deep technical expertise. Watch the video for an introduction and a walk-through or follow the instructions in this blog.
Getting Started: Setting Up Model Context Protocol (MCP) in Business Central
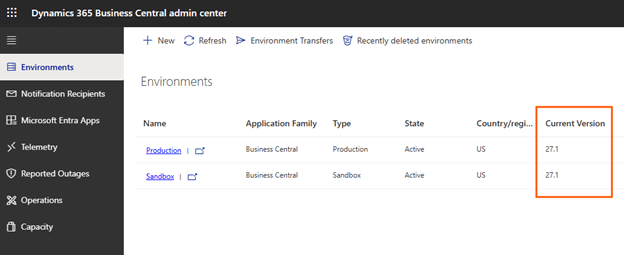
Step 1: Confirm You’re on Business Central Version 27
MCP only works starting in version 27.
Before you do anything else, make sure your Business Central environment is on that version.
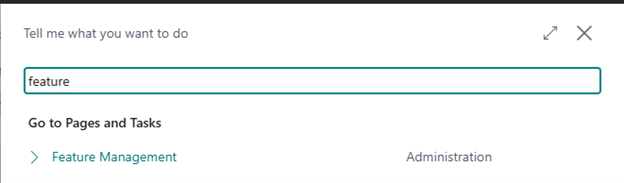
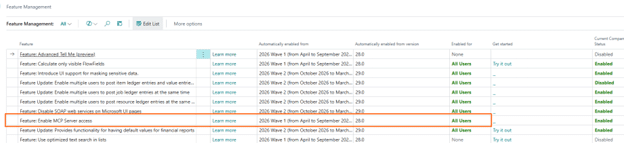
Step 2: Turn On MCP in Feature Management
- In Business Central, open Feature Management.
- Look for a feature named "Feature: Enable MCP Server access".
- Enable it.
Once this is enabled, Business Central becomes capable of exposing the set of connection points that Copilot agents use.
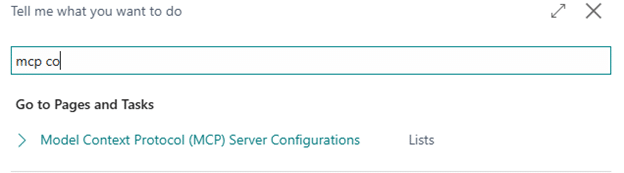
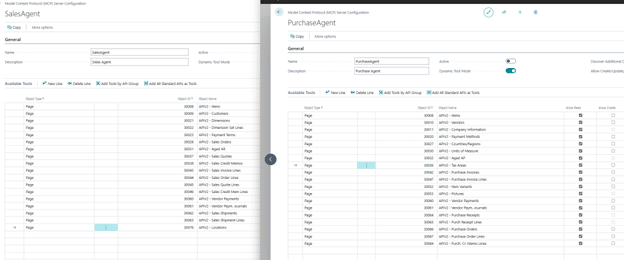
Step 3: Create Your MCP Configuration
Now you’ll tell Business Central what data Copilot is allowed to use.
- Search for “MCP Configurations”.
- Click New.
- Name your configuration (something simple like “Demo” or “SalesAgent”).
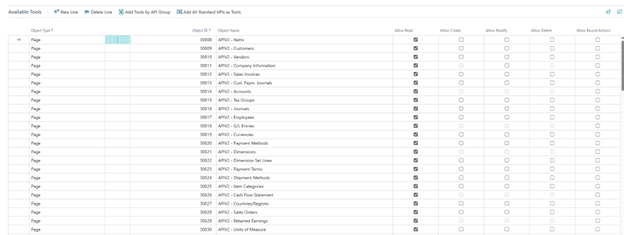
- Click Add all standard APIs as tools.
This brings in all the “talking points” that Business Central already offers — items, sales orders, posted documents, etc.

If you need assistance connecting your Business Central Environment with Copilot watch this video:
Then:
- Set the configuration to Active.
Add All Standard APIs as Tools will bring standard Business Central APIs (https://learn.microsoft.com/en-us/dynamics365/business-central/dev-itpro/api-reference/v2.0/)
You can create multiple configurations later if you want agents to focus on different areas — for example, Sales, Purchasing, or Inventory.
Add all, decide what makes sense to have in a particular configuration.
Step 4: Connect MCP in Copilot Studio
Switch to Copilot Studio and either create a new agent or open an existing one.
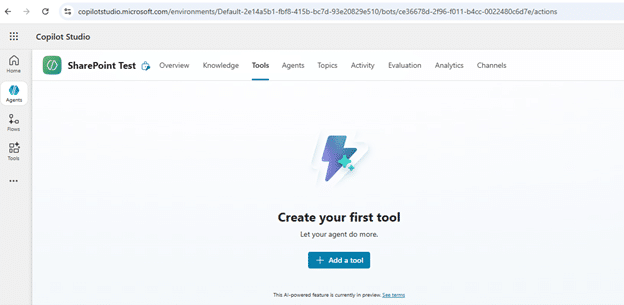
- Go to Tools.
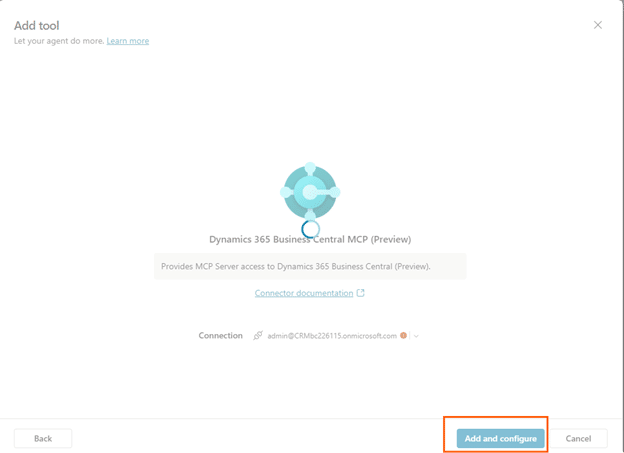
- Click Add a tool.
- Search for MCP Business Central (preview).
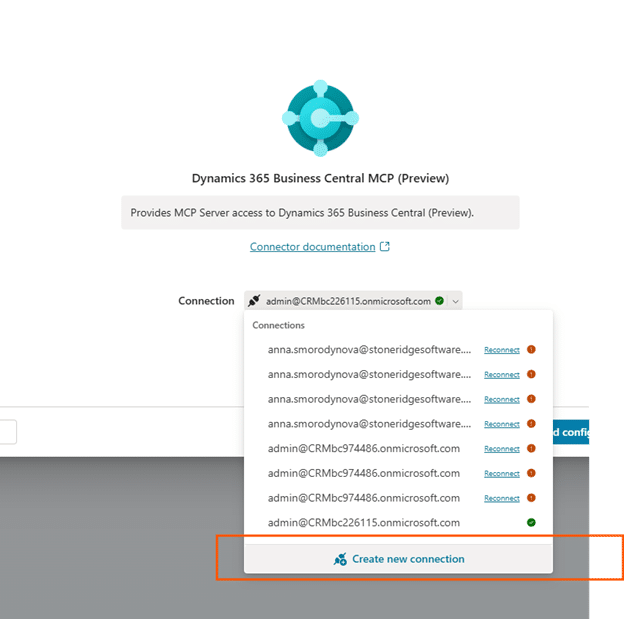
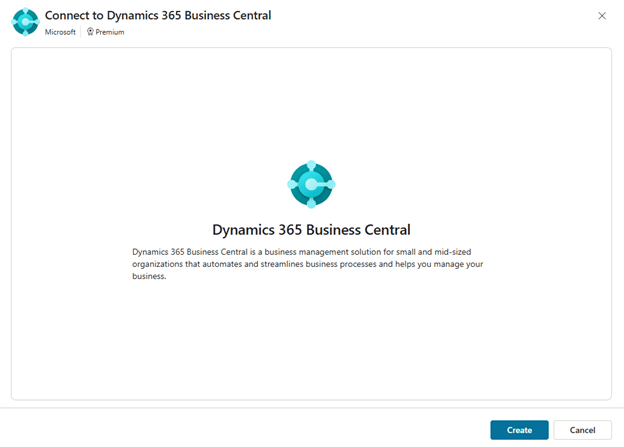
- Create a new connection (you’ll sign in if needed).

After you connect, Copilot will ask you to choose:
- Your environment
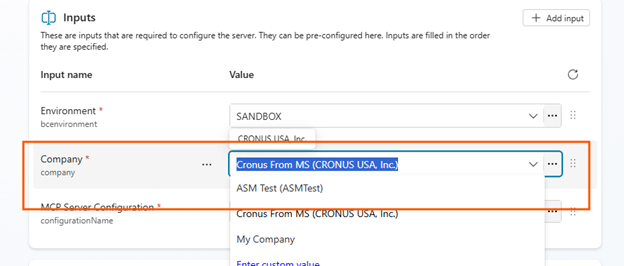
- Your company
- The MCP configuration you created

With working connection all environments are available in Drop-down:
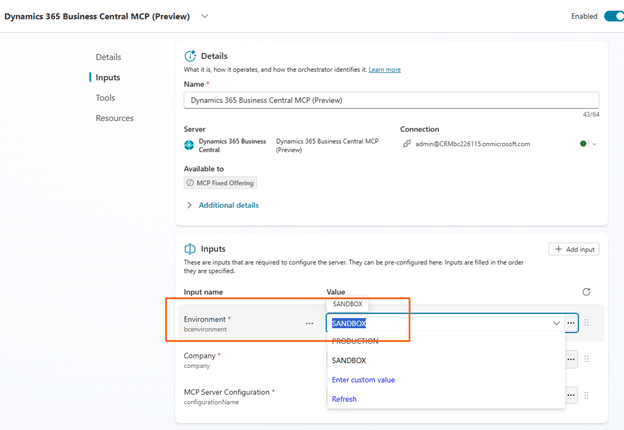
With a working environment all companies are also available in Drop-down :
MCP Configuration: Copy-paste from Business Central
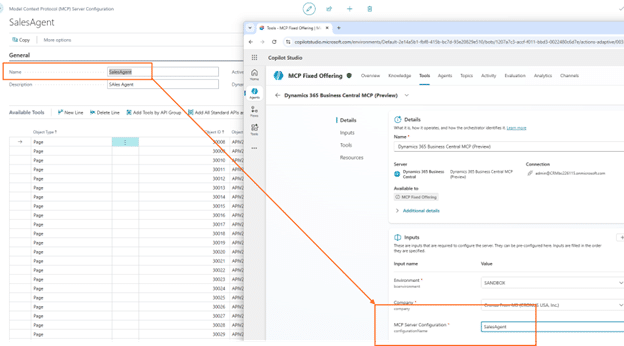
Once saved, your agent is now linked to Business Central through MCP.
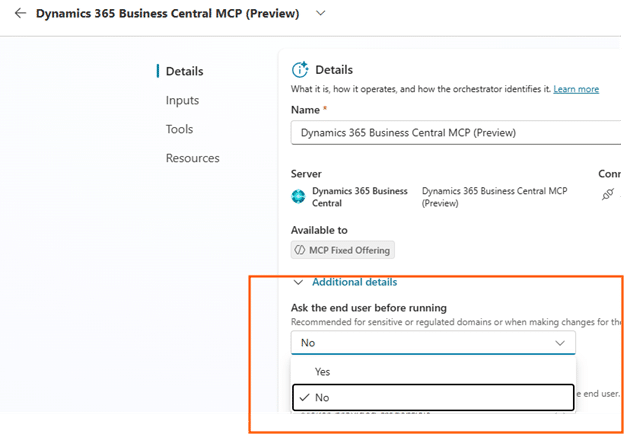
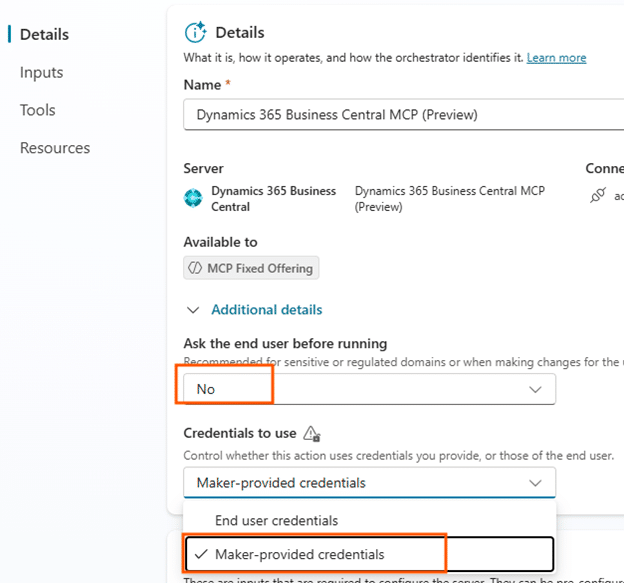
Step 5: Choose How Credentials Should Work
You’ll see a few options:
✔ Maker-provided credentials: Good for testing or internal agents.
✔ Prompt the user for permission: Useful if you want transparency every time the agent connects.
✔ Use the end user’s own permissions (delegated access): This is my favorite for production use.
If a user doesn’t have access to certain data in Business Central, the agent won’t show it.
As I mentioned during the demo:
“If the user… is not allowed to see something, they won’t see it.”
Step 6: Test Your Agent (The Fun Part)
Open the Test pane in Copilot Studio.
Now you can ask questions like:
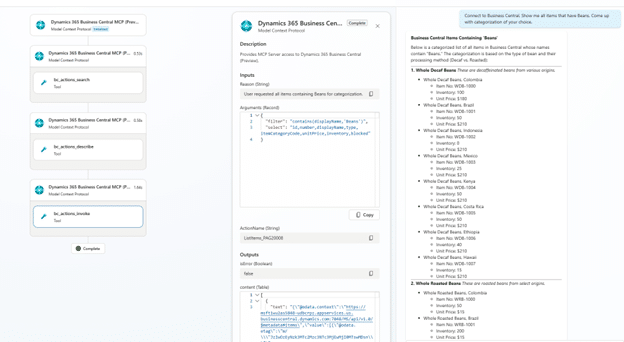
- “Connect to Business Central. Show me all items that have Beans. Come up with categorization of your choice.”
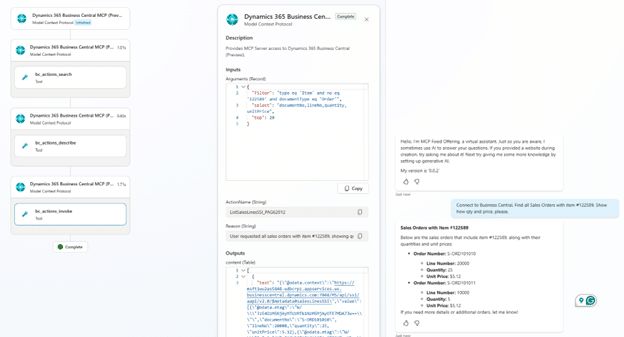
- “Connect to Business Central. Find all Sales Orders with item #122589. Show how qty and price, please..”
- “Show me the other lines on these orders.”
What happens behind the scenes?
- Copilot activates the MCP tool
- It decides which API is the best match
- It builds a retrieval plan
- It returns the data with structure and detail
When I ran these tests, it even sorted items into “roasted” and “decaf” categories without me asking.
The best part is that you don’t have to know where the data lives.
You just ask the question.
Step 7: Know What MCP Can (and Can’t) Do Today
✔ Reading data — works beautifully
Item lists, orders, inventory, prices, customer details… all smooth.
✔ Creating records — possible
You’ll just need to provide enough detail in the prompt.
Updating or deleting — more complex
Business Central needs exact record identifiers, so those operations are more technical.
Microsoft will likely improve this over time.
Step 8: (Optional) Create Separate MCP Configurations
If you're building multiple agents, you might want to separate what they can access.
For example:
- One agent for Sales with only sales-related APIs
- One agent for Purchasing with vendor and PO data
- One agent with full access for internal operations
This keeps your environment clean and your agents focused.
Last Tips on MCP To Help You Get Started
If you’re new to MCP, my best advice is to start simple. Begin by adding the standard Business Central APIs as MCP connection points, ask a few natural questions, and see how the agent responds. Once you understand its behavior, you can refine your MCP configurations and tailor agents for specific teams or use cases. MCP is flexible, you don’t need to design everything perfectly on day one.
This approach works whether you’re experimenting in a sandbox or preparing for production.
If you’d like help along the way, I’m happy to share examples, testing ideas, or troubleshoot questions. And if you’re looking for broader support—from Business Central guidance to MCP setup, agent design, or long-term planning—our team is here to help.
Reach out to your Stoneridge contact or connect with us directly. We’ll guide you in taking the next step.

Under the terms of this license, you are authorized to share and redistribute the content across various mediums, subject to adherence to the specified conditions: you must provide proper attribution to Stoneridge as the original creator in a manner that does not imply their endorsement of your use, the material is to be utilized solely for non-commercial purposes, and alterations, modifications, or derivative works based on the original material are strictly prohibited.
Responsibility rests with the licensee to ensure that their use of the material does not violate any other rights.