Dynamics 365 for Operations: How to Create a New Model
Before we learn how to create a new model in Dynamics 365 for Operations (AX7), it is important to understand what a model is. A model can be defined as a collection of elements that represent a distributed software solution.
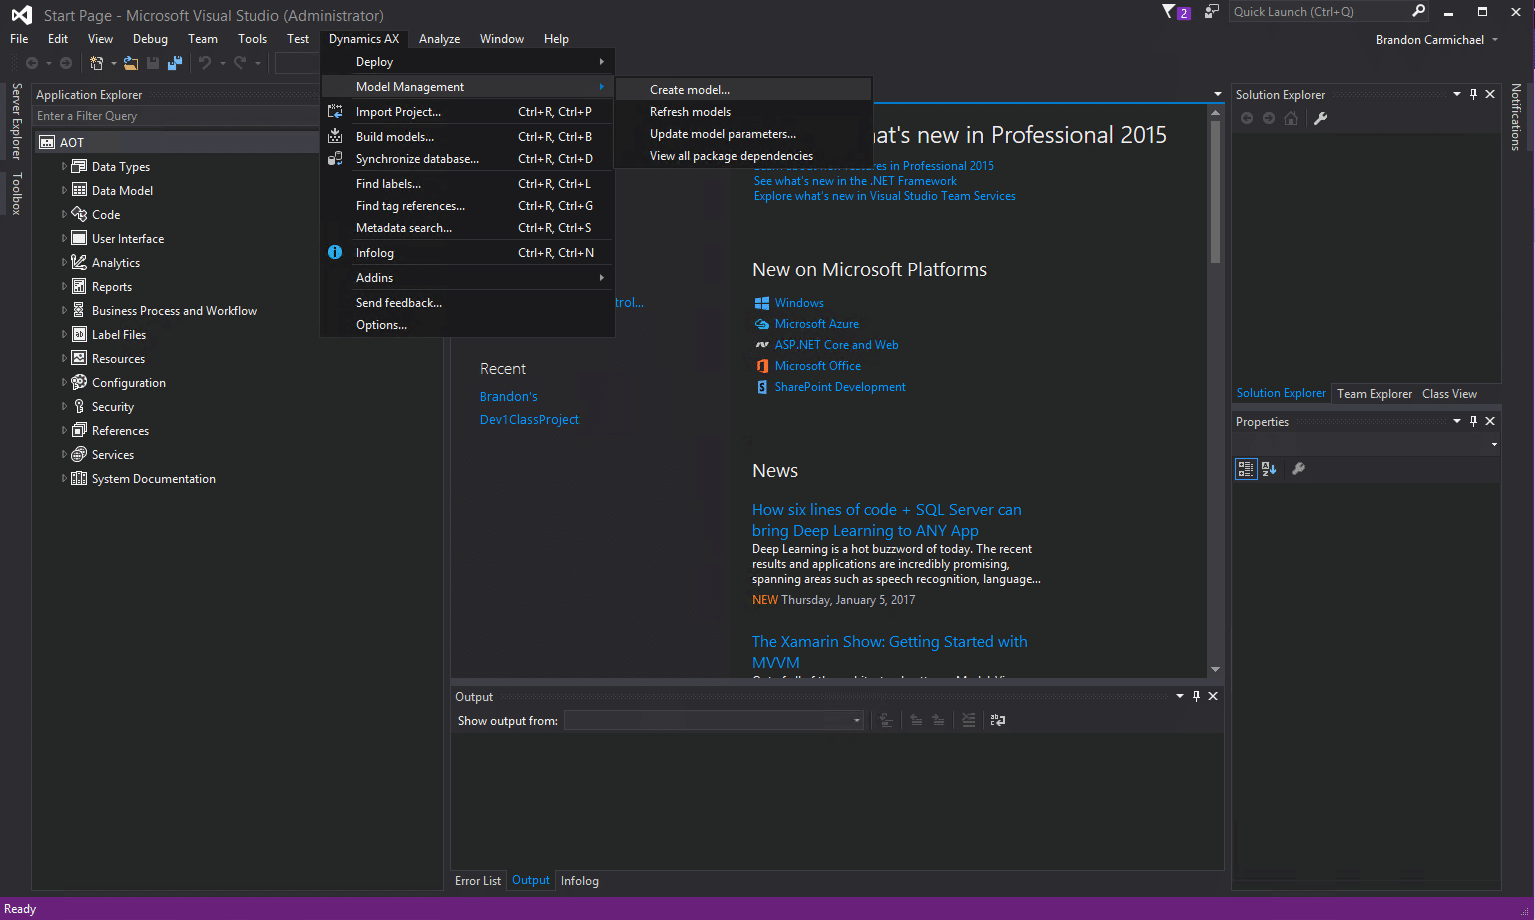
To create a new model, in Visual Studio - from the menu, click on the Dynamics AX > Model Management > Create model… This will open the model wizard.
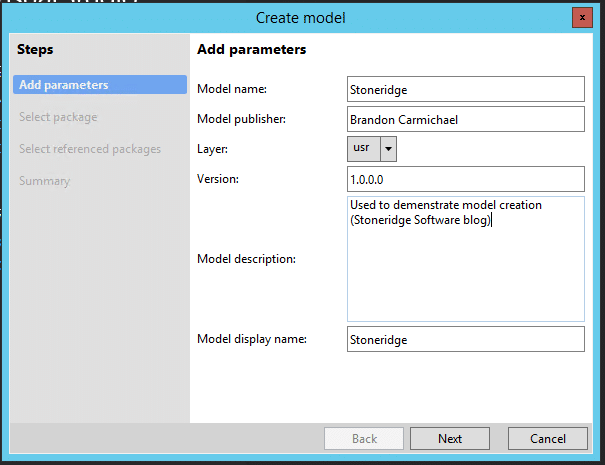
From the model wizard, you can specify the Model name, Model Publisher, Layer, Version, Model description, and Model display name.
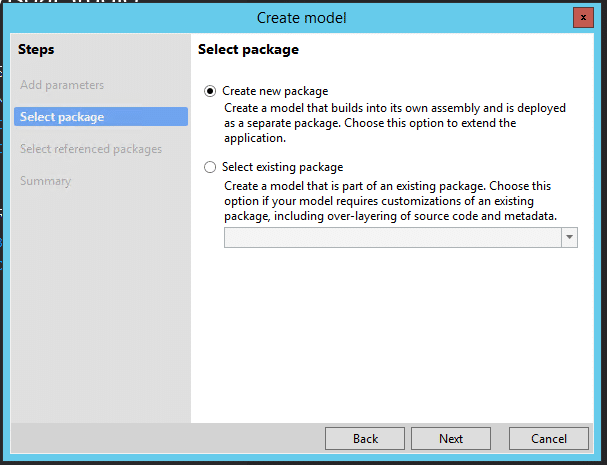
After clicking Next, you will need to determine if you want to Create new package, or Select existing package.
Create a new package
Create a model that builds into its own assembly and is deployed as a separate package. Choose this option the extend the application.
Select existing package
Create a model that is part of an existing package. Choose this option if your model requires customizations of an existing package, including overlaying of source code and metadata.
A few things to consider before making your selection:
- If your model does not override any existing objects and is rather extending them or consists of brand new custom objects, choose Create a new package.
- This is the preferred choice for making modifications in Dynamics365 for Operations.
- If your model customizes or overrides objects in ways similar to how existing methods were modified in AX2012, choose Select existing package.
- Your new model will be created in the same deployment package as the objects being customized
- The new model has to exist in the same deployment package because there will be a dependency between your model and the models containing the objects being customized
- Your new model will be created in the same deployment package as the objects being customized
Examples of extending vs. overriding objects:
- Adding methods = extending
- Changing the code within an existing Microsoft method = overriding
- Changing the properties on a form control or table = overriding
- Adding an event handler that responds to the event of clicking a button = extending
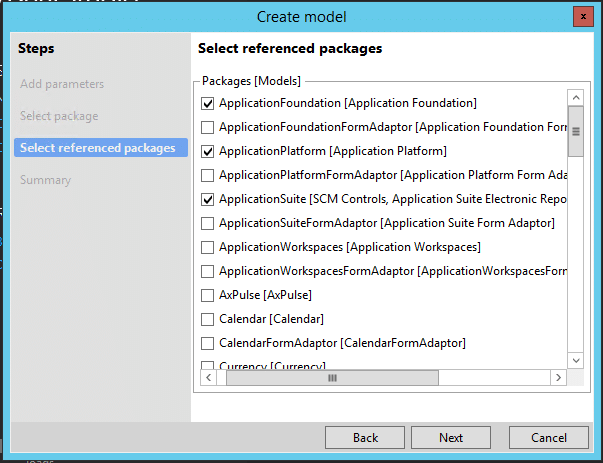
If you selected Create a new package, you will need to select any referenced models after clicking Next. Selecting referenced models means, you will need to select any models that you want your new model to see or which elements you want the new model to have access to. There are many models, for example some system models include the Application Platform, Application Foundation, and Application Suite that have a lot of the tables you’ve come used to seeing: customer table, vendor table and so on. For the purpose of my blog article, I will select all three: Application Platform, application foundation, and Application Suite. When finished select, Next.
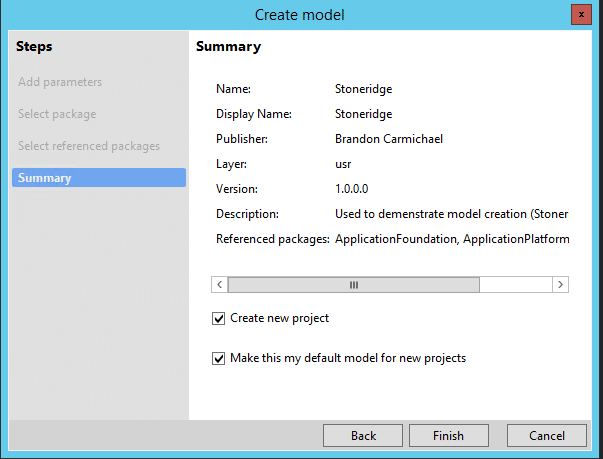
After reviewing the summary, please take note of the two check box options, which are checked by default.
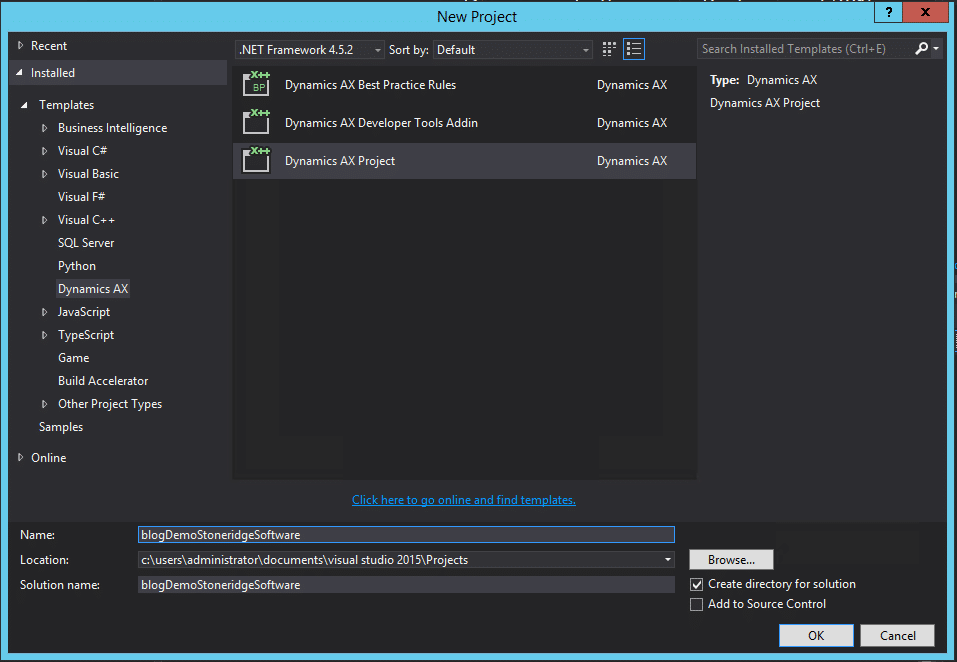
Because I left the two checkboxes checked, after reviewing the summary and selecting Next I am prompted to give a name for the new project being created associated with my new model.
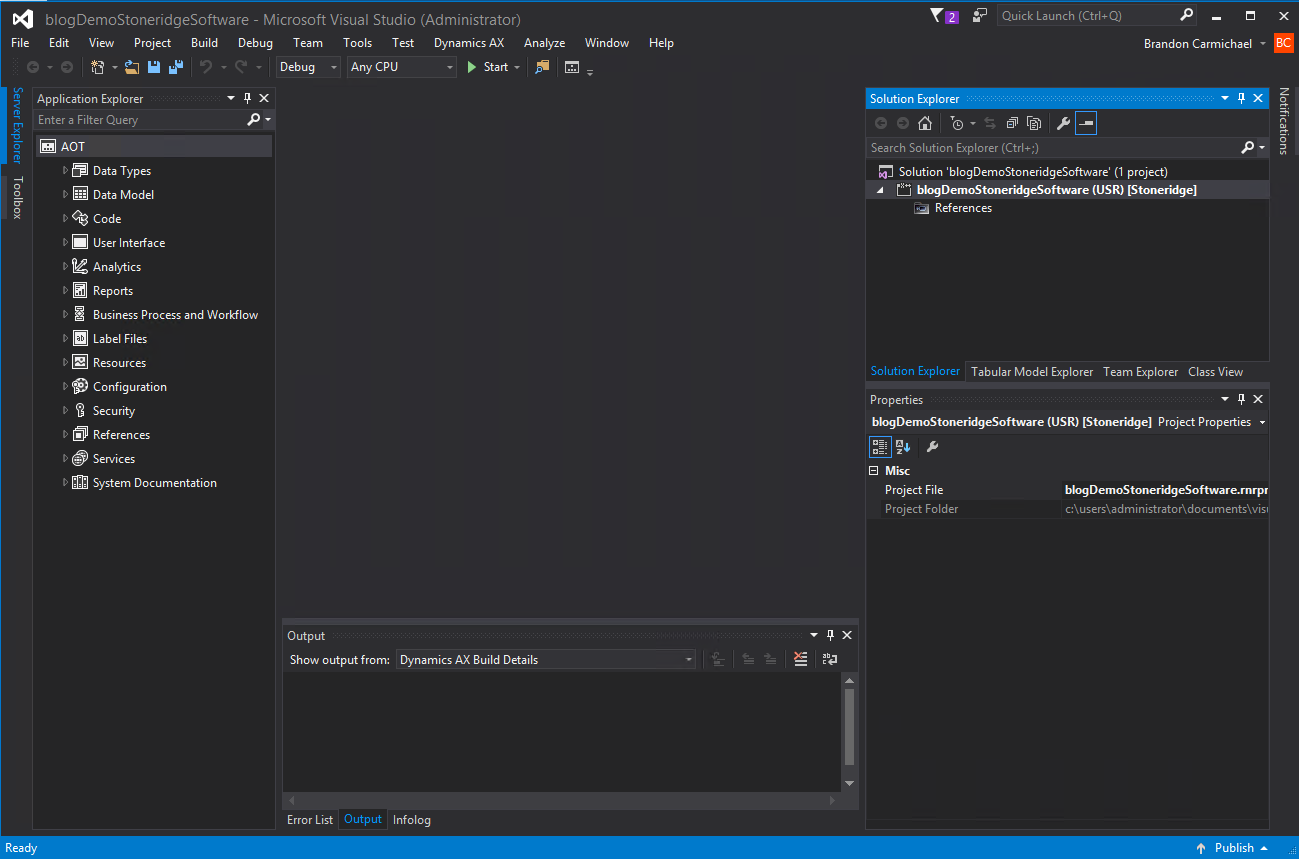
After hitting Ok, my new project (associated with my model) can be seen in the Solution Explorer window. From my picture below, outlined in red is my project name, in white is the layer, and blue is the model.
At this point, I am now ready to begin adding and customizing elements. A quick note, now that I have my model created, I can go back and update the model parameters as needed. To do this, I will navigate to: Dynamics AX > Model management > Update model parameters… This will launch the model wizard.
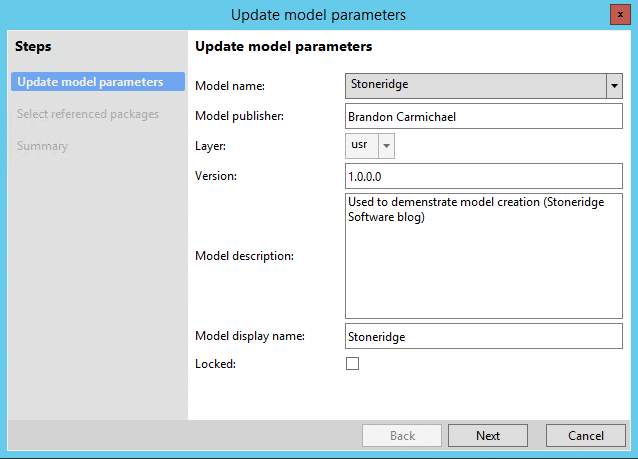
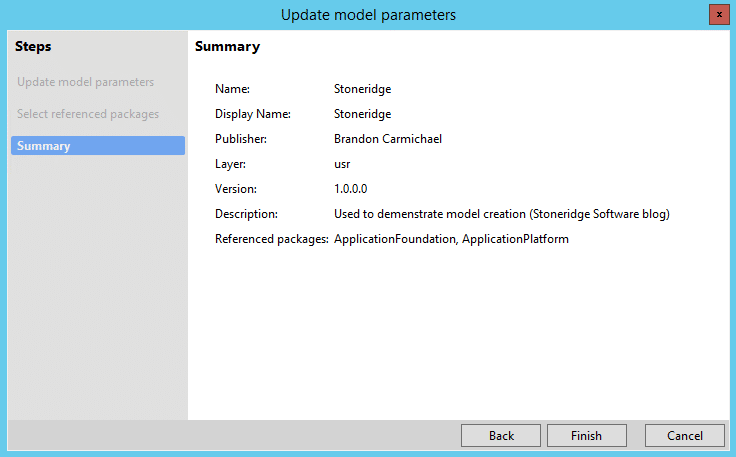
On the Update model parameters form, select the model you would like to update. In this case, I will select the Stoneridge model – notice that the Model publisher, Version, Model description, and Model display name are automatically filled in and are editable. After selecting Next, I am able to select or deselect any referenced packages. I’ve decided to deselect the AppliationSuite. After selecting Next, I am able to review the models summary before I select Finish. Notice in my models’ summary, ApplicationSuite is no longer a referenced package.
Under the terms of this license, you are authorized to share and redistribute the content across various mediums, subject to adherence to the specified conditions: you must provide proper attribution to Stoneridge as the original creator in a manner that does not imply their endorsement of your use, the material is to be utilized solely for non-commercial purposes, and alterations, modifications, or derivative works based on the original material are strictly prohibited.
Responsibility rests with the licensee to ensure that their use of the material does not violate any other rights.


