


Getting Started with Financial Reports in Dynamics 365 Business Central – Account Schedules vs Jet Reports
Have you struggled getting a quick and accurate balance sheet or income statement in the past? Has the thought of creating these much-needed reports seemed too daunting? Do you want to see the light at the end of the tunnel? Then this blog is for you. I’ll show you two easy ways to create a basic balance sheet in Dynamics 365 Business Central with minimum fuss.
Account Schedules is the collective name for financial reports in Dynamics 365 Business Central. I’m going to describe two ways to create a basic balance sheet:
- using D365 Business Central default balance sheet format
- using Jet Reports
Using D365 Business Central Balance Sheet:
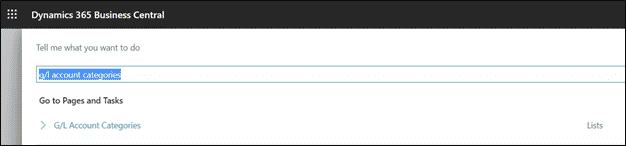
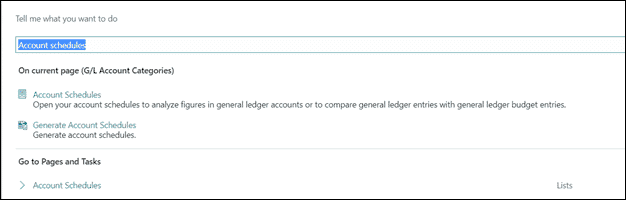
First, it’s best to make sure all G/L accounts have an Account Category and Subcategory assigned. Search for G/L account categories.
The G/L Account Categories screen shows basic information about the G/L accounts: description, category, balance. If multiple accounts rollup into a total, the G/L Accounts in Category will show the accounts used. For example the Cash account line shows the range of 10100..10300.
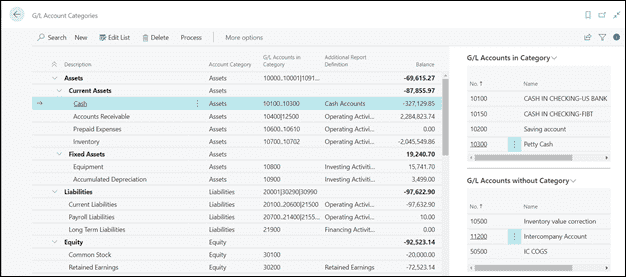
On the right side of the screen, the Fact Box has 2 panes: G/L Accounts in Category and G/L Accounts without Category. Select a totaling line to see the accounts included in the range. This is a great double-check to ensure the correct accounts are included.
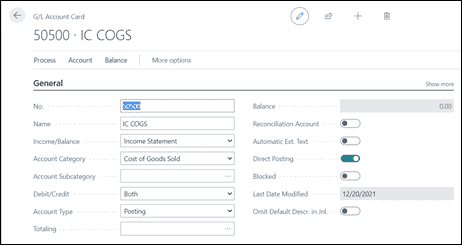
The G/L Accounts without Category pane shows G/L accounts that do not have an Account Subcategory assigned. Notice the last account on that list – 50500 IC COGS. When the G/L account card is open, the Account Subcategory is blank. If this is an important account for financial statements, assign a Subcategory, and the G/L account will disappear from that Fact Box. This can be ignored if the G/L account is no longer in use. This is a one-time change, although should probably be reviewed periodically if the COA has gone through some changes.
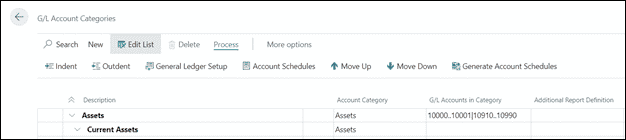
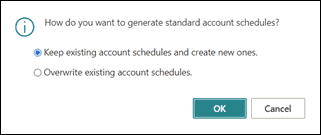
If accounts and/or or their category/sub-category assignments have changed, you will need to regenerate the system generated account schedules from the G/L Account Categories page. From this page, click Edit List >> Process >> Generate Account Schedules. You may choose to keep existing account schedules or overwrite them.
Now we’re ready to begin using the Account Schedules. Search for Account Schedules to open the account schedule list.
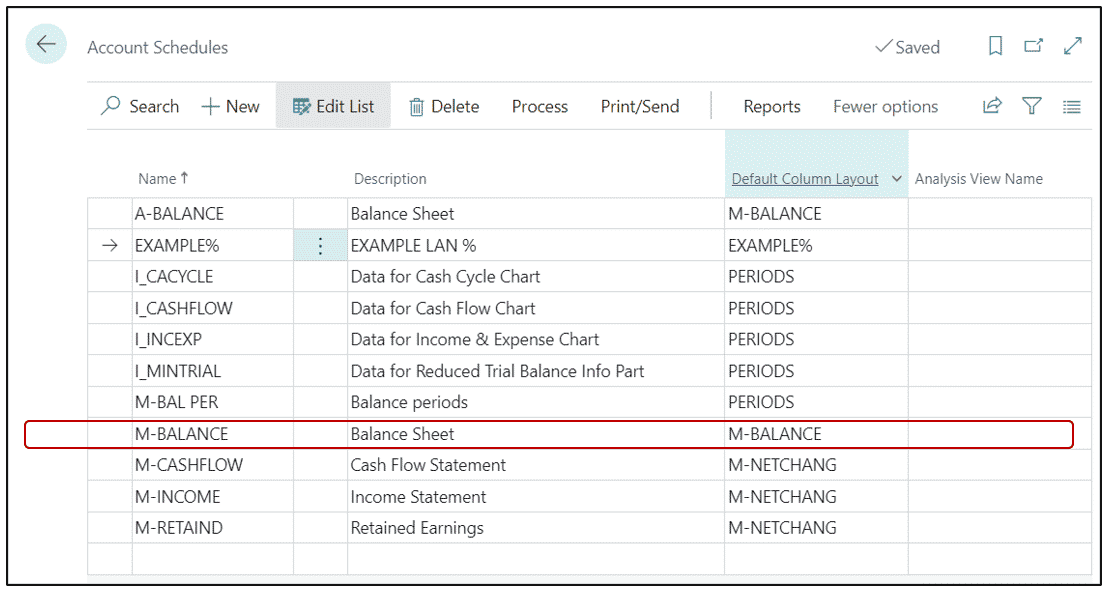
In this list, the Name indicates the account schedule (financial report) to be produced. The Default Column Layout indicates the columns that will populate with data.
Account Schedules with the prefix “I_” or “M-“ are default, system-generated account schedules.
For demonstration, I’ll show the Balance Sheet for a single month, using the Default Column Layout.
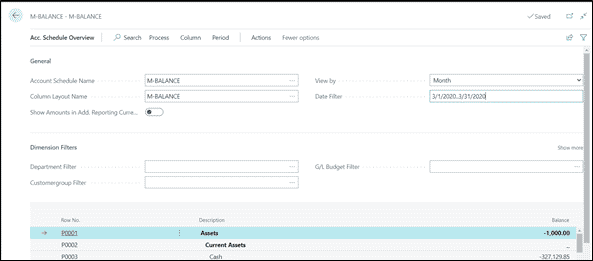
After selecting the account schedule line, click Process >> Overview.

The Account Schedule Overview page opens. The schedule name, column layout name, view by (period type) and date filter are all editable. Dimension filters may be added also. The resulting data is shown in the lower portion of the screen.
The data may be printed, saved as a PDF, sent to Word, or sent to Excel.
Using Jet Reports and D365 Business Central:
Jet Reports (found in the Extension Marketplace) is an Excel add-in which allows the user to pull data directly from the data source and produce the results in Excel.
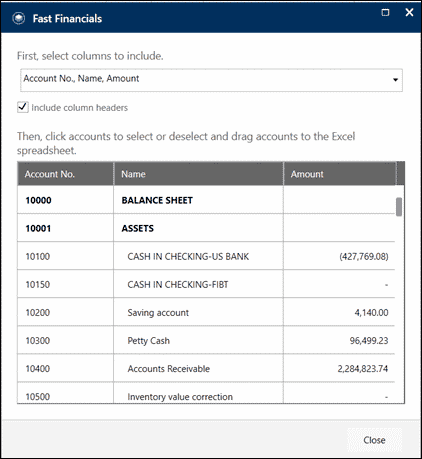
There are a few ways to create a balance sheet using Jet. For this demonstration, I’m using the easiest way: Fast Financials.
On the Jet ribbon, select Fast Financials.

Jet Reports will review the database and retrieve the entire chart of accounts in the Fast Financials page. Select the account range desired, drag the range to Excel and drop it in a worksheet.
(Use Shift to select accounts in a range, use Ctrl to select individual accounts.)
For this demonstration, I chose the Assets and Liabilities accounts only, to create a balance sheet. I selected the header row Assets, held the shift key, scrolled until I saw the Total Liabilities row and click it to select all the accounts between. Then I dragged the accounts to the desired space in my worksheet.
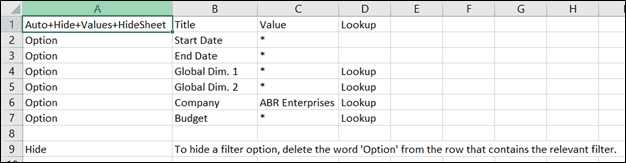
After the accounts have been chosen and placed in your worksheet, close the Fast Financials page. In Excel, Jet Reports creates a worksheet named Options which contains all the filters (options) for the report. Another worksheet contains the rows for the accounts.
Options worksheet:
Sheet1:
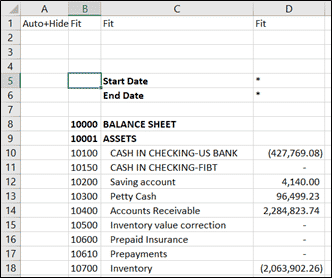
At this point, while in Design mode, the report may be formatted using common Excel techniques – bold, borders, number format, etc. Additional calculations may also be added.
To run the report, click the Run button on the Jet ribbon. The Report Options dialog allows the use to enter dates, select global dimensions, Company and Budget name. The funnels indicate lookup values for ease of filtering.
For the balance sheet, enter the end date and click the Run button.
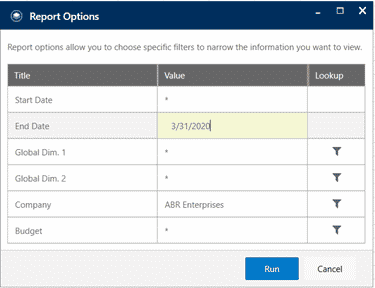
Jet Reports will fetch the data and return the results in Excel.
Business Central Account Schedules vs Jet Reports
Both BC and Jet produce financial reports – balance sheet in this example – that may be reviewed, manipulated and updated in Excel, so when trying to decide between the two products, there are a few points to consider.
BC advantages/disadvantages:
- Easy to see the report without leaving BC.
- Easy to review your chart of accounts for proper grouping of accounts since you’re already in BC.
- Additional accounts added with the proper account subcategory and falling within a totaling range will be included automatically.
- Basic account schedules already exist.
- Additional calculations are not as intuitive as in Excel.
- A few more clicks are required to print the report.
Jet Reports advantages/disadvantages:
- Report is produced in Excel’s familiar environment.
- Complex calculations may be added to further enhance the report.
- Easy to update by clicking the Run button and changing filters.
- Easy to share the report – treat it like an Excel file.
- Fast Financials feature does not group accounts together – a separate row is produced for each G/L account.
- New G/L accounts must be added to the report manually, if using Fast Financials feature.
- Report written and viewed outside of BC.
- Must purchase Jet Reports separately from Business Central.
Conclusion:
BC will provide basic financial reports with some additional changes that can be made by users with average BC skills. If these reports provide the insight needed to make business decisions, use them. If you’re looking for a solid all-around reporting tool that will create financials also, consider Jet Reports.

Under the terms of this license, you are authorized to share and redistribute the content across various mediums, subject to adherence to the specified conditions: you must provide proper attribution to Stoneridge as the original creator in a manner that does not imply their endorsement of your use, the material is to be utilized solely for non-commercial purposes, and alterations, modifications, or derivative works based on the original material are strictly prohibited.
Responsibility rests with the licensee to ensure that their use of the material does not violate any other rights.