


Guide to Advanced Budgeting in D365 Finance: Setup
This is part I of a 2 - Part Series on advanced budgeting.
Advanced Budgeting is vast and can have many ‘moving parts’, In this blog, I will mention workflows when applicable but for the most part, we will stick to the manual processes to create a budget in D365 Finance.
The first step to designing the budgeting process is to build a plan on how it will be structured. The configuration can be changed once set up, but it is far easier to have a plan and build to the plan than to jump in and try to fix it after setup. Design it out to determine what will be budgeted (only profit loss accounts or also balance sheet) and which financial dimensions will be budgeted. The more detailed, the more complex it will be to setup. Because of the many ‘moving parts’, be sure to test thoroughly. It is best to determine a common middle ground where you have enough details, but not too detailed as to cause difficulty in setting it up. If there are doubts, KIS (keep it simple) and build on the complexity in the coming budget years.
There is a lot of configuration which must be completed first. This is where we will start.
Basic Budgeting Setups
Even though it is for Dynamics 365 Finance Advanced Budgeting, we will start with some of the Basic Budgeting setups. These are needed for Advanced Budgeting to process the budget. We will cover the following:
- Budgeting Parameters.
- Dimensions for budgeting
- Budget codes
- Budget models
Budgeting Parameters:
(Budgeting > Setup > Basic budgeting > Budgeting parameters)
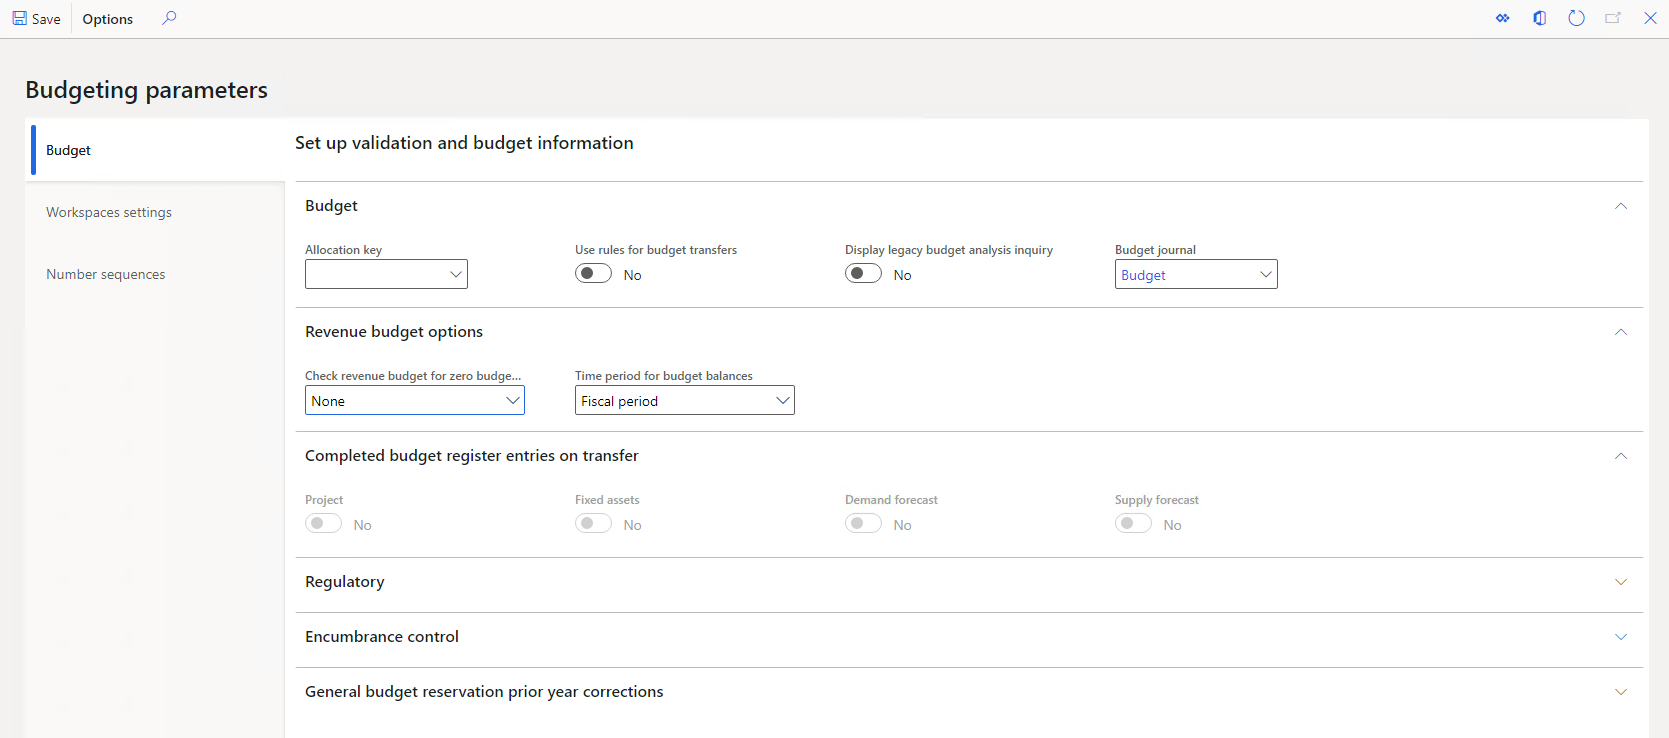
A budget journal needs to be set up, but the rest of the fields in the top 3 fast tabs, are optional. The time period for budget balances should be ‘Fiscal period’ if you want to do monthly or period balances.
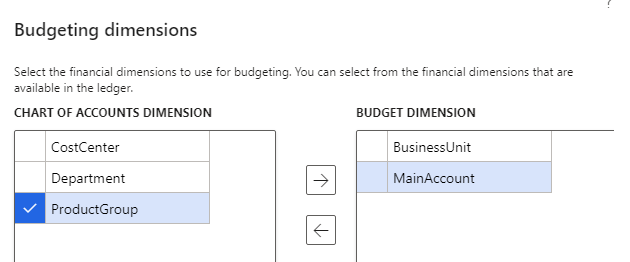
Dimensions for Budgeting in Dynamics 365 Finance:
(Budgeting > Setup > Basic budgeting > Dimensions for budgeting) Select which financial dimensions are being used for budgets. In this example to keep it simple, we are using only the Main Account and Business Unit.
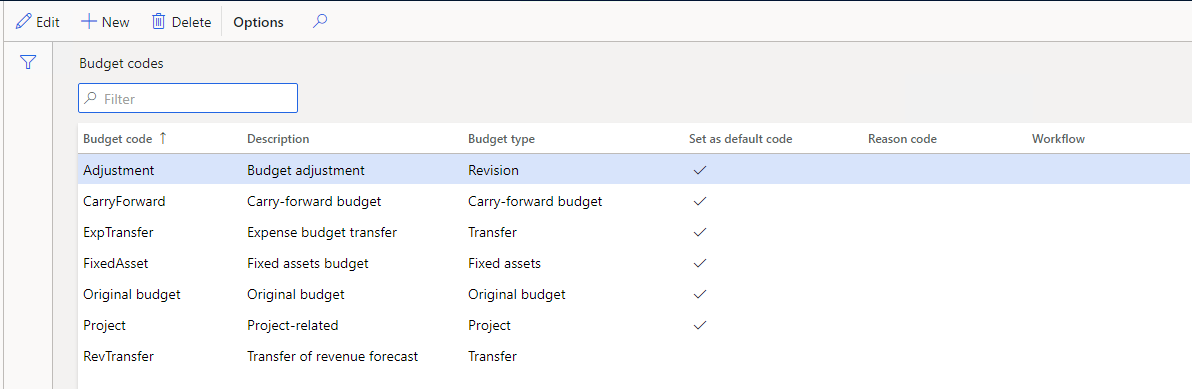
Budget Codes:
(Budgeting > Setup > Basic budgeting > Budget codes) These are set up as default data but can be used or added to. These are the ‘buckets’ which the budget numbers will fall into such as original or revision or revised numbers/adjustments.
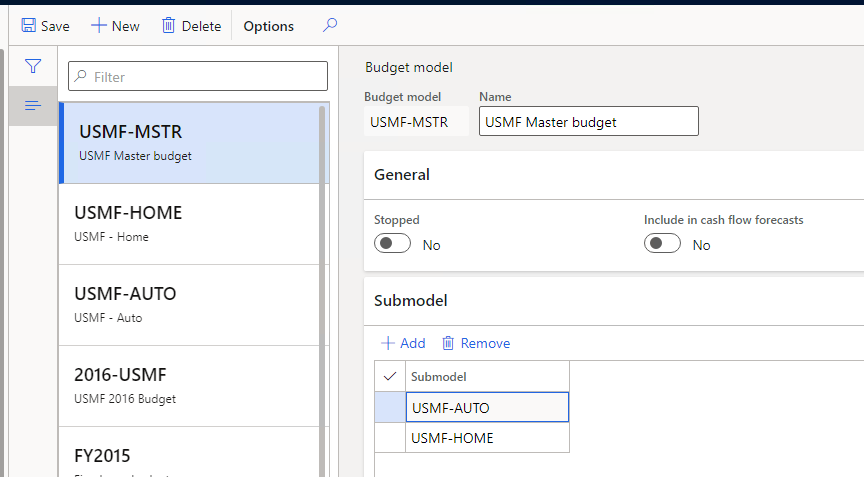
Budget Models:
(Budgeting > Setup > Basic budgeting > Budget models) This was put last as it only applies if using Financial Reporter as it allows you to define how you can pull your budget numbers into reports. If using, I would recommend setting up a master budget so you can also use forecasts to compare to there. Then your sub-models can be like your org hierarchy which is covered next. It saves having to change columns in Financial Reporter each year and the report dates determine the budget numbers.
Organizational Hierarchy
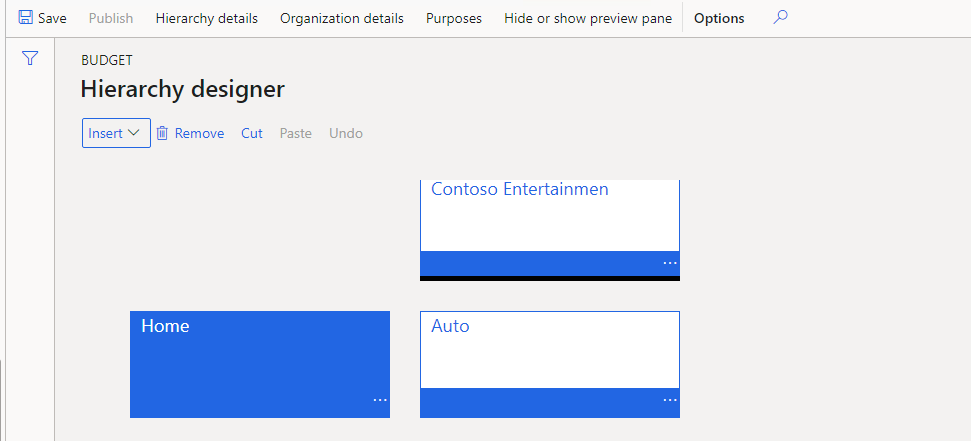
This will represent the structure of the budget. For example, in our case, we will need a company level, with business units as children under the company. This step would be in addition to the models if using those. The finished, published hierarchy setup looks like this:
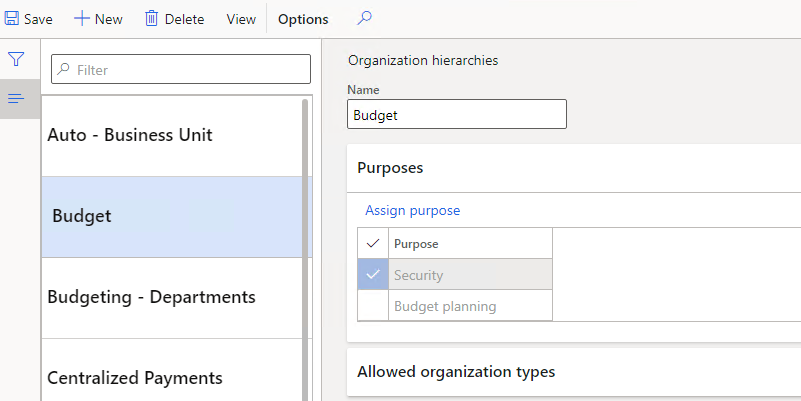
- To add a new hierarchy, go to Organization administration > Organizations > Organization hierarchies. Click New and give it a name. Call it Budget or similar as this will be the hierarchy used for each budget cycle.
- Next, 2 purposes need to be assigned by clicking the ‘Assign purpose’ hyperlink. Security and Budget planning need to be assigned. This opens the purpose window where you need to select the Security purpose and then assign your hierarchy(s) by clicking Add. Select the hierarchy you are working with and click OK at the bottom. Then do the same for the Budget planning purpose. It should then look like this:

- To set up and view the hierarchy, click the View button at the top. Once the window opens, click the Edit button in the top left.
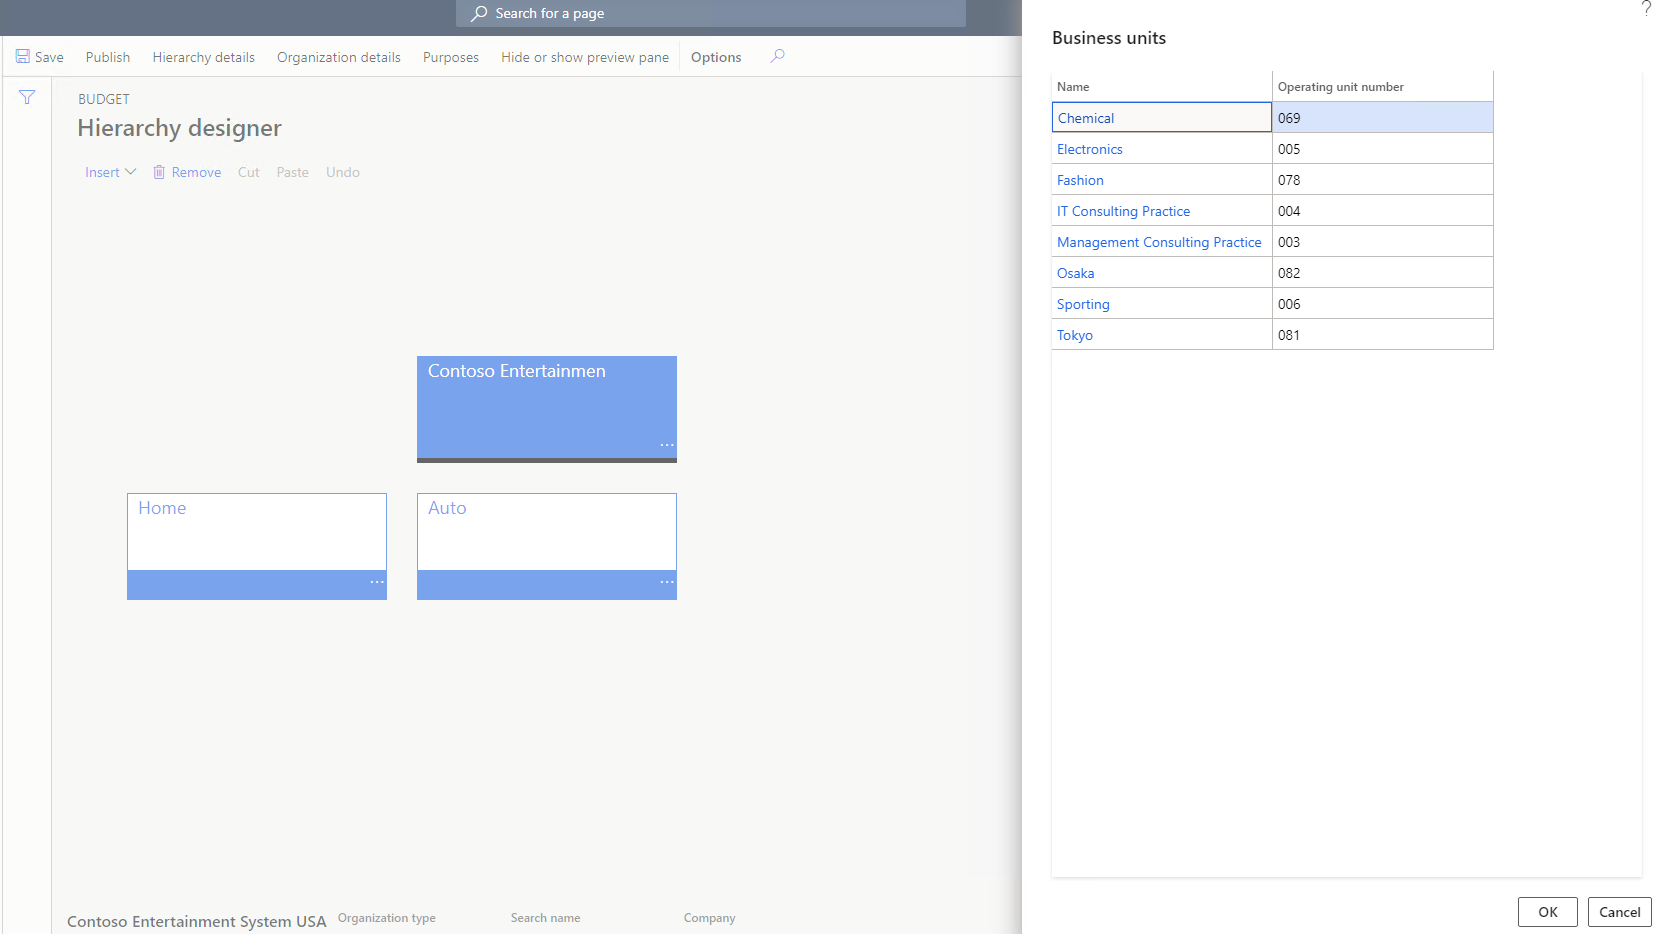
- This changes the menu in the form below. Click the Insert and start with the Legal entity or top level of your budget design. This will bring up a list of all the legal entities in your system. Select the appropriate one and click OK.
- With the box of your legal entity highlighted (shaded in blue), click the insert again and select the next level down in your hierarchy. In our case, it is the Business unit. Once an operating unit is selected it will no longer show in the list. Continue until all units are selected, and unfortunately, they must be done one at a time. Just make sure you have the correct parent selected before clicking insert.

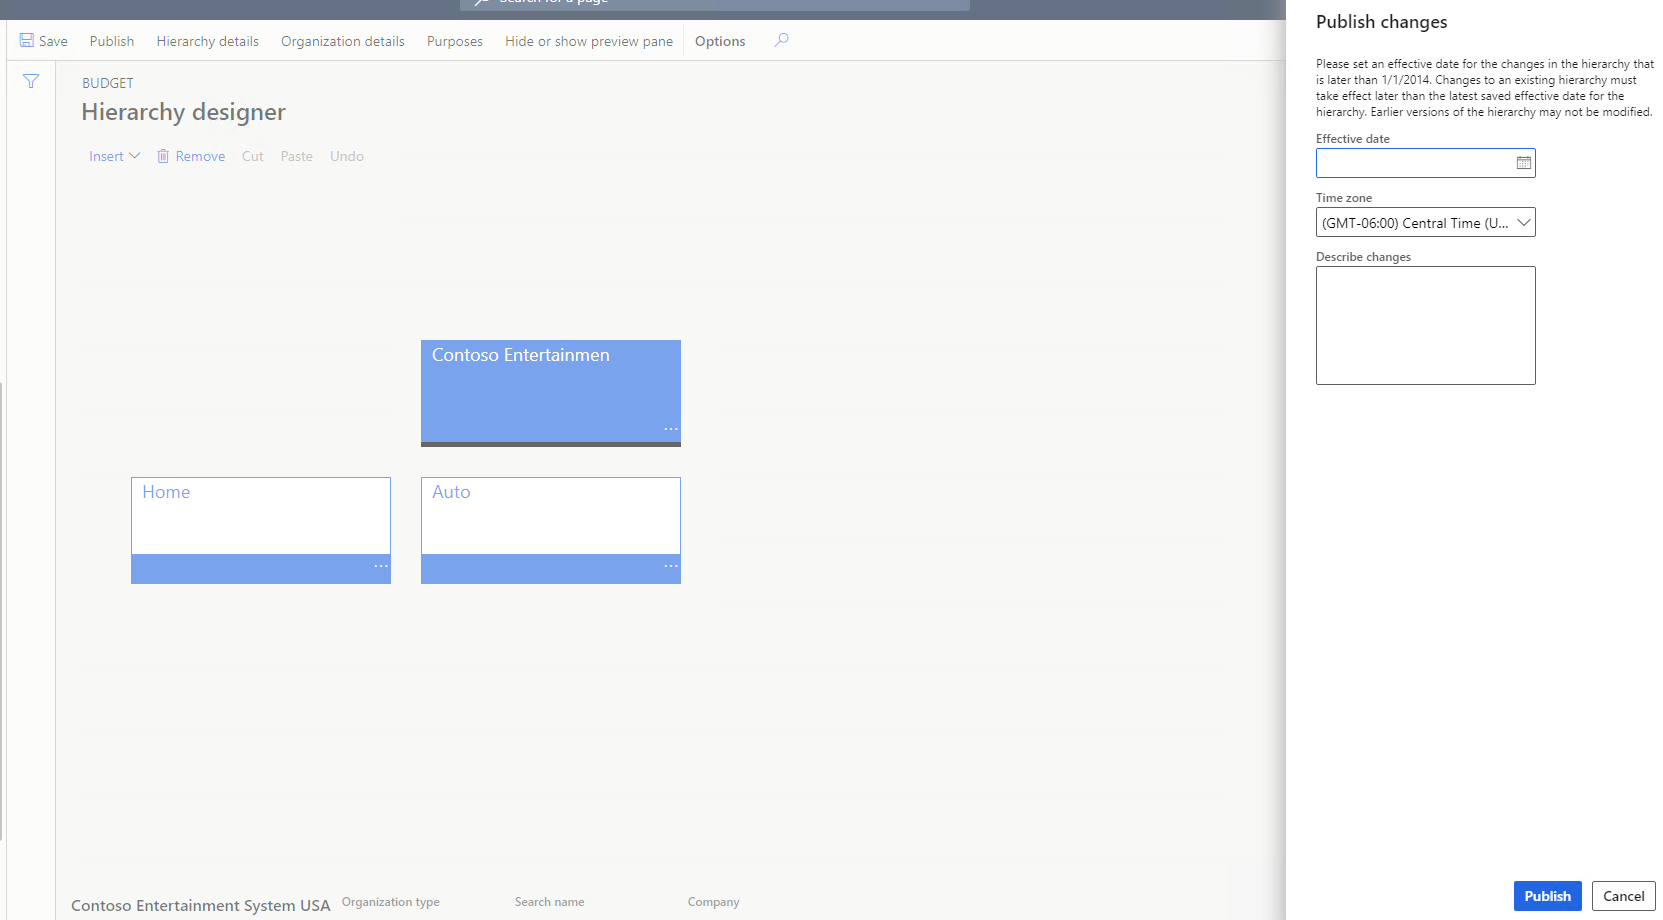
- Once all levels and units are selected/created, then you must publish the hierarchy to make it available. Click the Publish button at the top. It will prompt for an effective date. Just make sure the date is the current date or earlier. Then click the Publish button at the bottom to activate it.

Advanced Budgeting Parameters
Now we are ready to tackle the Advanced Budgeting parameters. At this point, we need to go through the Budget planning setups. The list will include but may not be limited to (dependent on how your design is setup):
1) Budgeting parameters (if not completed as part of the Basic budgeting steps)
2) Budgeting workflows (just to touch base on these)
3) Budget cycles
4) Budget planning configuration
- Parameters
- Scenarios
- Stages
- Workflow stages
- Allocation schedules/Stage allocations
- Columns
- Layouts
5) Budget planning process
Budgeting Parameters
(Budgeting > Setup > Budget planning > Budgeting parameters) This is a link to the same form discussed back in Step A 1. If not completed there, it needs to be completed at this time. Refer to A 1 for details.
Budgeting Workflows
(Budgeting > Setup > Budget planning > Budgeting workflows) As stated earlier, I will not be going into workflows as there are many options, and can automate some functions if needed. There are some out-of-the-box workflows to start to test with.
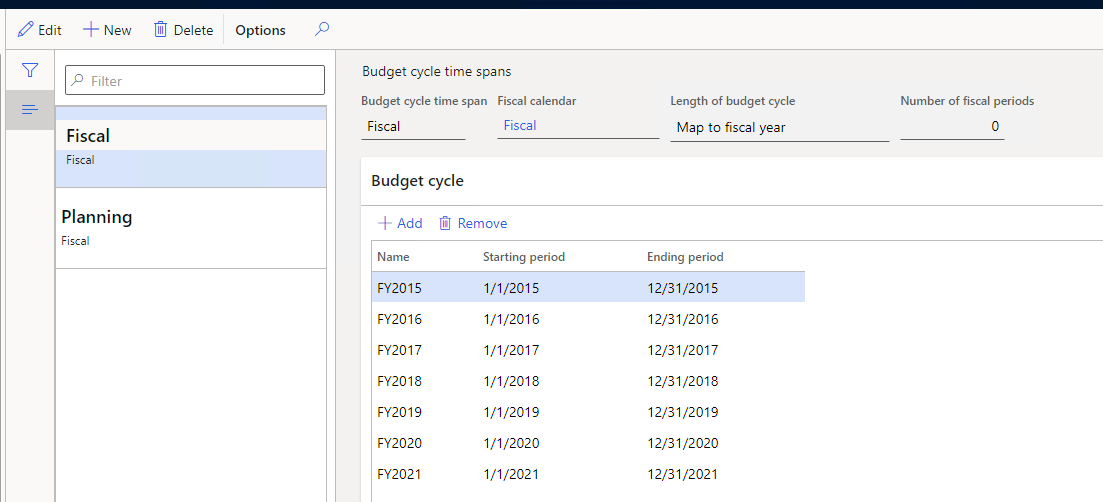
Budget Cycles
(Budgeting > Setup > Budget planning > Budgeting cycles). These define the budget period as it links to the financial calendar. In our example, we are creating a cycle for each year which is most common. They are used in the Budget planning process later.
Budget Planning Configuration
(Budgeting > Setup > Budget planning > Budget planning configuration). During this step, we define much of the details around the budget process.
- Parameters fast tab - Select the security model, default financial dimension set, and whether to allow access to budget plans by user group. For the security setting, I have found it easiest to manage by security model based on the hierarchy so I recommend the based-on security organization. The others are preferences on how you want to manage.

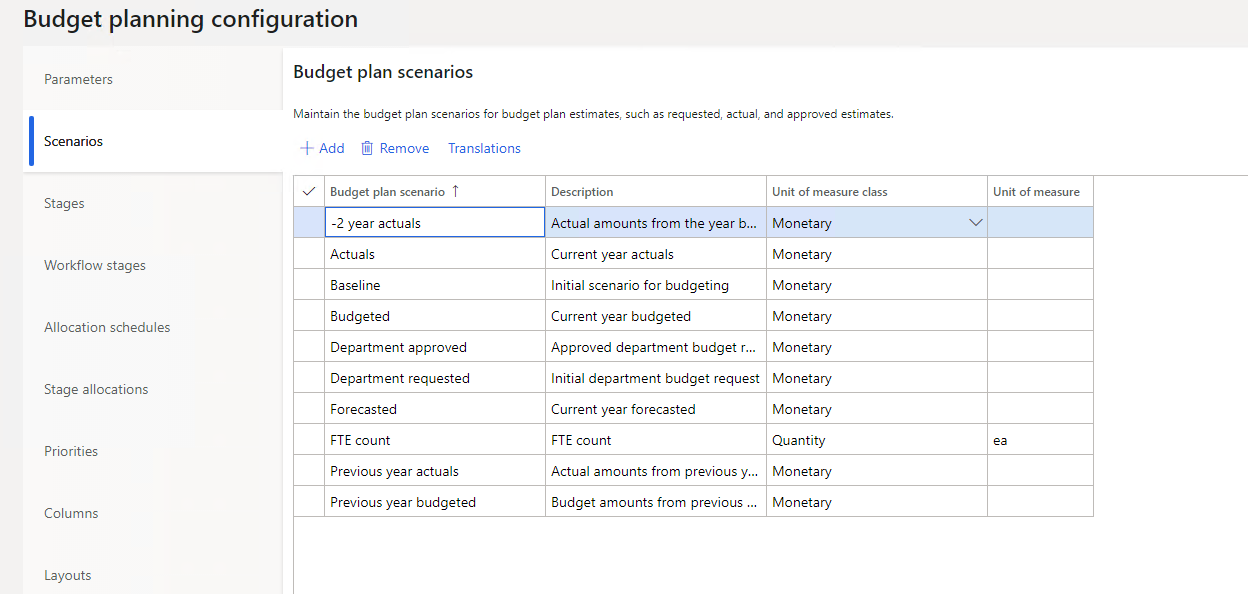
- Scenarios fast tab – This is where the ‘buckets’ used in budgets are defined. There are some system default scenarios, but you can add or change the names as you see fit. When adding, just make sure you assign the correct Unit of measure class. Here is the out-of-the-box list in the USMF Contoso data:

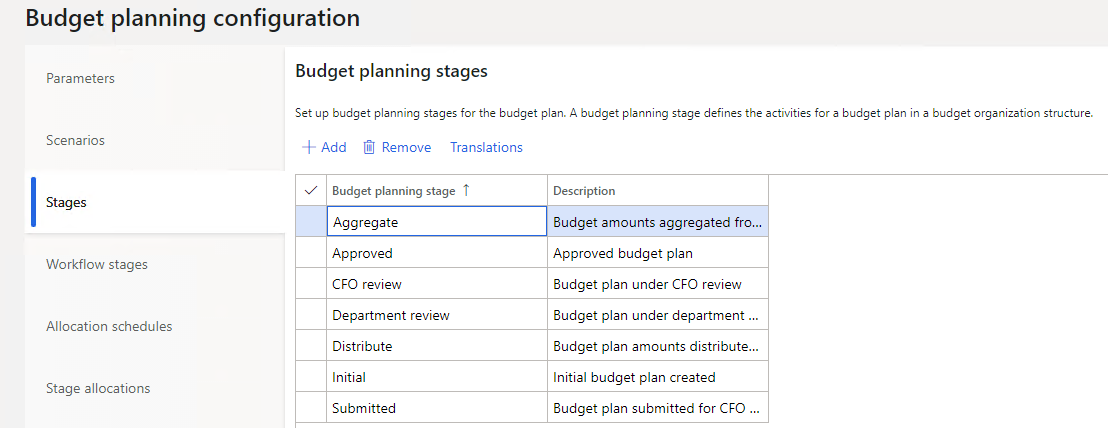
- Stages fast tab – The stages fast tab is where you can define the steps for your budget process. I did not do it in our scenario, but what I have done in implementations is number the stages by adding a prefix of x- with x relating the numerical step. This makes it easy for anyone to know which step they are on and sorts the list in order of occurrence. Again, there are default stages that can be reused, changed, or add your own.

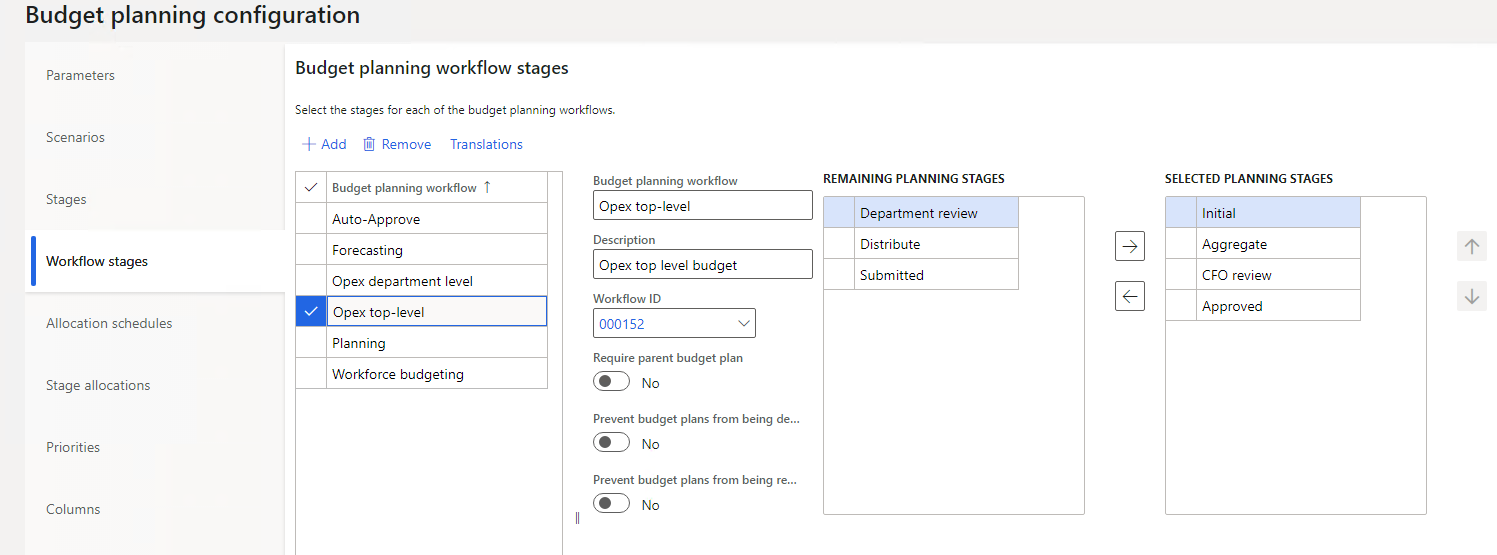
- Workflow stages fast tab – This fast tab is where the workflows are assigned to the specific stages created in c. There are some default workflows created and those can be used. This form allows you to match the workflows to the stages. There are some differing workflow levels. You can also set whether to allow deleting or resetting of the budget plan workflow. This is the step where you can make the budget process more complex. Between this step and the allocation steps, do a thorough test if you go down the more complex path.

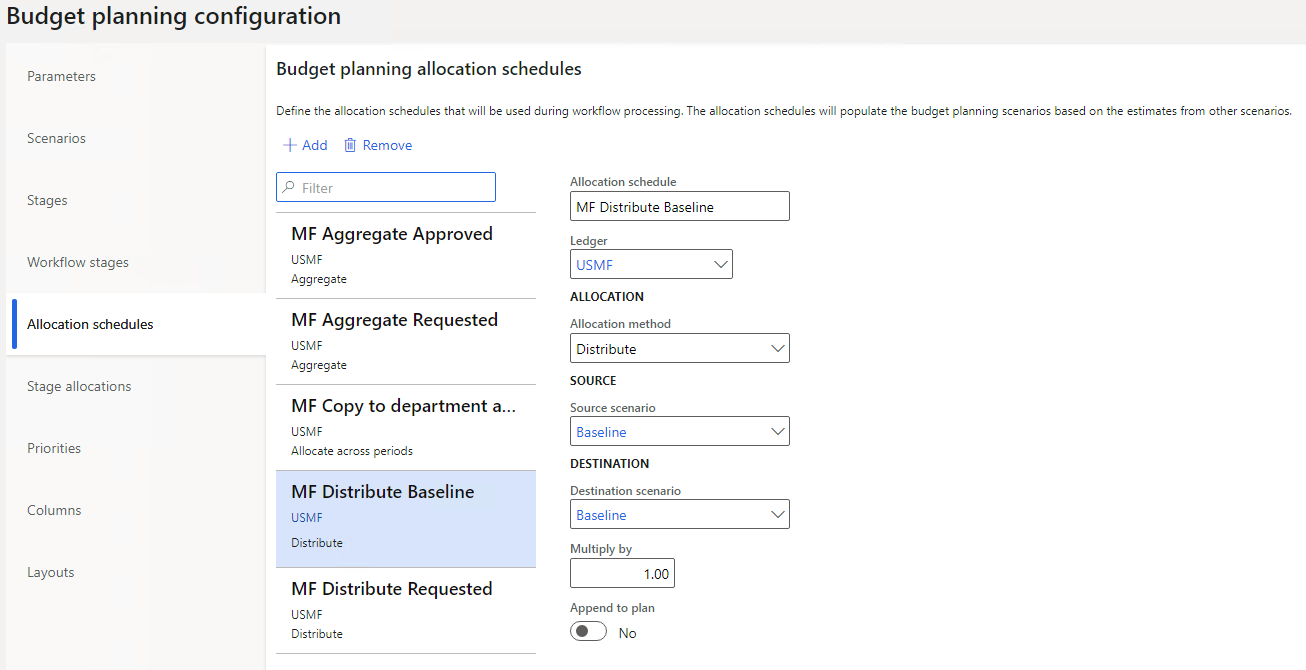
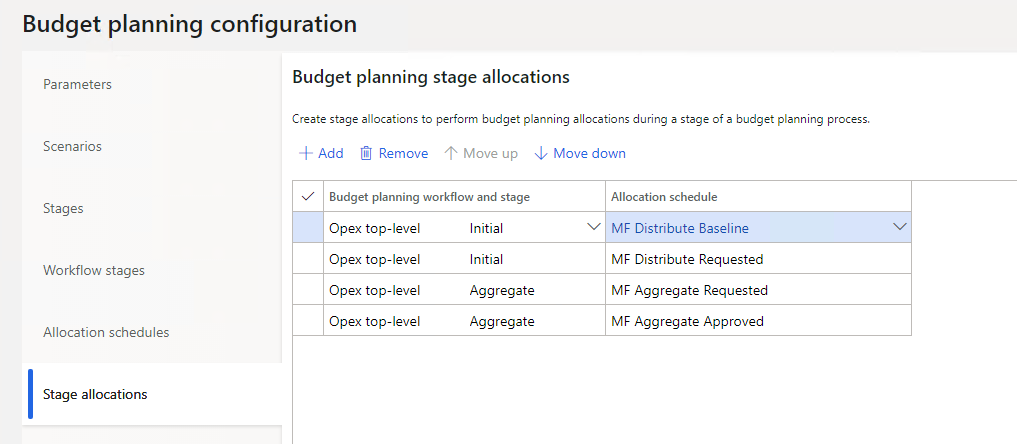
- Allocation schedules/Stage allocations fast tabs – On these fast tabs, you define the schedules by aligning them with scenarios and then assign them to steps in the workflow stages. These steps are also where a lot of options can complicate things. Again, there are some defaults for both:


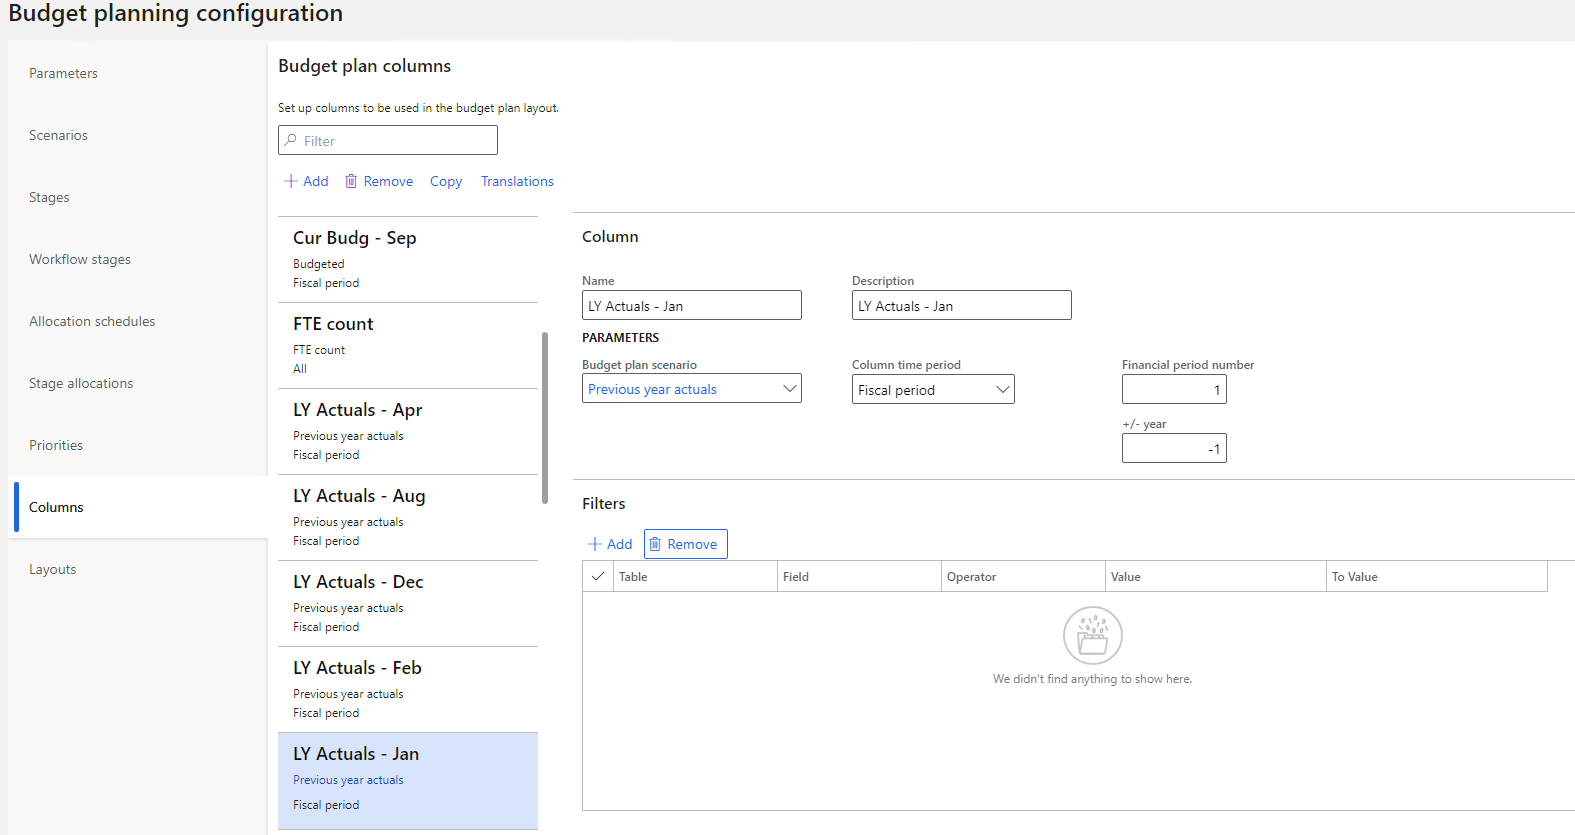
- Columns fast tab – The Columns fast tab is for defining all the columns you want to display on the budget plan list page. Keep in mind if you are doing by period or monthly buckets, the list page can only show 36 columns. Each month or period will consume a column. You can do more columns in excel, but F & O will only show the 36. In our scenario, I am showing LY Actuals, Current budget, and New budget numbers so I have 12 months of each for the 36. You give each a label and then also select which scenario (step b above) and define which column time period with period number and/or year. Filters can also be used to limit what shows in this form. This is how Jan of last year was set up:

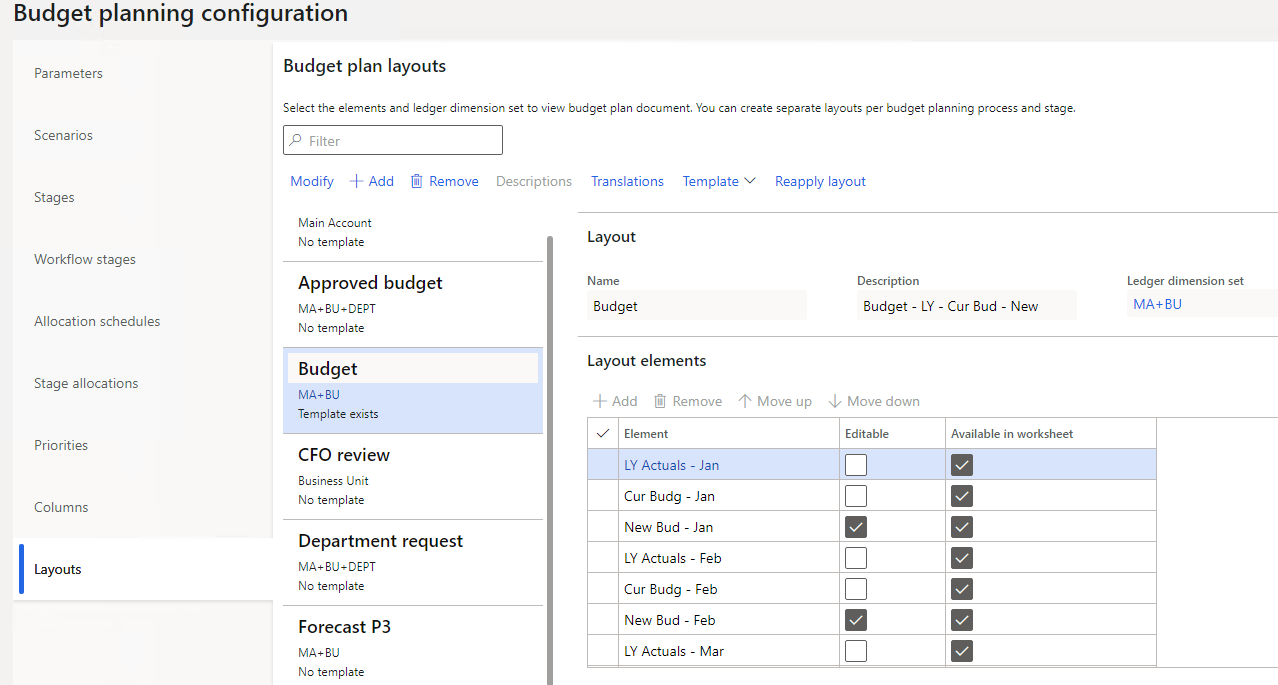
- Layouts fast tab – In the Layouts fast tab, you take your columns and build the layout to be used. You also have the option to make the columns editable and whether they should be available in the worksheet.


At this point, you have almost all the setups in place. The next step is to define the budget planning process.
Budget Planning Process
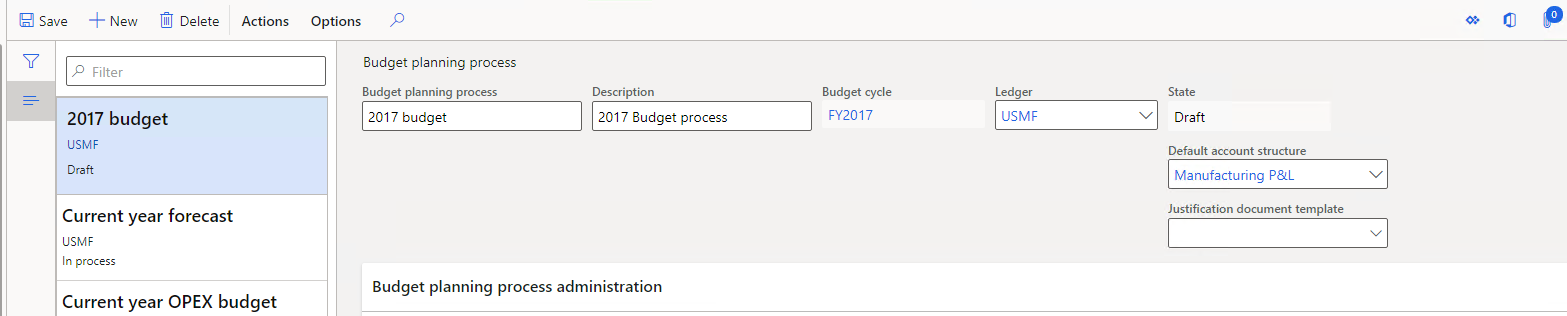
(Budgeting > Setup > Budget planning > Budget planning process). The Dynamics Budget planning process setup defines how the budget will look and work. This needs to be created for each budget year or budget cycle. These are the options to assign:
-
- Give it a name and description.
- Assign a budget cycle for the year in which you want to define the budget.
- Select the ledger (company) for which the budget will be for.
- Assign the account structure for which you will be budgeting. If you have one account structure for all accounts, in the column setup you could use filters to only show P & L accounts if that is all that is budgeted (a most common scenario). This is the header info:

- In the Budget planning process administration fast tab, select the organization hierarchy you created earlier.
- Assign the workflow. This part works with your setups for workflow stage allocations and stage allocations. You can use this to mass assign if many departments, cost centers, or other org types. Start with the organization type of Legal entity and select your company. Then select the Budget planning workflow for that type. Click the Assign button:

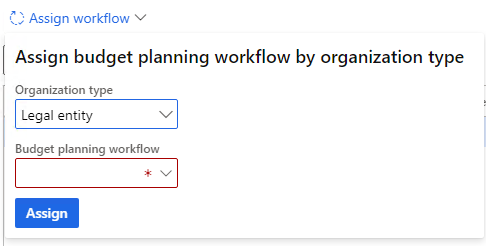
Continue until all branches have a workflow assigned.
7. Proceed to the Budget planning stage rules and layouts fast tab. Highlight the workflow and it will populate the window with all the steps assigned back in the workflow stages step. For each line, mark whether you will have associate plans, allow adding lines, modifying lines, and which layout should be used. If multiple workflows are used, complete the other workflows as well. Then it should look like this: 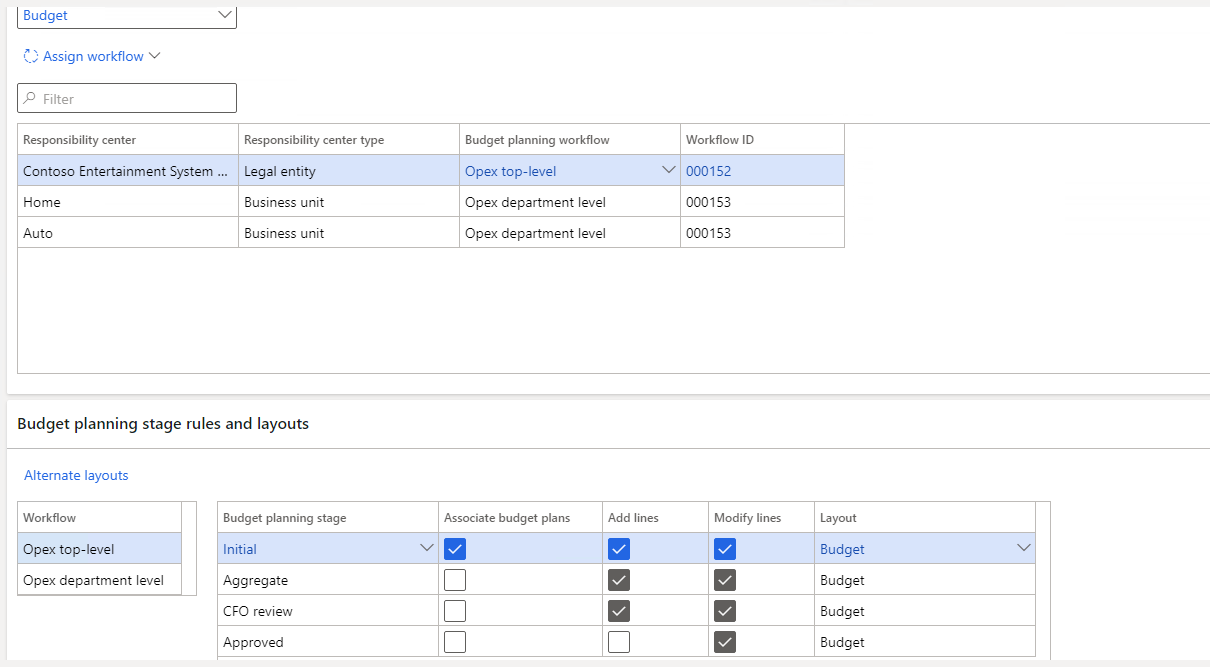
8. The last step is to activate the BPP. Click Actions > Process state > Activate to make it active.
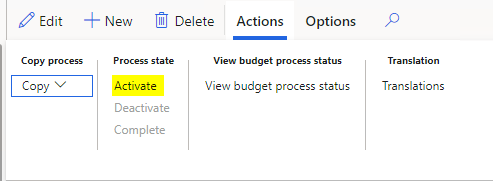
At this point, you will be ready to start creating a budget.
Security Settings
When creating the organization hierarchy, no one will be able to access it unless you allow some security to it. This is done via the Assign users to roles form. There are 3 roles around budgeting: Budget clerk, Budget contributor, and Budget manager. A contributor has the fewest rights, and a clerk should be able to do most things for editing. I will show how to assign a budget manager to the hierarchy.
- First, highlight the budget manager role in the filter pane. If the user is not in the users assigned to the role list, then make sure they are assigned to the role as you would any role. Highlight the user in the list and then select Assign organizations.

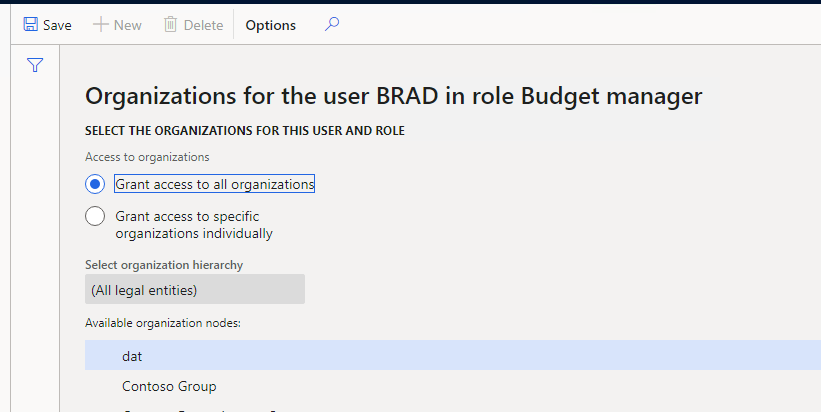
- It opens the Organizations for the user XXX in the role Budget manager window.

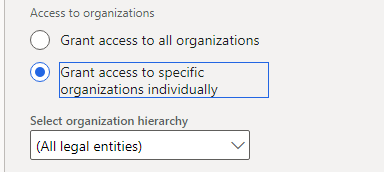
- Change the radio button to ‘Grant access to specific organizations individually’ selection. It should enable the ‘Select organization hierarchy’ dropdown.

- Select the org hierarchy you are using for budgets. It will be in the dropdown. If not, make sure it is published.
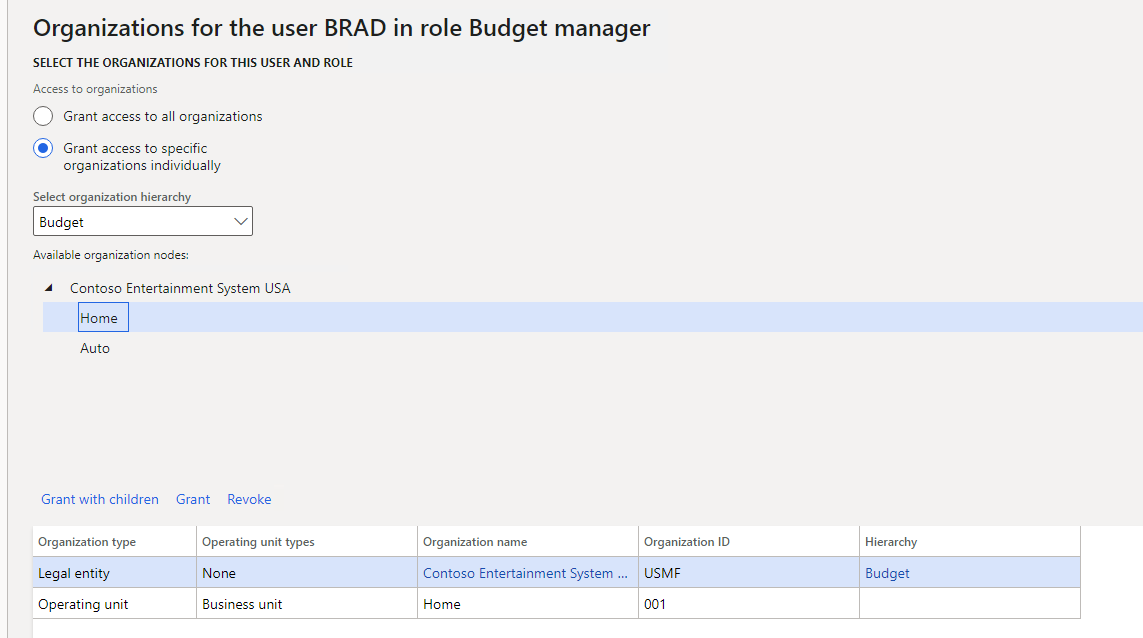
- Depending on the level of the tree you see, you can select specific levels or the top level and then select the level of access above the pane below. The options are Grant with children or Grant. If Grant with children is selected, then it populates only with the org type associated with the top-level you had highlighted. The user will have access to that level and all children under that level. If Grant is selected only the level selected has access. Below is an example of both, although this would not happen as the user would not need the child access since he would have it with the Grant with children of the top level.


All setups are now complete and in the next blog, we will create and process a budget in Dynamics 365 Finance.

Under the terms of this license, you are authorized to share and redistribute the content across various mediums, subject to adherence to the specified conditions: you must provide proper attribution to Stoneridge as the original creator in a manner that does not imply their endorsement of your use, the material is to be utilized solely for non-commercial purposes, and alterations, modifications, or derivative works based on the original material are strictly prohibited.
Responsibility rests with the licensee to ensure that their use of the material does not violate any other rights.