


Guide to D365 Marketing Templates for Customer Journeys, Emails, Marketing Pages and Forms
Microsoft Dynamics 365 Marketing comes with a wide variety of professionally designed templates. Each time you create a new email message, customer journey, marketing page, or marketing form, you start by choosing a template. Most of these templates include a column layout, color scheme, sample content, and sample images, whereas others provide a basic column layout without sample content. You can also start with a blank template.
The templates included with Dynamics 365 Marketing provide:
- A starting point to help you be more efficient with your time
- Advanced layouts based on responsive design techniques that help make the content look good at any screen size
- A color palette with a manageable number of colors that you can easily match your business's identity
- Designs that have been tested against a wide range of web and email clients to help ensure they will look great everywhere
This blog will walk through templates for Customer Journeys, Emails, Marketing Pages, and Marketing Forms.
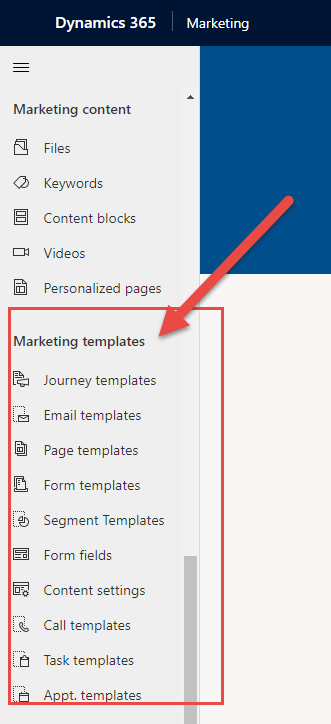
When you create a template, the process is nearly the same as when you create an actual message, page, journey, or form. Within the Sitemap, in the Marketing Area, you’ll see a Marketing template section with the templates listed.
Select Journey Templates to start a Customer Journey with a template. The page will prompt you with different types of templates. You can also create a New template starting from scratch.
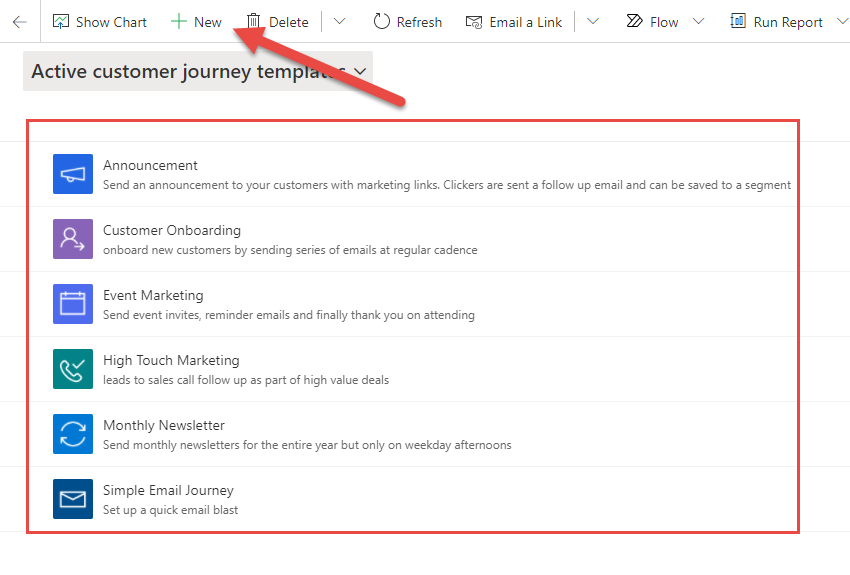
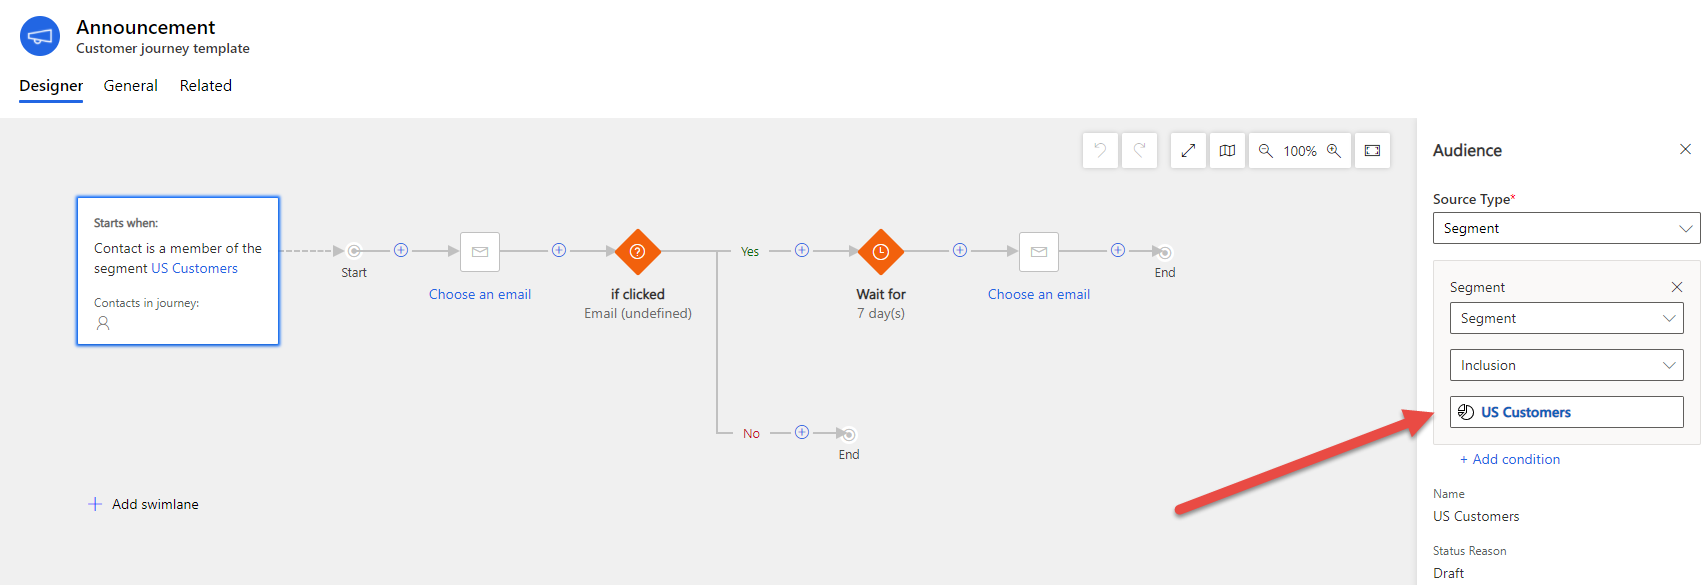
Let’s look at the Announcement customer journey template. This is used to send an announcement to your customers with marketing links. The customers who click will be sent a follow-up email and can be saved to a segment.
You start the journey by selecting a segment, or a group of related contacts that you want to target. Segments can be queried on demographic, firmographic, behavioral, and other data considerations. In this example, we created a Segment of Customers located in the US.
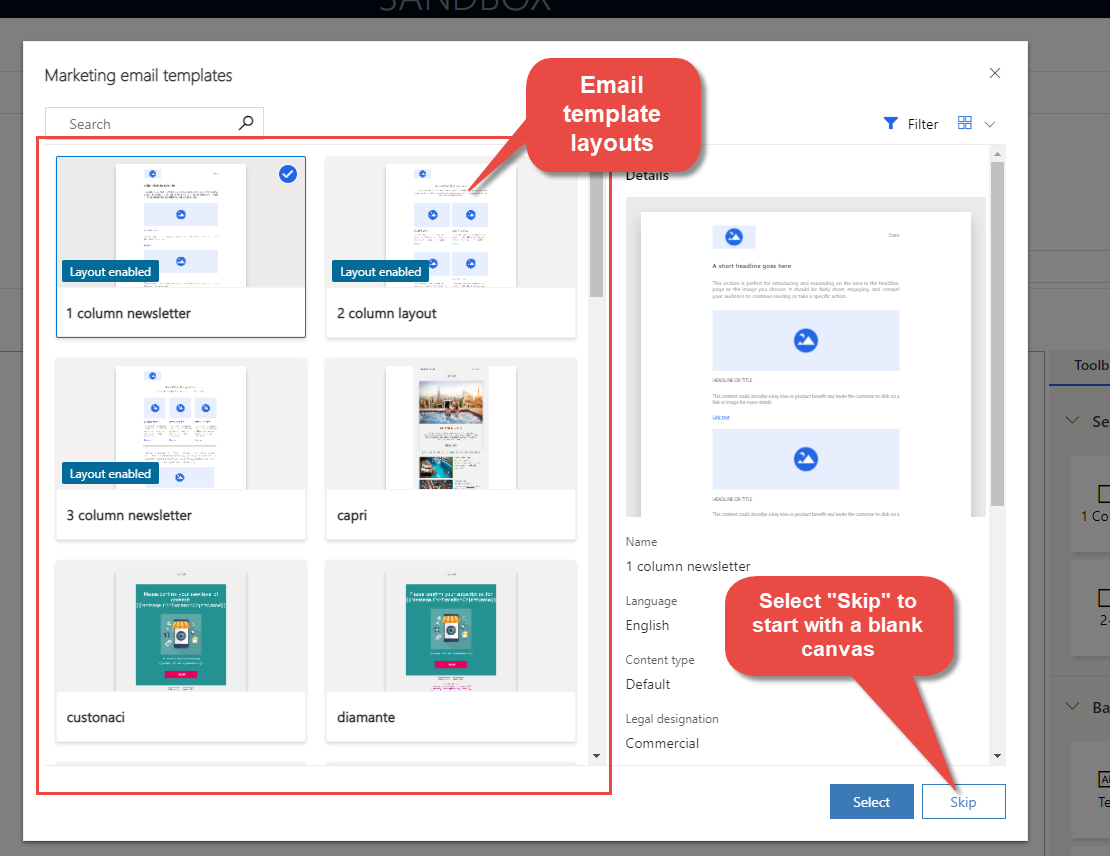
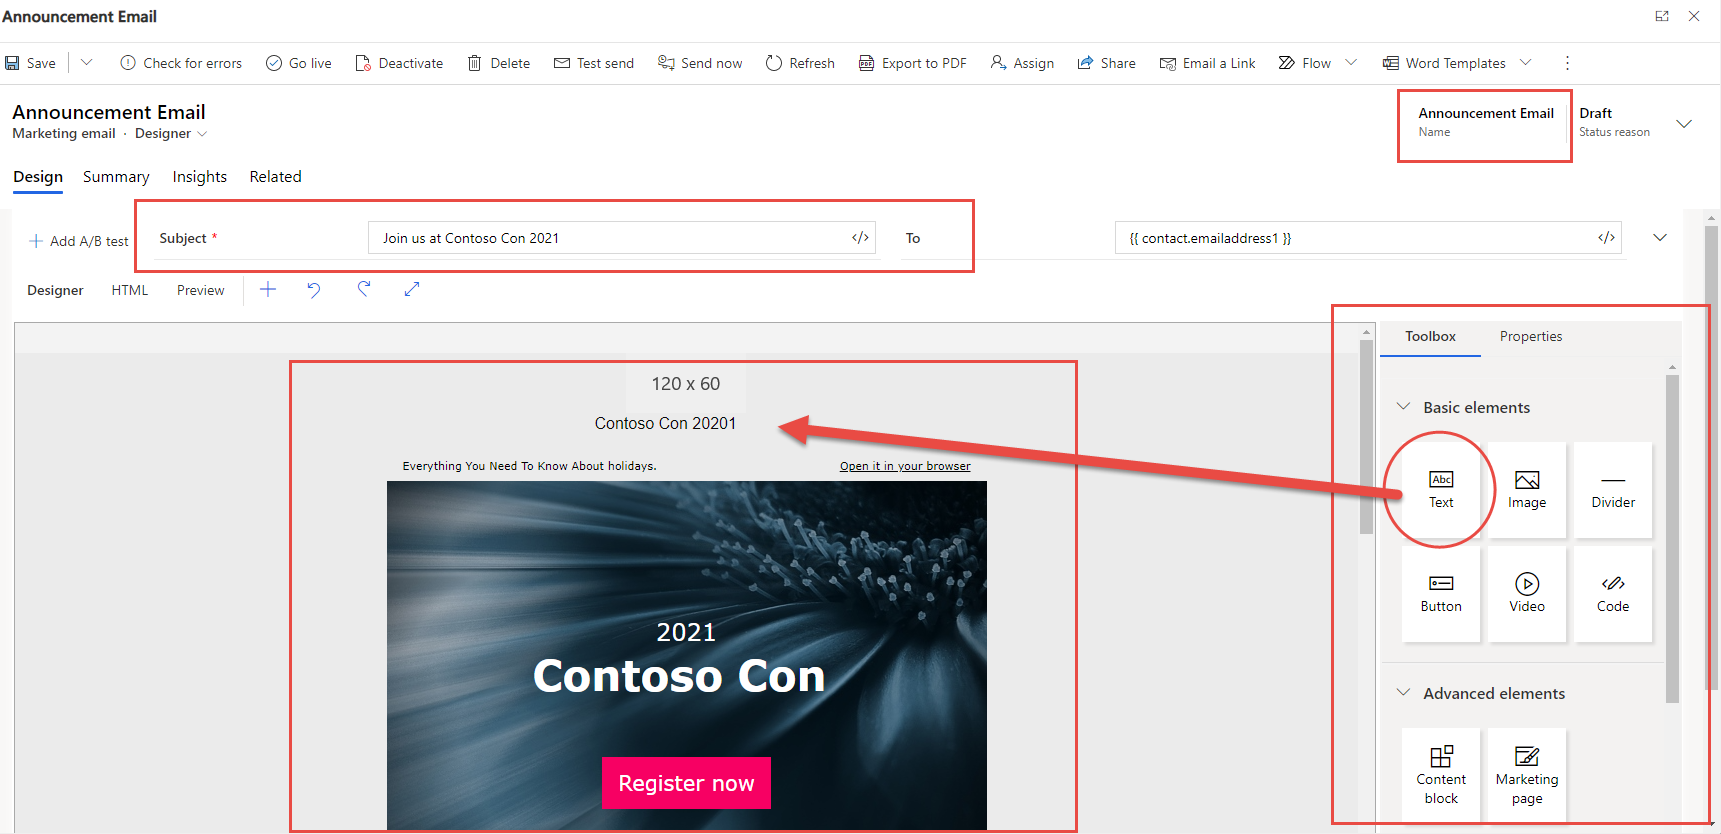
Next, you’ll choose the Email you want to be sent from the Email Templates. You can either select an existing Email Template or create a new one.

Once you select a template you’ll enter the following:
- Email Template Name which is populated in the head at the top of the page.
- A Subject for your email is very important because this is one of the first things recipients will see when they receive the email.
- The To field must contain an expression for finding each address the message will be sent to. This should almost always be the dynamic expression provided by default.
- From Name & Address to identify what recipients will see from the sender
Each of these settings is repeated on the Summary tab. Next, you’ll design your content in the body of the email in the template using the Toolbox on the right side of the template creator. The Toolbox provides design elements that you’ll use to construct your message. You can do things like drag a Text or Image box to the template.
Once you’ve completed your Email Template, the next step of the customer journey has a Yes or No path depending on if the customer clicks on the Email. In this example, if the customer clicks on the email, we have a Wait For condition. If the Customer does not click on the email, they have completed the customer journey.
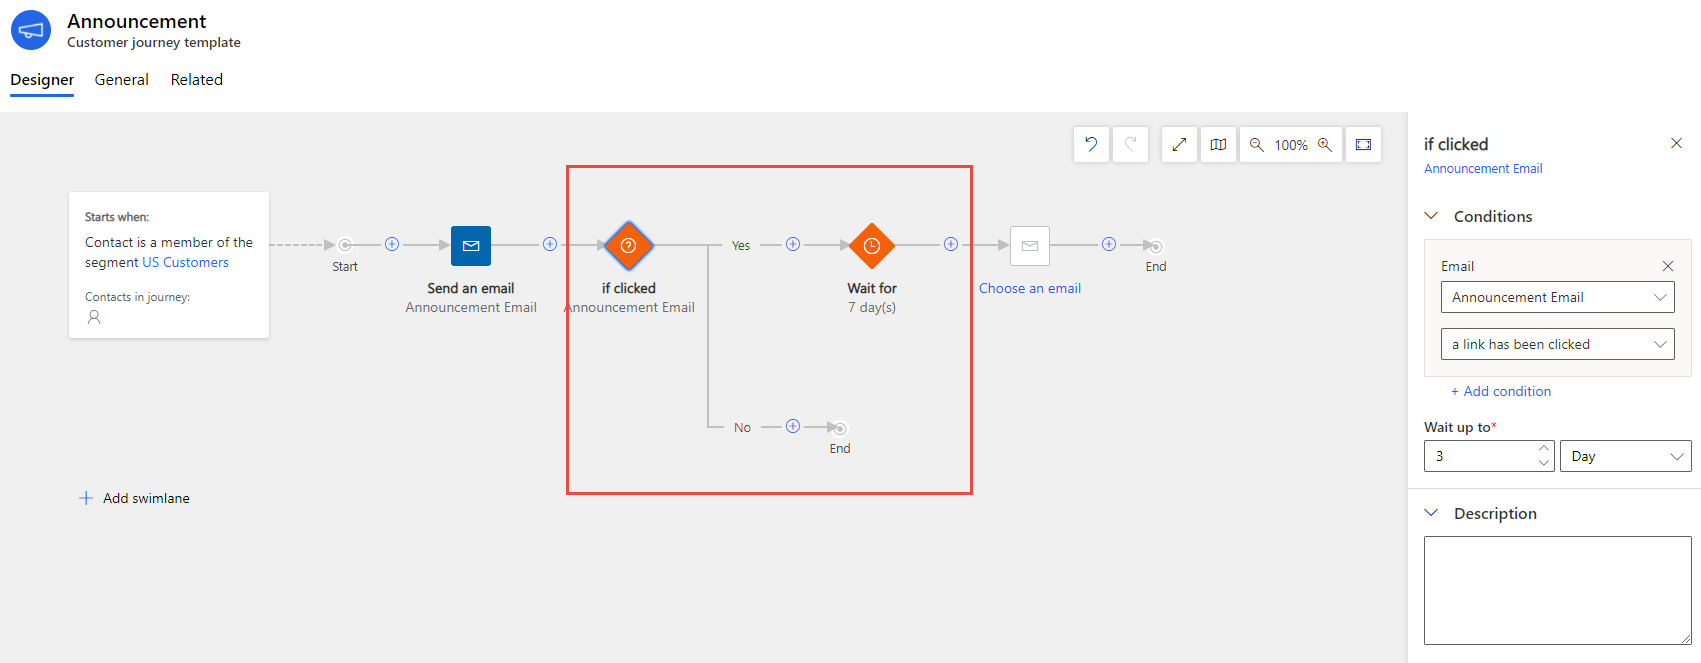
Use the Toolbox to set the Wait For condition. You can use the Schedule tab to select what days of the week and time of day apply to the wait condition.

Once the Wait for step is completed, 7 Days in our example, then we have another Email step. You will follow the same process as earlier. Either add an existing email template or create a new one. Now that we’re completed with our Announcement customer journey template, we will save and close it.
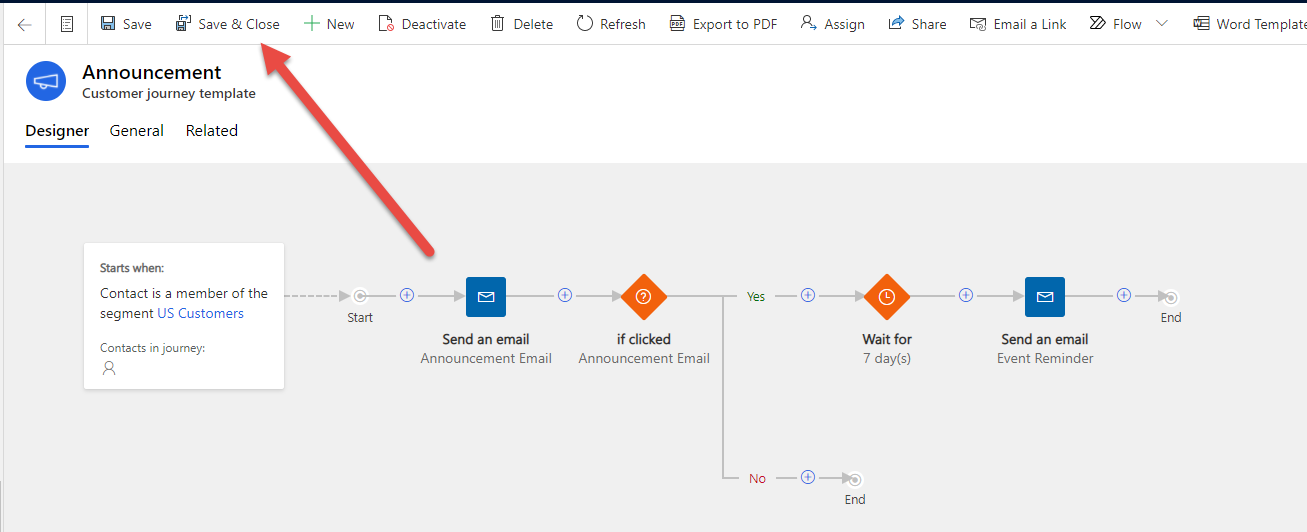
We can now find our “Announcement” customer journey template and apply it to an active Customer Journey.
Marketing Pages and Form Templates
Marketing pages and forms within Dynamics 365 Marketing are powerful tools to be used in targeted campaign campaigns, events, and beyond. Marketing Pages allow customers to register for an offer, update their contact information, manage mailing list subscriptions, and more, whereas Marketing Forms define a set of input fields arranged into a form layout. It’s common to build a library of reusable forms that you can place on all your various marketing pages as needed. All the information submitted through a marketing page is automatically captured by Dynamics 365 Marketing and applied immediately to your customer base.
When using templates, the designer is like what we saw above in the Email Template designer. A simple drag and drop builder makes it easy for users to get pages and forms up and running in no time. Creating or modifying a template for Marketing Forms and Pages function very similarly. You’ll find the templates on the sitemap and once selected, you have the option to modify an existing template or create a new one.
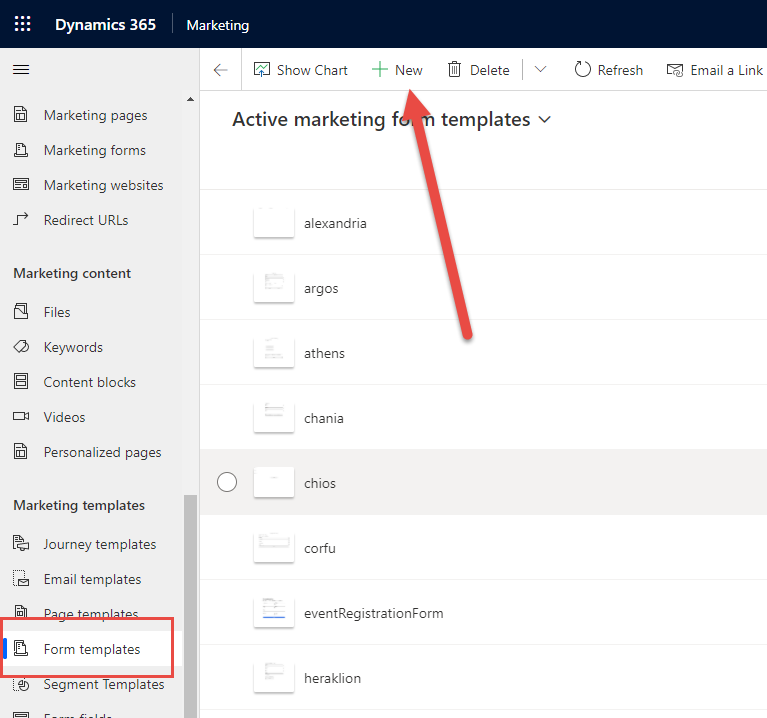
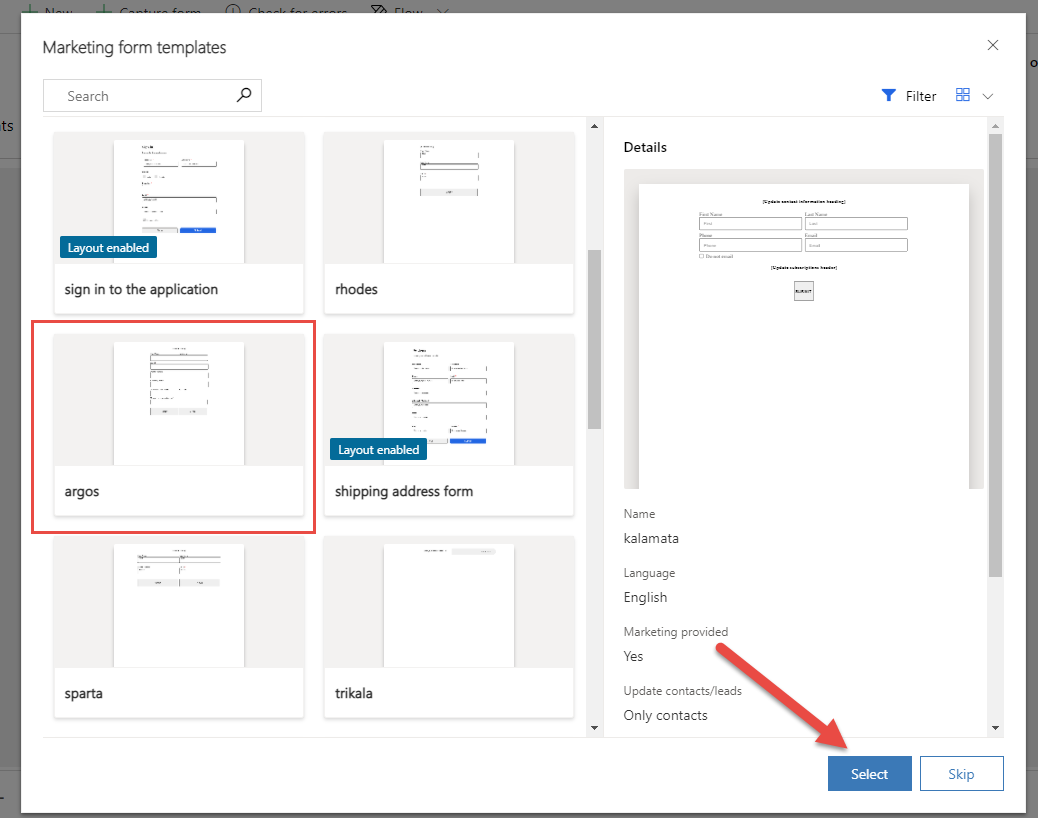
Select an existing marketing form template from the list to make modifications. This will bring you to the Form Designer which allows you to easily drag and drop design elements and settings to modify the form template. Each element represents a specific type of content, such as a text element, image, or input form. The settings and features for each element vary by type.
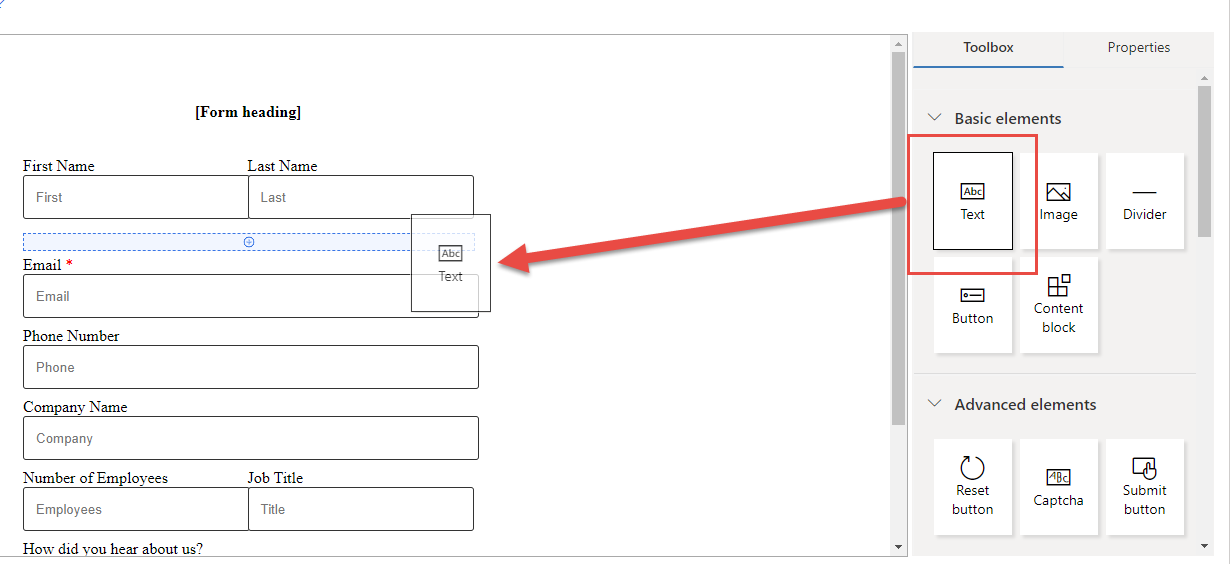
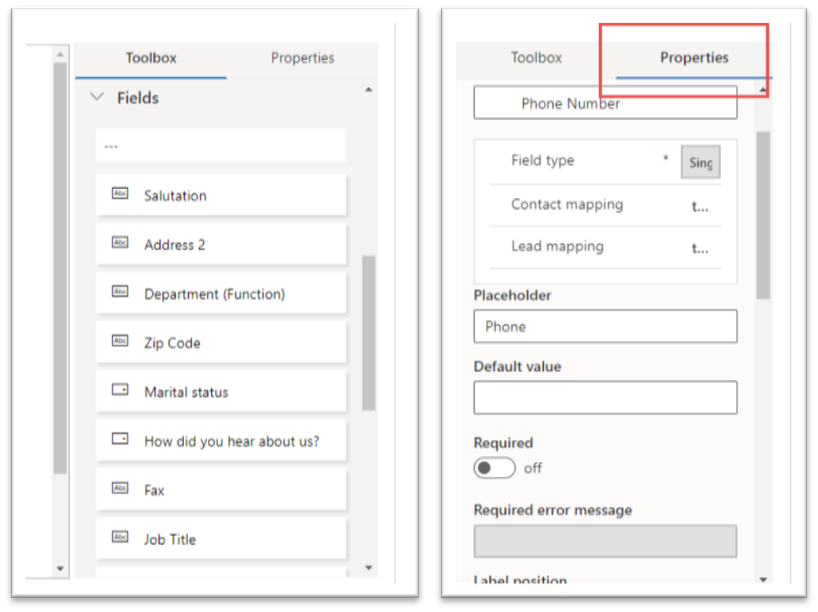
You can also pull specific fields from the Toolbox to your form. Each element has properties that can be found next to the Toolbox. These will change depending on the element type you’re modifying.
Once you’re completed with your template, you can save and close. To create a form with your template, navigate to Marketing forms, and select new. The template dialog will pop up for you to select the form template you just modified. Click your template and click Select.
Give the form a name and save. You can now apply this Form to a Marketing Page.
Templates are a great starting point to help you work more quickly and efficiently. There’s a wide variety of professionally designed templates to take advantage of, or you can always choose to start from scratch and create your own template. Regardless of what path you start from, Dynamics 365 Marketing templates are customization to match your organization's identity. To learn more about the templates offered with Dynamics 365 Marketing reach out to the experts at Stoneridge.

Under the terms of this license, you are authorized to share and redistribute the content across various mediums, subject to adherence to the specified conditions: you must provide proper attribution to Stoneridge as the original creator in a manner that does not imply their endorsement of your use, the material is to be utilized solely for non-commercial purposes, and alterations, modifications, or derivative works based on the original material are strictly prohibited.
Responsibility rests with the licensee to ensure that their use of the material does not violate any other rights.