


How to Configure Access for Scribe Online for Dynamics 365 for Operations (AX7) Integration
I was recently working with a client where we had deployed Dynamics 365 for Operations (AX7). One of the initiatives was to enable integration between Dynamics 365 for Operations and Scribe Online. Scribe Online has a variety of platforms where it can help enable integration. My client needed to setup integration between CRM Online and Dynamics 365 for Operations (AX7).
There are two pieces to enabling integration between Dynamics 365 for Operations (AX7) and CRM online. The first piece is setting up the connecting agent and depending on your scenario it may be an On-Premise agent or it may be a Cloud agent. For the integration I was doing, it was a Cloud agent. The initial setup was almost a breeze, however, there was a key field that required a little additional work to get the integration working correctly.
Setting up a connection from Scribe to Dynamics AX
First, a connection to Dynamics AX was required, to do this the following steps were done:
- Create a New Connection in Scribe
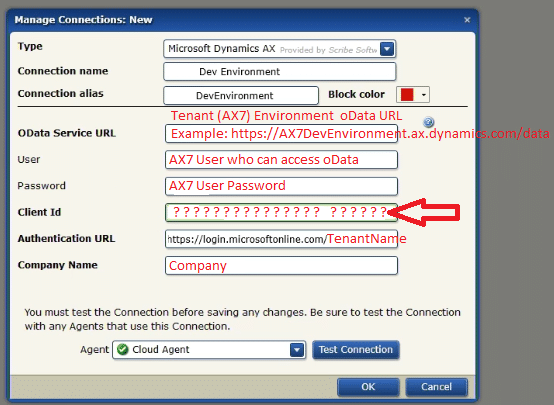
- Select Microsoft Dynamics AX as the Type and then enter the following bits of information:
Connection name — I typically name it for the environment.
Connection alias — Alias for Connection name (I typically name it the same as above w/o spaces).
Block color — A nice color coding option used for a visual reference to distinguish connections.
OData Service URL — The address of any acceptable URL where the OData service is located. This URL must end in /data.
User — The name of the user who has rights to access OData.
Password — Dynamics 365 for Operations authorized user that can access the oData feed.
Client Id — The GUID that identifies the client in the Dynamics AX system.
Authentication URL — The URL where the Client Id is verified which is the Microsoft Tenant URL:
Here is what an almost configured connection looks like:
How to Configure the Client ID
The missing piece and the purpose of this blog is to explain and show how to configure the Client Id. The Scribe Online documentation was pretty vague as to what or how to get the Client Id.
What is helpful to know is that Dynamics 365 for Operations (AX7) has 2 types of authentication mechanisms which are:
- User Authentication
- Services Authentication (OAuth)
User authentication looks like this:
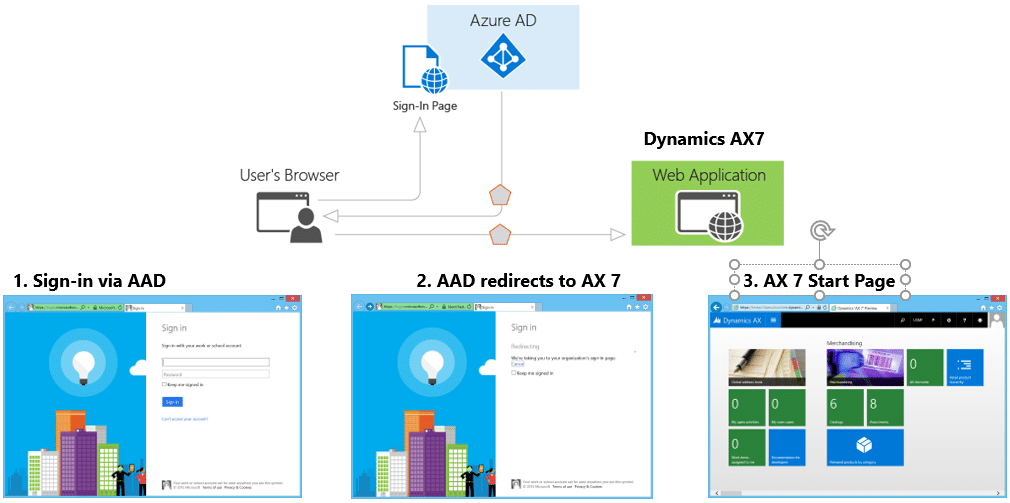
And acts like this:
- The User authenticates against their AAD
- The User presents a set of claims to AX (claims-based authentication)
- Instead of a windows token (like on-premise AD) a user presents a set of claims saying my name is so and so and I belong to this tenant and this tenant has a subscription of AX.
- The Dynamics 365 for Operations (AX7) security subsystem says, all right, I'm going to verify your claims and look to see if you're a valid user. If you're a valid user, I'm going to look at all the security rules that are associated with you and then I'm going give you access to the system.
Service authentication, on the other hand, looks like this:
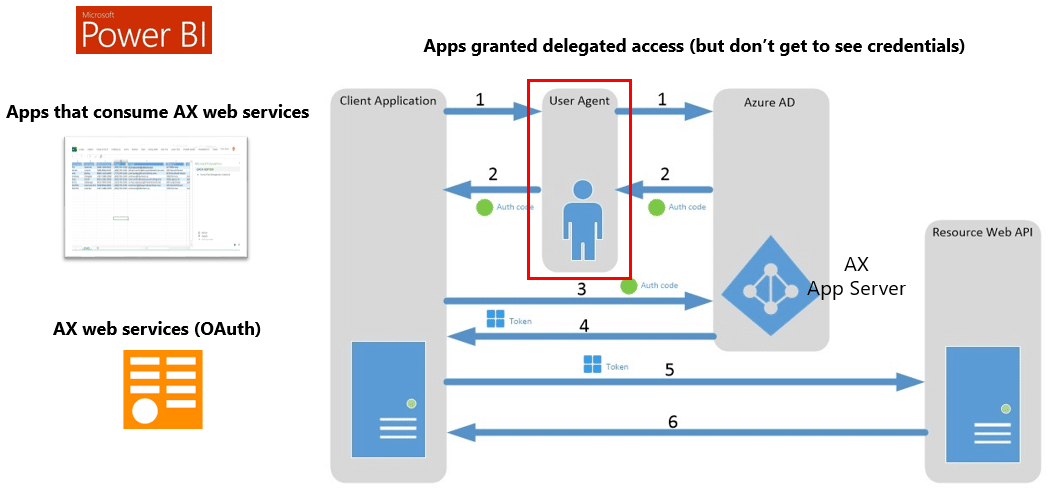
And acts like this (the part in red we will come back to in a minute):
- User authenticates, creates user agent in AAD and consents to service(s) access
- The client receives Authorization code (Client ID)
- Now, the client can request access to resources with the authorization code
- AAD verifies authorization code and passes the client back an Access token
- The client now requests data from Dynamics 365 for Operations (AX7) with the Access token
- Hopefully, the client now receives the data
On a side note, OData Services, JSON-based Custom Service, and REST Metadata Services all support standard OAuth 2.0 authentication.
This part is critical to understand as this is the missing link. Scribe Online is a service that needs to access Dynamics AX without a user being present (it’s a service and as such will follow service authentication).
To get scribe the Authorization code (Client Id) what is required is the following:
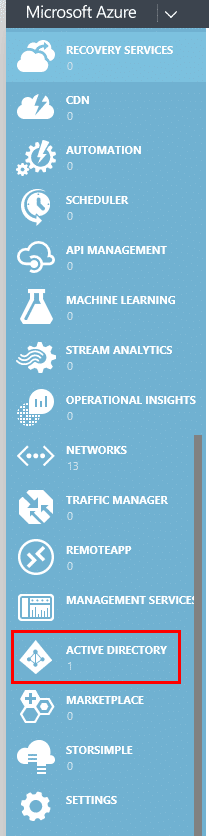
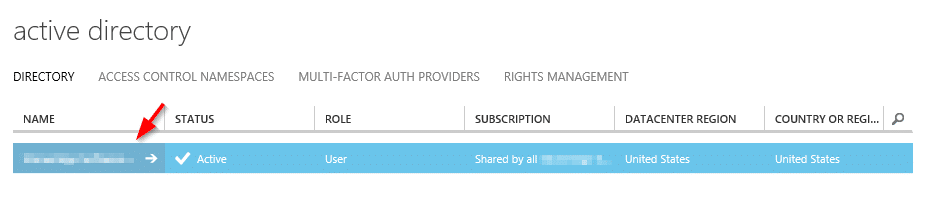
- Log into your AAD with Admin credentials - http://manage.windowsazure.com/
- In the left-hand pane select Active Directory
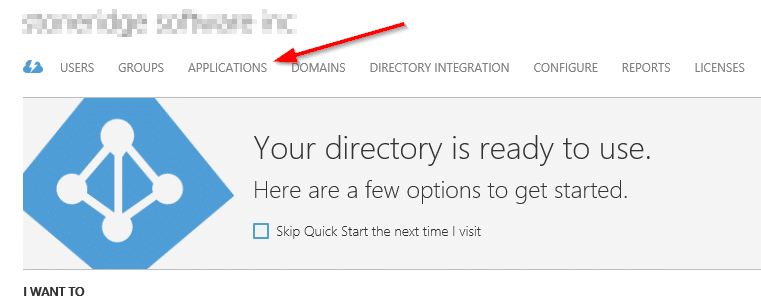
- Click on your Domain
- Click on Applications
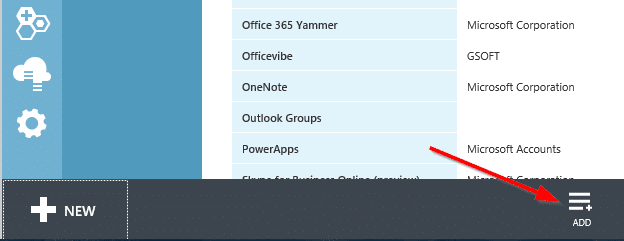
- Click Add
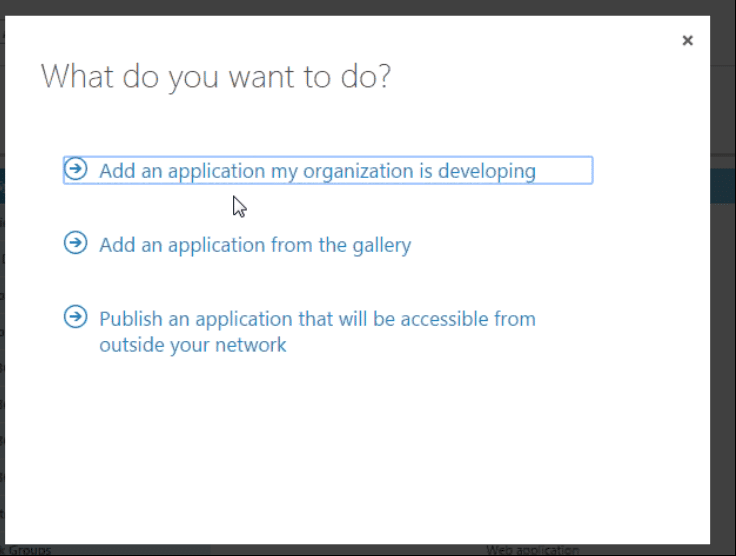
- Select Add an application my organization is developing
- Provide a name for the application and select Native Client Application

There are two kinds of application are supported in Microsoft Azure Active Directory (AAD):
- Native client application – This flow uses a user name and password for authentication and authorization.
- Web application (Confidential client) – A confidential client is an application that can keep a client password confidential to the world. The authorization server assigned this client password to the client application.
- Enter a URI (doesn’t matter) and click the check mark to complete the setup.

- You will land on the application page, click configure
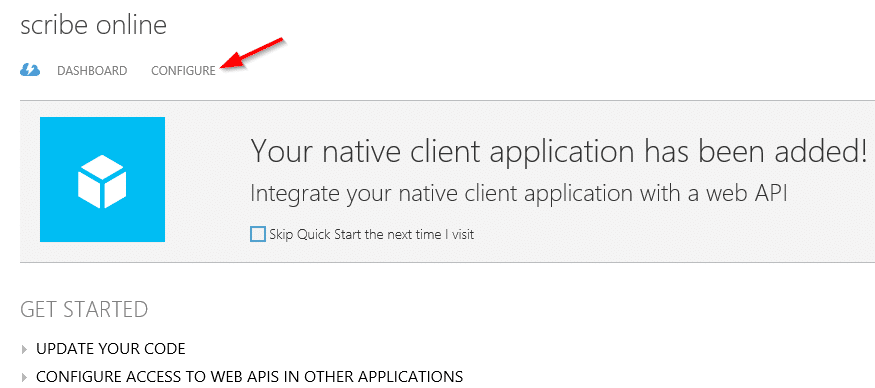
- Here you will find the golden goose, the Client Id!
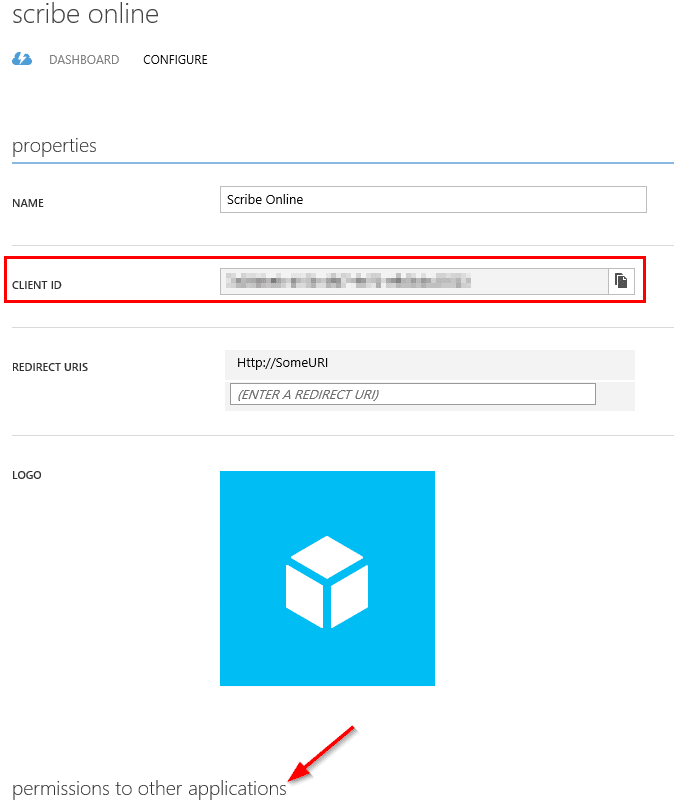
- Continue to scroll down to the bottom to permissions to other applications
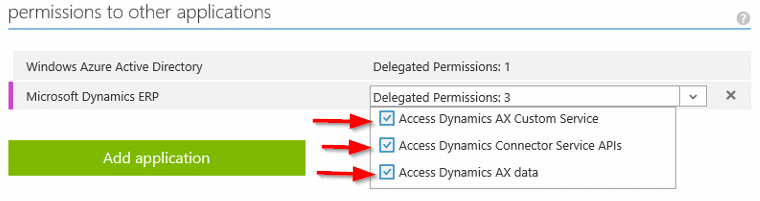
- Click Add application and select Microsoft Dynamics ERP then click the check mark in the lower right-hand corner


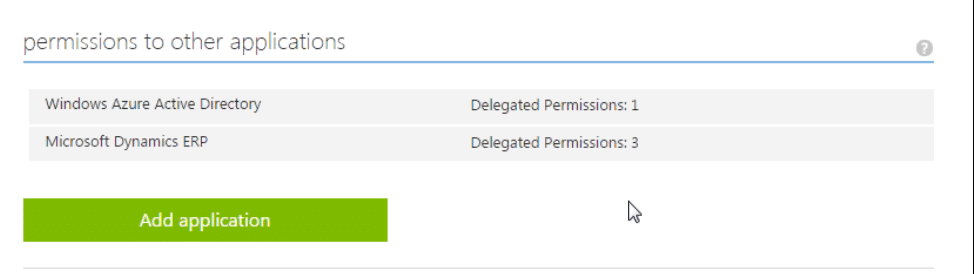
- When you return to the application page, select Microsoft Dynamics ERP and in the drop down select all check boxes
You are now set to go back into the Scribe Connector and paste in the Client ID!
- Once you have completed this, the only remaining piece is configuring Scribe Online to connect to Dynamics CRM online. The previous connection was for connecting Scribe Online to Dynamics AX.
Hopefully, this will help understand why you need the client ID and where you can get it from.

Under the terms of this license, you are authorized to share and redistribute the content across various mediums, subject to adherence to the specified conditions: you must provide proper attribution to Stoneridge as the original creator in a manner that does not imply their endorsement of your use, the material is to be utilized solely for non-commercial purposes, and alterations, modifications, or derivative works based on the original material are strictly prohibited.
Responsibility rests with the licensee to ensure that their use of the material does not violate any other rights.