


How to Generate Positive Pay Text Files in Dynamics AX
Positive Pay within Dynamics AX is one of the easiest systems to put into place to help prevent check fraud and protect your business. Positive Pay generates an electronic file that you can submit to your bank with a list of your approved checks, reducing the chance of processing any fraudulent checks.
Once you have set up Positive Pay in AX 2012 R2, users can then easily generate a report with the selected file format, company name, bank account, and cut-off date for the checks.
Follow the steps below to set up Positive Pay to output a text file. Note that this has only been tested in AX 2012 R2 but should work in other AX 2012 versions. This setup will produce a file with the extension “.xml” but once you change the extension to a “.txt” it opens as a regular text file, displaying your text as programmed in your XSLT file. It’s a limitation that I have not found a way around at this time.
Steps to set up Positive Pay text files in Dynamics AX
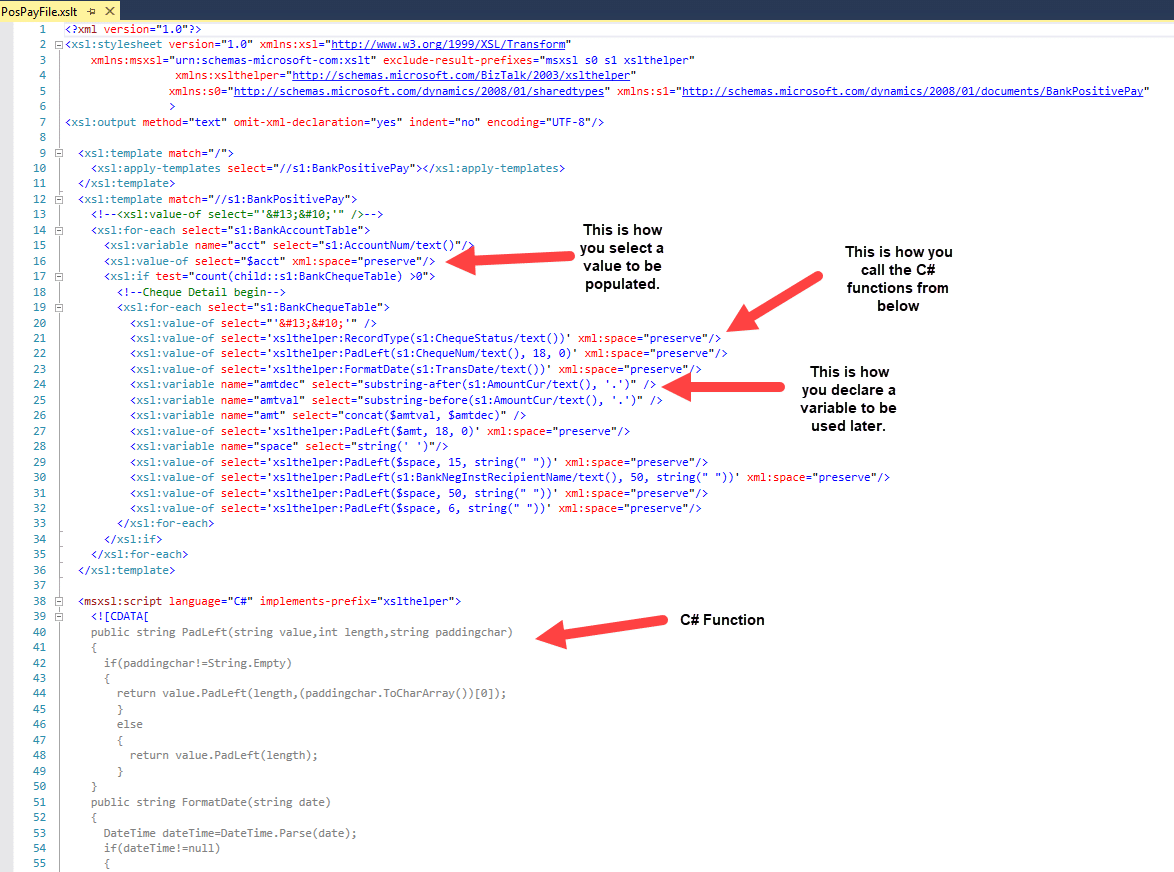
- Create your XSLT file. Below is an example of one that I recently made.
- A starter version that produces XML is available via the website (Set up positive pay) in Step 2.
- Follow the steps on this Microsoft website (Set up positive pay) for the initial setup.
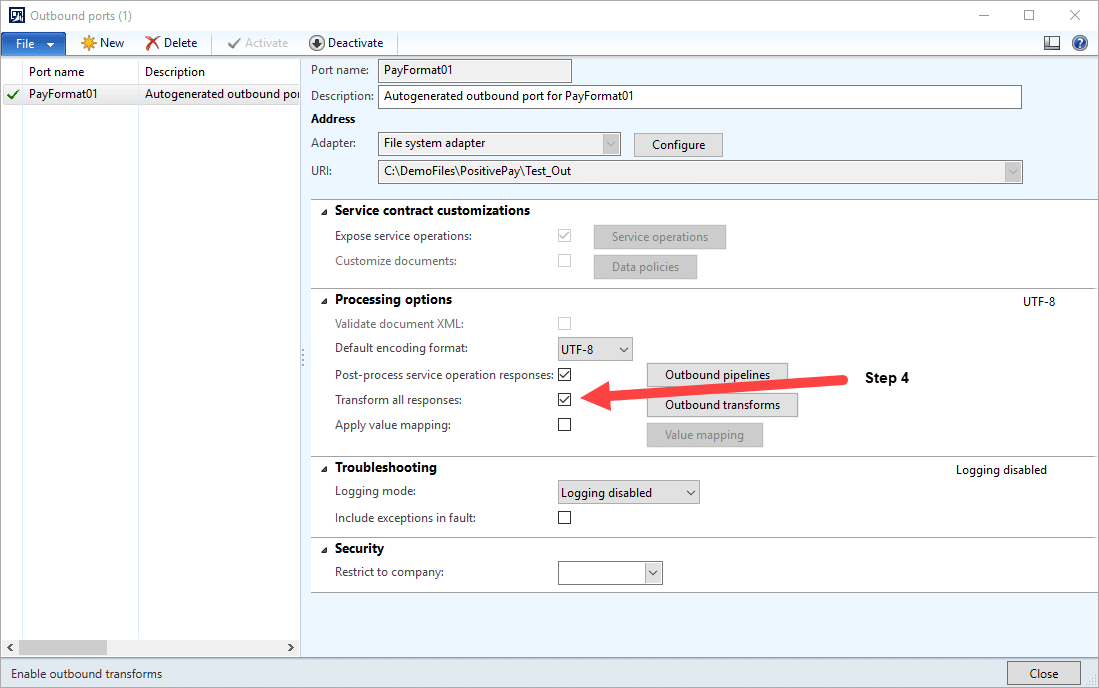
- Once that is complete, go into System administration > Setup > Services and Application Integration Framework > Outbound ports, then select the port you made in the last step.
- Check Transform all responses.
- Your screen should now look something like this:
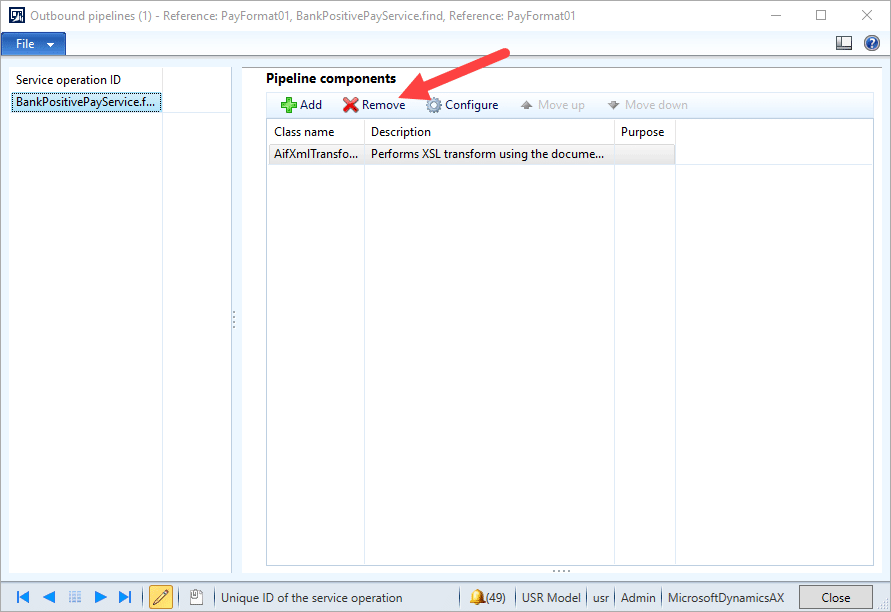
- Click the Outbound pipelines button, in the processing options fast tab.
- Then you’ll want to click remove in the pipeline components. This should leave the components space now empty of any records. This is intentional.
- Close this window.
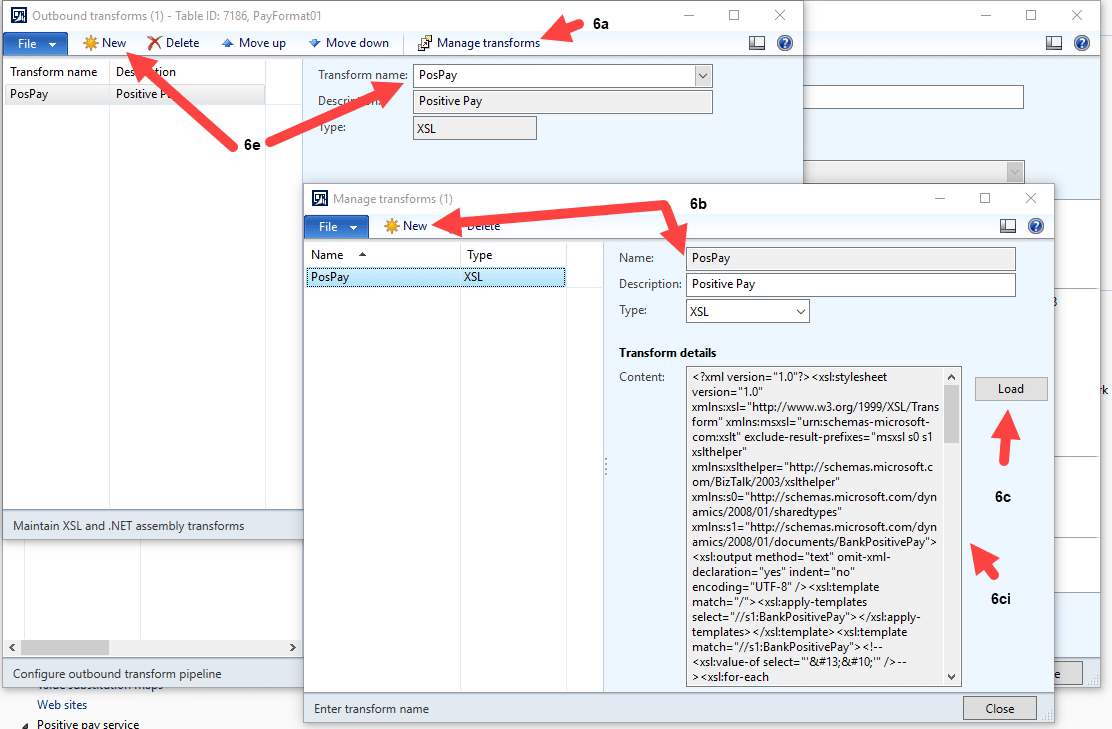
- Click on Outbound transforms in the processing options fast tab.
- Then click Manage transforms.
- Click new, give it a name and description. It should be of type XSL.
- Click Load, select your XSLT file, and ok.
- You’ll notice the content besides the load box is now filled in.
- Close this window.
- Back on the outbound transforms window you’ll now want to click new and select your newly created transform.
- Now you can close this form.
Now you should be ready to start creating positive pay files.
If you have any questions on how to set up Positive Pay, or generate the correct files to submit to the bank, please reach out to the Stoneridge AX support team.

Under the terms of this license, you are authorized to share and redistribute the content across various mediums, subject to adherence to the specified conditions: you must provide proper attribution to Stoneridge as the original creator in a manner that does not imply their endorsement of your use, the material is to be utilized solely for non-commercial purposes, and alterations, modifications, or derivative works based on the original material are strictly prohibited.
Responsibility rests with the licensee to ensure that their use of the material does not violate any other rights.