How to Integrate LinkedIn Sales Navigator with Dynamics CRM On-Premise
With LinkedIn Sales Navigator, sales professionals can target new leads more effectively, increase their pipeline, and close more deals. In fact, businesses have seen 5% higher win rates and closed 35% larger deals with Sales Navigator. Users can take advantage of this by integrating LinkedIn Sales Navigator with Dynamics CRM on-premise directly.
The integration for on-premise is different than it is for CRM online. The steps below outline how to install the integration for on-premise CRM only – specifically for CRM version 8.2.
Before you begin the setup process, ensure you have:
- a LinkedIn Sales Navigator license
- LinkedIn Sales Navigator Admin rights
- CRM system admin rights
Once you’re ready to get started, follow the directions below to install LinkedIn Sales Navigator within Dynamics CRM on-premise.
Download the solution
- Import the solution into your CRM org.
- This installation guide from LinkedIn will walk you through the steps to import the solution.
- Once you get to step 11, come back and continue the setup process that is outlined below.
Set up your LinkedIn App
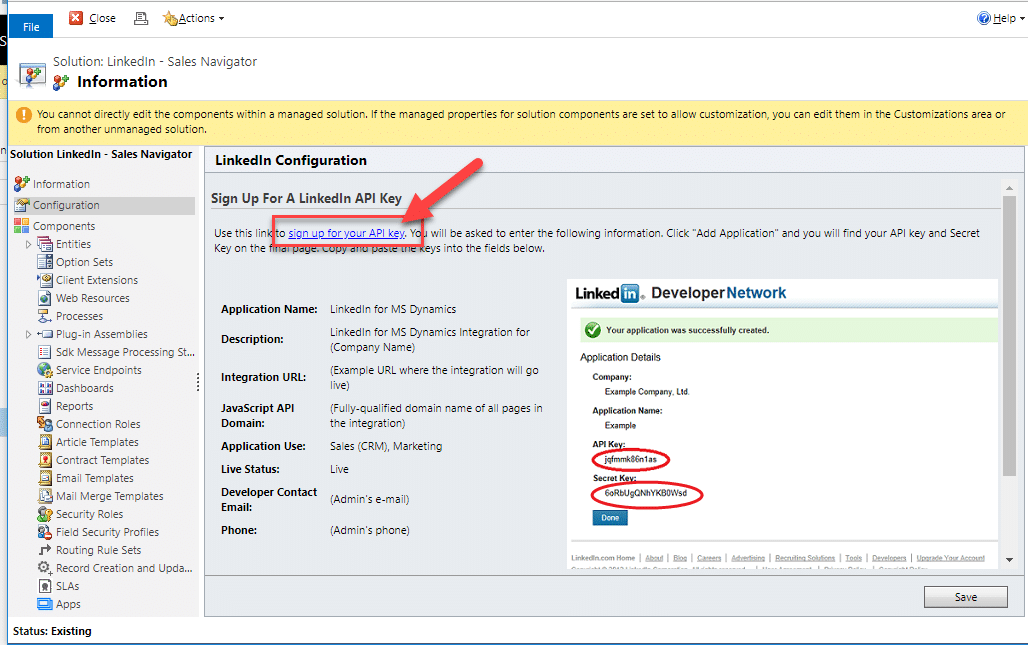
- Open the solution go to the configuration section and select “set up for your API key”. This will take you to a page where you can create your app.
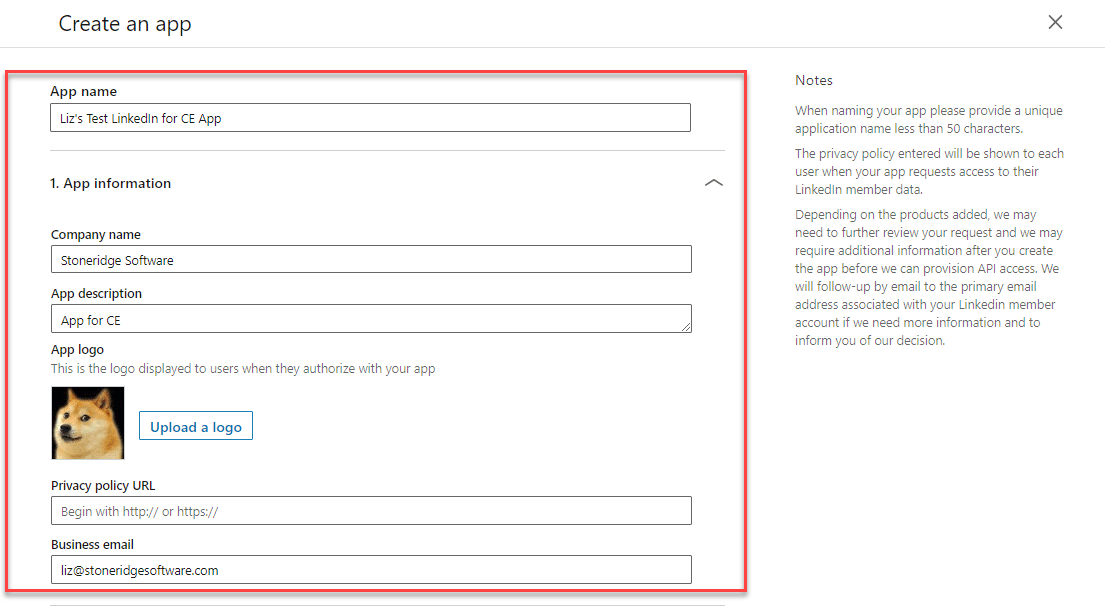
2. The following steps will not work in Chrome. You will need a company logo that is square and 100x100 pixels.
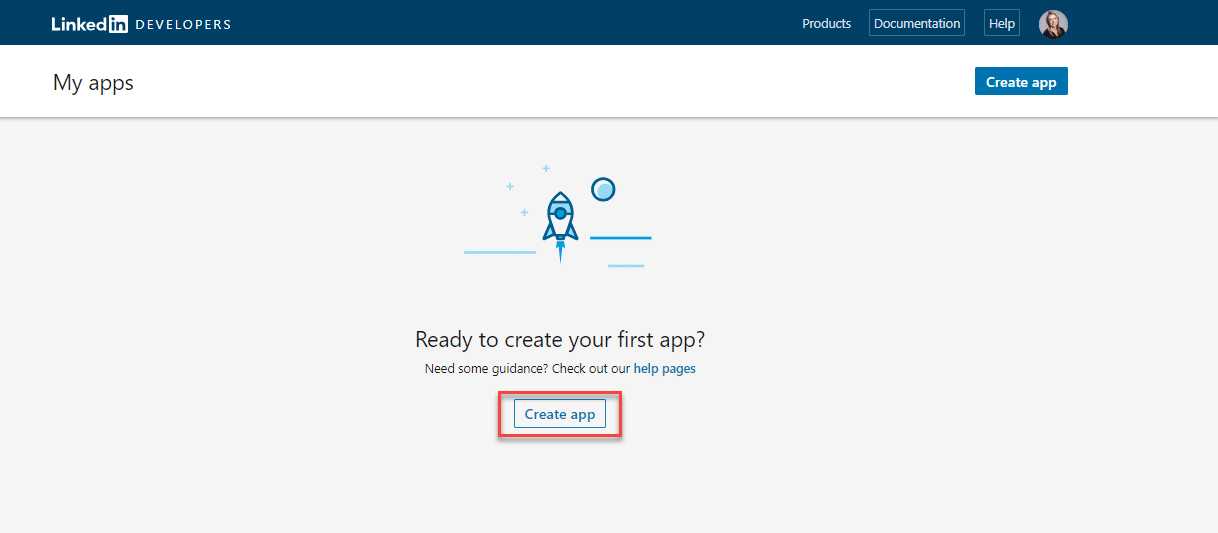
- Click “Create App”
- Complete the necessary information.
- Select “Create App”.
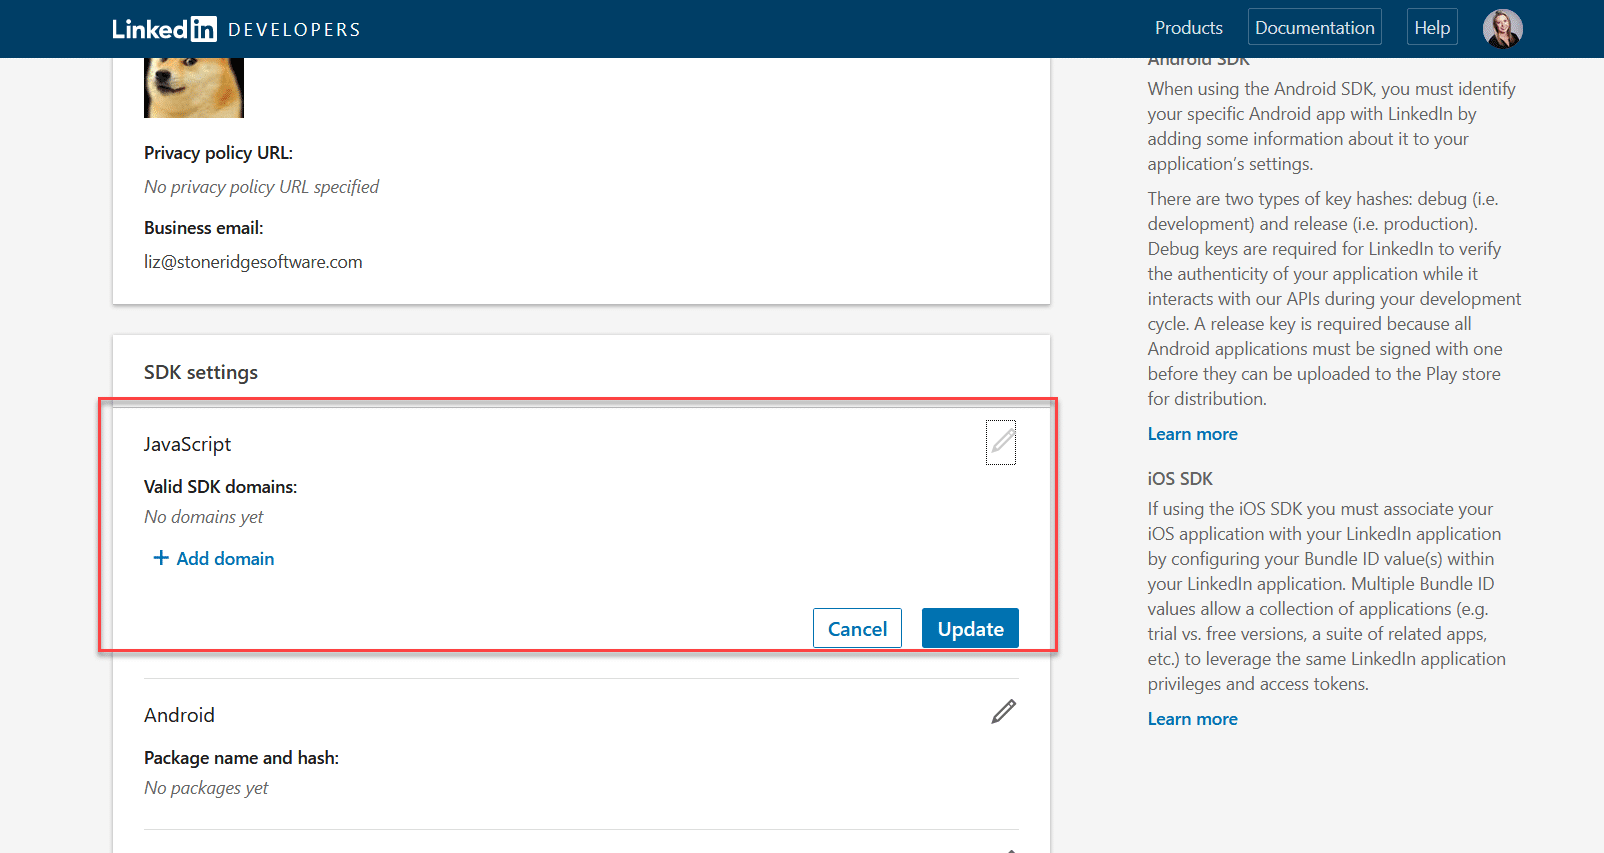
- Once your App is initially saved, scroll down the page to the “JavaScript” section, set up a domain. This should be your CRM URL.
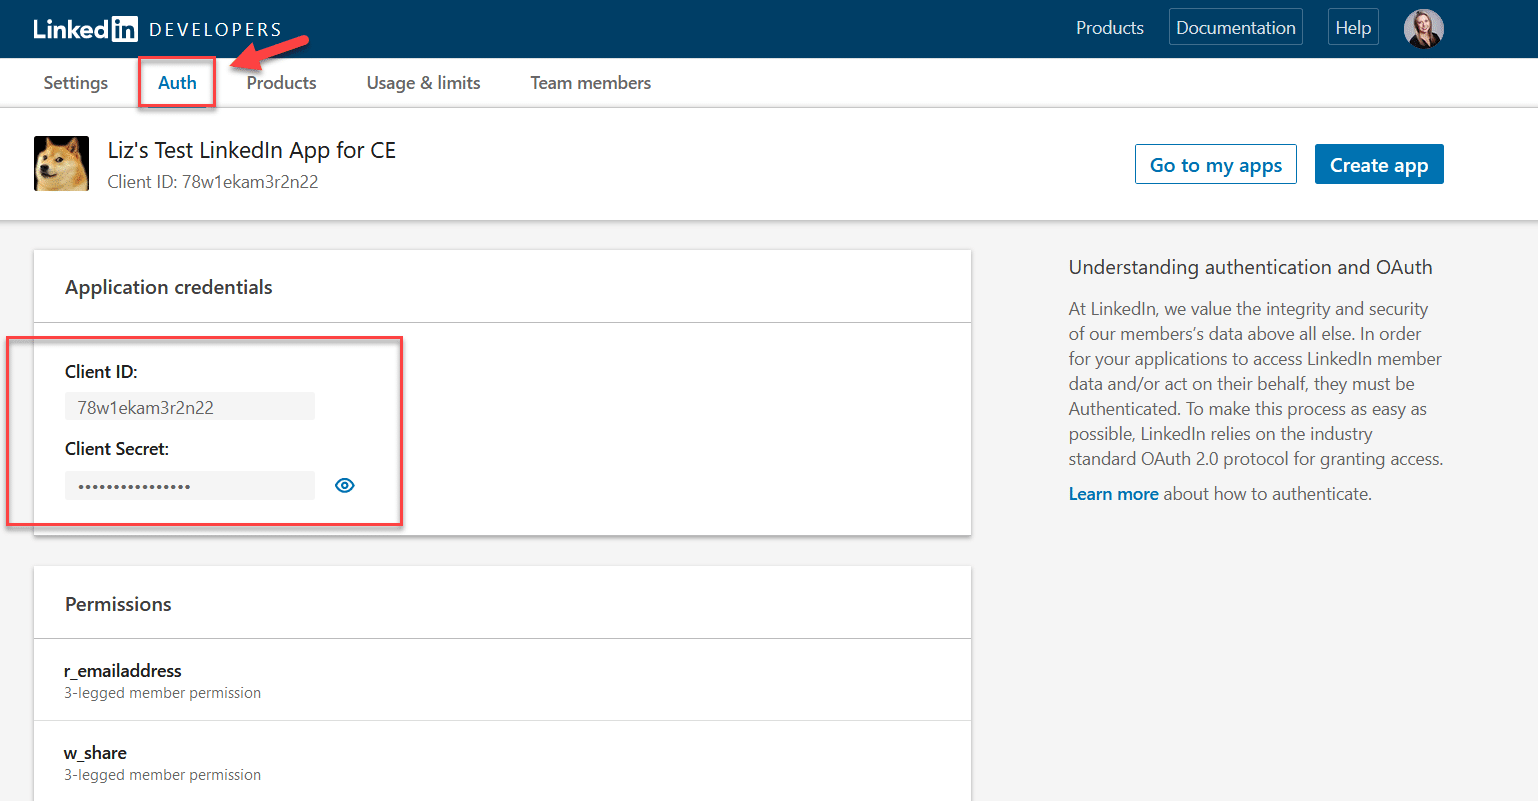
- Go to the “Auth” tab. You’re going to need your Client ID and Client Secret Key from this page.
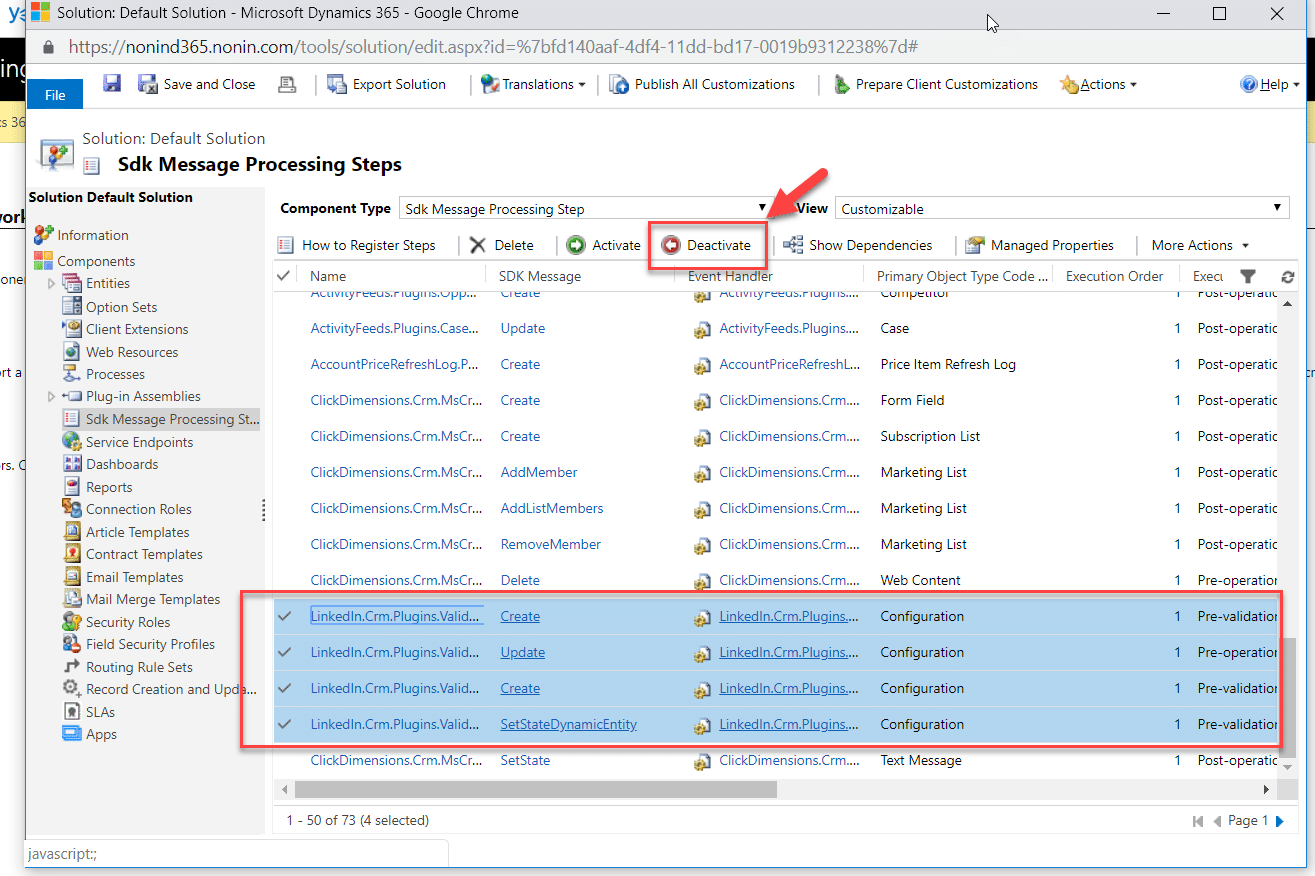
3. Go back to CRM and deactivate the SDK message processing for the LI plugins. Please follow this path: (Settings > Customizations > Customize the System > Component Type: SDK Message Processing).
4. Next, you need to set up a Configuration record.
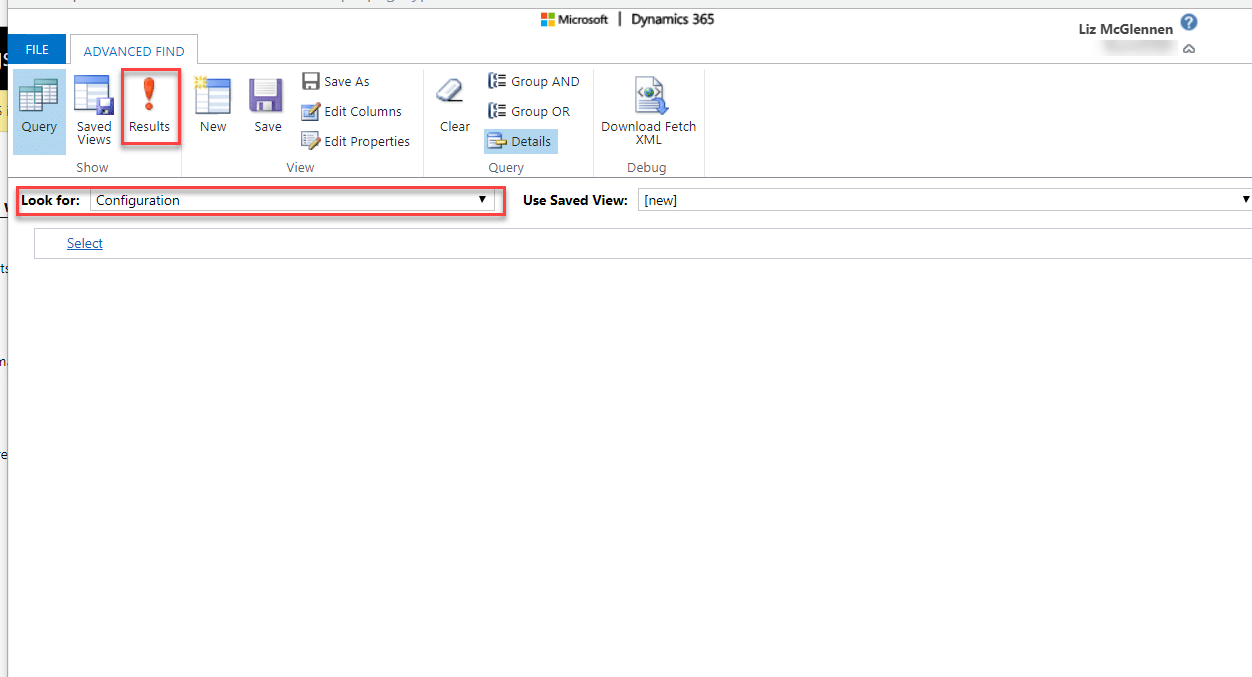
- Navigate to Advanced Find.
- Look for: Configuration.
- Select “Results”. You should have no records yet.
- Select “New Configuration”.
- Name the record “LinkedIn Integration” and click “Save & Close”.
5. Now you will need to export and re-import this record so that you can enter the Client ID and Secret Key
- First, you’ll need to go back to advanced find and add the appropriate columns.
- Add “API Key” and “Secret Key”.
- Export your Configuration record to excel.
- Enter your Client ID in the “API Key” column and your Client Secret in the “Secret Key” column.
- Save your spreadsheet and import it back into CRM.
- In CRM, go to “Imports” and start a new Import job.
- Import the spreadsheet.
- You should see one configuration record that was successfully imported.
6. The is the final step. Now will assign security roles to the users that will be using the LinkedIn integration.
- Navigate to Security > Users.
- Select the users that will be using LinkedIn Sales Navigator.
- Assign the users the “LinkedIn Configuration” role.
Once you have completed these steps, your team can start taking advantage of LinkedIn Sales Navigator. If you want to learn more about CRM, need assistance or would like more information about Sales Navigator, reach out to the team at Stoneridge Software.
Under the terms of this license, you are authorized to share and redistribute the content across various mediums, subject to adherence to the specified conditions: you must provide proper attribution to Stoneridge as the original creator in a manner that does not imply their endorsement of your use, the material is to be utilized solely for non-commercial purposes, and alterations, modifications, or derivative works based on the original material are strictly prohibited.
Responsibility rests with the licensee to ensure that their use of the material does not violate any other rights.


