


How to Open a Job in Dynamics 365 Business Central, Part 2: Job Tasks
In the first post of this series Opening a Job in Dynamics 365 Business Central, Part 1: Job Card we learned the structure of the job card and the basics of opening a new job.
Once you have created your job, the next step is to create job tasks. Job tasks allow you to bucket costs and track revenue by category or process.
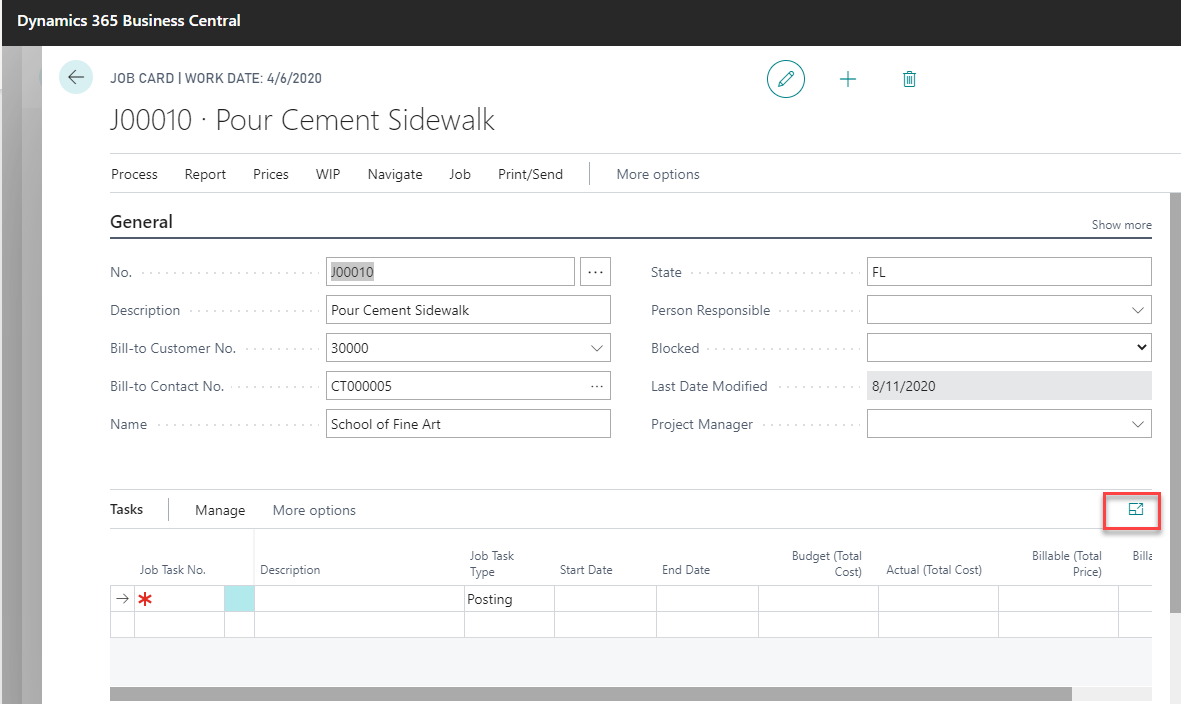
The Job Tasks are located underneath the General FastTab on the Job Card. You can expand the Tasks to a full-size screen for easier data entry & viewing by selecting the symbol highlighted below.
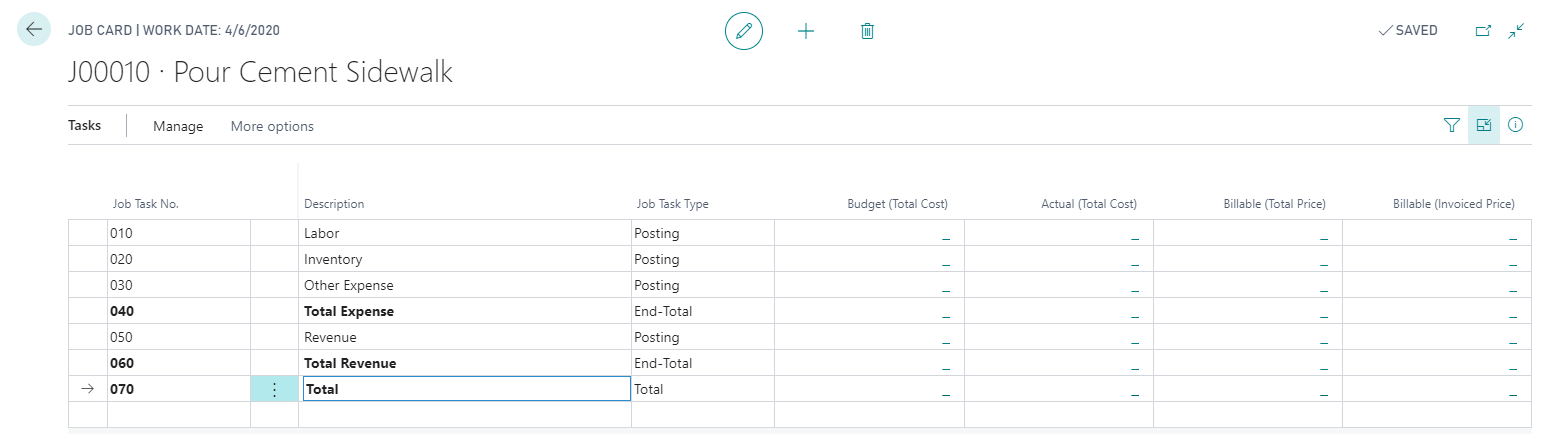
To populate the task lines, enter a Job Task No. and Description for each task line to group your costs. Tasks can be as simple and can allow you to track costs by category or can be more detailed to outline the step by step process of a project and associated costs. The example below illustrates a more simplified approach.
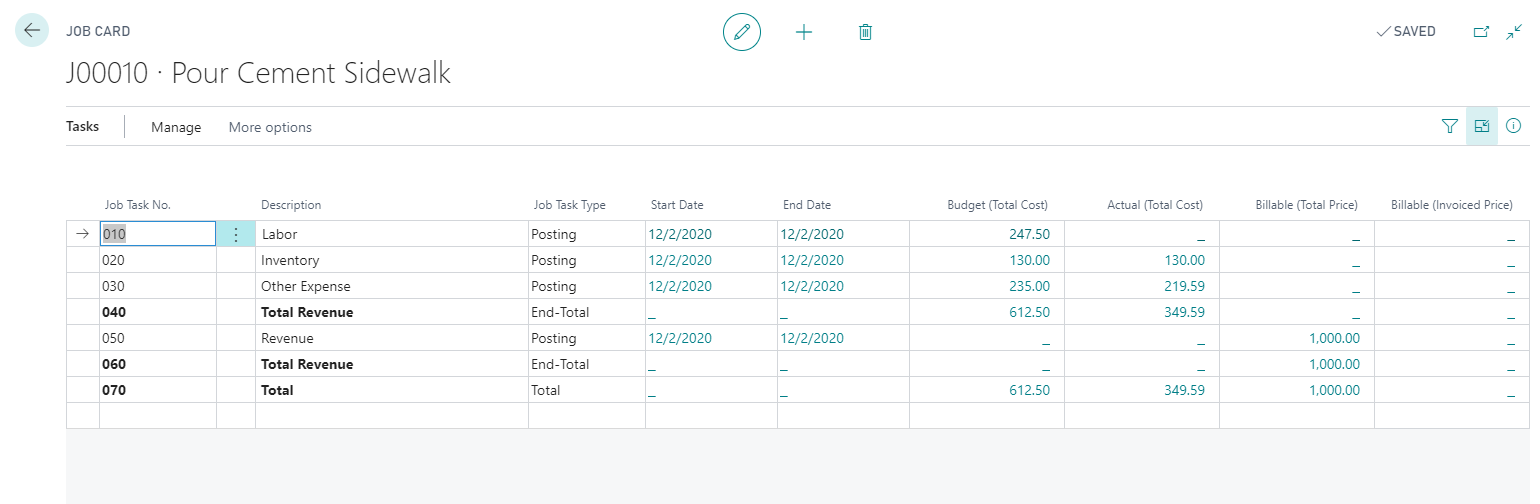
As budgets are entered on your job and costs & billings are posted, you will notice values populating on your job tasks to summarize these values.
Miss the first part of this series? Read part one – Job Card. Ready for part three? Read on to Planning Lines.
If you’d like to learn more about how Dynamics 365 Business Central can help you become more productive and efficient, reach out to the experts at Stoneridge Software.

Under the terms of this license, you are authorized to share and redistribute the content across various mediums, subject to adherence to the specified conditions: you must provide proper attribution to Stoneridge as the original creator in a manner that does not imply their endorsement of your use, the material is to be utilized solely for non-commercial purposes, and alterations, modifications, or derivative works based on the original material are strictly prohibited.
Responsibility rests with the licensee to ensure that their use of the material does not violate any other rights.