How to Upload Budgets into Dynamics GP
Budgeting season is upon us and it’s time to get them loaded into Microsoft Dynamics GP. How do you upload budgets into Dynamics GP? Dynamics GP makes it simple by allowing the of import/export of data with a wizard and accountants favorite tool, Microsoft Excel. Once the budgets are in, you’ll be able to report on your budgets utilizing Dynamics GP, Management Reporter or other reporting tools like Jet Reports.
Let’s go through the process of setting up a new budget for the Fabrikam Company and import it back into Dynamics GP.
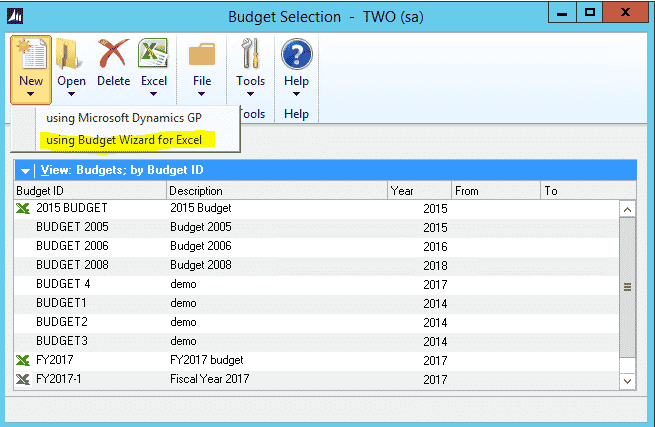
First, we want to navigate to the Budget Selection Window by going to Cards > Financial > Budgets. Once selected, you will be presented with the following screen.
From this window you will be able to create a new budget using Dynamics GP or the Budget Wizard. We are going to select the Budget Wizard.
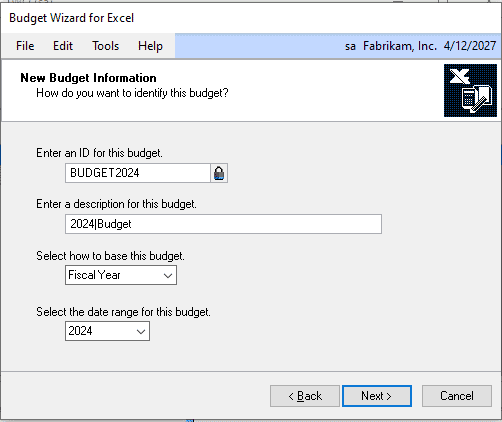
Once you have selected the Budget Wizard you will fill out the “New Budget Information” screen. The Fabrikam Company is set up with years in the future so we will utilize 2024 and will use the Fiscal Year selection for the base of the budget. Keep in mind you do have the option to choose a date range instead of utilizing your Fiscal Year for those situations where budgets might run for alternative time frames.
Another key point to note is the importance of the ID for the budget. This ID is what will be available for use in Management Reporter in your Book Code section to create those Budget vs. Actual reports.
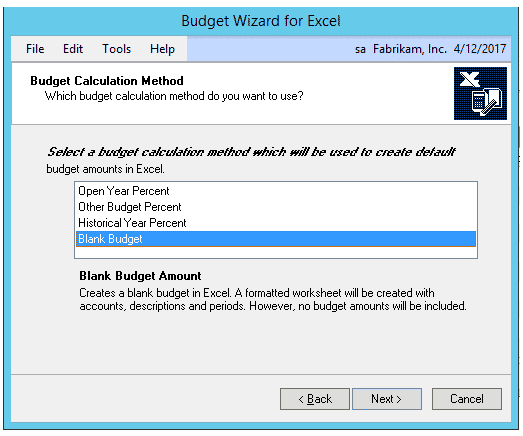
When you click next you will be presented with the Budget Calculation Method screen.
Here you have the option on how you would like your budget template calculated.
Open Year Percent – Calculates a new budget on the actual balances of any year that hasn’t been closed by increasing or decreasing the open-year balances by a certain percentage.
Other Budget Percent – Calculate amounts from another budget by increasing or decreasing by a set percentage for the new budget.
Historical Year Percent – Calculates a budget based on a historical year’s actual balances. You can calculate a budget by increasing or decreasing the amounts by a specified percentage. This calculating method can be selected only if you are keeping account history.
Blank Budget – Creates a blank budget in Excel. A formatted worksheet will be created with accounts, descriptions, and periods. However, no budget amounts will be included.
For our example, we are choosing the Blank Budget and will click Next to get to the Actual Amount Selection form.
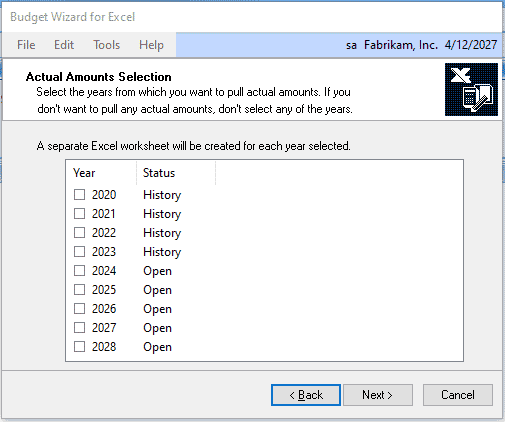
On this form you have the option to select open and historical years to export for viewing purposes. In this example we are not going to select any additional years and will just click Next to access the Account Types screen.
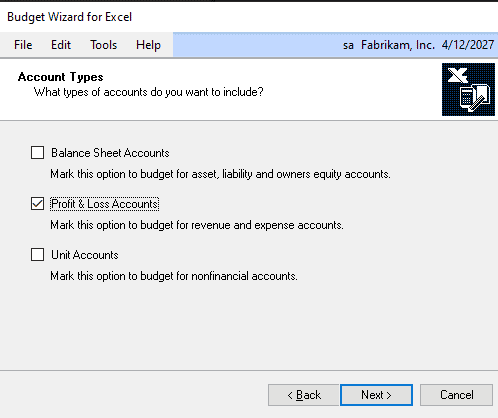
Here you will want to select the account types you will be including in the budget. You have the option to choose your balance sheet accounts, profit and loss accounts, unit accounts, or any combination of the three. For our example we will be selecting the profit and loss accounts. Click Next to access the Accounts screen.
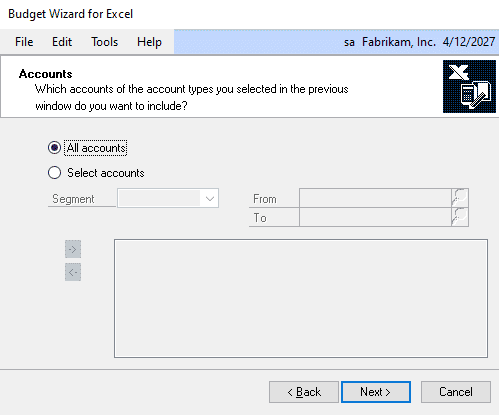
Here on the accounts screen we can further filter the account types we chose on the previous window. We are going to leave it at All Accounts so every profit and loss account will pull in and will click next.
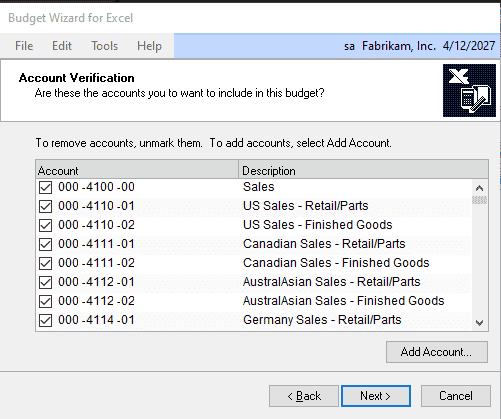
Here on the Account Verification screen, we can add or remove accounts as desired. We want to include all of them so we will click next.
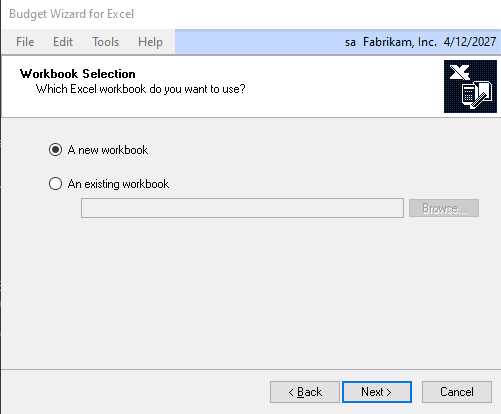
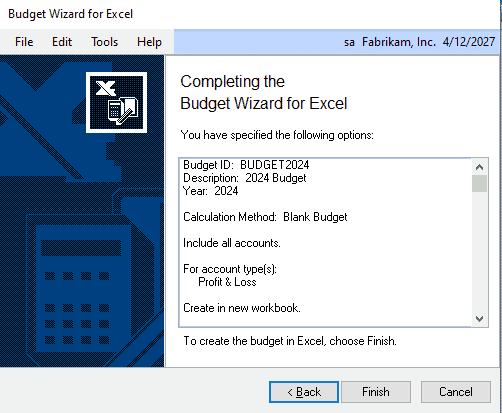
On the last screen we are presented with the option to either create a new Excel workbook or choose an existing one to export to. We will use a new workbook and click Next.
Select Finish to create the template.
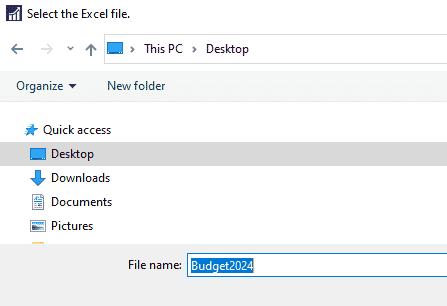
Choose a location and give the file a descriptive name and choose the Open Button.
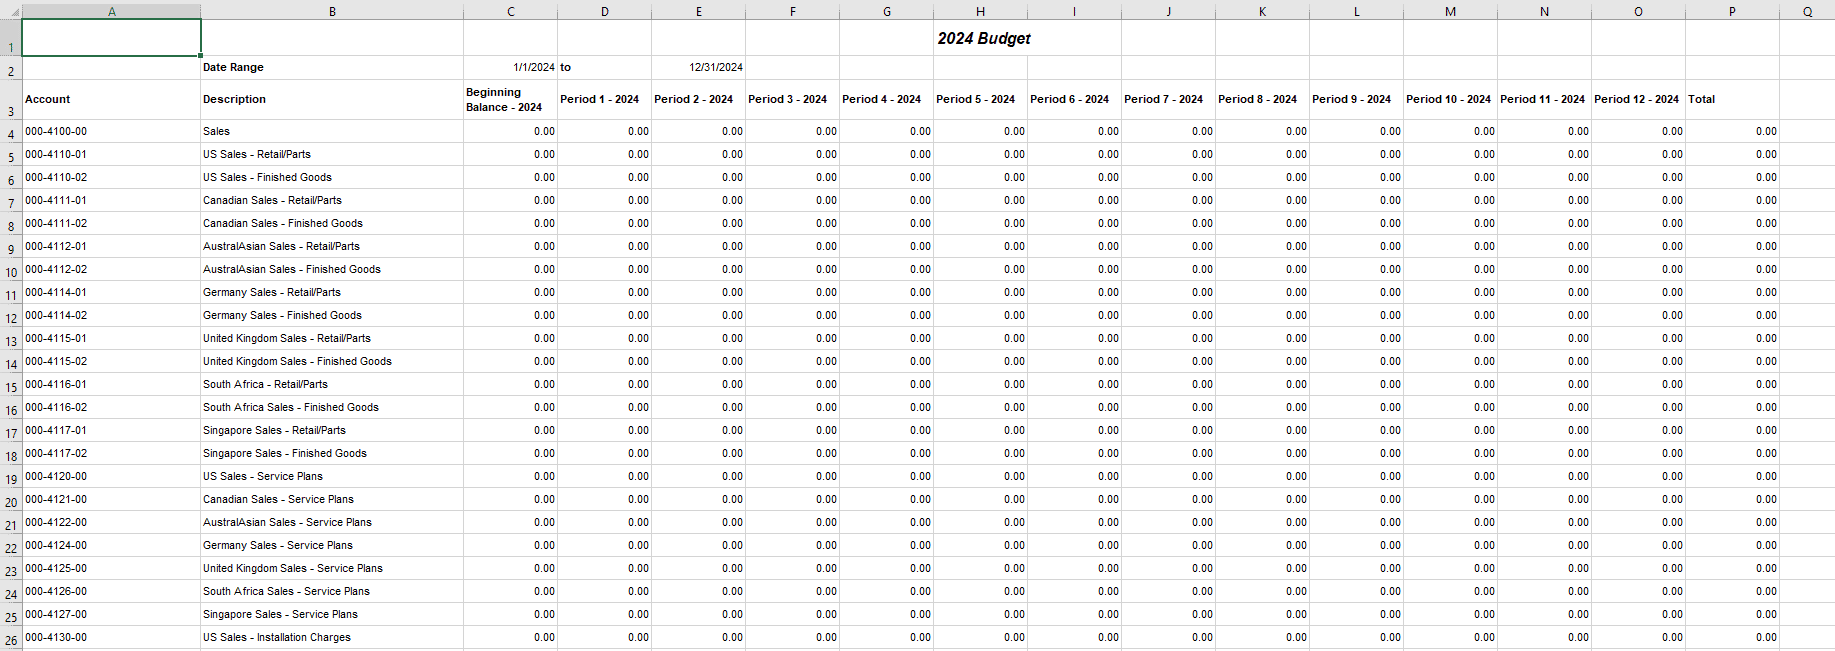
You will see a progress bar on your screen and then your new file will open in Excel.
Understand you may not be using all accounts so if you need you are welcome to remove lines as needed or leave them as $0 amounts. You are welcome to create additional templates from this template to distribute to other departments and can import the template multiple times into Dynamics GP.
A few important notes:
- It is also important to maintain the structure of your template. I recommend staying away from the use of formulas if possible but if you need to, perform a copy and paste of the values only at the end. We have run into issues where slight changes in the template will cause the import to fail or miss lines.
- Accounts with a normal credit balance need to be entered in as negative numbers.
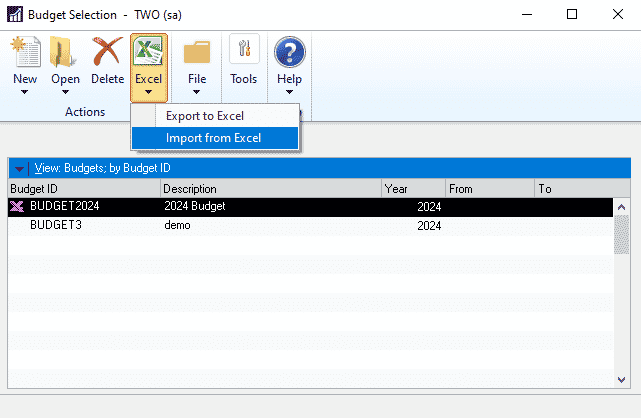
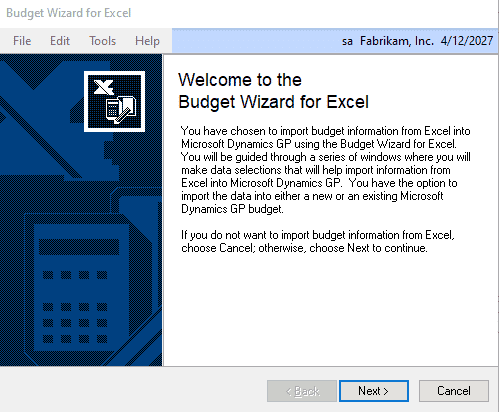
Once you have your file ready for import you can open Dynamics GP, navigate to Cards > Financial > Budgets > Choose the Excel drop down and select Import from Excel.
Choose Next.
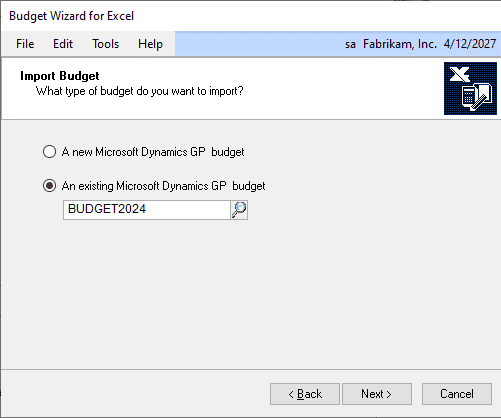
Select An existing Microsoft Dynamics GP budget so we can include the import data into our BUDGET2024 budget. Select Next.
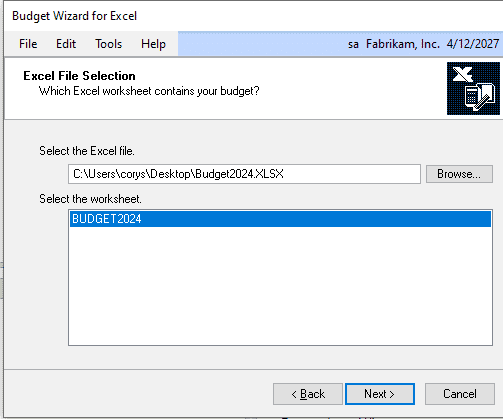
Browse to the file and select the proper worksheet tab and select Next.
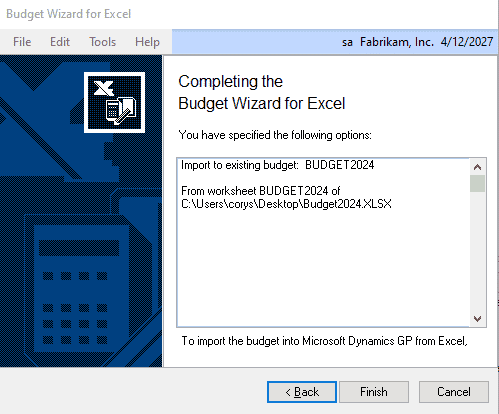
Select Finish.
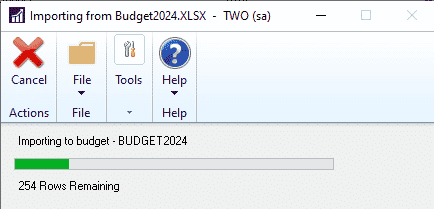
You will see a progress bar while the import takes place and the screen will disappear when completed.
The budget will now be in Dynamics GP with the data from the upload. You can view budget numbers in GP from the cards and inquiry menus.
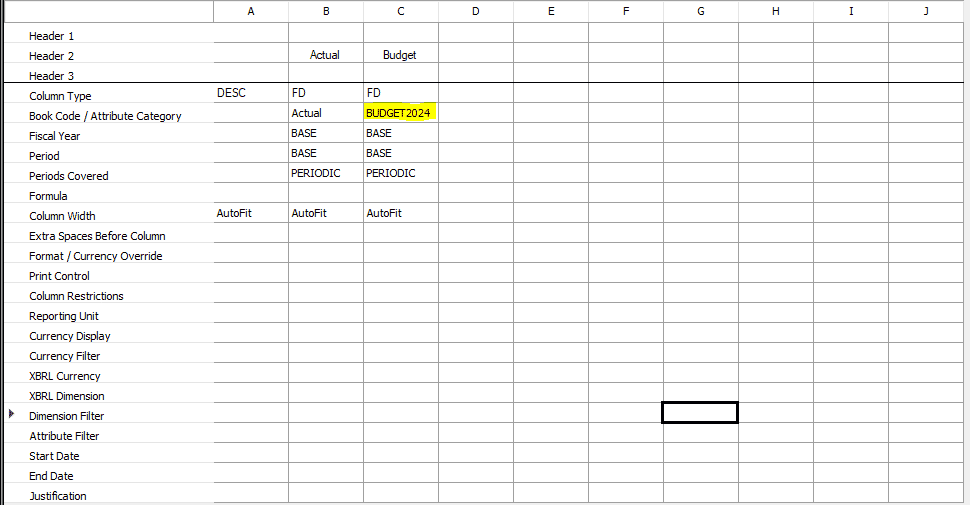
If you plan do utilize Management Reporter for Budget/Actual reports you can access the new budget in your column definition from the Book Code drop down.
NOTE: If you are using the Legacy connector the budget will show up in the Book Code drop down as soon as you close and open Report Designer. If you are utilizing the Datamart you will need to wait until the process runs and places the new budget into your database.
Additionally, Dynamics GP does allow the use of Budget Transaction to adjust your budget in specific periods throughout your cycle.
For those of you that like to view data through SQL Management Studio or Excel, the Budget tables are as follows:
GL00200 – Budget Master (Header)
GL00201 – Budget Summary (Detail)
I hope you find this post useful. If you have questions, please reach out to Stoneridge Software for assistance.
Under the terms of this license, you are authorized to share and redistribute the content across various mediums, subject to adherence to the specified conditions: you must provide proper attribution to Stoneridge as the original creator in a manner that does not imply their endorsement of your use, the material is to be utilized solely for non-commercial purposes, and alterations, modifications, or derivative works based on the original material are strictly prohibited.
Responsibility rests with the licensee to ensure that their use of the material does not violate any other rights.


