


How to Use Excel Reports in Dynamics 365 Business Central
Using Excel reports in Dynamics 365 Business Central allows you to export data from standard reports into Excel files, where you can customize and manipulate it easier.
You can use Excel’s built-in tools such as pivot tables, charts, and formulas to analyze, visualize, and present your data in a customized way. Despite its innovation, this function is something we find our clients underutilize. In this blog, we will highlight the benefits of Excel reports and show you how to set up and run them in Dynamics 365 Business Central.
How to Run Excel Reports in Dynamics 365 Business Central
To show you how to run this process, we will use an aged receivables report as an example. This report shows the outstanding balances of your customers by aging buckets, and it is suitable for creating a chart for demonstration purposes.
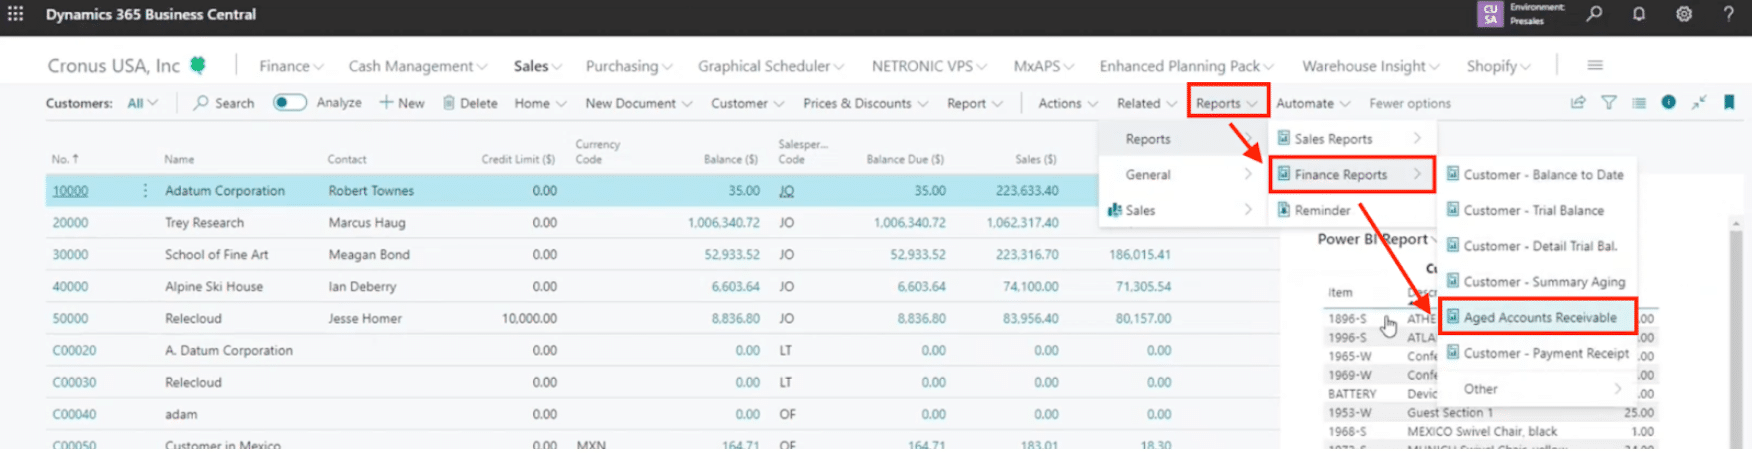
To run the report, go to Reports > Finance Reports and select the “Aged Accounts Receivables” report.
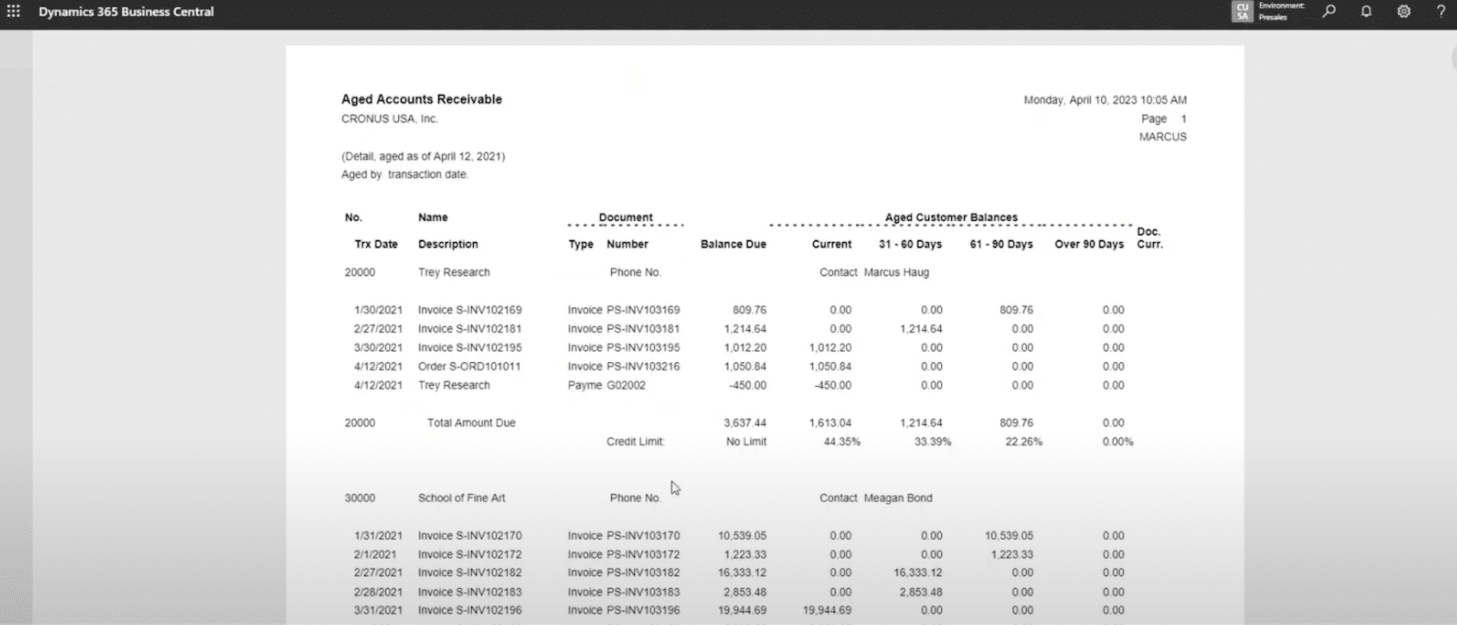
You can specify the “Age as of Date” as you wish. Then, click Preview to see the report in the standard RDL format. This is the familiar layout that shows the detailed information of each customer and their balances.
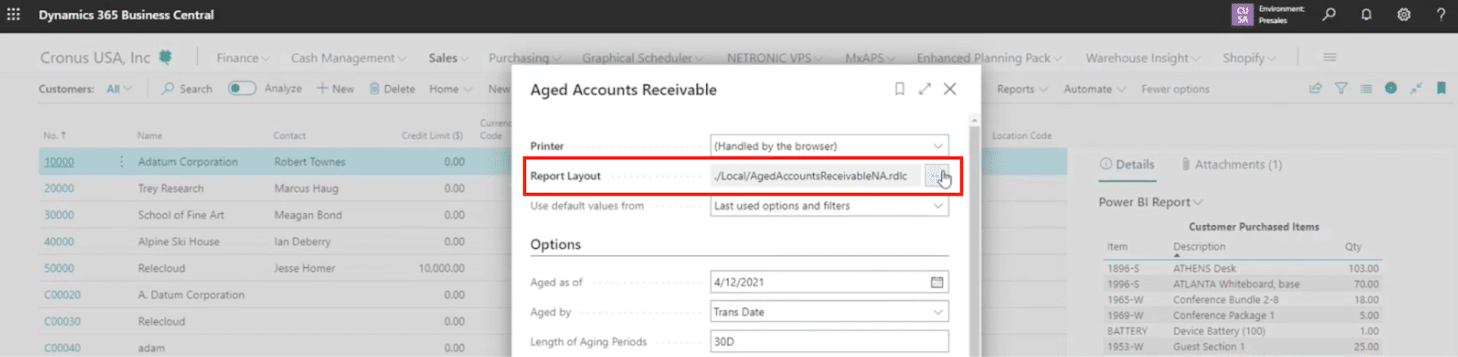
However, you may notice a new feature at the top of the report preview. This is the “Report Layout” option, which allows you to choose a different format for the report. In the past, you had to go to the “Report Layouts” page to create or modify the report layouts, but now you can access them directly from the report preview.

- Notice the “Report Layout” option at the top of the report preview by clicking on the ellipses, which allows you to choose a different format.
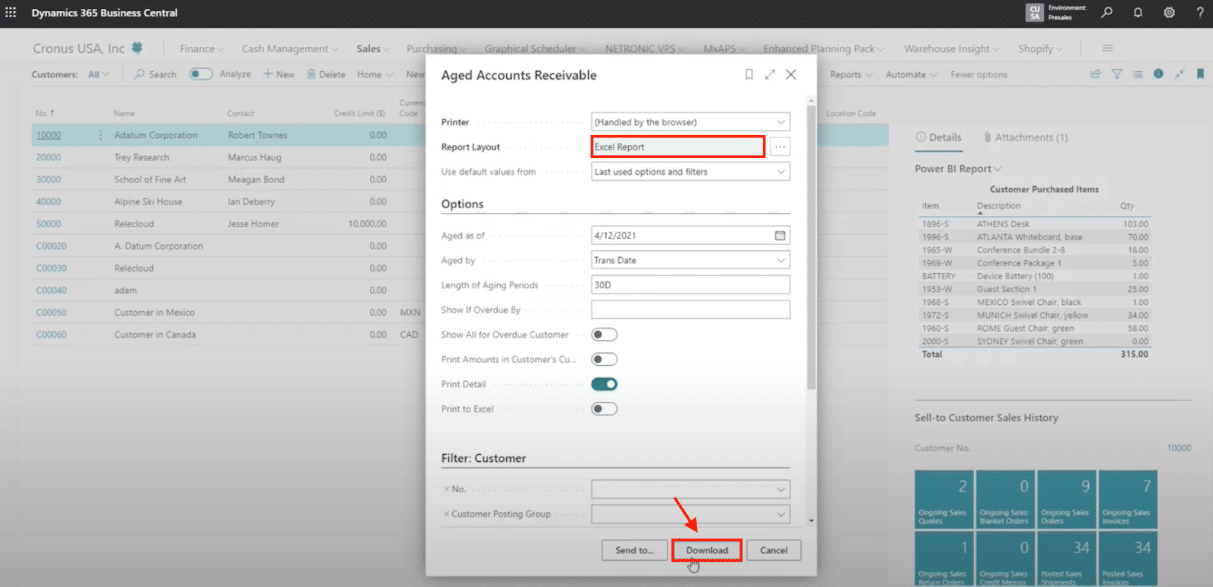
- Select the “Excel Spreadsheet” format and click Preview again.

- You will see a message that says the report is being generated. When the report is ready, you can download it by clicking the download button at the bottom of the message.
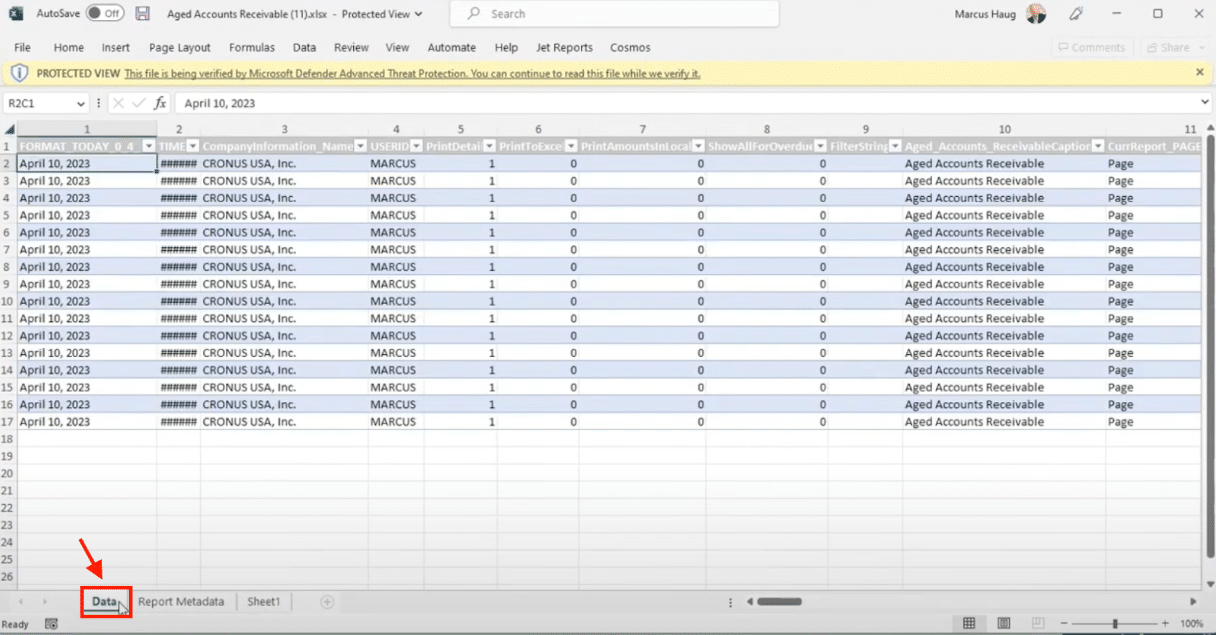
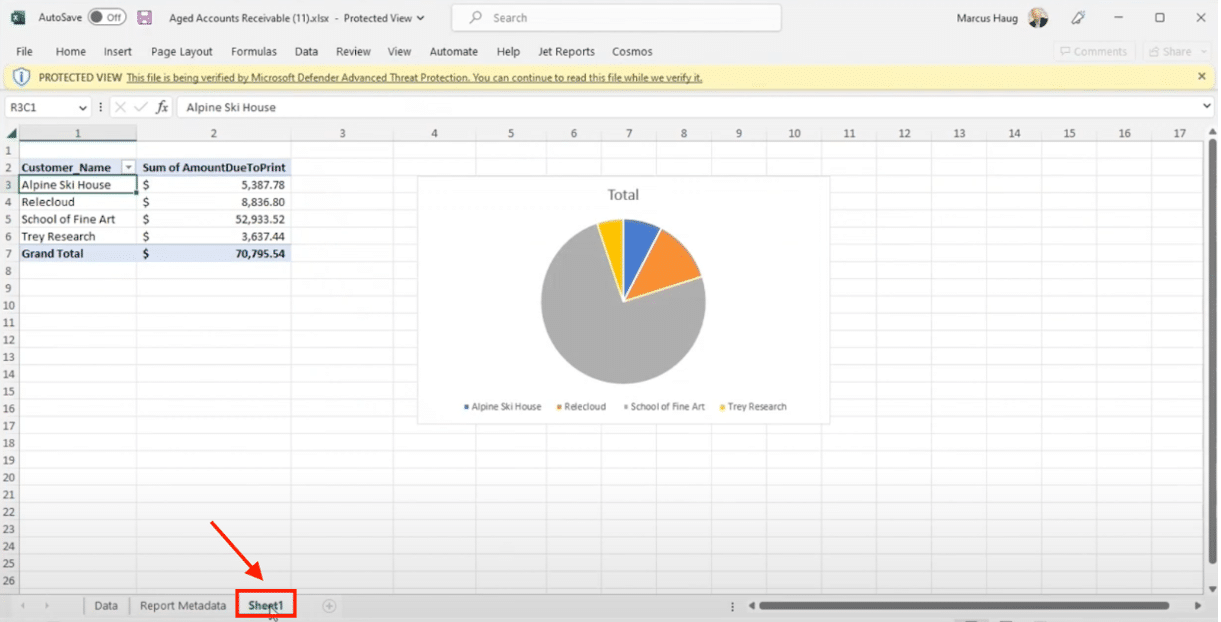
- The downloaded Excel file contains several tabs.
- The first tab is the “Data” tab, which shows the raw data of the report in a table format.
-
- The second tab is the "Report Metadata" tab, which shows the parameters that you used to run the report.

-
- The other tabs are optional and depend on the report layout that you created or modified. For example, you may have a tab that shows a pivot table or a chart based on the report data. We will explain how to create these tabs in the next section.
How to Create Excel Reports in Dynamics 365 Business Central
There are two easy, convenient, and straightforward options to create a new Excel spreadsheet report in BC.
OPTION 1: To create a new Excel spreadsheet within the report, you follow these steps:
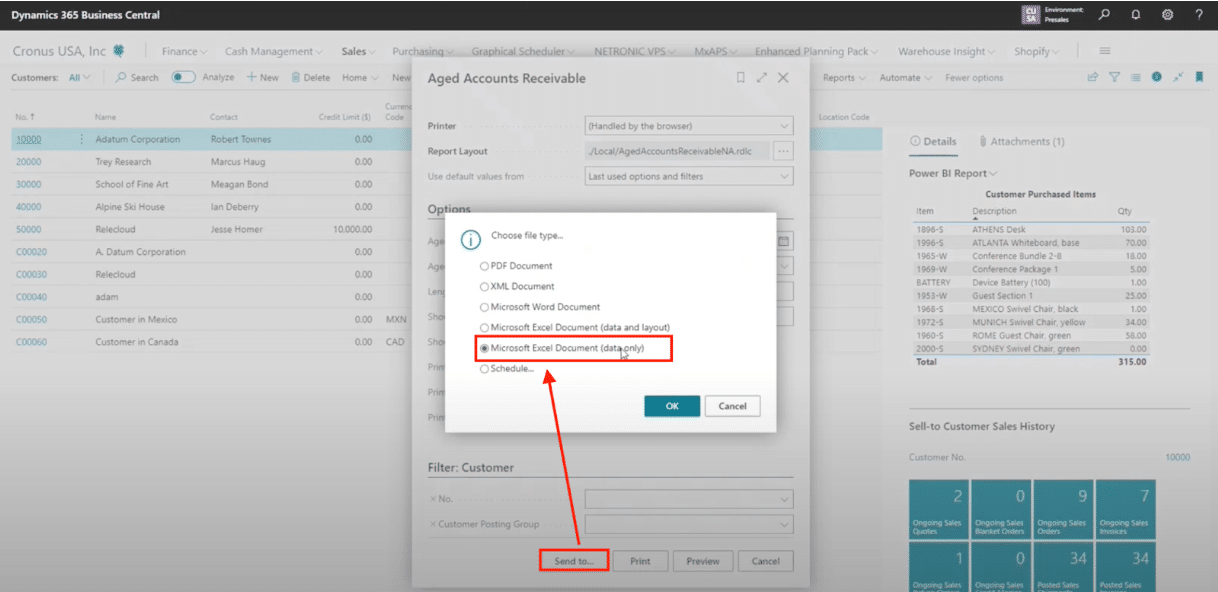
- Run your report in BC.

- Send to “Microsoft Excel Document (data only)” and it will give you the “Data” and “Report Metadata” tabs. You can then create a new sheet and pull data from either table to build pivot tables, etc.
OPTION 2: You can also create a new Excel spreadsheet using the “Report Layouts” page. This page allows you to manage the different formats of the reports, such as RDL, Word, and Excel.
- Run your report in BC.
- Select the “Report Layout” option by clicking on the ellipses.
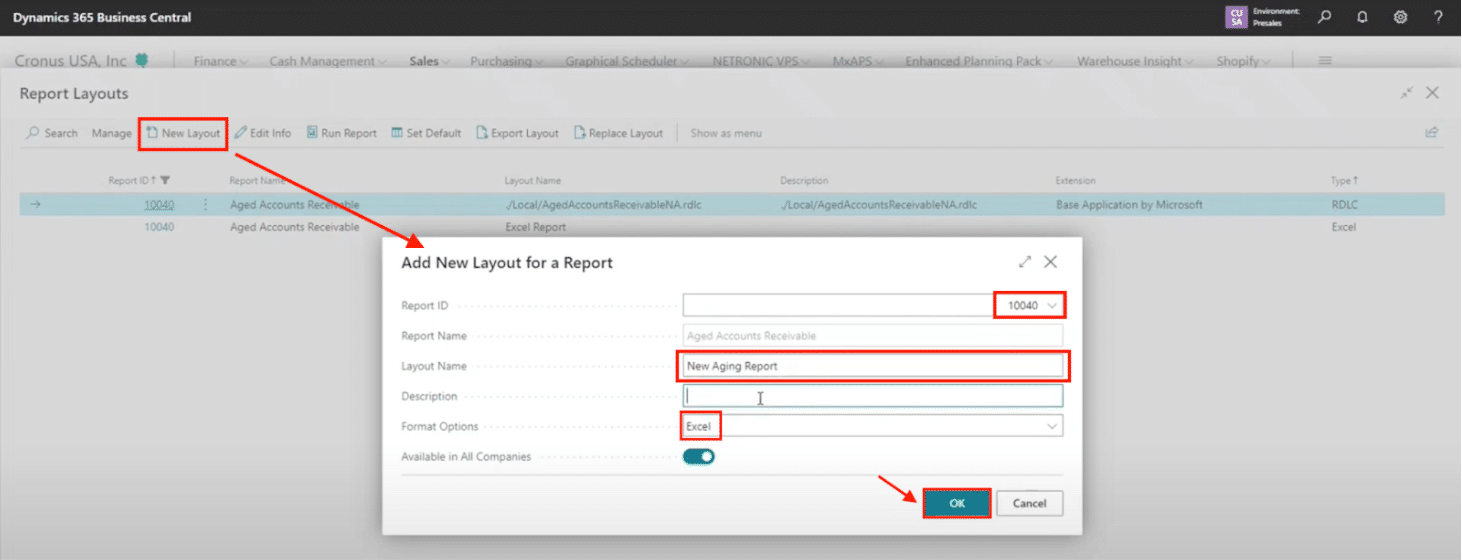
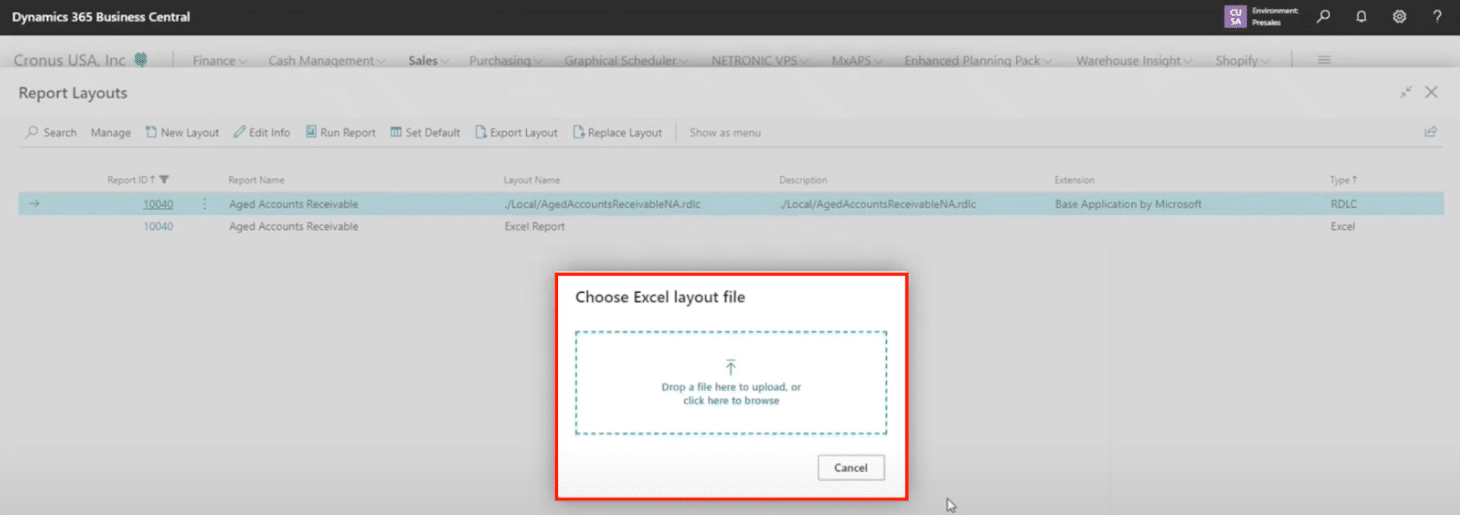
- Go to the “Report Layouts” page and click “New Layout”.
- Enter a name for your new report layout and select the Excel spreadsheet option.
- Ensure to include the report ID number. You can search for the report name in BC. For example, this aged receivables report has the report ID 10040.
- Click OK to create the report layout.
- Drag and Drop your Excel layout file
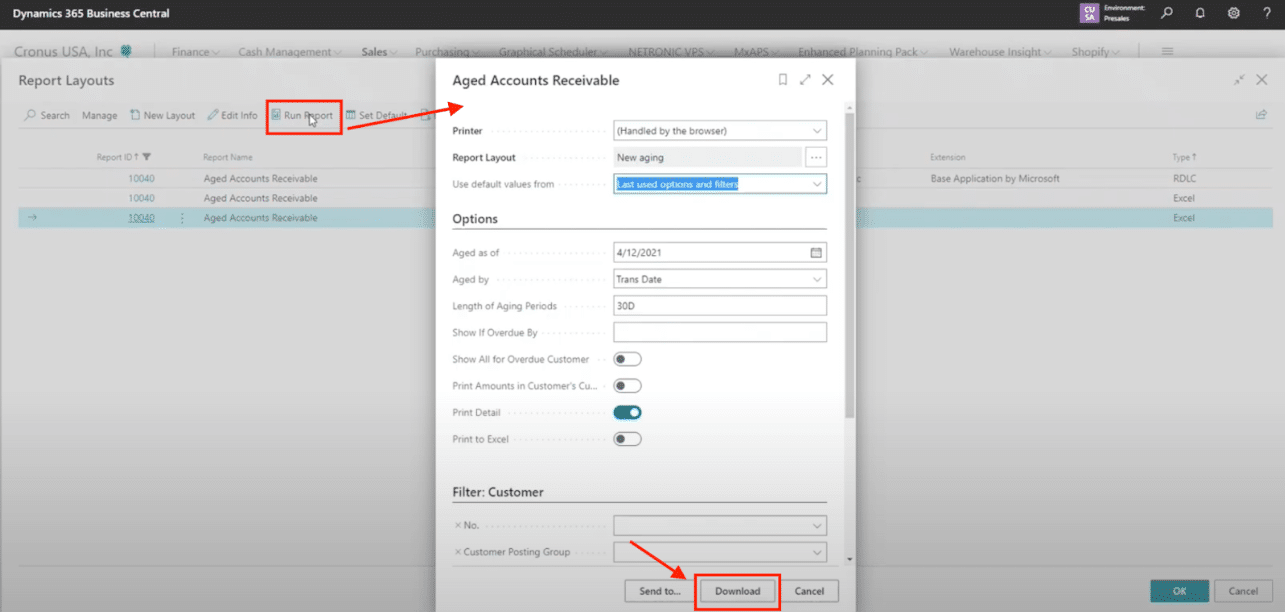
- Run your report, check the parameters to ensure accuracy, and download.
Want to Learn More About Dynamics 365 Business Central Processes?
We hope you found this helpful and encourage you to spend some time running Excel reports in Dynamics 365 Business Central and discover the benefits it may bring to your organization. For more information on features like this, reach out to us at Stoneridge Software.

Under the terms of this license, you are authorized to share and redistribute the content across various mediums, subject to adherence to the specified conditions: you must provide proper attribution to Stoneridge as the original creator in a manner that does not imply their endorsement of your use, the material is to be utilized solely for non-commercial purposes, and alterations, modifications, or derivative works based on the original material are strictly prohibited.
Responsibility rests with the licensee to ensure that their use of the material does not violate any other rights.