


How to Use Positive Pay Format with Electronic Reporting in D365 Finance and Operations
Electronic reporting in Dynamics 365 provides a powerful point-and-click interface to generate exports for positive pay, it may be a little confusing at first to get used to the interface, but it can provide an easier way to generate your files than using the old XSLT format for positive pay.
In this blog, we will walk through how to change the default out-of-box XML with embedded CSV format to just CSV format.
How to Set Up Positive Pay Format with Electronic Reporting in D365 Finance and Operations
First, go into the Electronic Reporting workspace. You will need to initialize and set up the repositories. You can do this by following the information in this related Microsoft article.
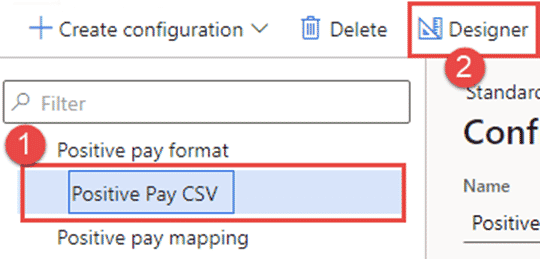
Next, once you import the base configuration for the Positive Pay mapping, Positive Pay model, and Positive Pay format, select the Positive Pay format:

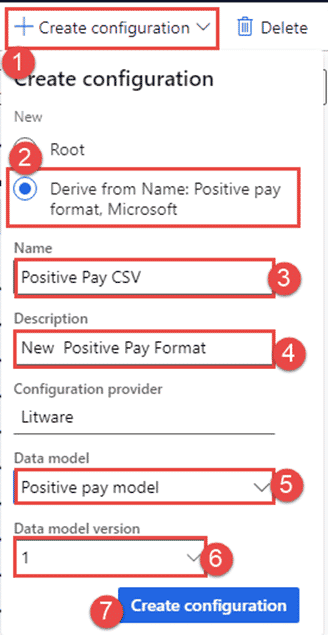
Next, click on the drop-down menu in the Action menu to create and set up a new configuration:
- Under New, select Derive from Name, Positive pay format Microsoft
- Enter a name for the new format shown below as Positive Pay CSV
- Enter a description for the new format
- Select the Data model and the Data model version
The steps are shown in the steps below. Note these are the defaults. If you have added a new data model or data model version you should select the appropriate one.
Once the new configuration is created click on it and then click on Designer in the action pane toolbar. This opens the interface that helps you modify the positive pay output file format you just created.
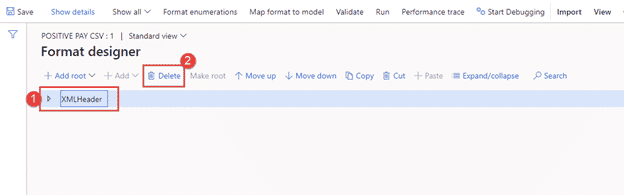
In the Designer area, we need to start with a clean slate as the default format is CSV in an XML node shell, which you do not want. To proceed, you will select the XMLHeader node (1) and then click on Delete in the toolbar (2).
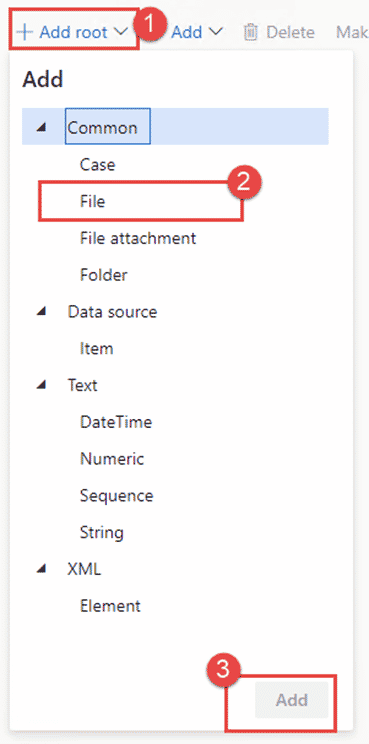
Next, we need to add the Root file type as shown below, click on Add Root (1) then Common > File (2), and then click on the Add button (3) if the next dialog doesn’t pop up automatically.
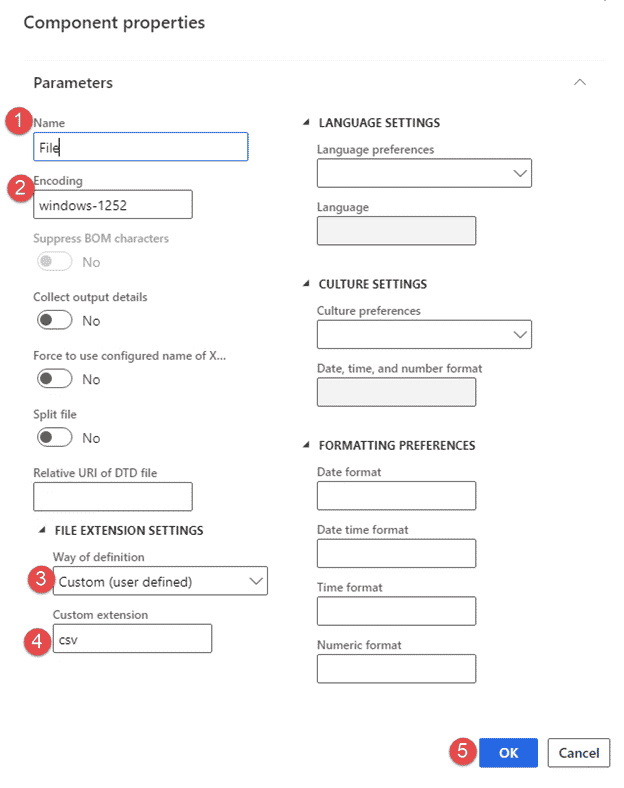
In the Component properties window for the new Root file object, we need to modify a few fields to get started. Enter the name for the component (1) under encoding enter windows-1252 (2). I find this encoding to work best.
Under the File Extension Settings change the Way of definition to Custom (user-defined) (3), then under Custom extension enter CSV (4). Then to add it simply click on the OK button (5).
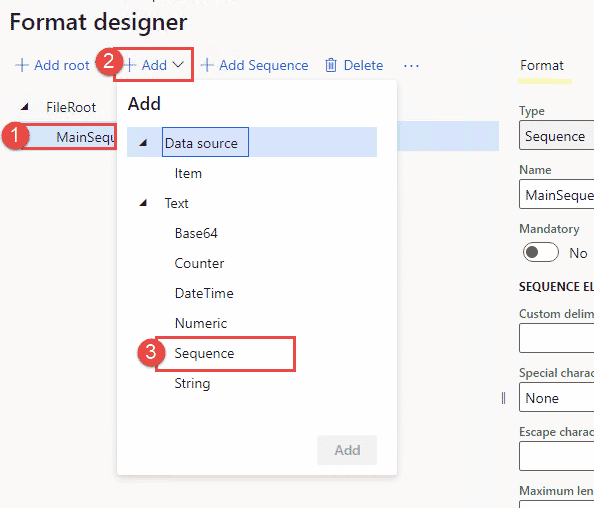
Now we need to create a text sequence component under the File root node that we created. To do that, click on the File component you created, (1) then click on +Add, (2) and select Sequence under Text (3).
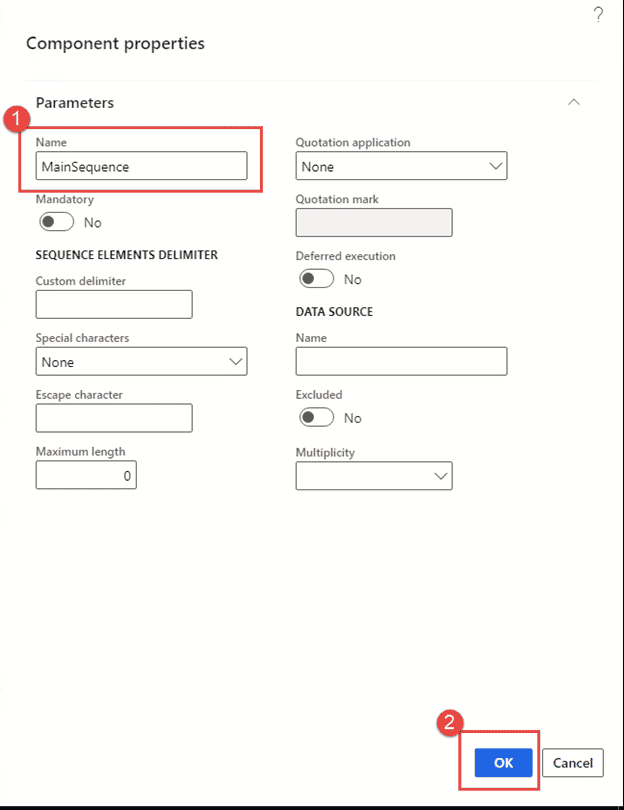
Add a name in the component properties window. Here we will use MainSequence (1) and then click OK (2).
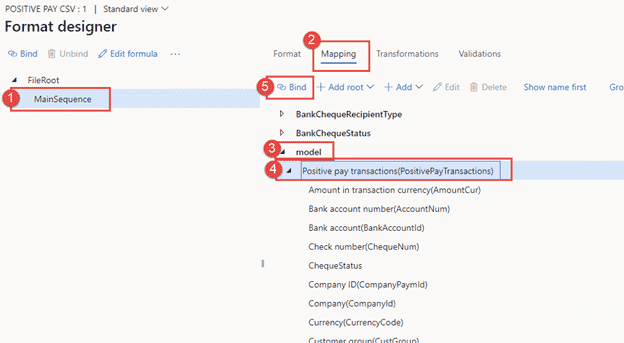
Now we need to map the sequence component to the data model. To do this, select the sequence component named MainSequence (1) then on the right pane click on Mapping (2). Next, click on the model (3) and expand it to reveal and then select the Positive pay transactions (4).
Then you can finish it off by going to the toolbar and clicking on Bind (5).
Once you click Bind, you will notice that the MainSequence component has changed and is bound to the model.PositivePayTransactions as shown in the picture below.

Now you can add a transaction sequence by repeating the steps we used to add the MainSequence, (if you do not see the +Add button click on Format on the right-hand panel to get back to the main tab. You can then click on MainSequence (1) then click +Add (2) then click on Sequence (3) then OK (4).
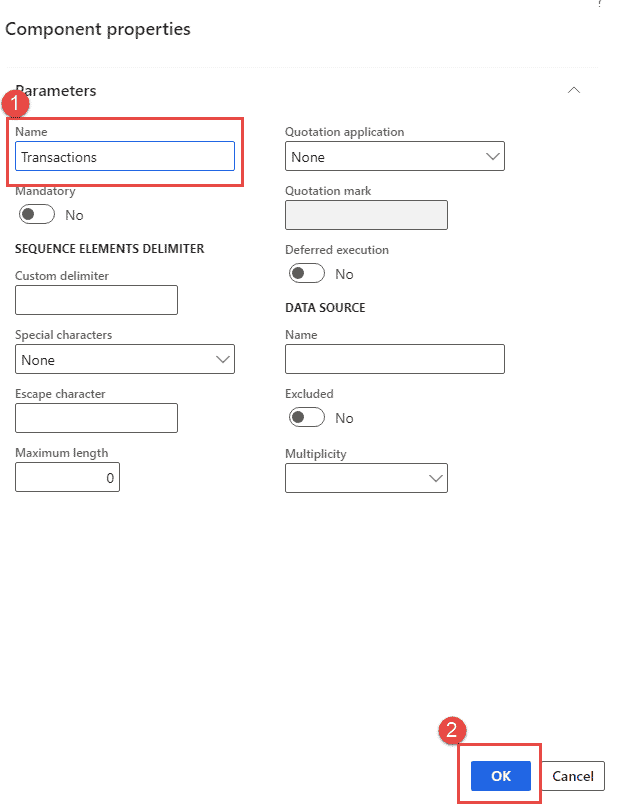
Name the new sequence Transactions (1) and click OK (2).
Identical to the MainSequence, you can now Bind the transactions component. You will see its binding set to "@" once this is done.

Inputting File Content in Positive Pay Format with Electronic Reporting in D365 Finance and Operations
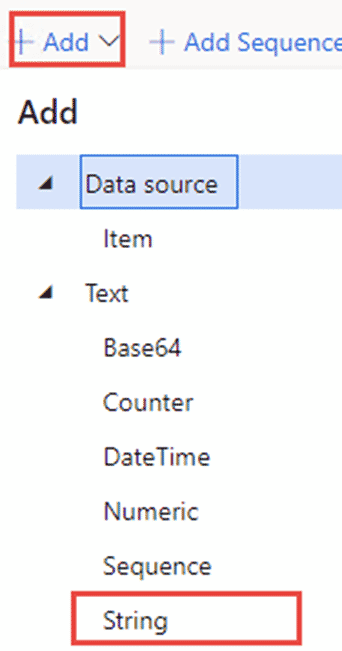
Now we start to get into the actual file contents here, this is where you can add the Account number, Amount in the cheque, the recipient’s name, the cheque number, etc. To do this simply click +Add and then click on String, most items will need to be converted to a string in the file format anyway so we will do this by adding String components then binding the component, and then using the format tool to do the conversion.
So let’s say we need the format of the Account number, Check number, Amount, and Recipient’s name.
The Format specifies the following:
- Account number needs to be 10 characters long left padded with 0’s,
- Check number should be 8 characters padded left with 0’s,
- Amount should not contain any decimal characters but display the decimal values (100.42 should look like 10042)
- The recipient’s name should be no longer than 40 characters.
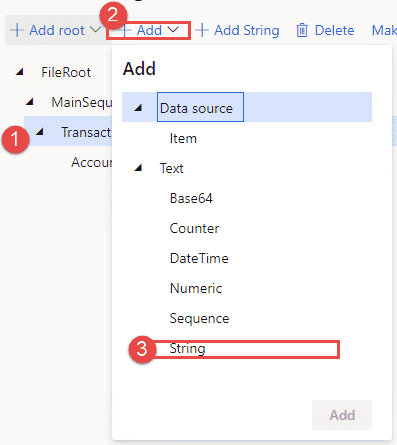
To do all of this, select the Transactions component click +Add (1), and select String (2).
Name the first string component AccountNum (1) and then enter 10 in the minimum (2) and maximum (3) length (2).
Set the alignment to Right (4), padding character 0 (5) and click OK (6).

Now you will bind the AccountNum component to the Account number in the Model.PositivePayTransacitons data model item. To do this, click on mapping (1) then select Bank account number (AccountNum) under model > Positive pay transactions (2) then click Bind (3).
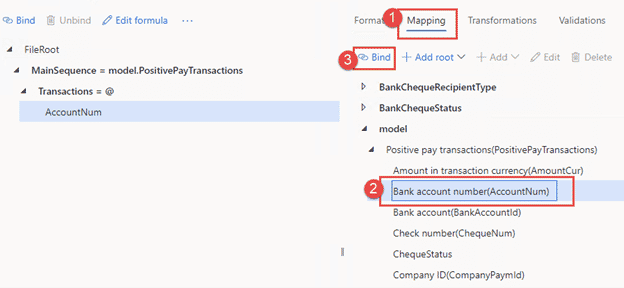
The account number is now bound to the data model object field for accountNum and will have the desired formatted output automatically.
Now we need to add the separator component by clicking on the transactions component (1), then clicking on +Add (2), and finally, clicking on String (3).
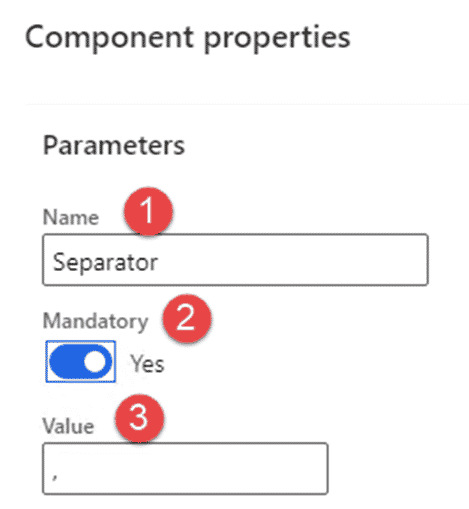
Once you are in the component properties dialog, enter the name Separator (1), set Mandatory to Yes (2), add a comma to the value field (3), and then click OK.
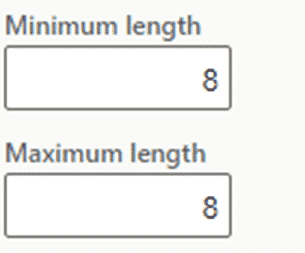
For the cheque number, we are going to follow the same steps we did for the Account number. The only difference is we will set the minimum and maximum length to 8.
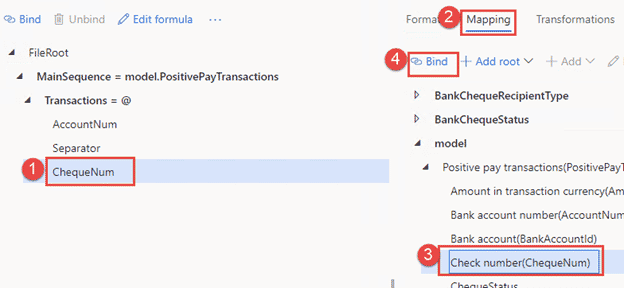
Then bind the Cheque number component to the Check number (ChequeNum) field under mode.PositivePayTransactions in the mapping panel.
Add another Separator as we did above.
Then you can proceed to add the Check amount. To do this we simply go to +Add then String as we did before to create a component, but this time we need to add a formula to the binding so that the number is formatted correctly in the file.
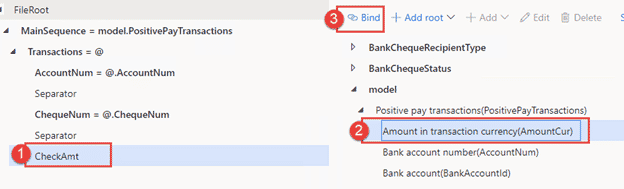
Select the CheckAmt string component you created (1) then select the Amount in the transaction field in the model (2) then select Bind (3).
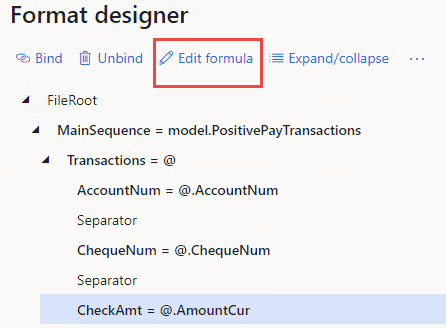
Now click on the Edit formula in the toolbar. This opens the formula designer.
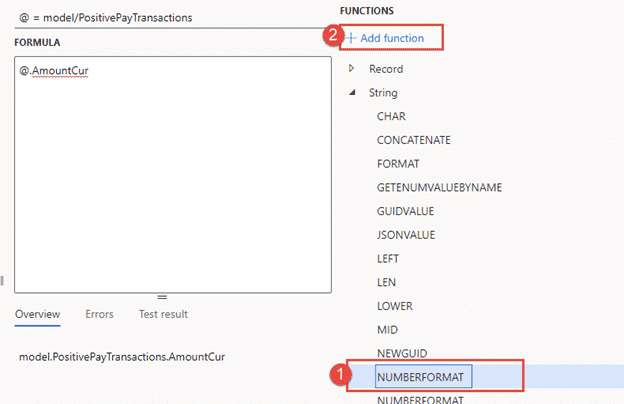
In the formula designer, you will find the Number format String function in the right-hand side panel. Select it (1) and then click on +Add Function (2).
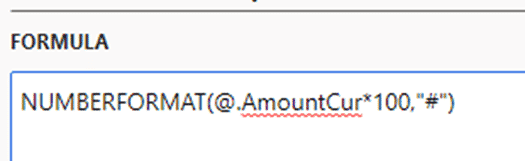
Now that you have added the formula, you can finish up the necessary adjustments by adding the 100x multiplier so the decimal portion of the number will be displayed. You can then add the format string of “#” to not show decimals.
We're almost done!
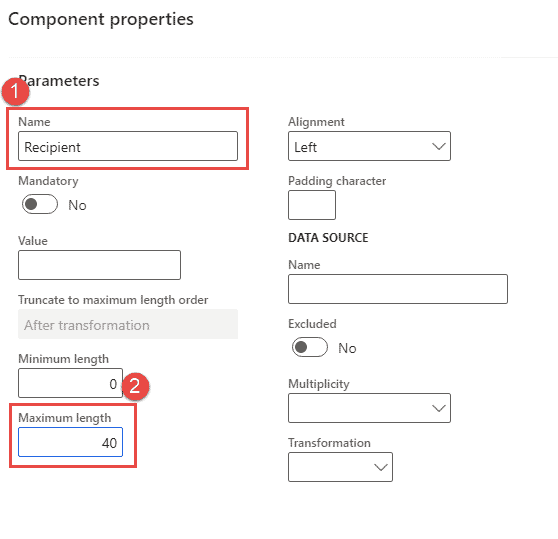
Now you can add another separator component and the Recipient string component. Enter the name as Recipient (1). When you add this component, make sure to set a maximum length of 40 (2) in the properties. This will truncate any additional characters if the field has them.
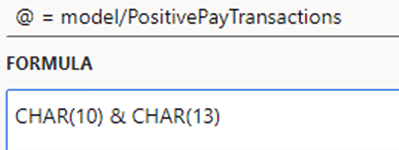
Finally, you can add a carriage return component to the end of the transactions sequence component.
You can do this by adding another String component, like before, and name it CarriageReturn. After that, click on the Mapping button (note: instead of mapping click on Edit Formula to open the formula designer, enter the following CHAR(10) & CHAR(13) so it looks like the below image). Then save and close the formula designer.
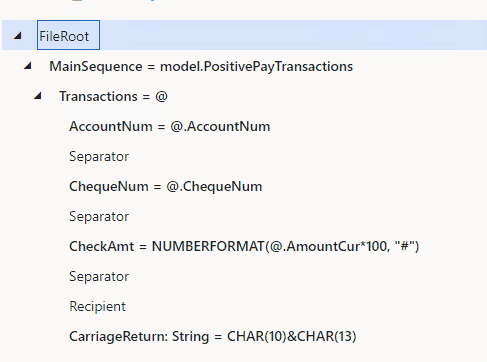
If you followed along, all the mappings should look like the below image:
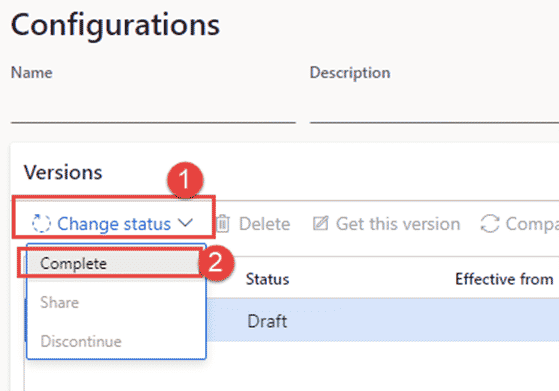
To wrap things up, all you need to do is save and return to the main window. There you can run tests to export files. When you are ready to let users test it, you can complete the draft by going to Change Status (1) and clicking Complete (2) under the versions tab of Configurations.
Potential Error Note:
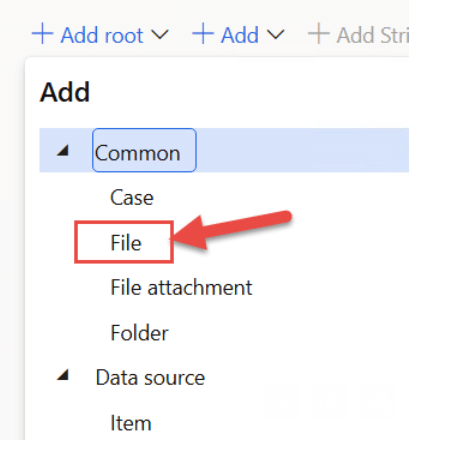
If you receive an error that the "Field 'Template' or Field 'Attachment name' must be filled in", make sure that you are not using the File attachment component and instead use the component that just says "File", as shown below:
Questions?
We have a team of experts ready and willing to assist you. Please get in touch with us if you have any questions about this or other Dynamics 365 Finance and Operations solutions.

Under the terms of this license, you are authorized to share and redistribute the content across various mediums, subject to adherence to the specified conditions: you must provide proper attribution to Stoneridge as the original creator in a manner that does not imply their endorsement of your use, the material is to be utilized solely for non-commercial purposes, and alterations, modifications, or derivative works based on the original material are strictly prohibited.
Responsibility rests with the licensee to ensure that their use of the material does not violate any other rights.