


Leveraging Power BI for Dynamics 365 Business Central – Part 1: Connect
Power BI is a powerful reporting tool that allows you to extract, split, combine, modify, filter, and display data in a manner that best suits your needs. Today, I will show you a foundational step in that process - how to connect Power BI to your Dynamics 365 Business Central environment. Once you are able to properly extract this information, you’ll be one step closer to organizing this data so that you are able to help answer the question of how to best run your business.
Step 1: Download Power BI Desktop
First, you’ll want to download Power BI Desktop from the Microsoft Store. 
Step 2: Open Power BI and Connect
Once downloaded, open the program. When you first open Power BI Desktop, you’ll want to tell it what data source you want to connect to. You can connect to countless sources such as SQL databases, Azure databases, Excel tables, Text files, Access databases, Sharepoint sites, OData feeds and much more. For our purposes, we want to connect to our Business Central environment. With a new Power BI file open, go to the Home tab on the ribbon and click Get Data > “More…”. 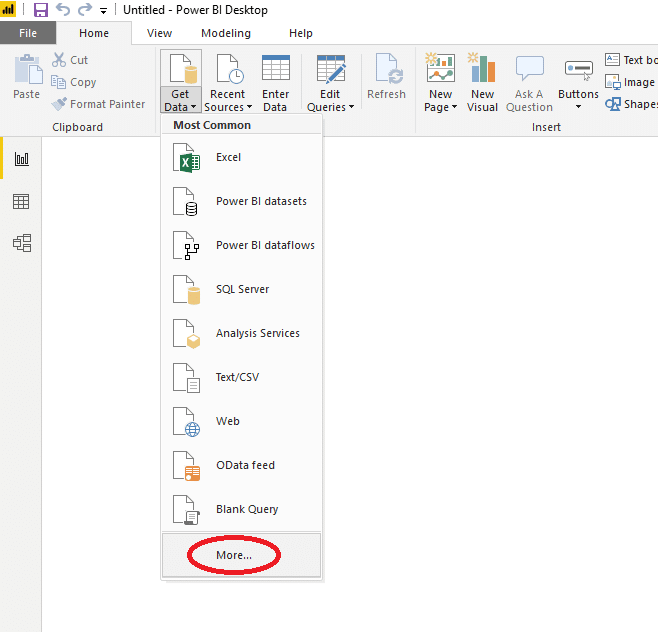 This opens a popup that shows all the different types of databases we can connect to. We want to go to Online Services > Dynamics 365 Business Central > Connect.
 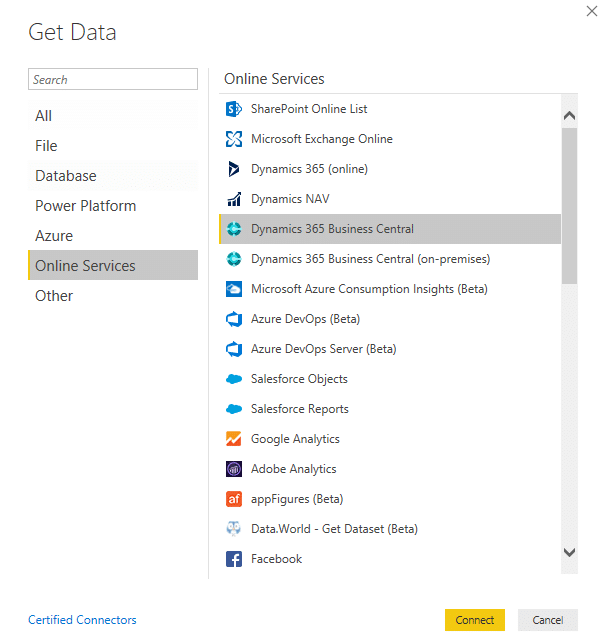 You will get a popup asking you to sign in. Use the same sign is as your BC user and click Connect. (Note: If at any point you want to change the login info to another user, go back to the main ribbon and go to Home > Edit Queries > Data source setting and Clear Permissions for the Dynamics 365 Business Central data source.) You will now see a list of environments to choose from. Expand the PRODUCTION environment to see a list of companies in that environment.
  Expand one of the companies to see the queries and tables you are able to report off of and load into PowerBI.
 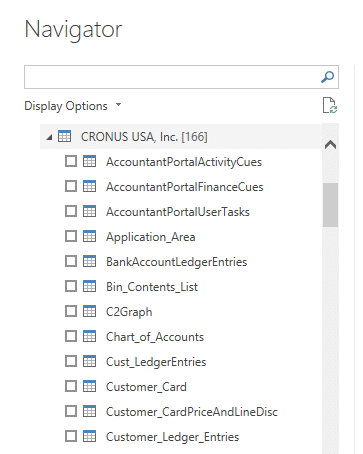 As an example, if you choose to load the Chart_of_Accounts item, it will load in your GL Account info. Navigating to the Data page after it loads will show you the raw data.
 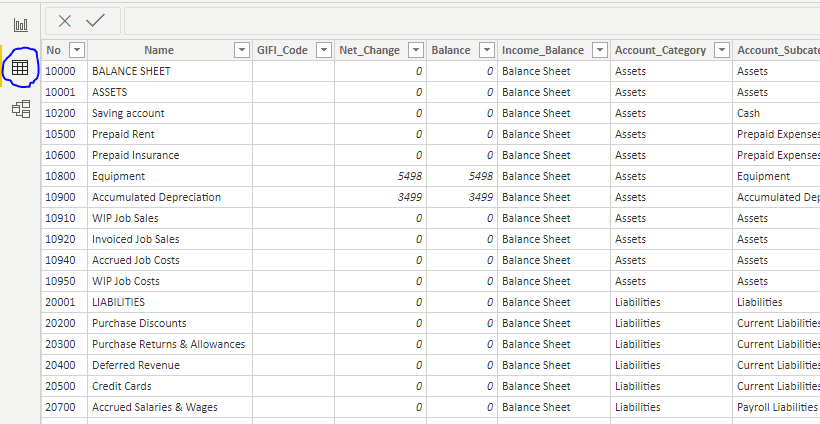 In future posts, I will help guide on how to filter, modify, and visualize data on PowerBI so that it can work best for you.

Under the terms of this license, you are authorized to share and redistribute the content across various mediums, subject to adherence to the specified conditions: you must provide proper attribution to Stoneridge as the original creator in a manner that does not imply their endorsement of your use, the material is to be utilized solely for non-commercial purposes, and alterations, modifications, or derivative works based on the original material are strictly prohibited.
Responsibility rests with the licensee to ensure that their use of the material does not violate any other rights.