Part II: Publishing a Dynamics AX 2012 R3 Default Entity
This blog is a continuation from Configuring the Dynamics AX 2-12 R3 Entity Store. This is part 2 of a 3-part series:
Part 1 - Setting up and Configuring the Dynamics AX 2012 R3 Entity Store
Part 2 – Publishing a Dynamics AX 2012 R3 default entity
Part 3 – Creating and publishing a custom Dynamics AX 2012 R3 entity
When we last left off we had configured the Entity Store but hadn’t published an Entity due to challenges with some of the default entities fields (namely the memo field). For this blog, I’ll be publishing the SalesTable entity since it does not contain the memo field. To do this, I selected the SalesTable entity and clicked Publish:
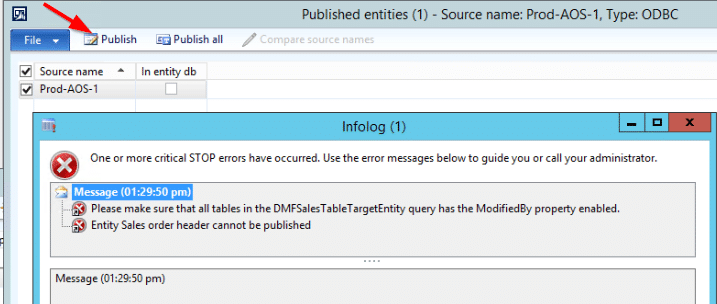
Then I selected my source and clicked publish . . . .DRATS! Foiled again!
Apparently, some of the tables that are referenced by the DMFSalesTableTargetEntity query (tables referenced in the data sources) do not have the ModifiedBy property set to Yes. This means I’ll have to locate all the tables in all the data sources and verify that ModifiedBy is set to Yes. To do this I did the following on the SalesTable and PriceDiscChangePolicy table.
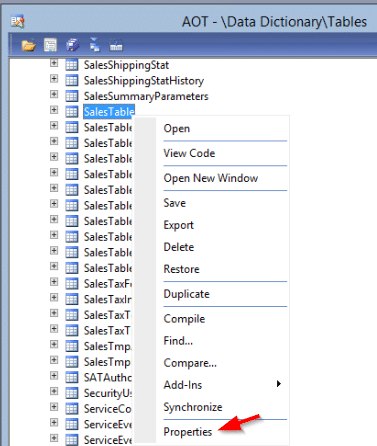
- In the AOT go to Data Dictionary, Tables, [Table]
- Right click on table (if properties pane does not appear on the right) and select Properties
- Find the Modifiedby property and change it to Yes
- Click the Save button in the AOT
- Synchronize
- Restart the AOS (I found this was required for it to pick up the changes, your mileage may vary)
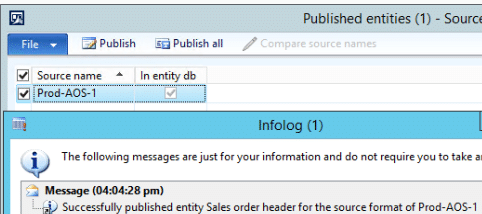
Once the SalesTable and PriceDiscChangePolicy reflected the change I went back and attempted to republish the SalesTable entity.
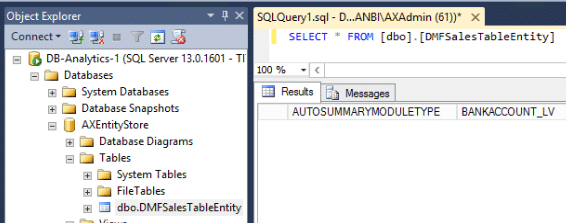
Success! Now to check I opened up SQL Server Management Studio and queried the table that was published (DMFSalesTableEntity). As you can see there is no data because this only published the definition (schema) of the entity to the database but did not push the data over.
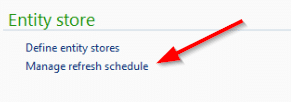
To populate the table with data, go back to AX, open the Data import export framework Area page and click on Manage refresh schedule.
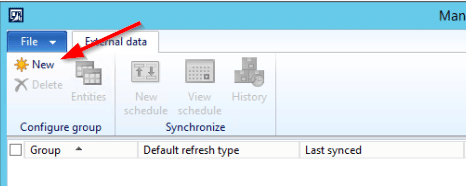
Click New.
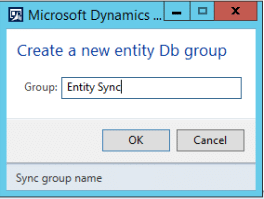
Create a group to hold the entities that you will sync.
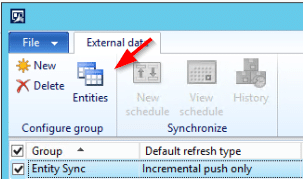
Once a group is created, select it and then click Entities.
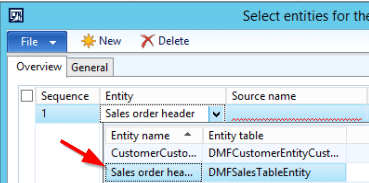
Select the SalesTable Entity we created before (ignore the other one, that will be in a later post on creating a custom entity)
Select the source
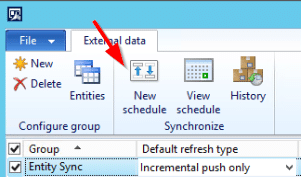
Click New schedule
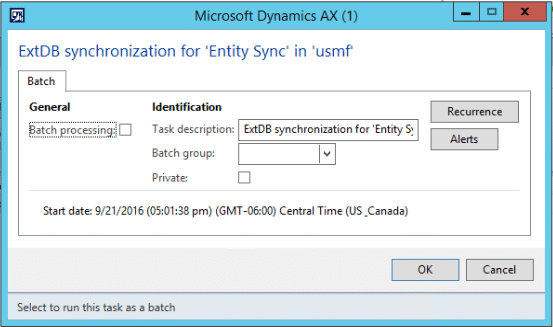
Within the schedule form you have 2 ways to get data:
- On a schedule
- Ad-hoc
If you simply click OK, the dialog will close and the population process will kick off. You can also schedule this to run on a batch server and on a set schedule (click Recurrence) for an automatic incremental refresh. For now, I’m going to click OK. When the processing is complete you will see something like this:
Back in management studio I now see data!
And that completes publishing a default entity. For the final post, I will cover how to modify the existing entities that contain memo fields that are incompatible with SQL. For now, you can hook up PowerBI to the table that was created and start reporting!
Under the terms of this license, you are authorized to share and redistribute the content across various mediums, subject to adherence to the specified conditions: you must provide proper attribution to Stoneridge as the original creator in a manner that does not imply their endorsement of your use, the material is to be utilized solely for non-commercial purposes, and alterations, modifications, or derivative works based on the original material are strictly prohibited.
Responsibility rests with the licensee to ensure that their use of the material does not violate any other rights.


