Using Dynamics AX to Track Part Status in Inventory
Depending on your business model, there may come a time when you end up with a used or refurbished part that you need to store in inventory. You are then faced with a couple of quandaries. First, how do you make sure that the part shows up in inventory as a used part without creating a new part number for it? Second, how can you add it to inventory at a different cost than a new part without affecting any costing calculations?
The solution I have found in Microsoft Dynamics AX is to use a product dimension for Status. Once you have setup the products correctly, this will allow you to define a status on each inventory transaction and to track a different cost per status. An important note – you must set up the product to use this dimension when you first create the product as this cannot be changed at a later date.
Create a Product Dimension Group
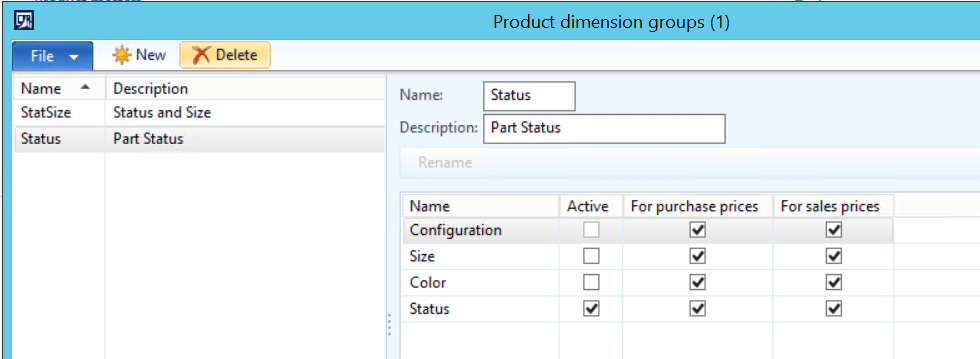
Your first step in defining statuses to be used on a product is to create a product dimension group. Go to Product information management > Setup > Dimension groups > Product dimension groups and create a new product dimension group. Select one of the dimensions that isn’t already being used for other purposes (except for the Configuration dimension) and mark it as Active. Make sure that it is active for purchase prices and sales prices as well. To minimize confusion, it is also a good idea to rename the dimension to Status (I used the Style dimension and renamed it to Status).
Create a Product Master
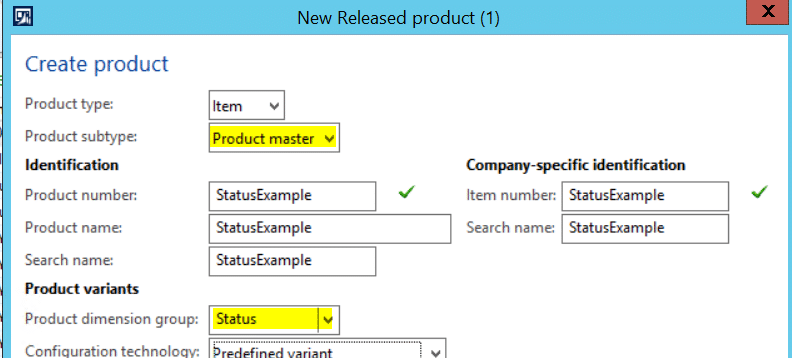
Once you have the product dimension group created you can create your products. When using product dimensions there are a few extra steps that are required in order to apply those dimensions to your product. The first step is to create a product master. There are a couple of ways to do this but today I’m going to focus on creating a product master that is automatically released to the company. Go to Product information management > Common > Released products. Create a new released product and make sure to select Product master as the Product subtype and your new product dimension.
Create Product Variants
This next step is actually more of a two-step process. You first need to define the applicable Product dimensions for this product. Select the released product you just created and click the Product dimensions button on the product tab of the action pane. Create a new dimension for each status (you will have to type each status for the first product but all the subsequent products you create you will be able to just select them from the dropdown).
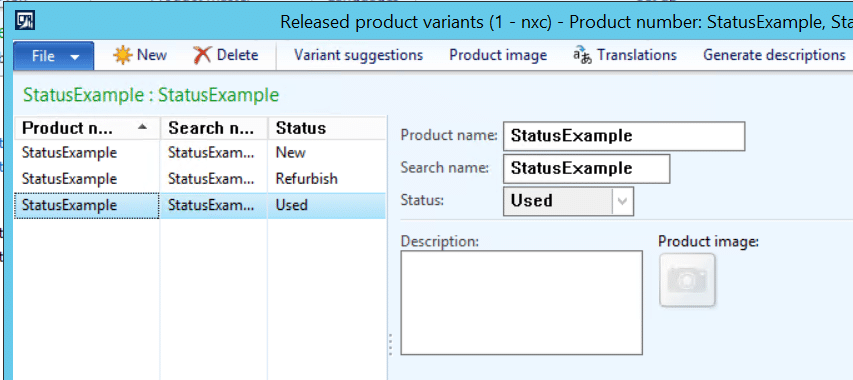
Now that the statuses have been defined, you need to create the product variants in order to use the statuses. With your released product still selected, click the Released product variants button on the Product tab of the action pane. You will need to create a variant for each of the statuses. On the Released product variants window, select the Variant suggestions button. Select all of the suggested variants and click Create. This will create a variant for each of the statuses you defined in the product dimensions form.
Allow Costing by Variant
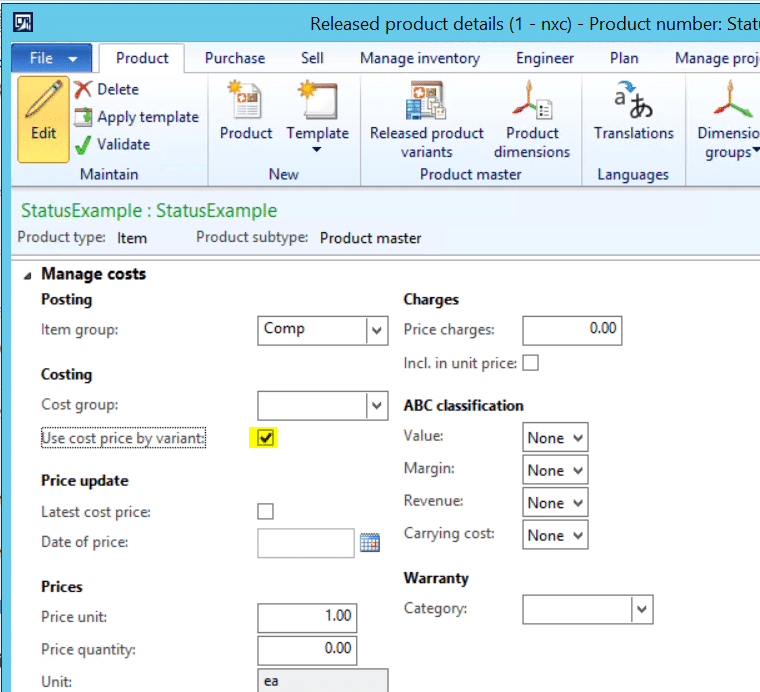
The final step before you can begin using the new product is to make sure that it allows a different cost for each variant. Open the released product and make sure that the Use cost price by variant checkbox on the Manage costs fast tab is checked.
Now you are able to track the status of this part in inventory and manage your costs appropriately.
Under the terms of this license, you are authorized to share and redistribute the content across various mediums, subject to adherence to the specified conditions: you must provide proper attribution to Stoneridge as the original creator in a manner that does not imply their endorsement of your use, the material is to be utilized solely for non-commercial purposes, and alterations, modifications, or derivative works based on the original material are strictly prohibited.
Responsibility rests with the licensee to ensure that their use of the material does not violate any other rights.


