


Dynamics NAV Development for Non-Developers: Part 7- Adding a Field to a Report
Unlike adding a field to a table in, as according to Part 5: Adding a "Simple" Field to a Table, or exposing a field on a page as according to Part 6: Adding a Field to a List Page, adding fields to reports in Dynamics NAV requires the use of both the object designer and a report design (layout) tool. The two report design tools available for Dynamics NAV reporting are Visual Studio and SQL Report Builder. In this exercise, we will utilize Report Builder.
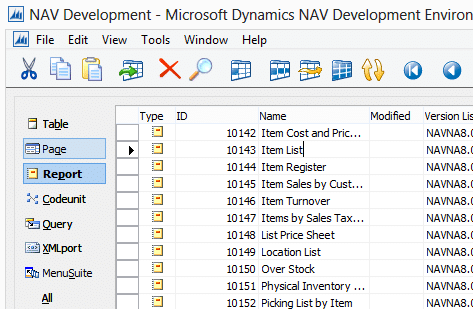
The field we have been working with in this series is called “Web Site Description.” Here, we will add our new field to the Item List report.
Add New Field to Item List report:
1. In the Development Environment (Object Designer), ensure that the Report Builder is specified as the tool for report layout work. From the toolbar, select Tools – Options. IN the list of options returned, the last one should be called “Use Report Builder”. If this is not set to ‘Yes’, change it now.
2. Still in the Development Environment, find and “Design” the report in which you want to add the new field(s) (see Part 3:How to Find the Object You Want to Change for more information related to identifying and locating the table) Specifically, select the ‘Design’ button at the bottom of the screen while the line representing the report in the Object Designer is selected.
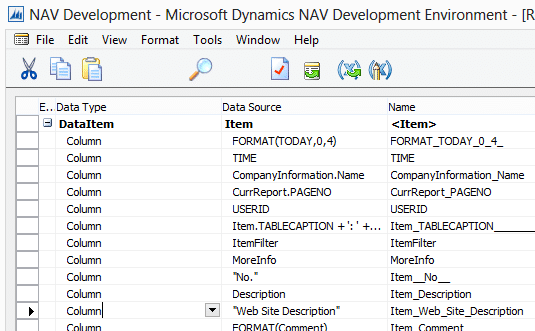
3. Within the rows directly beneath the “DataItem” called ‘Item”, select a line and then select F3 (Edit – New from the toolbar). Unlike in page design, the order of the fields in the report definition does not matter much. The only limitation is that the field should be inserted beneath the “DataItem” which represents the table in which the field resides. Because reports may access multiple related tables (while pages only represent one table) we need to be aware of the table to which the field belongs. In this case, our field is in the Item table, so we want to place it indented somewhere beneath the ‘Item’ “DataItem”.

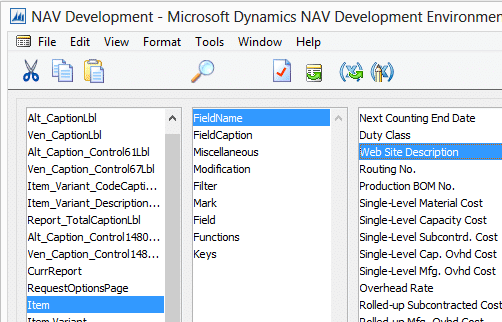
4. Select the Assist-Edit button in the image above. This may be found in the Data Source column and is identifiable by its three dots. Upon selecting the assist-edit button, you will be presented with a symbol menu. In it, select the line in the leftmost column that represents the table to which the field belongs (‘Item’ in this case). This will cause the field names for that table to be presented in the rightmost column. In that column, find and select the field you wish to add.
5. Select ‘OK’ to return the field to the report layout.
6. The table name and following period preceding the field name (“Item.” In this case) may optionally be removed, but don’t cause any harm. Add a description of the field in the “Name” column. This should contain no spaces or periods. In this example, the “Name” will be defined as ‘Item_Web_Site_Description’.
7. Now that the field has been added to the definition of the report, we need to add it to the actual layout. With the report still open in design mode, select View – Layout from the toolbar. What you will see is immediately overwhelming. Don’t give up here.
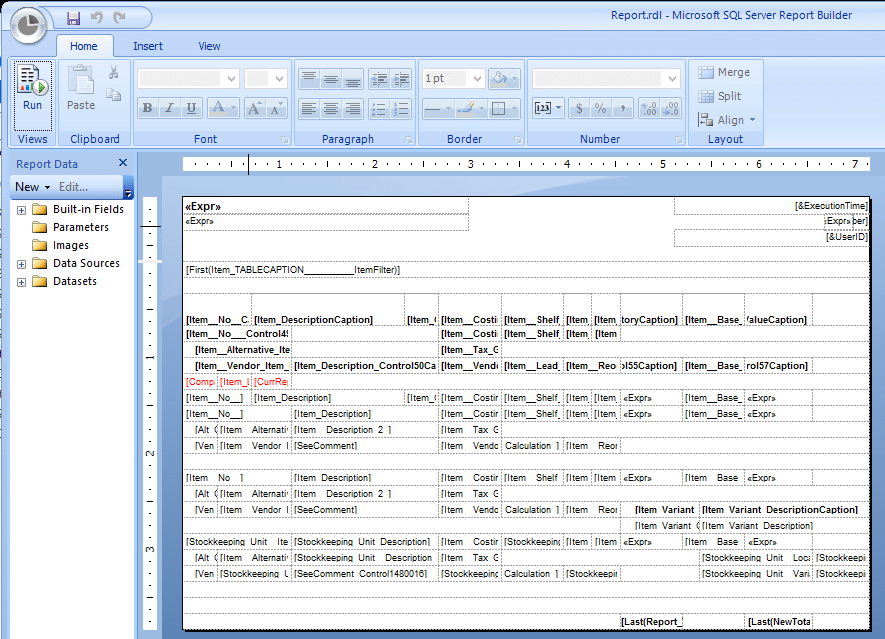
8. This report is used as our example because it more accurately represents a typical report than the customer list (which is more commonly provided as a sample report). It admittedly has some complicating factors within, but we will avoid getting bogged down in those details. The challenge in this, or any report, is to understand what you see in the designer. There are potentially row groupings, column groupings and cell merges with which to contend. The key is to find a position in the report where the field may reasonably be placed and cause the least amount of effort. In this example, the “Item Costing Method” column is relatively clean of nuances, so we will place our new field to the right of that. Select the header of the column to the left or right of where the new column should be placed, right-click and select either the Insert Column option and then either ‘Left’ or ‘Right’.
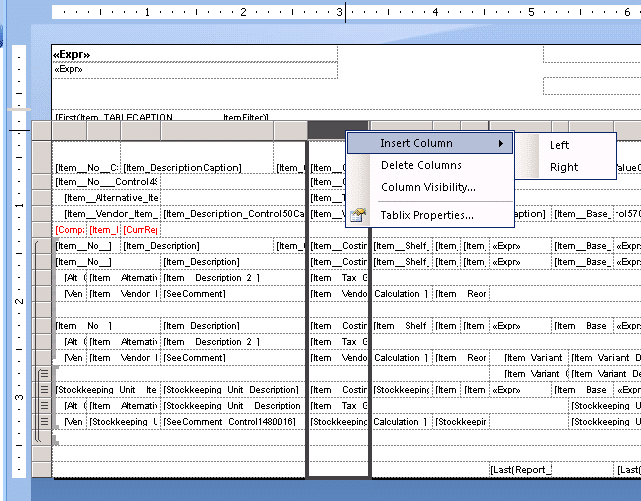
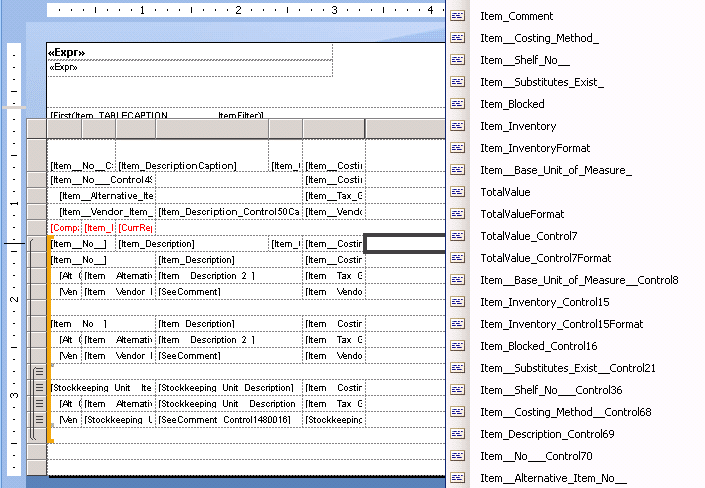
9. In the new, empty column, you will need to select the new field in all applicable body and grouping rows and manually type the header text into all header rows. The body and grouping rows are encapsulated by the bracket to the far left. The rows above are headers. Like in the screenshot below, select the paper icon in a body cell to return a list of available fields.
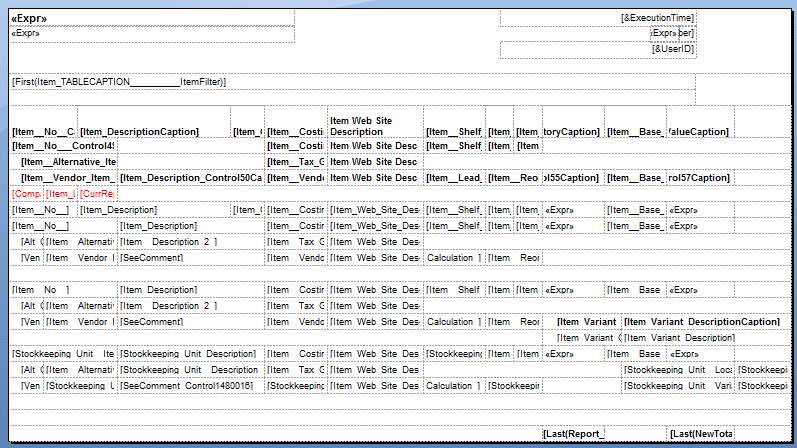
10. Repeat the process to add the field to all rows where it might be needed. As a rule of thumb, use another existing field where the behavior is known and duplicate the pattern. For this report, it appears that there are four headers, one of which will be returned – depending upon options the user selects when running the report. The first two headers in this report return the Item Costing Method and the latter two return different values to the report. We will elect to return our field in the new column regardless of how the user runs the report, so we will add it to all header, body and grouping rows. The result should look like the image below.
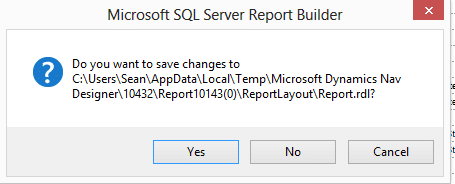
11. When you have completed the layout changes, close SQL Report Builder. You will be prompted to save changes. This does not actually save the report changes, but commits the layout changes to the report design – provided you ultimately save the report in NAV. We will do this in subsequent steps.
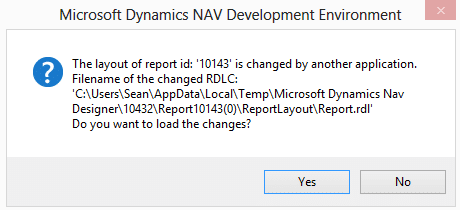
12. You will be returned to the NAV report definition in the Object Designer. When moving your cursor, you will be prompted again to load the changes made in Report Builder. Select ‘Yes’.
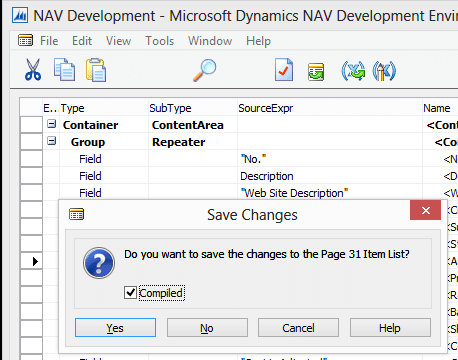
13. Close the report, currently opened in design more. You will be prompted to save the changes and compile. Select ‘Yes’. This will actually save all of the changes, despite what the previous messages had indicated.
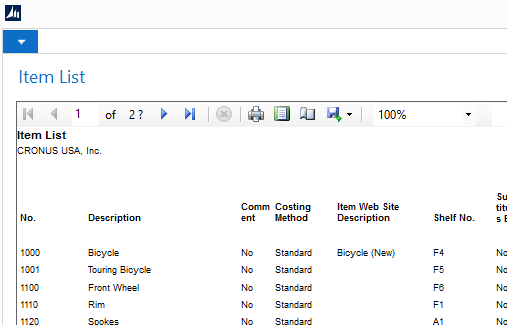
14. Run the report from Role Tailored Client to confirm that your new field appears and behaves as you expect.
More information about page design in Dynamics NAV, including more discussion around card pages, may be found at https://msdn.microsoft.com/en-us/library/dd355370(v=nav.80).aspx. Specifically, SQL Report Builder is discussed in much more detail in the following link: https://msdn.microsoft.com/en-us/library/dd207032.aspx.
The process for editing reports can often be iterative – much more so than table or page changes. You might make numerous attempts at a layout before the results are exactly right. This process is valuable as it allows you to grow more comfortable with cause and effect as it relates to report design.
The keys to making report changes in NAV are:
- Set reasonable expectations regarding the time it will take to become comfortable with the tools, and
- Don’t be afraid to explore properties and experiment with various changes.
Before long, you will be making light report changes in minutes rather than hours.

Under the terms of this license, you are authorized to share and redistribute the content across various mediums, subject to adherence to the specified conditions: you must provide proper attribution to Stoneridge as the original creator in a manner that does not imply their endorsement of your use, the material is to be utilized solely for non-commercial purposes, and alterations, modifications, or derivative works based on the original material are strictly prohibited.
Responsibility rests with the licensee to ensure that their use of the material does not violate any other rights.