


Dynamics NAV Development for Non-Developers: Part 6 – Adding a Field to a List Page
For those of us familiar with the Classic Dynamics NAV environment, there may be some familiarity with WYSIWYG (what you see is what you get) design on forms – most notably on “card” forms. In those older versions of NAV, you could open a form in design mode and place new fields exactly where you wanted. The NAV client, in turn, would present the fields in the form exactly as you had added them.
Pages in the Role Tailored environment are designed a bit differently. Because NAV is no longer tied to a specific client (now desktop, web, SharePoint, mobile), the design must be client agnostic. Today, we can tell the fields in what order to be presented and can provide some grouping parameters, but the specific client renders those fields in the way most appropriate for the device and/or format. To add a field to a list page, the differences are slightly less pronounced than in the Classic NAV environment, but different nonetheless.
The previous entry in this series described the process of adding a field to a table. The field added was called “Web Site Description” and was added to the Item table. Here, we will expose our new field to the Item Card so users are able to see and edit it.
How to Add a Field to a List Page in Dynamics NAV
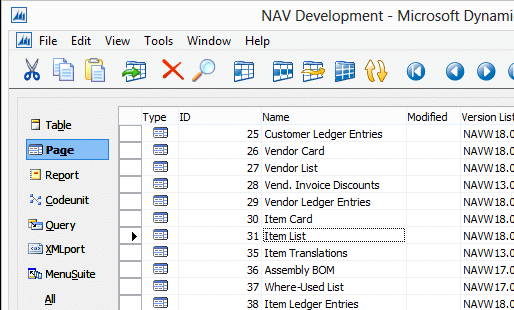
1) In the Development Environment (Object Designer), find and “Design” the page which requires the new field(s) [see previous blog for more information related to identifying and locating the page]. Specifically, select the ‘Design’ button at the bottom of the screen while the line representing the page is selected.
2) Find the position within the field order where you would like to place the new field. With your cursor on the line beneath where the new field should reside, select F3 (Edit – New from the toolbar).
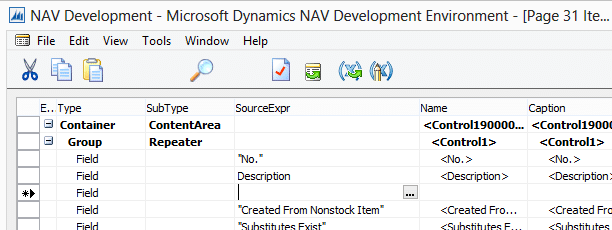
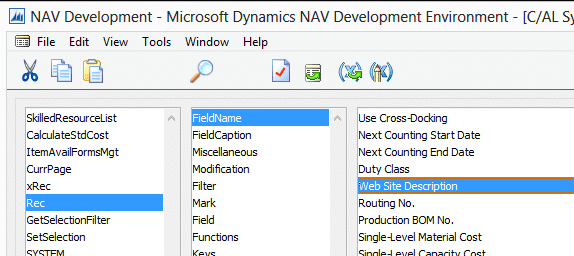
3) Select the Assist-Edit button in the image above. This may be found in the SourceExpr column and is identifiable by its three dots. Upon selecting the assist-edit button, you will be presented with a symbol menu. In it, select the “Rec” line in the leftmost column. This will cause the field names for the Item record (in this case) to be presented in the rightmost column. In that column, find and select the field you wish to add.
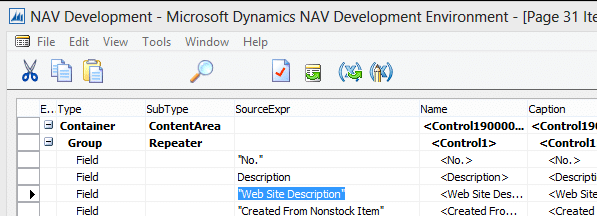
4) Select ‘OK’ to return the field to the list page layout.
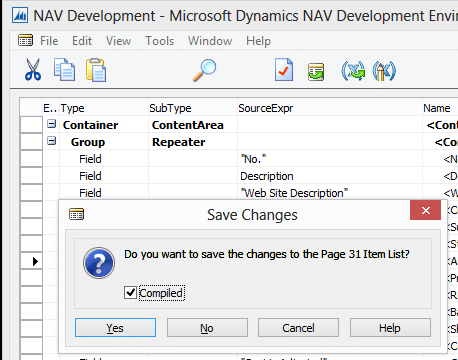
5) Close the page, currently opened in design more. You will be prompted to save the changes and compile. Select ‘Yes’.
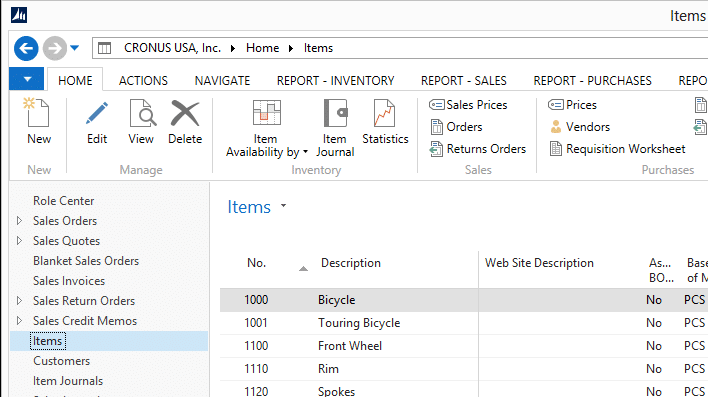
6) Review the page in the Role Tailored Client to confirm that your new field appears and behaves as you expect.
While there is less potential harm possible in modifying pages in your Production environment, it is still recommended that they are first modified in your Test environment, reviewed, and only then copied to Production. You can again reference the third entry in this series for a deeper discussion around moving objects from Test to Production.
Of note, editing the new field would require it also be added to the Item Card page because the Item List page in NAV is non-editable. This process is very similar to adding the field into the List Page. More information about page design in Dynamics NAV, including more discussion about card pages, may be found at https://msdn.microsoft.com/en-us/library/dd338968(v=nav.80).aspx.
The next entry in this series will describe the process to add this same field to a report.

Under the terms of this license, you are authorized to share and redistribute the content across various mediums, subject to adherence to the specified conditions: you must provide proper attribution to Stoneridge as the original creator in a manner that does not imply their endorsement of your use, the material is to be utilized solely for non-commercial purposes, and alterations, modifications, or derivative works based on the original material are strictly prohibited.
Responsibility rests with the licensee to ensure that their use of the material does not violate any other rights.