


GP to BC: Getting Familiar with D365 Business Central – General Ledger Setup
This blog series has been created to assist Dynamics GP end-users in getting familiar with Dynamics Business Central, but could be used by anyone new to learning Dynamics 365 Business Central. We will be covering the CORE modules first, starting with General Ledger and Accounts Payable.
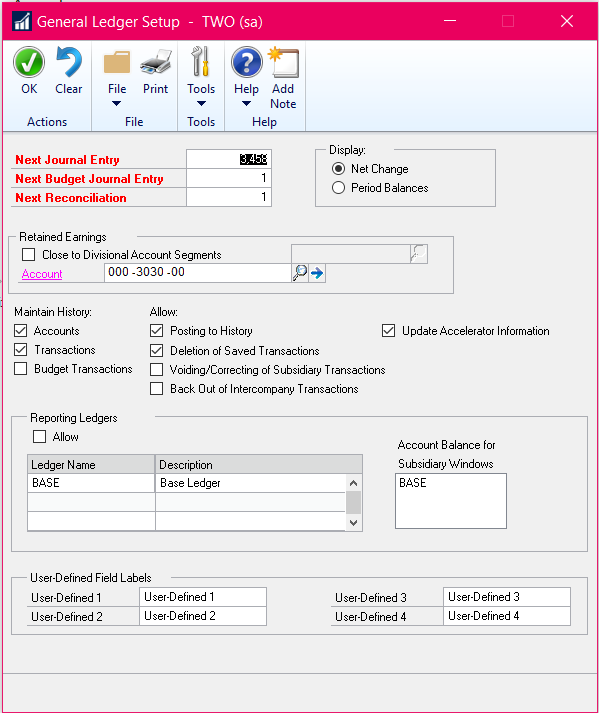
This blog focuses on the General Ledger Setup for Dynamics 365 Business Central. The General Ledger window, in the diagram below, is the location to configure various aspects of the general ledger, in GP Dynamics, including the numbering series and the respective retained earnings accounts. Overall, this determines how transactions are entered and saved.
Dynamics GP General Ledger Setup
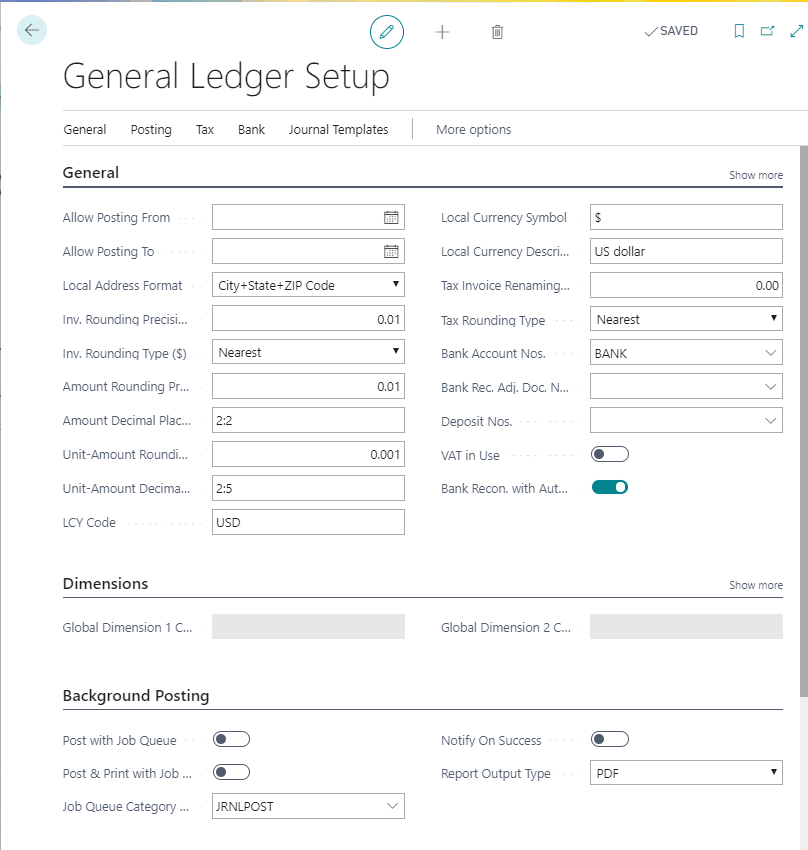
General Ledger Setup in D365 Bsuiness Central
The General Ledger Setup in D365 Business Central is accessed by clicking on the search icon and typing in General Ledger Setup
The page (what was previously known as Window in GP Dynamics) is structured with actions across the top, followed by ribbons and finally, there are Fasttab sections.
All windows have quick actions across the top. These include the back arrow and the name of the page you are on, the edit selection, the plus to create a new entry, the trash can to delete, the status of the page, the option to open the page in a new window, and the expansion arrow.

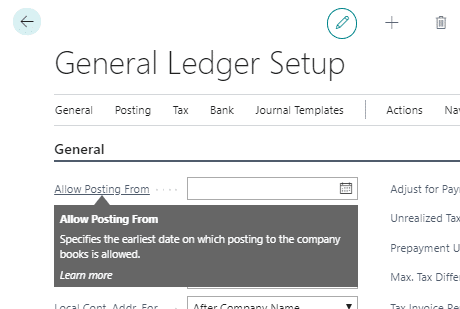
Looking at the General Fasttab section. With D365 Business Central there are a lot more selections that can be made in the setup windows. Because there are so many the highlights are shown below. Each field displays additional information when you mouse over it. Dates can be defined to allow for posting, invoice rounding precisions, and the ability to lock down accounts so they cannot be deleted if they are used in setup tables. The General Ledger Setup page also includes settings for Bank Reconciliation including the numbering series to be used for bank accounts and to turn on or off the ability to import bank statement files and automatically match the bank ledger entries.
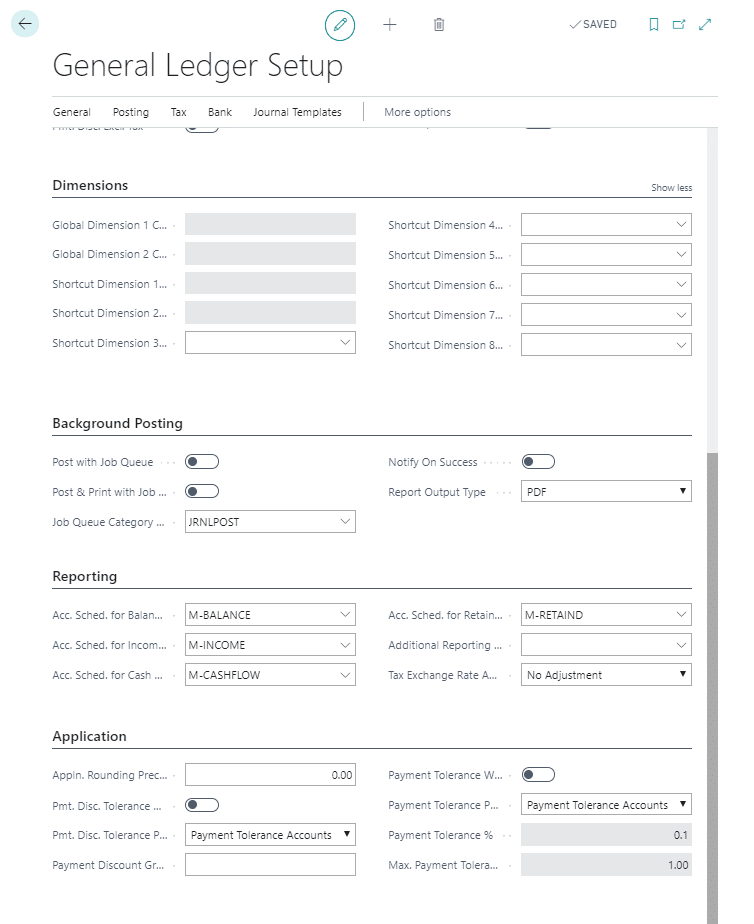
On the right side of the Fasttab section, there is a Show more option. This works like the Hide/show functionality in GP on transaction grids. Users can see additional fields for the sections by clicking on the Show more and collapse the section by clicking on show less. D365 Business Central can add additional fields to the Fasttab sections. This will be covered in a later blog.
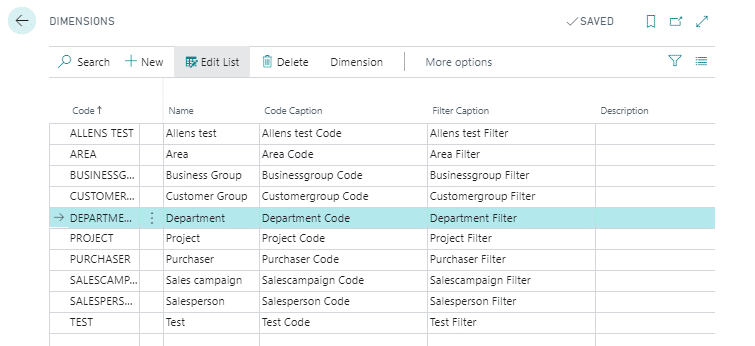
The next Fasttab section is for defining Dimensions. Dimensions identify what GP users know as segments of the account format. BC allows you to have up to 8 Dimensions, in addition to the Main account segment. Segments no longer are required to be numbers. They can be names – so Division, Department, etc.
Dimension is defined on the Dimensions page shown below. A company can have up to 8 dimensions.
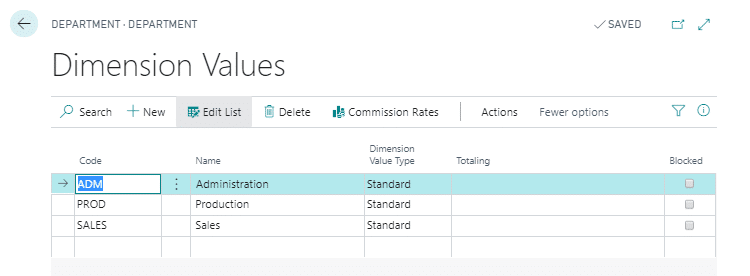
Once the dimensions are defined, the values that make up the dimension are assigned. The Dimension Values for the Department dimension are shown below.
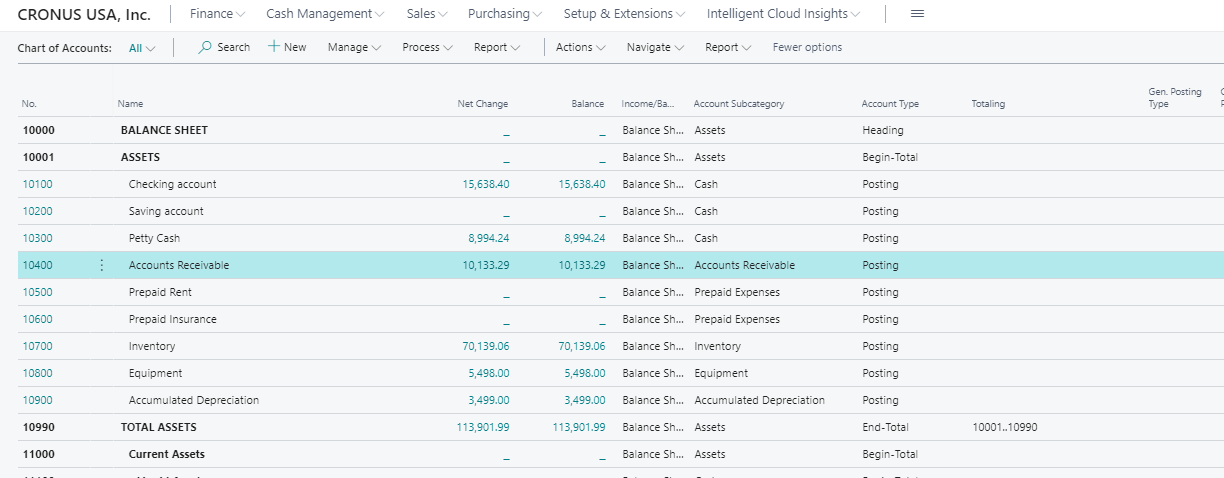
The main/natural account is separate from the dimensions – companies can set this as small as 1 character to up to 20 characters. The screenshot below shows a glimpse of the chart of accounts. The chart of accounts will be covered in another blog.
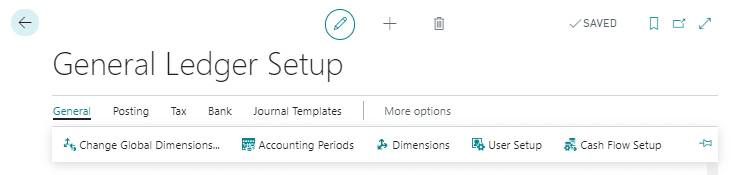
Ribbon selections – these are the options across the top of the page. Under the General option, we can choose to change the Global Dimensions, look at Accounting Periods (GP’ Fiscal periods), Dimensions, as shown above, User Setup, and Cash Flow Setup.
Like GP, BC offers multiple ways to get to the same place – it’s all about what works for each user.
From the ribbons, BC has placed functionality that was in the Administrative section of GP in the setup windows. BC does have and administrative area, but that is more specific to Admin tasks like Extension and Import information, Users, Workflows, and services type activities.
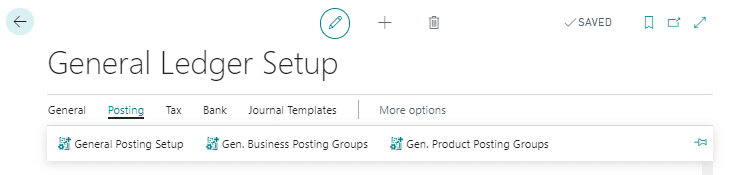
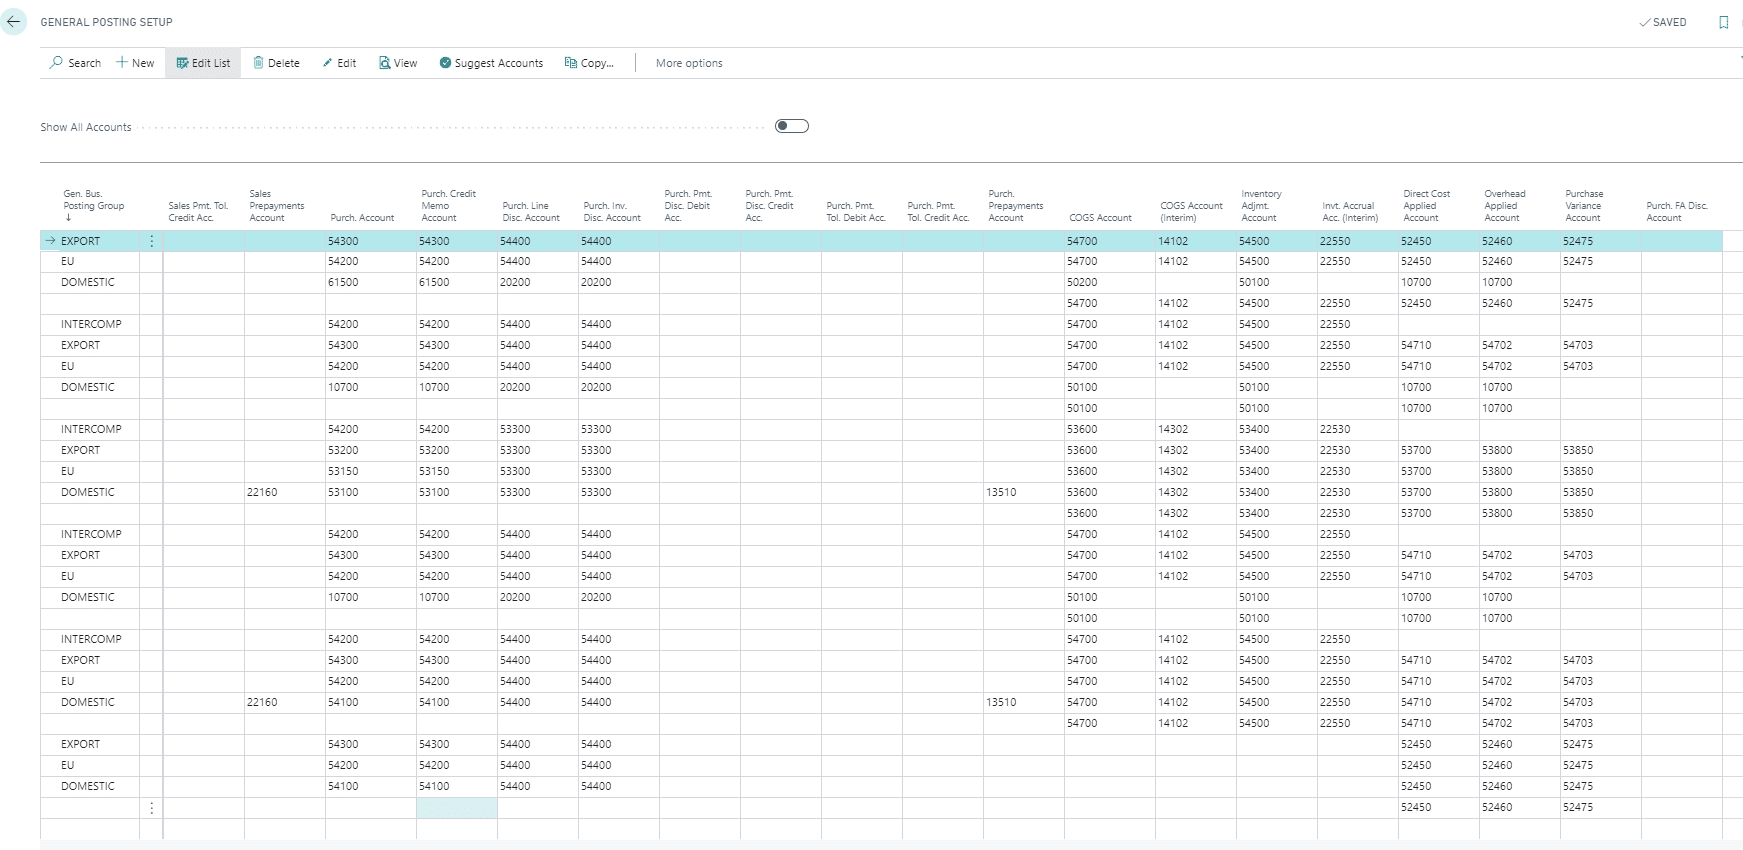
Under the Posting ribbon, users can see the General Posting setup, General Business Posting Groups, and General Product Posting groups. This is where the majority of posting to the general ledger is driven.
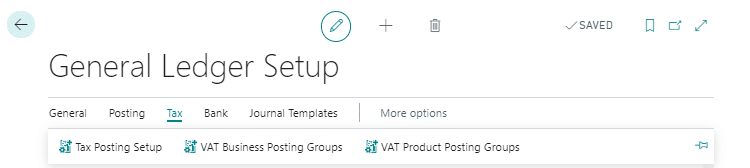
Under the Tax option on the ribbon, users can go into Tax Posting Setup, VAT Business Posting Groups, and VAT Product Posting Groups.
Under the Bank option on the ribbon, users can go to Bank Export/Import Setup and Bank Account Posting Groups.

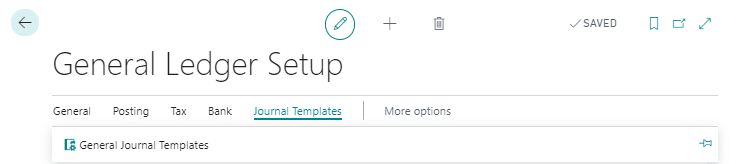
Under the Journal Templates, users can access the General Journal Templates. This is where all of the journals are setup.
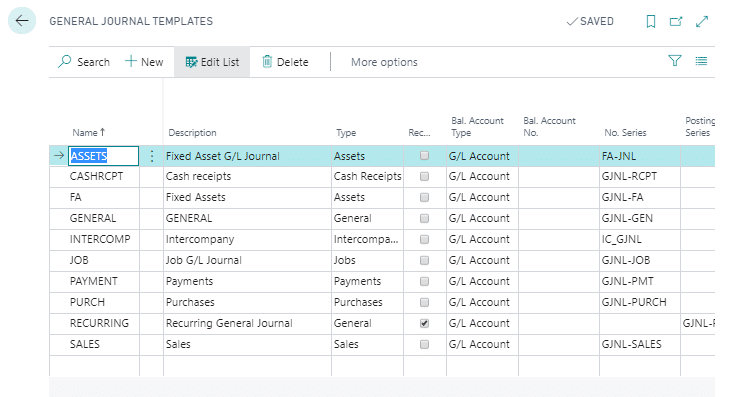
In BC, all transactions that will affect the general ledger are defined in the General Journal Templates. These include journals for Purchasing, Sales, and Fixed Assets.
Examples of the General Journal Templates are shown below.
From the General Ledger Setup ribbon, click on the More options button to see two additional selections – Actions and Navigate.
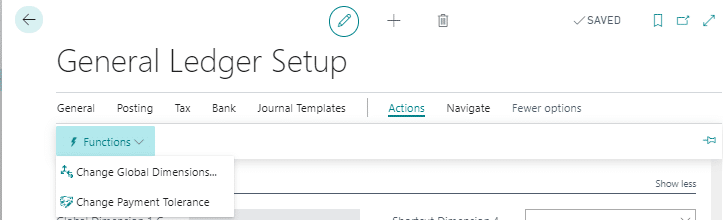
First is the Actions button – click on Functions to see the related functions to the General Ledger setup including Change Global Dimensions and Change Payment Tolerance.
The second is the Navigate button – this is another way to access the options discussed earlier. Again, there are multiple ways to navigate to action – there is no right or wrong way, it’s up to the user.

The next section is the posting setups.
Posting setups allow users to define the debit and credit accounts affected by transactions entered in BC. This is like defining the accounts on the Customer, Vendor, Item, and Employee cards and classes in GP. Also in GP, you have the Posting Accounts setup in the Administration > Setup > Posting area where you can define the default accounts that will be used if the master records do not have accounts defined.
In BC you still can manually enter accounts for transactions, just like in GP.
There are multiple parts to the posting setups. First, the General Product Posting Setup. This is where users set up customers and vendors to specify who you sell to, and who you buy from – you can group customers and vendors by geographical area, or by the type of business.
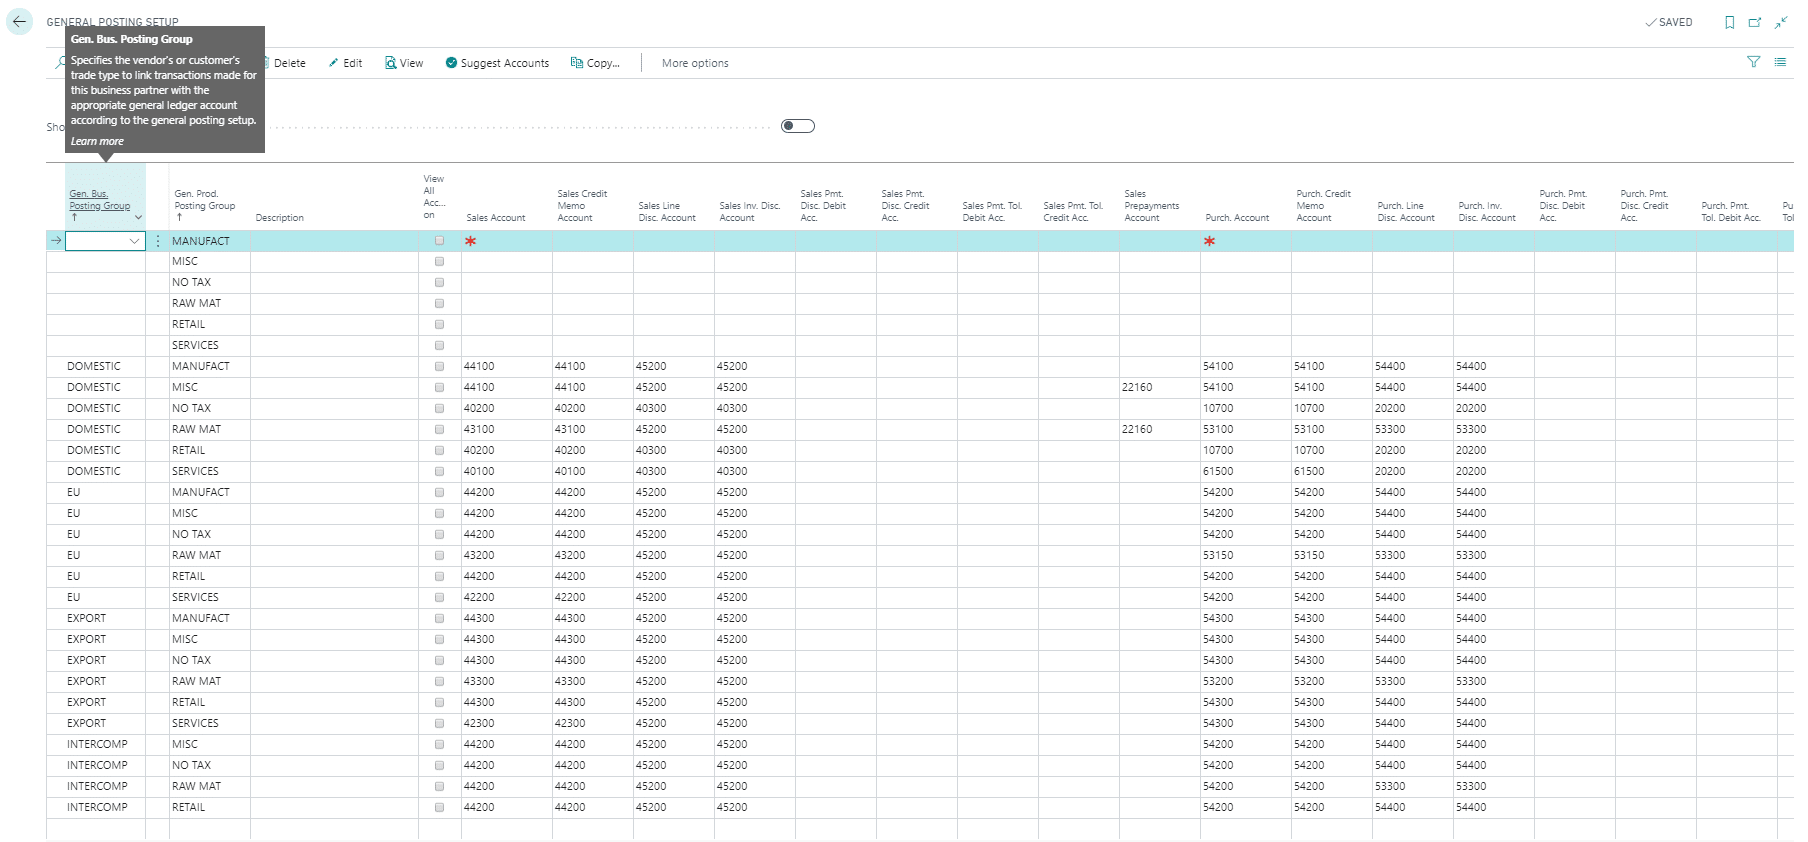
Next is to set up the General Product Posting Groups. You can assign items and resources to specify what you sell, and what you buy. When you do, consider the number of groups you will need to break down sales by product (items and resources) and purchases by items.
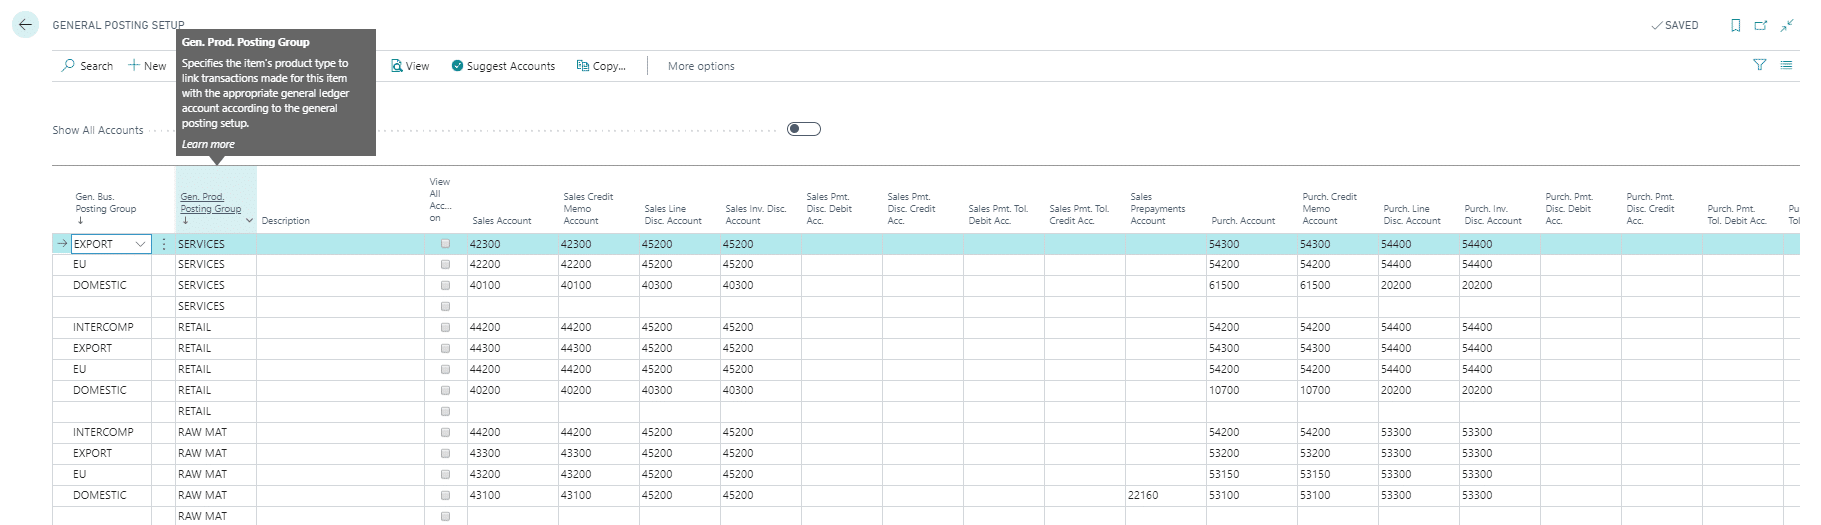
The last step to put this all together is to setup the General Posting Setup. For each combination of business and product posting groups, you can assign a set of general ledger accounts.
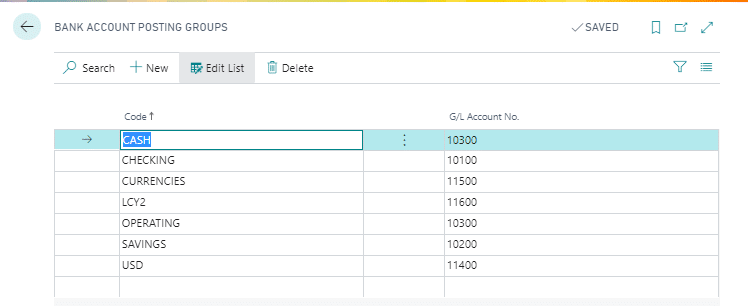
There are additional account setups that are needed for Bank Account Posting Groups. In GP, we would assign the Cash account to the checkbook in Checkbook Maintenance. The BC Bank Account Posting Groups window is shown below.
There is a lot of information held in the General Ledger Setup of Dynamics BC – it pulled all the General Ledger information into one area when comparing BC to GP. If you have any questions, please reach out.

Under the terms of this license, you are authorized to share and redistribute the content across various mediums, subject to adherence to the specified conditions: you must provide proper attribution to Stoneridge as the original creator in a manner that does not imply their endorsement of your use, the material is to be utilized solely for non-commercial purposes, and alterations, modifications, or derivative works based on the original material are strictly prohibited.
Responsibility rests with the licensee to ensure that their use of the material does not violate any other rights.