


How to Attach DocuRef Images into Dynamics 365 Finance and Operations SSRS Reports
Need to attach images from DocuRef into SSRS Report, but unsure how? Well, we have two options to offer today! Thumbnails, or full-size images.
1) Add the image to the related DocuRef
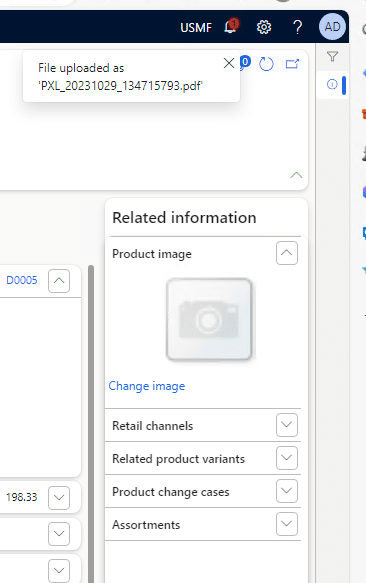
I would advise against PDF or other non-image types. This might be strange to hear, but it has confused some users. Here’s an example using a PDF image of my precious little kitty Peeta as a product image (not a very profitable product as he has a fancy palate.)
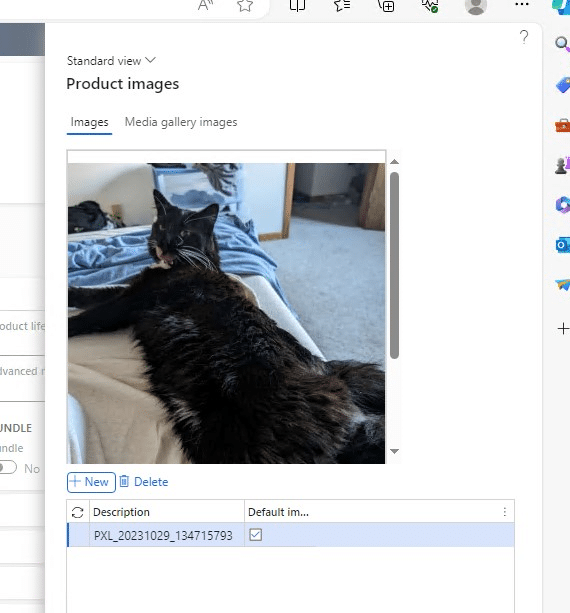
Looks like it works, but if you go back to the Product Image factbox, the image won’t appear.
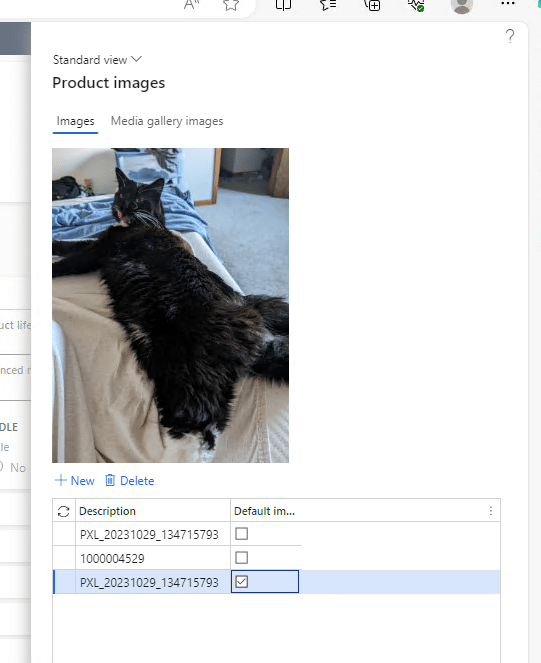
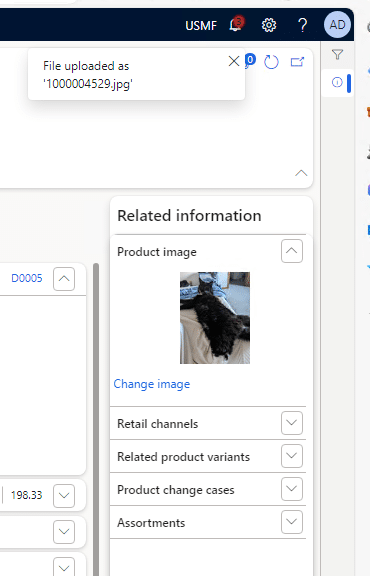
But if you upload a normal image, in this case a jpeg, it appears on both the product image and the Factbox which means we can easily pull it into the report.
Now that we have an image, let’s put it into an SSRS Report!
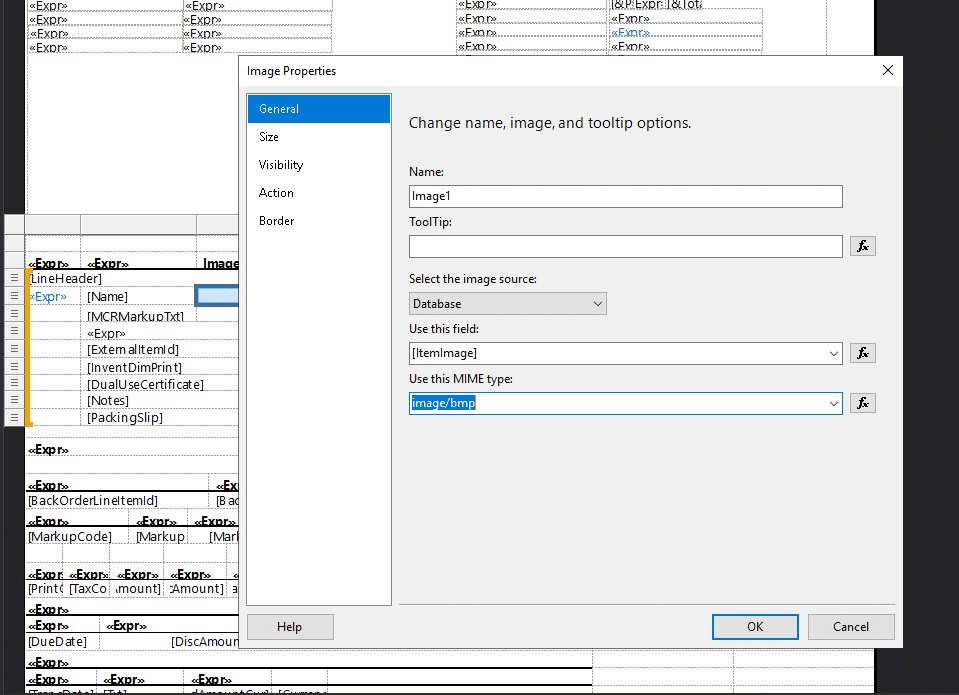
2) On your temporary table, add a new field of type “Container” with the EDT set as “Bitmap.”

3) On the Report, add a new Image element tied to the new field. We’re setting it to “Database” image source because the DP class will handle the image into the report temporary table.
For virtually all purposes, setting the MIME as “image/bmp” will work, but it is something you can play around with depending on the source images.
4) Extend/Create the DP Class
final class SalesInvoiceDP_Peeta_Extension
{
    protected void populateSalesInvoiceTmp(CustInvoiceJour _custInvoiceJour,
        CustInvoiceTrans _custInvoiceTrans,
        TaxSpec _taxSpec,
        CustPaymSchedLine _custPaymSchedLine,
        CustTrans _prepaymentCustTrans,
        TaxTrans _prepaymentTaxTrans)
    {
        next populateSalesInvoiceTmp(_custInvoiceJour, _custInvoiceTrans,_taxSpec,
            _custPaymSchedLine, _prepaymentCustTrans, _prepaymentTaxTrans);

        InventTable inventTable;
        inventTable = InventTable::find(salesInvoiceTmp.ItemId);
        Bitmap ItemImage;
        DocuRef docuRef;
        EcoResProductImage ecoResProductImage;

        select firstonly docuRef
            where docuRef.RefRecId == inventTable.RecId
            && docuRef.RefTableId == inventTable.TableId
     // Pulling from Product Image. Change as necessary
            join ecoResProductImage
            where ecoResProductImage.RefRecId == docuRef.RecId
            && ecoResProductImage.DefaultImage == NoYes::Yes;
        if(docuRef)
        {
            try
            {
                // Using Full Image Resolution
                // "using" here ensures resources held by this stream are automagically released.
                using(System.IO.Stream sourceStream = DocumentManagement::getAttachmentStream(docuRef))
                {
                    // Use the img variable below to debug if it is working or not
                    // in case you have attachment issues.
                    //System.Drawing.Image img = System.Drawing.Image::FromStream(sourceStream);
                    using(System.IO.MemoryStream memoryStream = new System.IO.MemoryStream())
                    {
                        sourceStream.CopyTo(memoryStream);
                        Binary binaryData = Binary::constructFromMemoryStream(memoryStream);
                        container binData = binaryData.getContainer();
                        salesInvoiceTmp.ItemImage = binData;
                    }
                }
            }
            catch(Exception::CLRError)
            {
                // Using DB Thumbnail as a fallback. Or you can use it directly as well.
                salesInvoiceTmp.ItemImage = ecoResProductImage.MediumSize;
                warning("Unable to add image to Pick List.");
            }
            catch
            {
                // Using DB Thumbnail as a fallback. Or you can use it directly as well.
                salesInvoiceTmp.ItemImage = ecoResProductImage.MediumSize;
                warning("Unable to add image to Pick List.");
            }
        }
    }
}
5) Make sure to change your print management setup settings.
// Making SalesInvoicePeeta available on Print Management Settings
classPrintMgmtDocTypePeeta_HandlersExt
{
 [SubscribesTo(classstr(PrintMgmtDocType),delegatestr(PrintMgmtDocType, getDefaultReportFormatDelegate))]
publicstaticvoidgetDefaultReportFormatDelegate(PrintMgmtDocumentType_docType,EventHandlerResult_result)
 {
switch(_docType)
 {
casePrintMgmtDocumentType::SalesOrderInvoice:
 _result.result(ssrsReportStr(SalesInvoicePeeta, Report));
break;
 }
 }
}
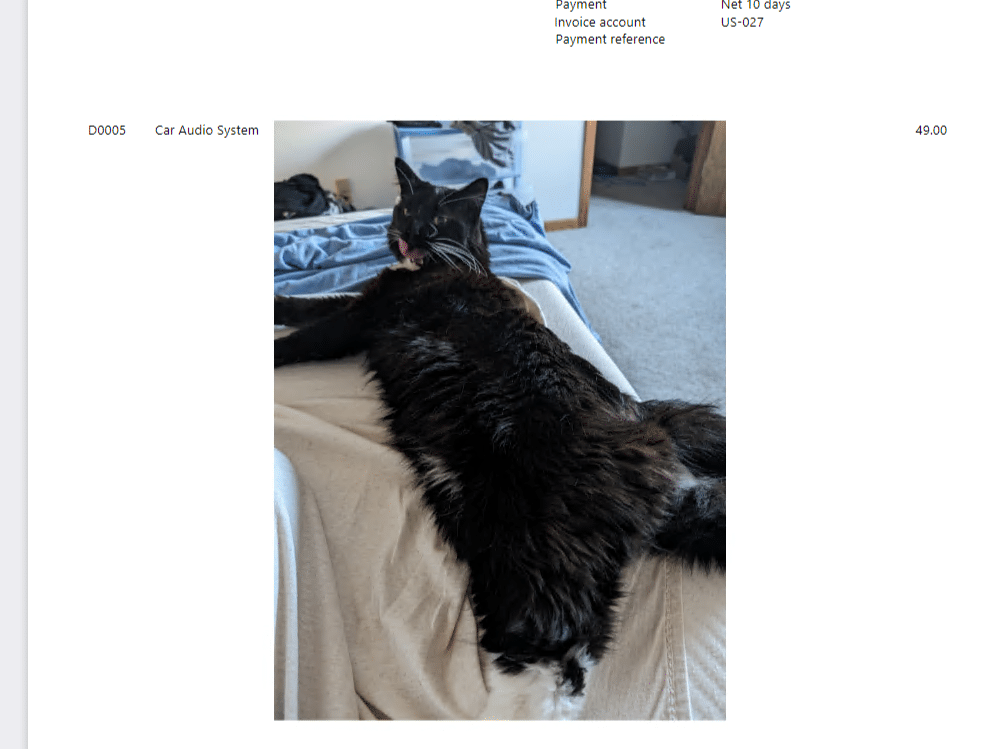
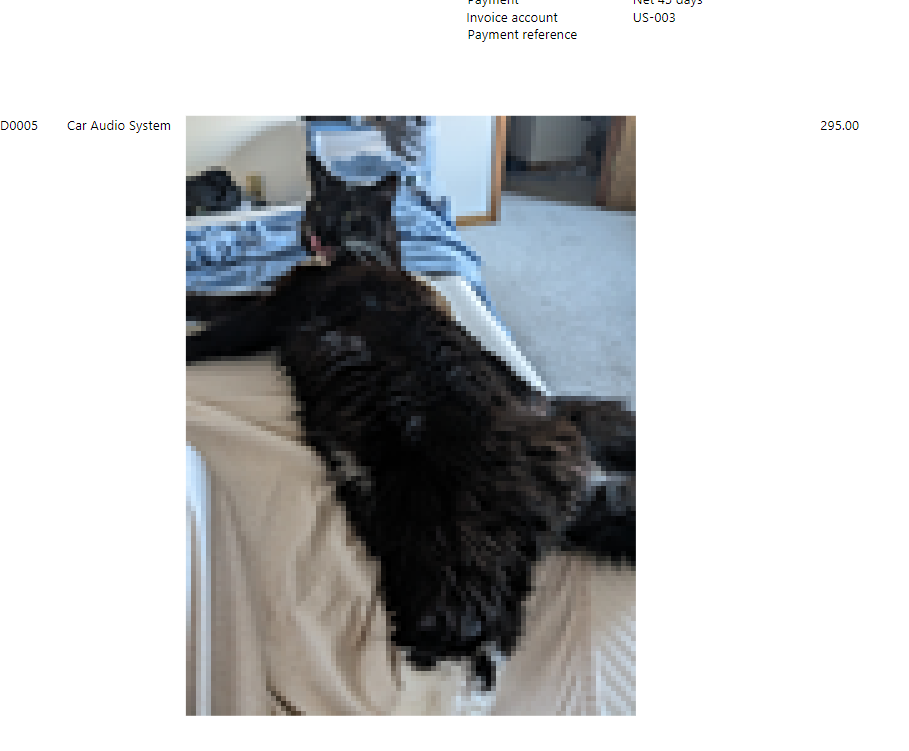
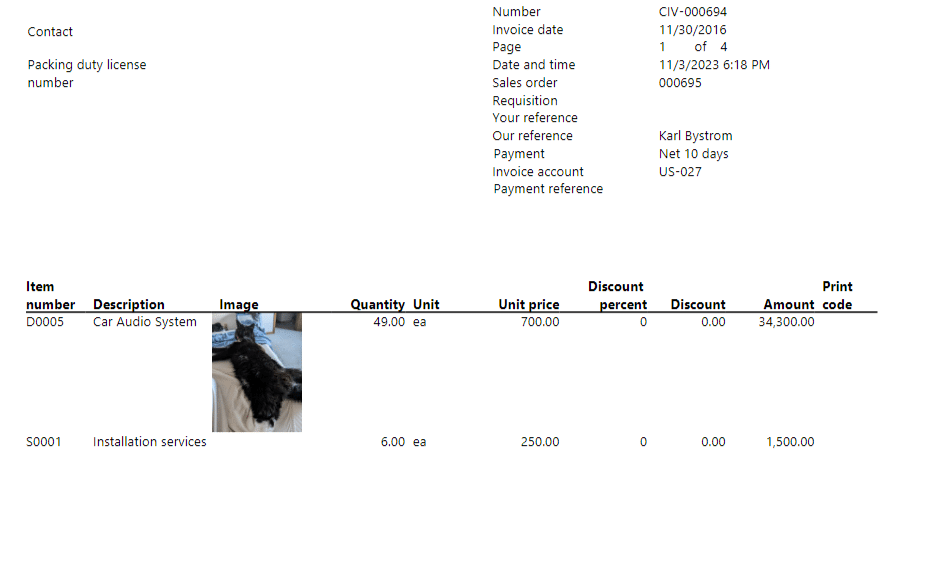
6) See the report in action! I Enlarged the image to 5in Width & Height to show the difference in quality:
Using Full Scale image:
Using DB Thumbnail (ecoResProductImage.MediumSize):
And here’s re-using the DB Thumbnail, but setting image size to 1in Width & Height:
Have an issue? Get in touch! We’re here to help you!

Under the terms of this license, you are authorized to share and redistribute the content across various mediums, subject to adherence to the specified conditions: you must provide proper attribution to Stoneridge as the original creator in a manner that does not imply their endorsement of your use, the material is to be utilized solely for non-commercial purposes, and alterations, modifications, or derivative works based on the original material are strictly prohibited.
Responsibility rests with the licensee to ensure that their use of the material does not violate any other rights.