


How to Convert an Opportunity into a Quote in Dynamics 365 Sales
Creating quotes in Dynamics 365 Sales doesn’t have to be complicated. When done right, it’s a smooth, efficient process that keeps your sales pipeline moving.
In this blog, we’ll walk through the steps to turn an opportunity into a quote, from adding products and adjusting discounts to finalizing details and sending it out. You’ll also learn how to revise quotes without losing track of previous versions and how tools like Copilot in Dynamics 365 Sales and templates can speed things up. Whether you haven't worked with quotes before or want to refine your process, this guide will help you work smarter, not harder.
With our opportunity set up and in the “Develop” stage, the first step is adding the right products to match our customers’ needs and ensuring they reflect everything they requested.
Adding Products to the Opportunity
To start, navigate to the “Products” tab within the Opportunity form. Here, you’ll see a price list selected, and below that is where you’ll add products. When you click “+ Add Products” it opens the product catalog, allowing you to browse by category. In this screenshot below, we’re setting up an office for Alpine Ski House, so we’ll select and add the products they have requested.
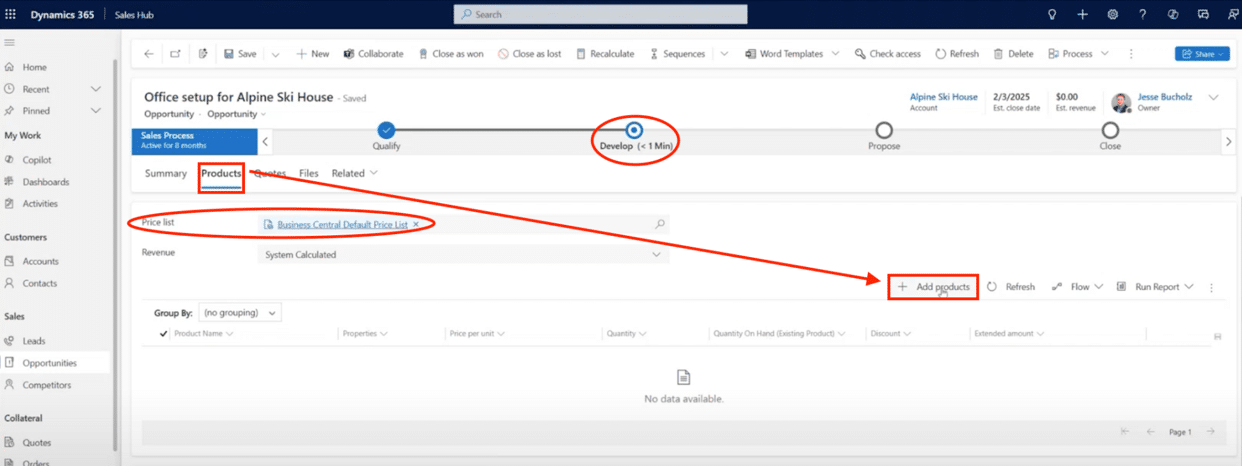

If a specific product isn’t in the catalog, you can use the Write-In feature to manually add an item. For instance, if we charge a $500 setup fee for assembling the desks, we can enter that as a custom line item.

Once all products have been added, saving the Opportunity will update the Products section with detailed line items. From here, we can apply discounts to adjust pricing. There are two options:
- Percentage Discount: A blanket discount is applied to the total amount.
- Fixed Discount: A set amount deducted from the total.
Additionally, we can factor freight costs directly within the Opportunity, ensuring that shipping expenses are accounted for in the final quote. If you use an ERP system to create the Order, you’ll likely capture or generate taxes there.
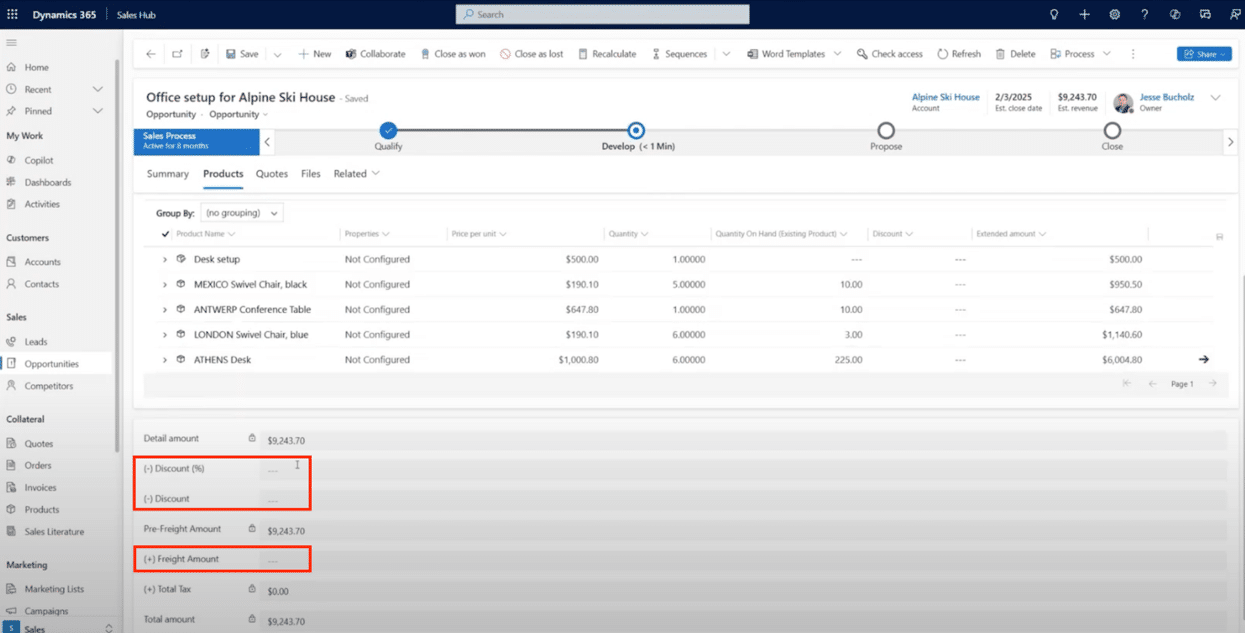
By adjusting these details now, we set up a smooth transition into the quoting process.
Creating a Quote from the Opportunity
With the Opportunity set up and all product details finalized, the next step is to generate a quote. D365 Sales makes this transition seamless by carrying over key details from the Opportunity, ensuring consistency and accuracy.
To create a quote, navigate to the “Quotes” tab within the opportunity and select “+ New Quote.” This action automatically gathers the summary and product details, generating a new quote based on the existing opportunity. The system assigns a name like the opportunity, which appears on the right side, along with the referenced customer information. All previously added products are displayed in the center of the screen, keeping everything organized and ready for further adjustments.
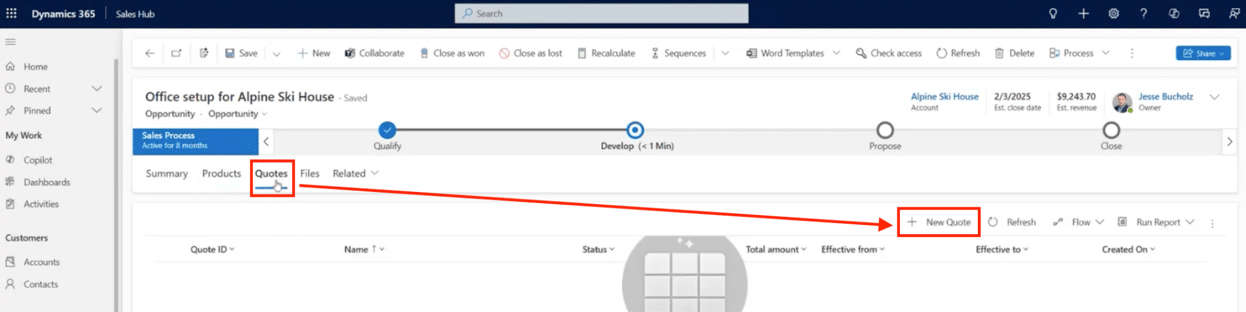

At this stage, the foundation of the quote is in place, and we can now move on to refining the details before sending it to the customer.
Updating Shipping and Billing Information
With the quote created, the next step is to ensure the shipping and billing details are accurate. D365 Sales provides flexibility in managing these details, allowing you to update addresses as needed.
If the customer has multiple shipping or billing addresses on file, you can select the correct one directly within the quote. Navigate to the shipping and billing section, where you can manually enter new details or look up existing addresses associated with the account.This makes it easy to map the correct “Ship To” and “Bill To” addresses, ensuring that all order details align with the customer’s preferences.
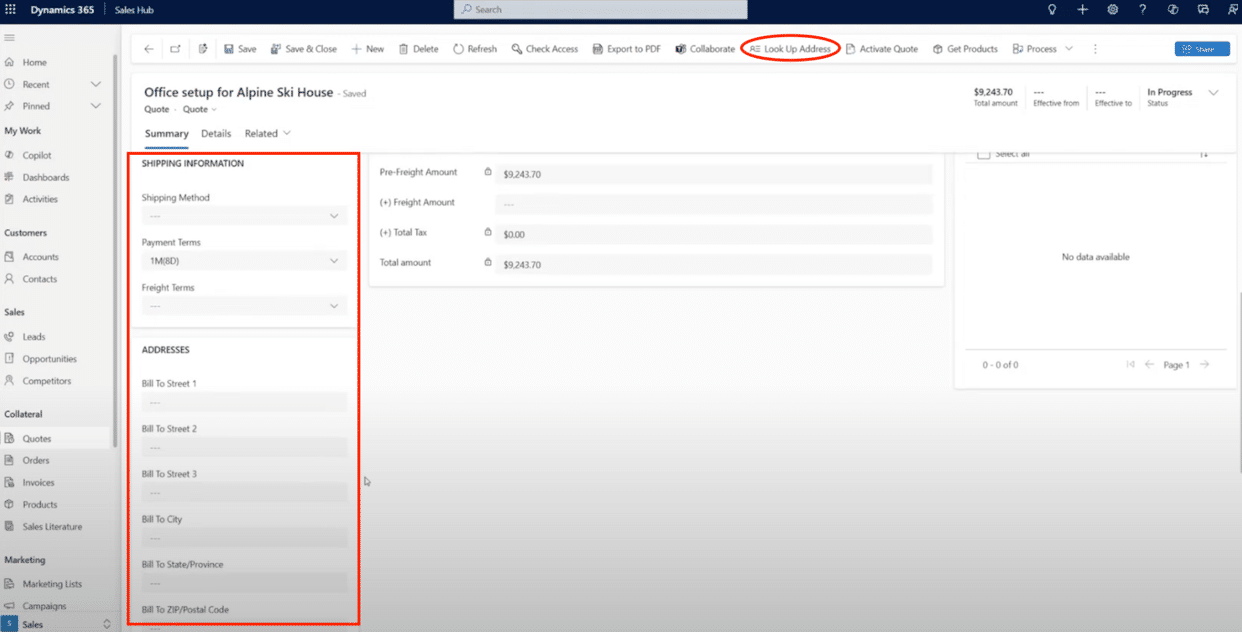

By confirming these details now, you can avoid delays and ensure a smooth order fulfillment process once the quote is finalized.
Distributing the Quote
Once the quote is finalized, the next step is to share it with the customer or a manager for approval. D365 Sales offers three convenient ways to distribute a quote, ensuring flexibility based on your workflow and system integrations.
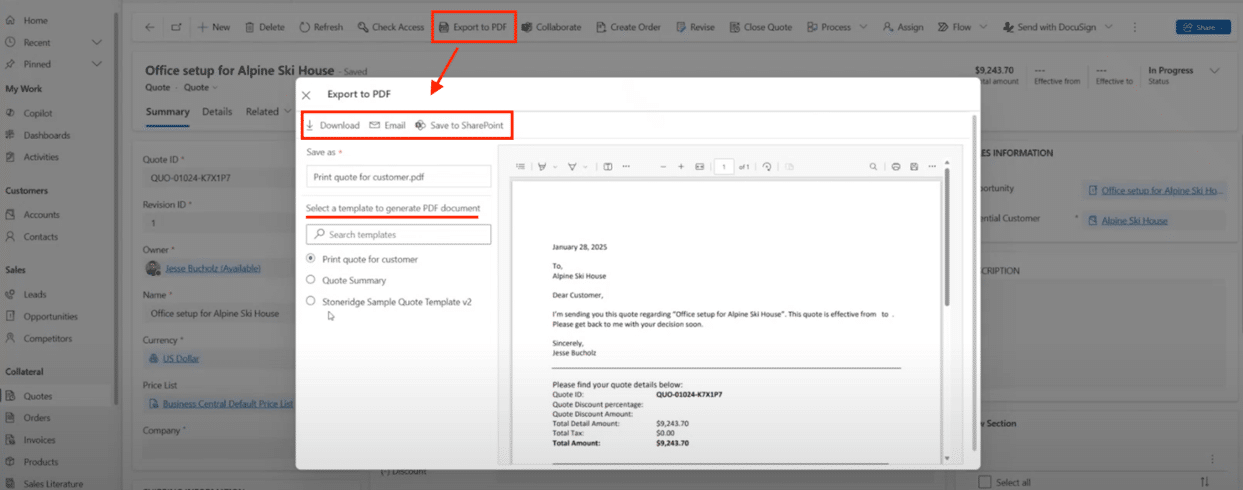
1. Export as a PDF
The most straightforward option is to export the quote as a PDF. Clicking “Export to PDF” generates a downloadable file you can save to your desktop. This allows you to print the quote, attach it to an email, or store it in another system as needed.
2. Send via Email
If your email integration is set up, you can send the quote directly from D365 without switching to Outlook. Selecting “Email” opens a message within the system, automatically populating the “From: " and “To” fields and attaching the quote as a PDF. You can further customize the email by:
- Using a company-approved email template to maintain consistency.
- Leveraging Copilot to generate or refine the message before sending.
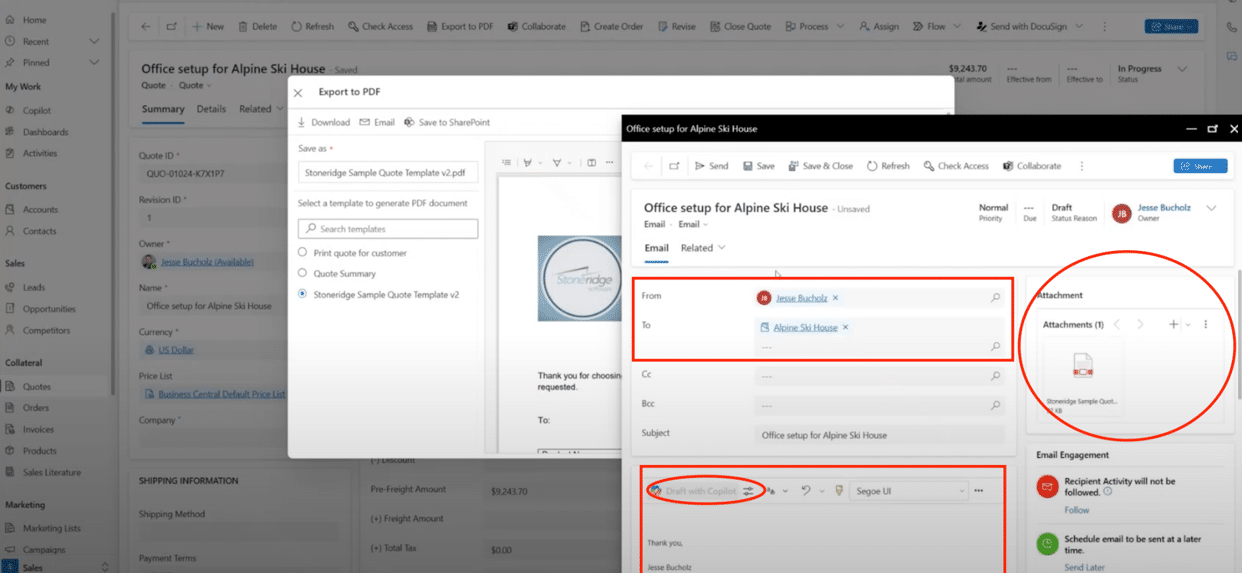
Once sent, the email is logged in the “Timeline”, keeping a record of the communication.
3. Save to SharePoint
For teams using SharePoint, quotes can be saved directly to a designated folder within the system. This ensures centralized storage, easy access for collaboration, and seamless integration with other business processes.
These three distribution methods in D365 Sales streamline the process of sharing quotes, ensuring that you can easily manage and track them at every stage of the sales cycle.
Managing Quote Revisions
Once you send a quote to the customer, there is still a chance you might need to make changes. These changes could include adding more products, adjusting pricing, or negotiating a discount. Instead of overwriting the original quote, D365 Sales allows you to create revisions, ensuring a clear record of all changes.
Each quote starts with Revision 0 which represents the initial version. If the customer requests updates, select “Revise”, which generates a new version—Revision 1—where you can make necessary modifications before activating it again. The system keeps both versions saved, so you can always refer to the original quote for comparison.

This revision history helps maintain transparency and gives you a clear record of all updates. This makes it easy to track changes throughout the sales process.
Viewing and Accessing Quotes
To keep track of your quotes, return to the Opportunity and navigate to the Quotes section. Here, you’ll find both the original quote and any revised versions. By selecting the link for each quote, you can easily open and review the details of either version, ensuring you have quick access to all relevant information.

Converting an Opportunity into a quote in D365 Sales is an efficient process that helps streamline your sales workflow, from adding products to managing revisions. By following the steps outlined in this blog, you can ensure that your quotes are accurate, professional, and easy to distribute. With the tools available in D365, you can quickly create, update, and track quotes, making your sales process more organized and responsive.
Talk to Stoneridge Today to Learn More About Dynamics 365 Sales
If you want to dive deeper into D365 Sales or need assistance tailoring it to your business needs, contact the experts at Stoneridge Software. Our team can provide additional resources, training, and support to help you get the most out of your D365 solutions.

Under the terms of this license, you are authorized to share and redistribute the content across various mediums, subject to adherence to the specified conditions: you must provide proper attribution to Stoneridge as the original creator in a manner that does not imply their endorsement of your use, the material is to be utilized solely for non-commercial purposes, and alterations, modifications, or derivative works based on the original material are strictly prohibited.
Responsibility rests with the licensee to ensure that their use of the material does not violate any other rights.