


How to Create a Location Blocking Conditional Access Policy
The Role of Conditional Access
When it comes to securing your organization’s data, every layer counts. Conditional Access policies give you the flexibility to control who gets in and under what circumstances. Think of it as setting smart guardrails—policies kick in after the first authentication factor and can be based on signals like user risk, device type, location, and more. It’s a cornerstone of the Zero Trust model, and for good reason.
Why Configure a Location Blocking Policy?
The location blocking policy has several benefits and can be configured with many different licenses, including Microsoft 365 Business Premium (comes with Microsoft Entra ID Premium P1). Some of these benefits include:
- Reducing exposure to high-risk regions
- Enforcing geographic access boundaries
- Preventing credential abuse
- Supporting compliance requirements
- Enhancing zero-trust strategy
Blocking all locations outside of where your organization operates is a part of the layered approach to a zero-trust security strategy and is often mandatory in certain industries with regulatory requirements to be compliant.
Steps to Configure a Location Blocking Policy
First, make sure your tenant has the proper licensing, and your administrator has the correct role to create the policy.
1. Create a 'Named Location'.
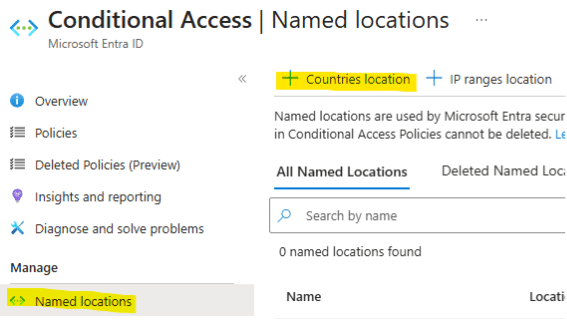
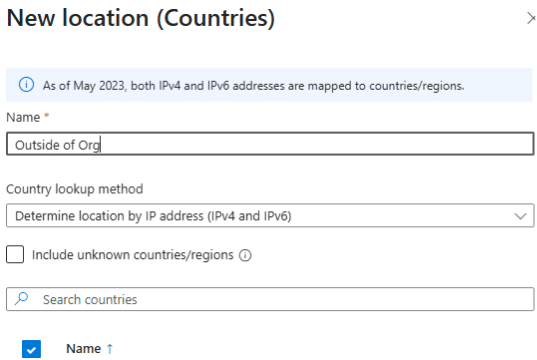
2. Appropriately name the location
If applicable, select all locations outside of organizational operations.
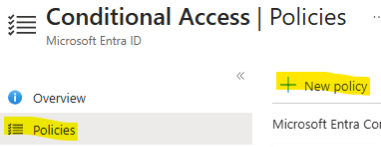
3. Create a ‘New policy’ in the ‘Policies’ section.
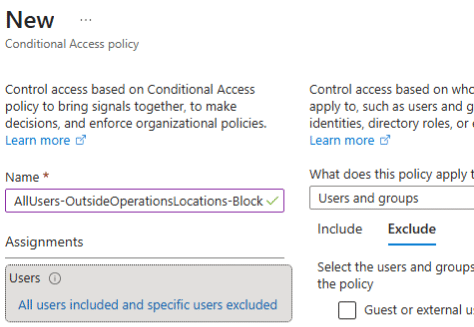
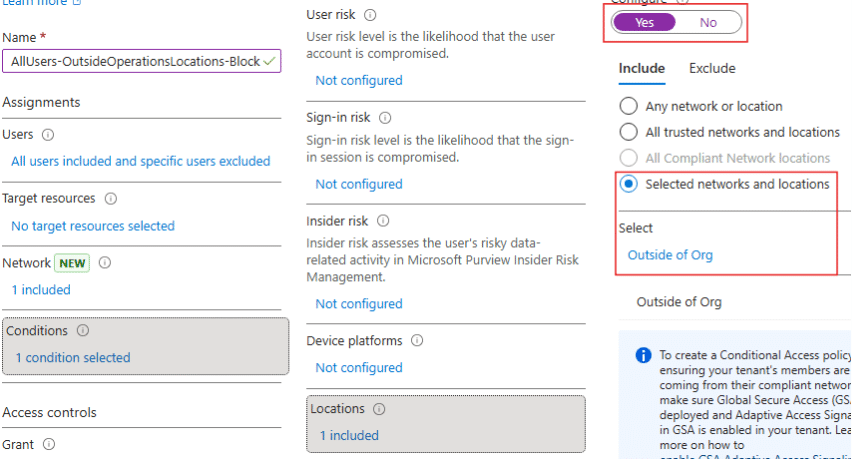
4. Give the policy an appropriate name
Include the users you want to include, and be sure to exclude a Break Glass Account—an emergency Global Administrator account reserved for critical situations when normal admin access isn’t available. For more details, check out Microsoft's guidance on emergency access accounts.
5. Configure the Conditions > Locations
Include the ‘selected networks and locations’ of the named location you created.
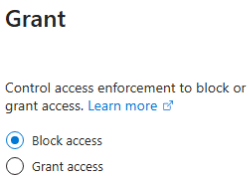
6. Under 'Grant', select 'Block Access'.
Tip: Always set conditional access policies to ‘Report-only’ and apply them to a small set of users until expected behavior is verified.
Ready to make your environment more secure?
Every tenant and user base is different. The Stoneridge team can help:
- Configure a custom conditional access strategy to enhance security across your organization
- Assist with licensing assessment and procurement
Security doesn’t have to feel overwhelming. Our team is here to answer questions, talk through your goals, and guide you through the next steps. Reach out to start the conversation.

Under the terms of this license, you are authorized to share and redistribute the content across various mediums, subject to adherence to the specified conditions: you must provide proper attribution to Stoneridge as the original creator in a manner that does not imply their endorsement of your use, the material is to be utilized solely for non-commercial purposes, and alterations, modifications, or derivative works based on the original material are strictly prohibited.
Responsibility rests with the licensee to ensure that their use of the material does not violate any other rights.