


How to Set Up Advanced Warehousing in Business Central in 10 Easy Steps
While sorting the thousands of BINs in your warehouse is complex, you can simplify this process with the advanced warehousing feature in Dynamics 365 Business Central.
Think about it this way: your warehouse is a box, and inside of that box you will put other boxes. Then, those boxes might have even more boxes, and so on. If that seems complicated, that's because it is. Luckily though, Business Central doesn't care how many boxes you have, it just needs to know what a particular box is and what goes in it.
Before you stress too much about how complex your warehouse is and the daunting task of setting it up in Business Central, keep reading this blog to learn how to make it easy.
I recommend that organizations start with a basic warehouse design because they can always expand it once they get more comfortable with advanced warehousing in Business Central. Building a solid foundation will help your business understand the limitations and requirements it might have to deal with while using this feature.
Bruce Lee once said, "I fear not the man who has practiced 10,000 kicks once, but I fear the man who has practiced one kick 10,000 times." That sentiment applies here, as it's important to master the fundamentals before adding more bells and whistles.
10 Steps to Optimize Advanced Warehousing in Business Central
Here are the key things you can do to use this feature effectively and ensure it meets your business's unique needs.
1. Access Business Central
Log in to your Microsoft Dynamics Business Central account.
2. Navigate to Warehouse Setup
Go to the Warehouse Setup page by searching for "Warehouse Setup" in the search bar.
Confirm that you have numbering for each type of warehouse transaction, including the blank ones. These will be the numbering series that will automatically populate the related transaction. For example, Whse. Receipt Nos. is set to WMS-RCPT. The expectation here is that the first Warehouse Receipt document created will include the no series schema declared on the related page "No. Series."
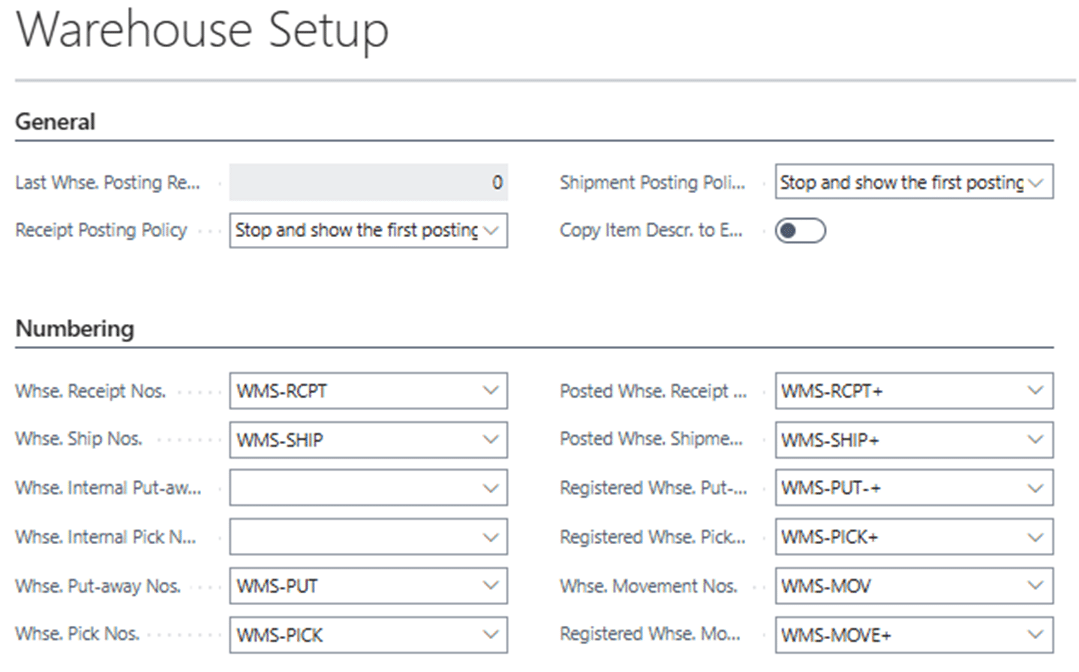
To make adjustments to these no. series, select the appropriate drop-down menu, and select "Show Details" or "See Full List".
3. Create a New Location
Search "Locations" and open the administrative page then follow these steps:
- Click on New to create a new warehouse location

- Fill in the necessary details such as Location Code, Name, and Address.
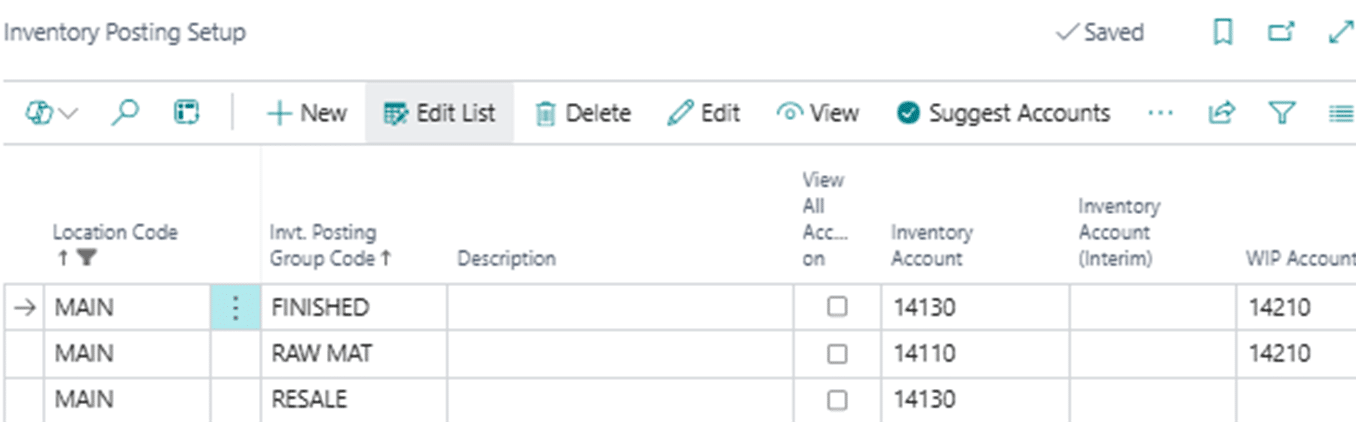
- Select "Inventory Posting Setup" and define the GL accounts that should be used for each column. If you're unsure what these should be, consult your accounting team for details. Or if you're in Cronus, steal from the other ones! It's all the same inventory moving from box to box, this shouldn't change much.


Here is an example:
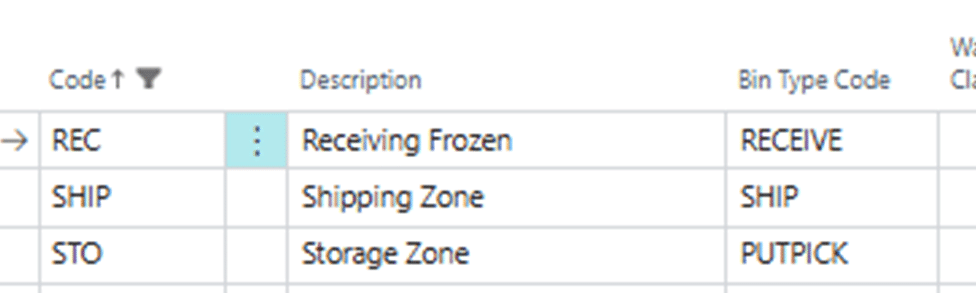
4. Create BIN Type Codes
With an Advanced Warehouse, the system requires logic behind how each holding location operates. BIN Types help the system understand what a zone is used for and how to drive where material is being transferred to and from or if it's being received or shipped.
- Search for "BIN Types"
- Select "+New" and Enter the code "REC". Repeat these steps for "SHIP" and "STORAGE"
- Enable the "PUT AWAY" and "PICK" Boolean for the STORAGE type. Then, enable REC and SHIP respectively.
This simple setup tells the system "I have 3 zones, One where I store my inventory, one to receive, and one to ship." When Inventory is received, the system will automatically designate the receiving zone and bin. Likewise for sales orders that use the shipping zone. Upon posting the receipt of goods, the put-away document will direct material to be "PUT AWAY" to storage and "PICKED" when needed for an order. We'll talk more about these later.
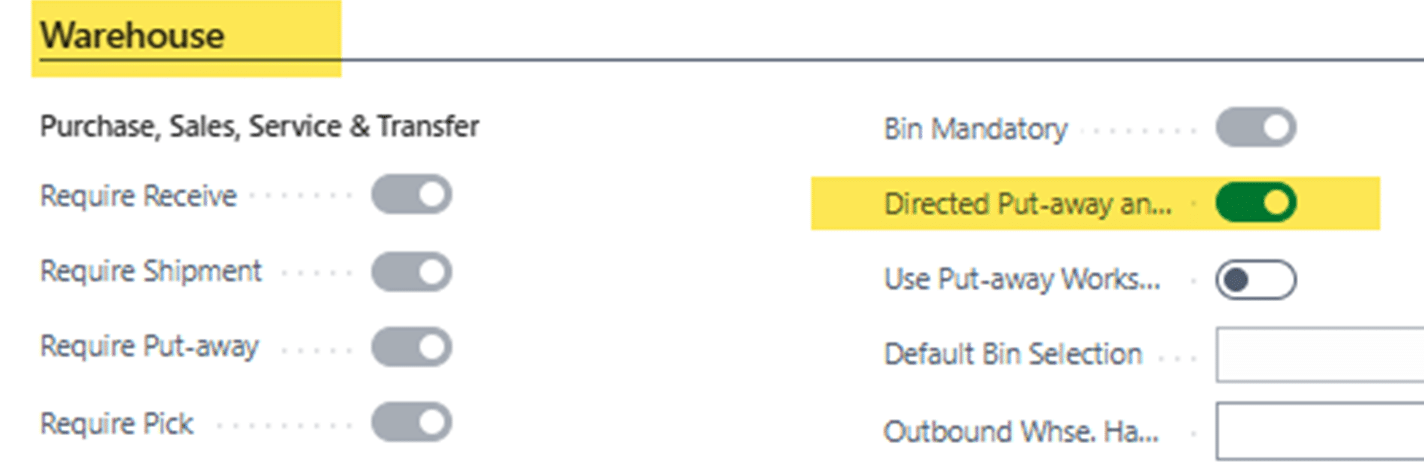
5. Go back to the location card and Enable "Directed Put-Away and Pick" under the Warehouse section
Important note once an Item Ledger Entry is posted in this location, you will no longer be able to disable this setting. Also, you should expect the toggle "BIN Mandatory" to enable it as well. Don't worry, it's a requirement.
- Directed put-away and pick forces the system to require warehouse documents to complete transactions in this location. All processes that include this location will now require supportive documentation to move, consume, transfer, and adjust material within it. This is an excellent feature in mid-larger organizations that require more detailed tracking and more dedicated roles. Such as a Shipping Team vs Receiving Team, vs Procurement Team. For smaller organizations that require more agility, this feature is not recommended.

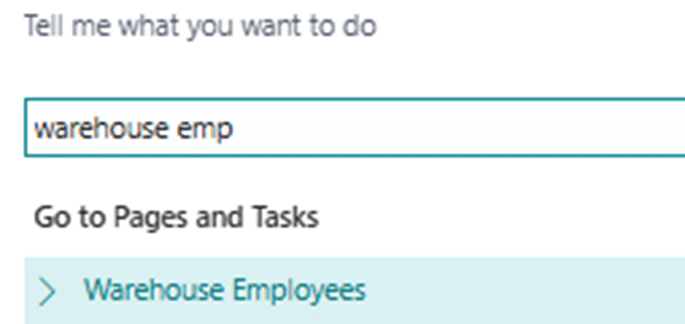
- Next, identify your warehouse employee by going to the "Warehouse Employee" table.

6. Define your Zones
Zones can consist of one or more bins and help organize the warehouse efficiently. When starting out, start small. This is where the "box" metaphor comes back. You can always change the name of a zone later. If you're not sure what zones you have or how many. Here is a quick 3 zone setup to get you started.
- Select "Zones" on the location card
- Select "+New"
- Create Zone "REC" and repeat the steps for "SHIP" and "STORAGE" zones.
You now have a zone where you expect to receive goods, ship goods, and store goods.
7. Next, configure Bins.
Boxes within boxes or shelves if you prefer that terminology, your widgets will be live here until they are inevitably used or sold. Usually, most people already have these already but, let's focus on "simple." We will make it easy by creating 1 bin in each zone.
- From the Zone page
- Add the corresponding BIN TYPE to the field "BIN TYPE"

- Next, select the row "REC"
- Select "Bins" from the menu.
- Select "+New" and Label the bin "REC".
- Repeat the steps for "SHIP" and "STORAGE" zones.
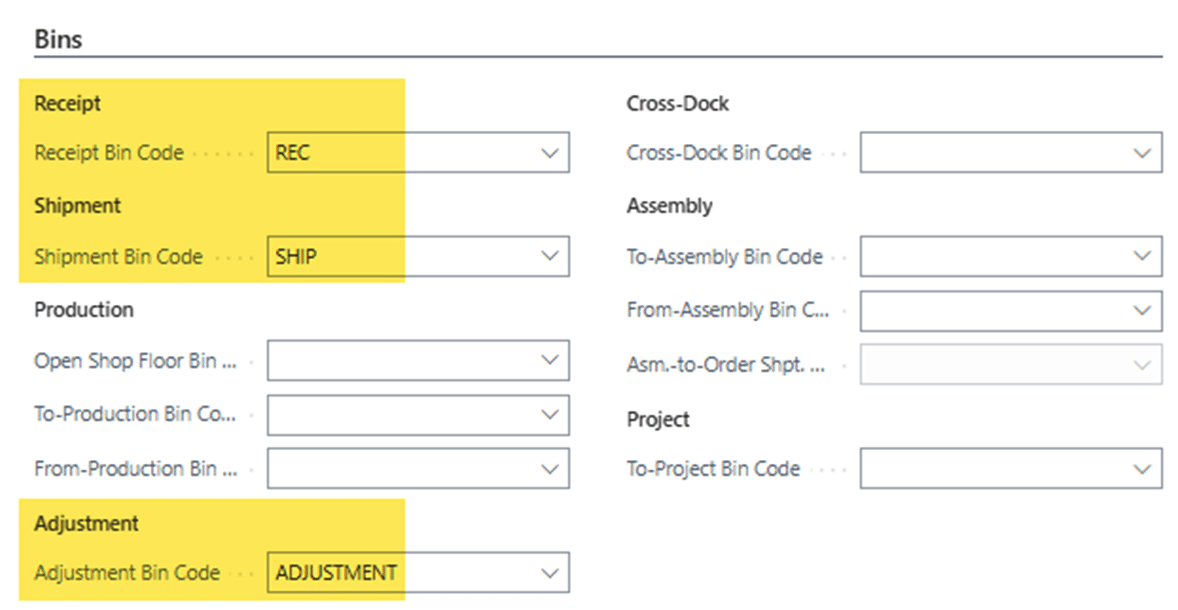
- Finally, let's set up an "ADJUSTMENT" bin within the "STORAGE" zone, this bin will be used for preparing the system to make adjustments such as physical inventory counts and item journal adjustments.
- Once that's complete, navigate back to the location card and set the following BINS to their designated roles within the BIN fasttab. Don't worry about the blank fields, those are for a different training.

8. Add Your Inventory
There are many ways to bring inventory into the system. The preferred method would be to use a warehouse item journal. You can Transfer them in from a different location, Purchase them in the new location, or even use a physical inventory count.
That said, the next steps "1" through "8" in this section don't really count towards "Setting up an Advanced Warehouse", but what's the point if you can't test right? So here are the steps anyway.
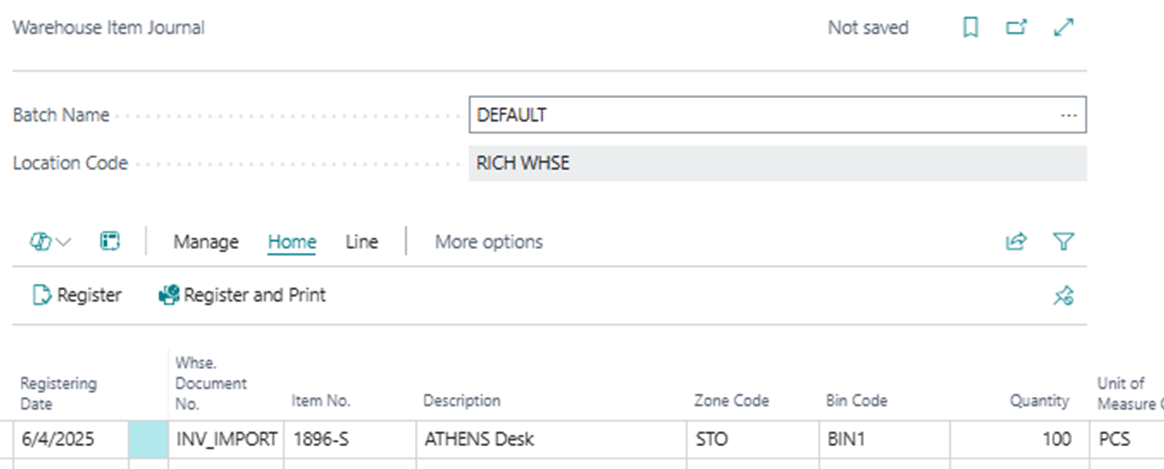
- Positive adjustments are made with positive numbers as shown in the example.
- Negative adjustments aren't available if you don't have inventory to negatively adjust, but for the record, to create a negative adjustment of 100, you'd type "-100" in the Quantity field.
- Register the document to save the transactions. To ensure it's visible to inventory, you must post the entries through the item journal.
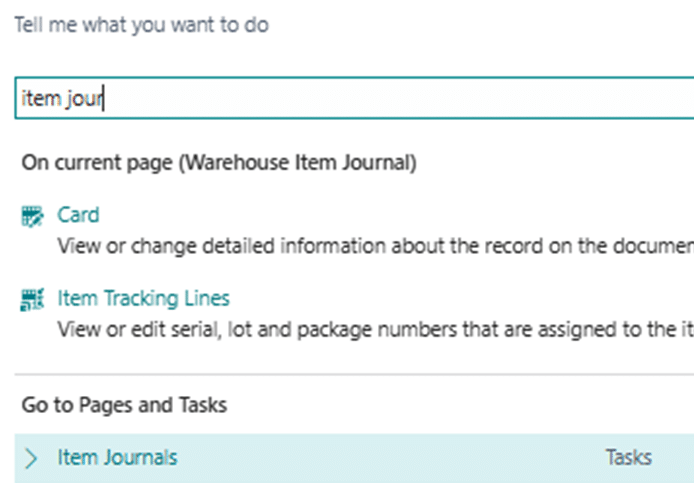
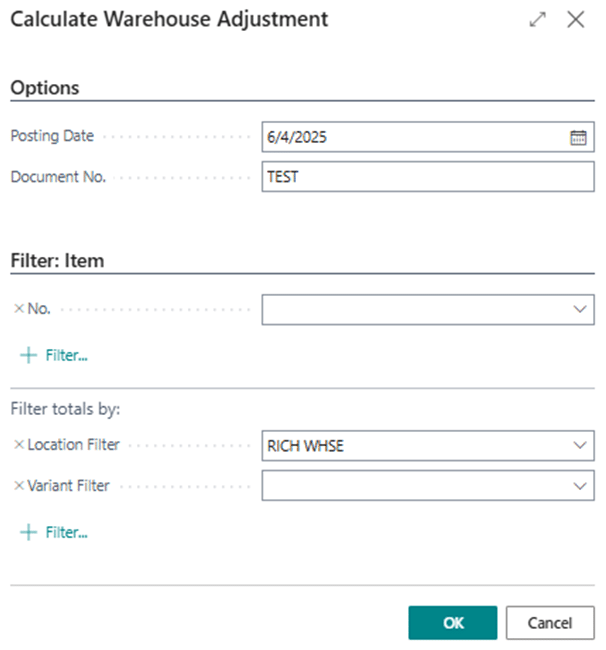
- Navigate to the Item Journal

- Select the function "HOME" > "Calculate Warehouse Adjustment"

- It should look something like this, though your warehouse might not be called "RICH WHSE"

- Your journal should populate with all the entries you've registered.

- Next, post the transaction. You now have inventory!


9. Enable SN Warehouse Tracking and Lot Warehouse Tracking
The next settings here aren't required but, in all my years of doing this…they should be! That's because it's often overlooked during implementations. Consultants will sometimes forget to mention that when you are using an advanced warehouse you must enable Warehouse Tracking! You heard me right!, this is an independent requirement on the item tracking cards, and it's a critical component to tracking LOT's and SN's for inventory. If you miss this step, they will not appear in your warehouse ledger and you will not be able to see the tracking information.
To enable this, search and open "Item Tracking Codes" and select +NEW. Depending on how you track or if you track serial and lot numbers. Business Central will allow you to select 1 the other, or both. The most important takeaway here is the toggle "SN Warehouse Tracking" and "Lot Warehouse Tracking"
![]()
![]()
These must be enabled if you want to track them later.
10. Test, Explore, and Study Your Advanced Warehouse
The last step is where you practice your kick 10,000 times to become a master of your advanced warehouse. This will help you and your team determine what works and what doesn't work. From there you can solidify good processes and make improvements to the ones that need work.
Nine times out of 10, the problems you'll encounter after advanced warehouse implementation come back to a user's unfamiliarity with the processes that have been activated. This is because in just 10 steps you've activated 6+ new processes which include:
- Whse. Receipts
- Whse. Put-Away
- Whse. Shipments
- Whse. Pick
- Whse. Phys. Inventory
- Whse. Item Journal and calc. warehouse adjustments
- Whse. Reclassification Journal
- Whse. Ledger Entries for Item Tracking
It's important that you and all of the applicable team members practice your kick and get to know your advanced warehouse from front to back. It will help your business thrive through smart warehouse management and enhanced workflows.
Talk to Stoneridge Today to Learn More About Advanced Warehousing in Business Central!
If you and your team need help with training or learning more about the advanced warehouse feature in Business Central, contact the Stoneridge experts today! Our team can give you more information on how you can use this powerful feature to streamline and optimize your warehousing processes now and in the future.

Under the terms of this license, you are authorized to share and redistribute the content across various mediums, subject to adherence to the specified conditions: you must provide proper attribution to Stoneridge as the original creator in a manner that does not imply their endorsement of your use, the material is to be utilized solely for non-commercial purposes, and alterations, modifications, or derivative works based on the original material are strictly prohibited.
Responsibility rests with the licensee to ensure that their use of the material does not violate any other rights.