


How to Use Hierarchy Visualization and Custom Hierarchy In Dynamics 365 CRM
Hierarchies can be an effective way of visualizing data in Microsoft Dynamics 365 for Customer Engagement. This enables users to see where a record fits into a data structure. You can see the different accounts and sub-accounts in Dynamics 365 Customer Engagement, and you can also see direct reports to a manager in an organization. We will explore the latter in the first section of this blog.
Hierarchy in Dynamics 365 for Customer Engagement (CRM)
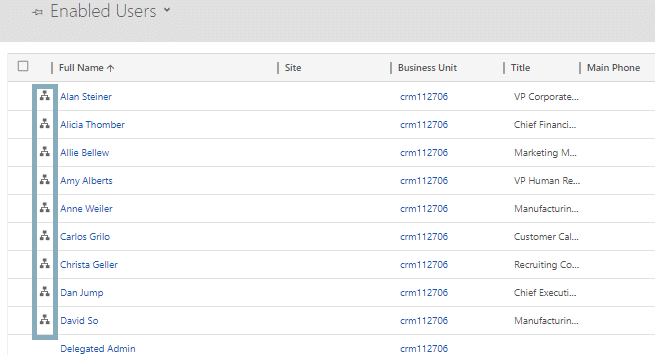
Below is an image of the users in a company, which is where we will explore the hierarchy functionality built into CRM. There is a button that looks like an organizational chart next to each user’s name that will direct you to the visualization of the data. If you wanted to see where a specific individual fits into the organizational structure, click on the button next to the user’s name you would like to see.
After selecting one of the records, the organizational hierarchy will be presented visually. Each tile represents a different employee and contains a portion of the information held in their record. In the screenshot below, the employee’s title, business unit, email, and mobile phone are listed. Only four fields can be added here, so you can adjust the fields shown to fit your business needs.
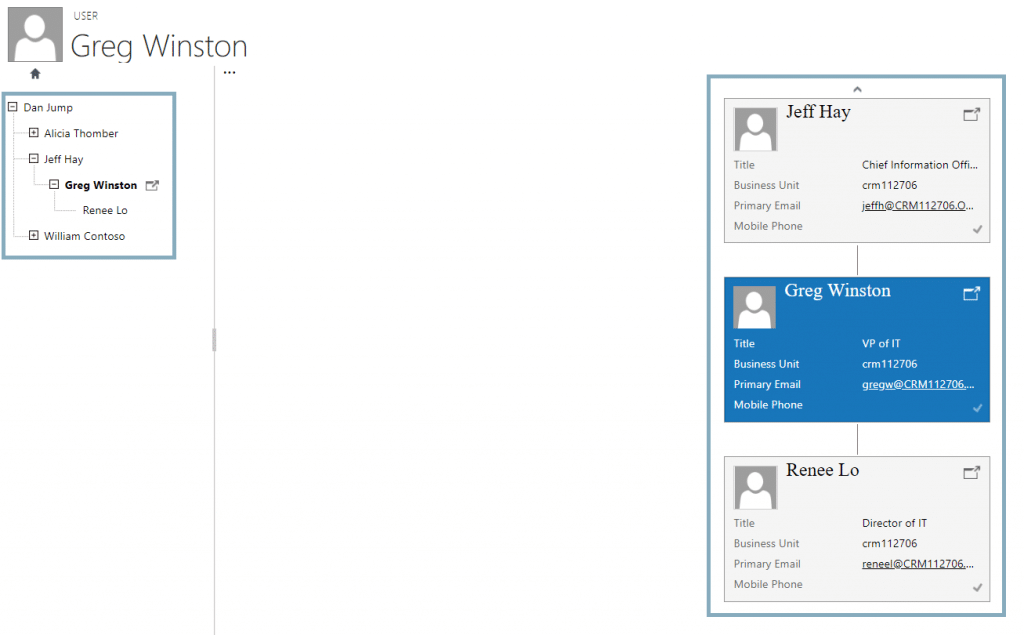
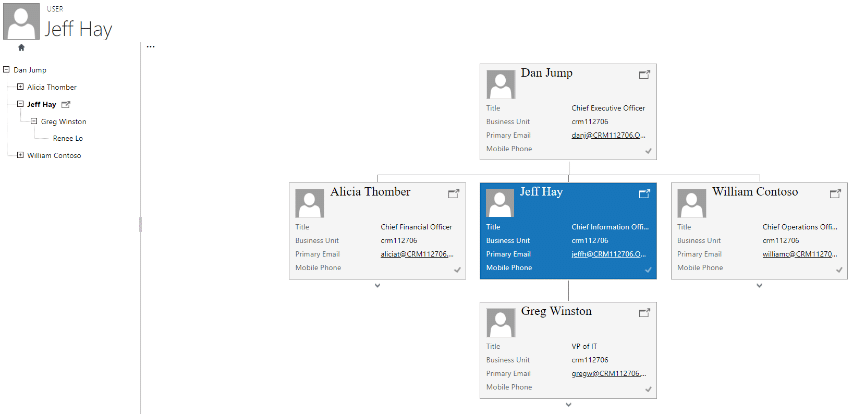
By selecting a different tile, or triangles along the sides, above, and below different tiles, you can navigate laterally and vertically to see which employees report to a manager, and which employees report to another employee in the organizational structure. In the image below, I clicked on Jeff Hay’s tile, who is Greg Winston’s manager. After clicking, I can see that Jeff reports to Don Jump, the CEO, and shares Don as a manager with Alicia Thomber and William Contoso.
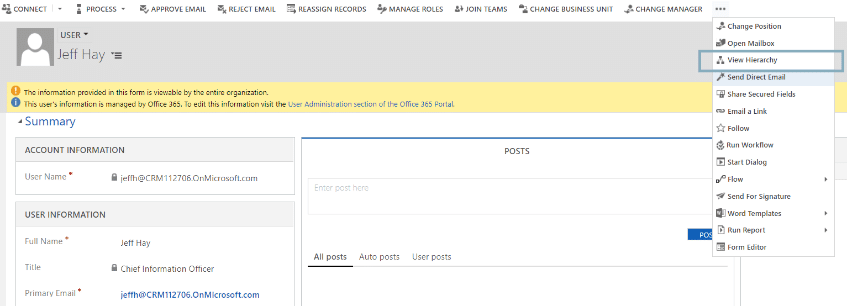
Another way to reach this visualization is in an individual user record. Along the command bar on the top of the screen, click on the ellipsis and then “View Hierarchy.” This will take you to the same place as clicking on the hierarchy button.
The above example of users and their managers is one of two out-of-the-box hierarchies in D365 Customer Engagement. The other is accounts and parent accounts, which allows all separate businesses to be visualized under a parent account. It is possible to create a custom hierarchy for any entity, which can be used for visualization of data specific to your business needs.
Custom Hierarchies in Dynamics 365 for Customer Engagement
Inside of Dynamics 365 for Customer Engagement, you can have custom hierarchies created to meet your business needs. By creating a parent-child relationship in Customer Engagement, you can build a hierarchy for the records through a lookup field. After adding enough fields to the hierarchy structure, something like the images in the above example will appear. Below, there are steps on how that is done in Customer Engagement, and some notes about custom hierarchies:
- As mentioned above, only four fields can be displayed for each individual record. Choose which four you want carefully, but know that they can be adjusted.
- Hierarchies require a 1:N relationship to be created in order to function. Unlike most relationships, for hierarchies, the primary and related entities must both the same entity, which is a self-referencing relationship.
- At any time, only one entity can be displayed at a time. A visualization for users and accounts cannot both be shown, nor any selection of two or more entities—only one at a time.
- Visualizing entities currently only works within one entity. In the case of accounts, you can visualize sub-accounts, but accounts and contacts or accounts and opportunities cannot be visualized together.
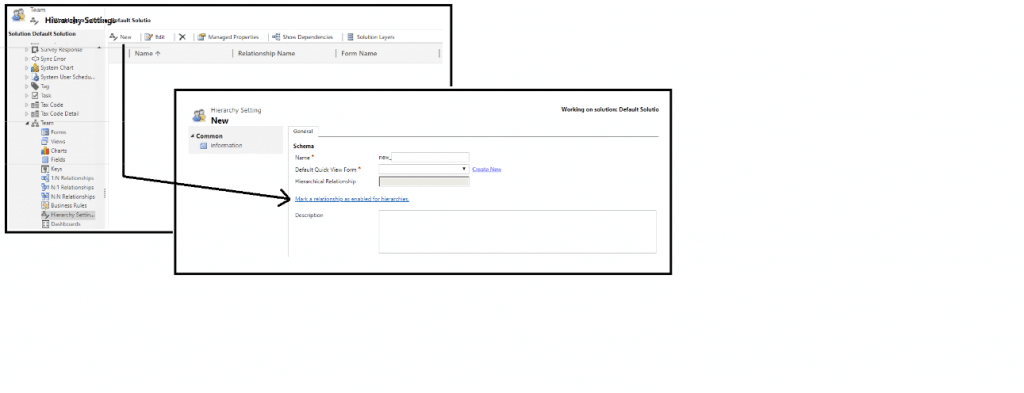
1. Navigate to the entity you would like to create a hierarchy for. Select “Hierarchy Settings” and click “New” Next, as indicated below by the arrow, select “Mark a relationship as enabled for hierarchies”
2. Make sure that the relationship you want to make hierarchical shows “True” under “Is Hierarchical?” If it doesn’t show as “True,” click the checkbox, and then click “Mark hierarchical.”
Note: Since I created a self-referencing (Parent/Child) relationship for the Team entity, I could quickly check the “Is hierarchical?” field to true. If there is no self-referencing relationship, you can create a relationship in “1:N Relationships” and then follow these steps.

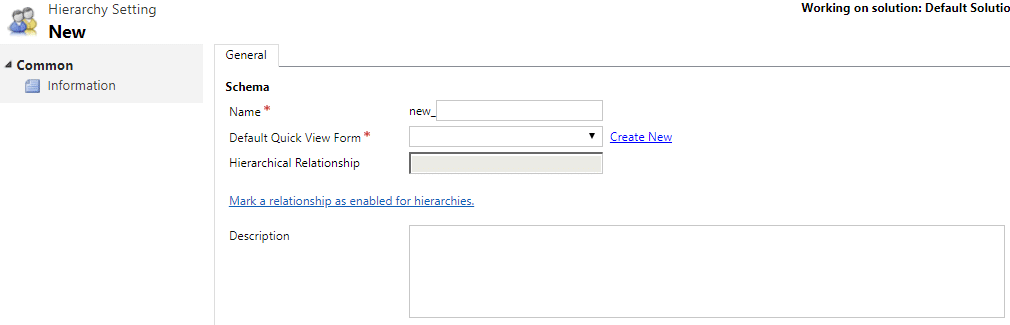
3. To complete the new hierarchy setting, enter a name (schema) for the hierarchy and choose the quick view form that will be used for display—you can create a new, custom quick view form, or use the standard, out-of-the-box option. Click “Save and Close.” Once all configurations are complete, select “Publish all customizations” and upload the new settings to Customer Engagement.
And that's how you can create hierarchies in Dynamics 365 CRM. If you are a Power BI user, you can create a Power BI hierarchy to help improve data visualization as well. If you are interested in learning more about Microsoft Dynamics 365 for Customer Engagement, check out other blogs here.

Under the terms of this license, you are authorized to share and redistribute the content across various mediums, subject to adherence to the specified conditions: you must provide proper attribution to Stoneridge as the original creator in a manner that does not imply their endorsement of your use, the material is to be utilized solely for non-commercial purposes, and alterations, modifications, or derivative works based on the original material are strictly prohibited.
Responsibility rests with the licensee to ensure that their use of the material does not violate any other rights.