


Managing Budgets in Dynamics 365 Business Central
Learning to create and optimize budgets in Dynamics 365 Business Central helps your company measure financial performance and gain valuable business intelligence.
In Business Central, you can create budgets for various periods during your fiscal year and also create multiple versions so you can make revisions as needed.
Budgets in Business Central: What You Need to Know
In this blog, we will cover:
- What a General Ledger budget it
- How to create a budget
- Exporting and Importing data from Excel
- How to copy a budget
- Tips for how to effectively manage your budget
This blog will help you better understand how budgeting in Business Central works and how it can help you forecast for the future and find ways to improve your business.
What is the General Ledger Budget?
A General Ledger (GL) budget is a financial plan that outlines projected revenues and expenses for specific accounts over a set period, usually a fiscal year. It helps businesses track financial performance by comparing budgeted amounts to actual results, providing insights into variances, and aiding in better decision-making. This process is crucial for effective financial management, ensuring that resources are allocated properly, and financial goals are met.
How to Create a Budget in Business Central
When managing your financials in Microsoft Dynamics 365 Business Central, the built-in budgeting functionality offers powerful tools for keeping your finances on track. Whether you're working with new versions of budgets or utilizing dimensions, you can use these steps:
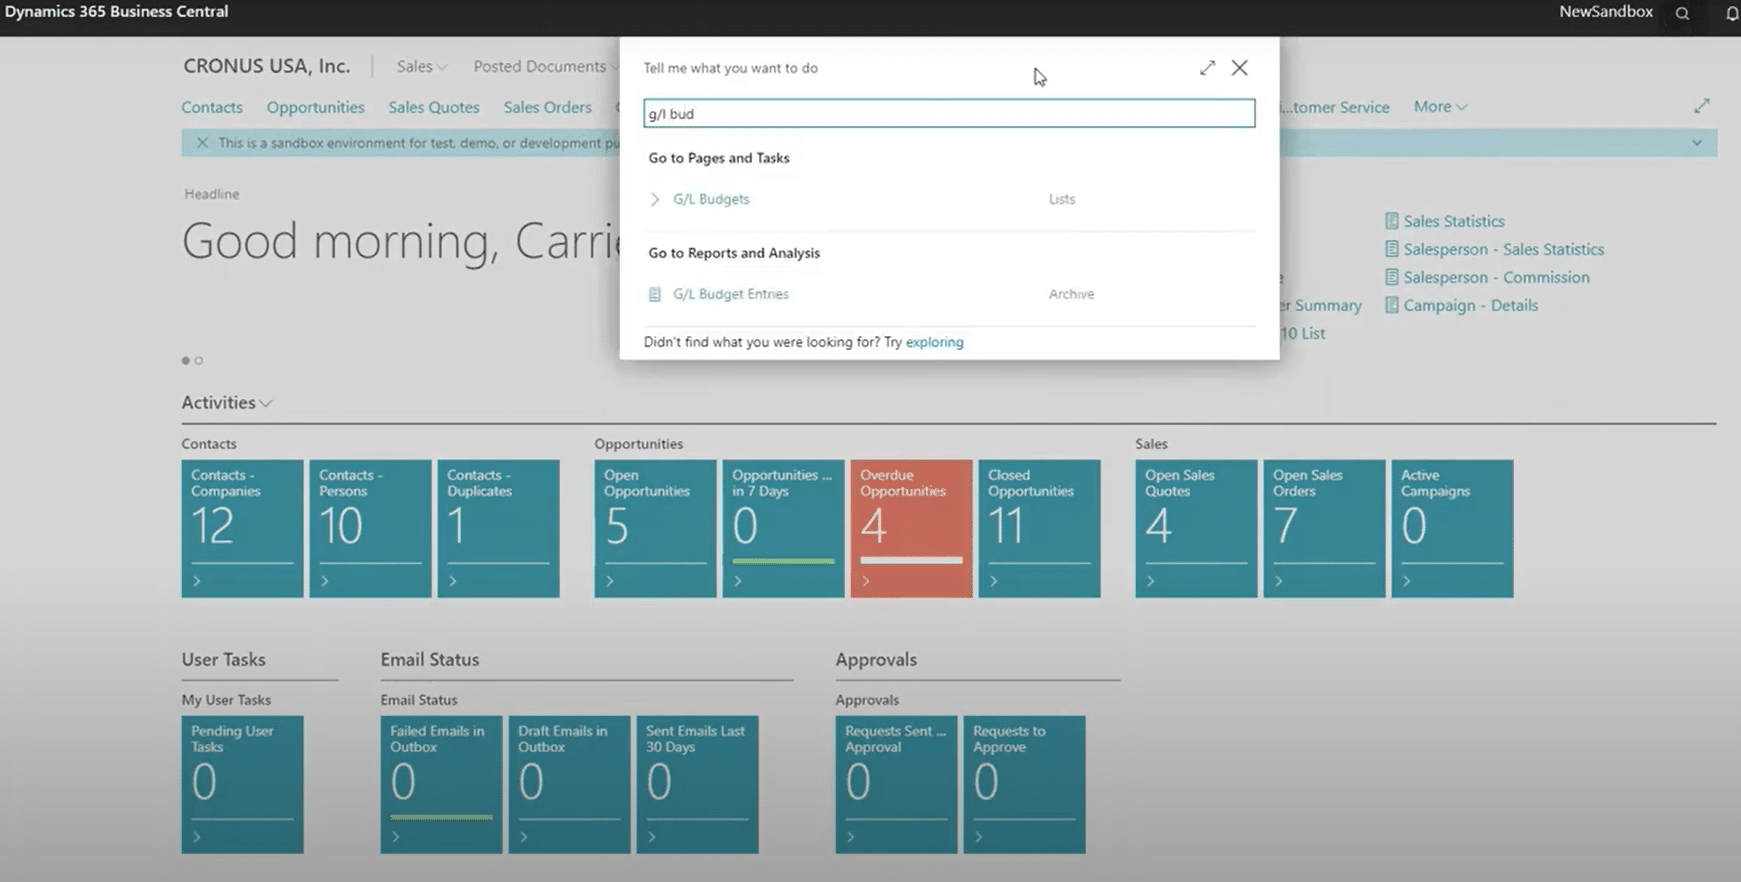
Step 1: Navigating to G/L Budgets
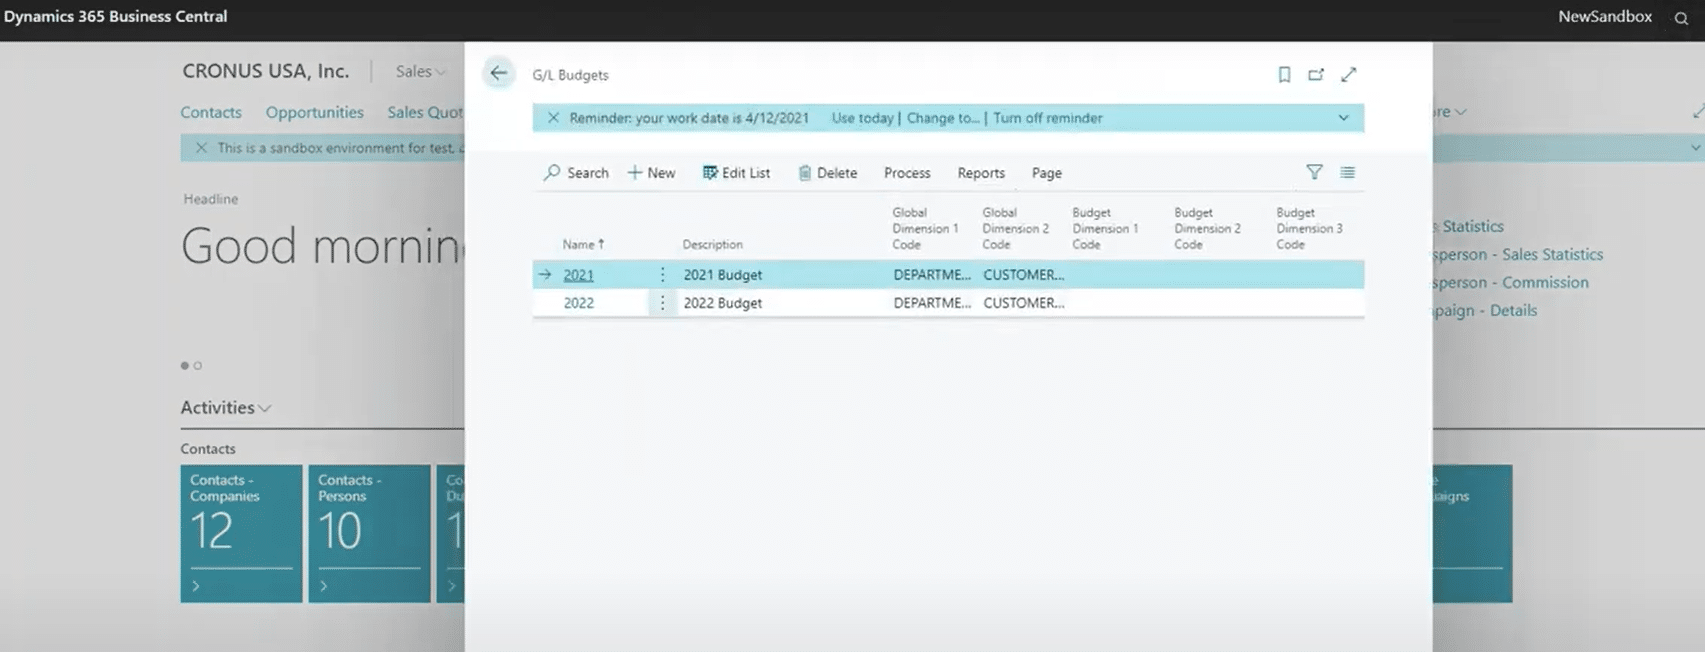
You can do this by searching "GL Budgets" from the application search bar. Once in, you'll notice you have multiple budgeting options. This feature is highly useful if you're managing several versions of your budget.
Step 2: Creating a New Budget
Ensure that Global Dimension 1 and Global Dimension 2 are predefined by the general ledger setup, which helps streamline data entry based on your organization’s structure. If you want to create a new budget, click “+ New”.
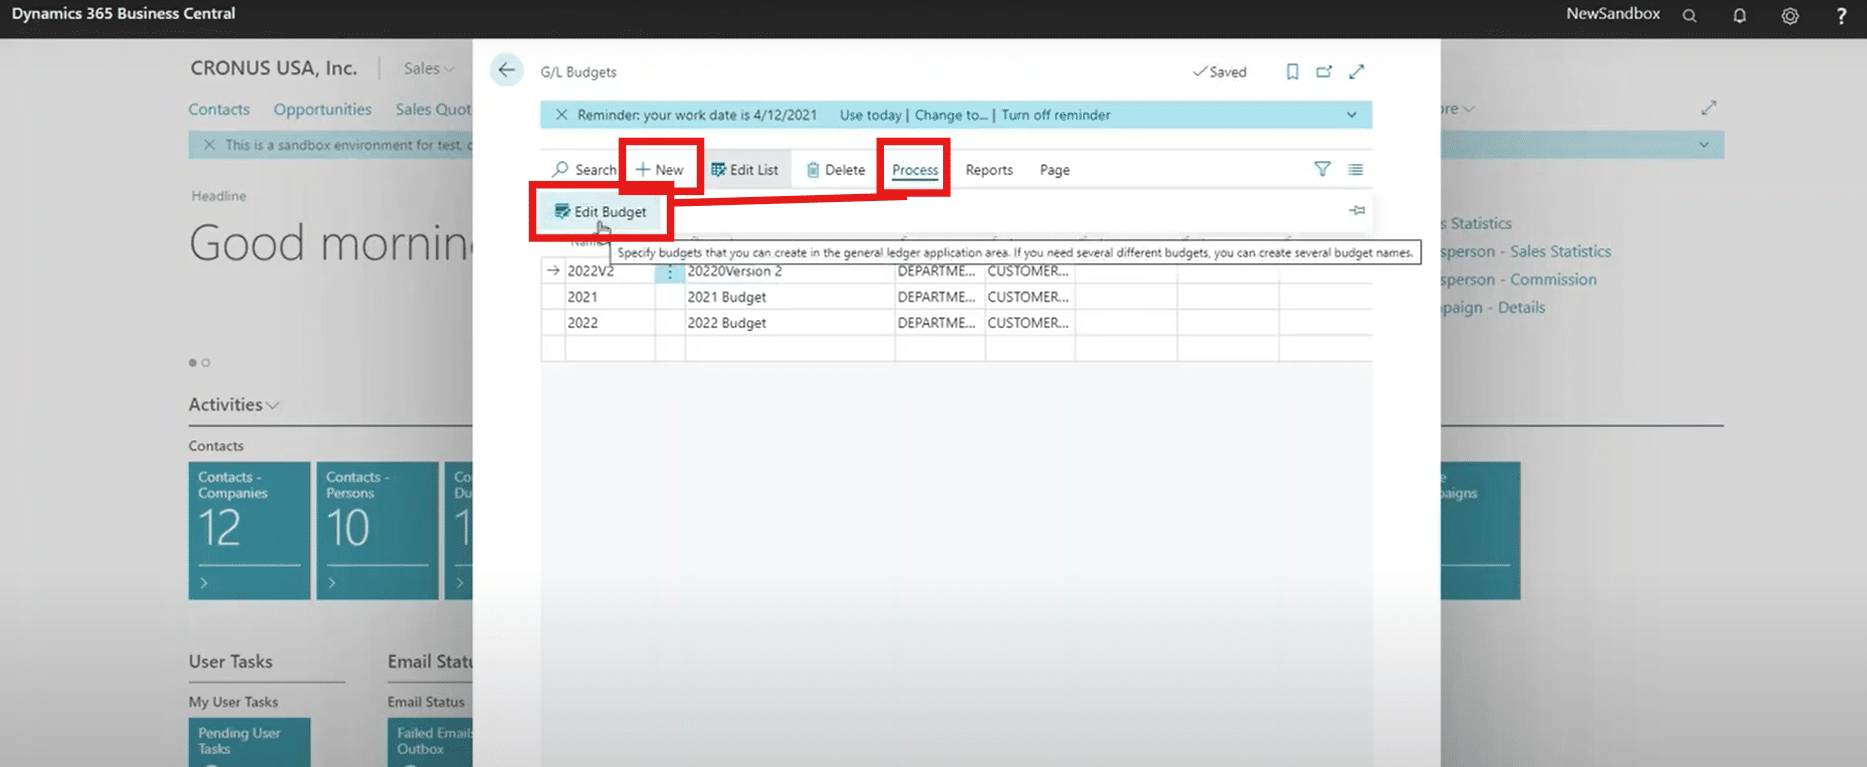
To start editing, go to the Process tab and click on Edit Budget. You’ll be taken to the budget matrix view, where you can manage your GL accounts based on different periods.
Step 3: Filtering and Entering Data
Use the Date Filter to specify the period for your budget. From there, you can manually enter amounts for various GL accounts. It's essential to remember the accounting rules for debits and credits:
- Income accounts are credits.
- Expense accounts are debits.
Step 4: Reviewing Net Income and Drilling Into Specifics
Once you’ve entered data for income, COGS, and expenses, you can scroll down the matrix to see the Net Income. Business Central automatically calculates this based on your entries, giving you a clear picture of your financial standing at any point in time.
You can also drill down into specific accounts, such as rent. The system displays the Budget Name, Date, GL Account, and any other relevant codes like Department or Customer Group, along with the dollar amounts you’ve entered.
Step 5: Using Dimensions for More Granular Data
Business Central allows you to filter your budget data using Dimensions, such as departments or projects. This is incredibly useful when you want to track expenses or income for different parts of your organization.
You can either set up or remove filters to drill down to see where money is being allocated in the budget through individual department codes.
Exporting and Importing Budgets with Excel
The ability to export budgets to Excel improves your ability to make adjustments. You can then import the updated data back into Business Central without skipping a beat.
Here is a more detailed breakdown of how to accomplish this:
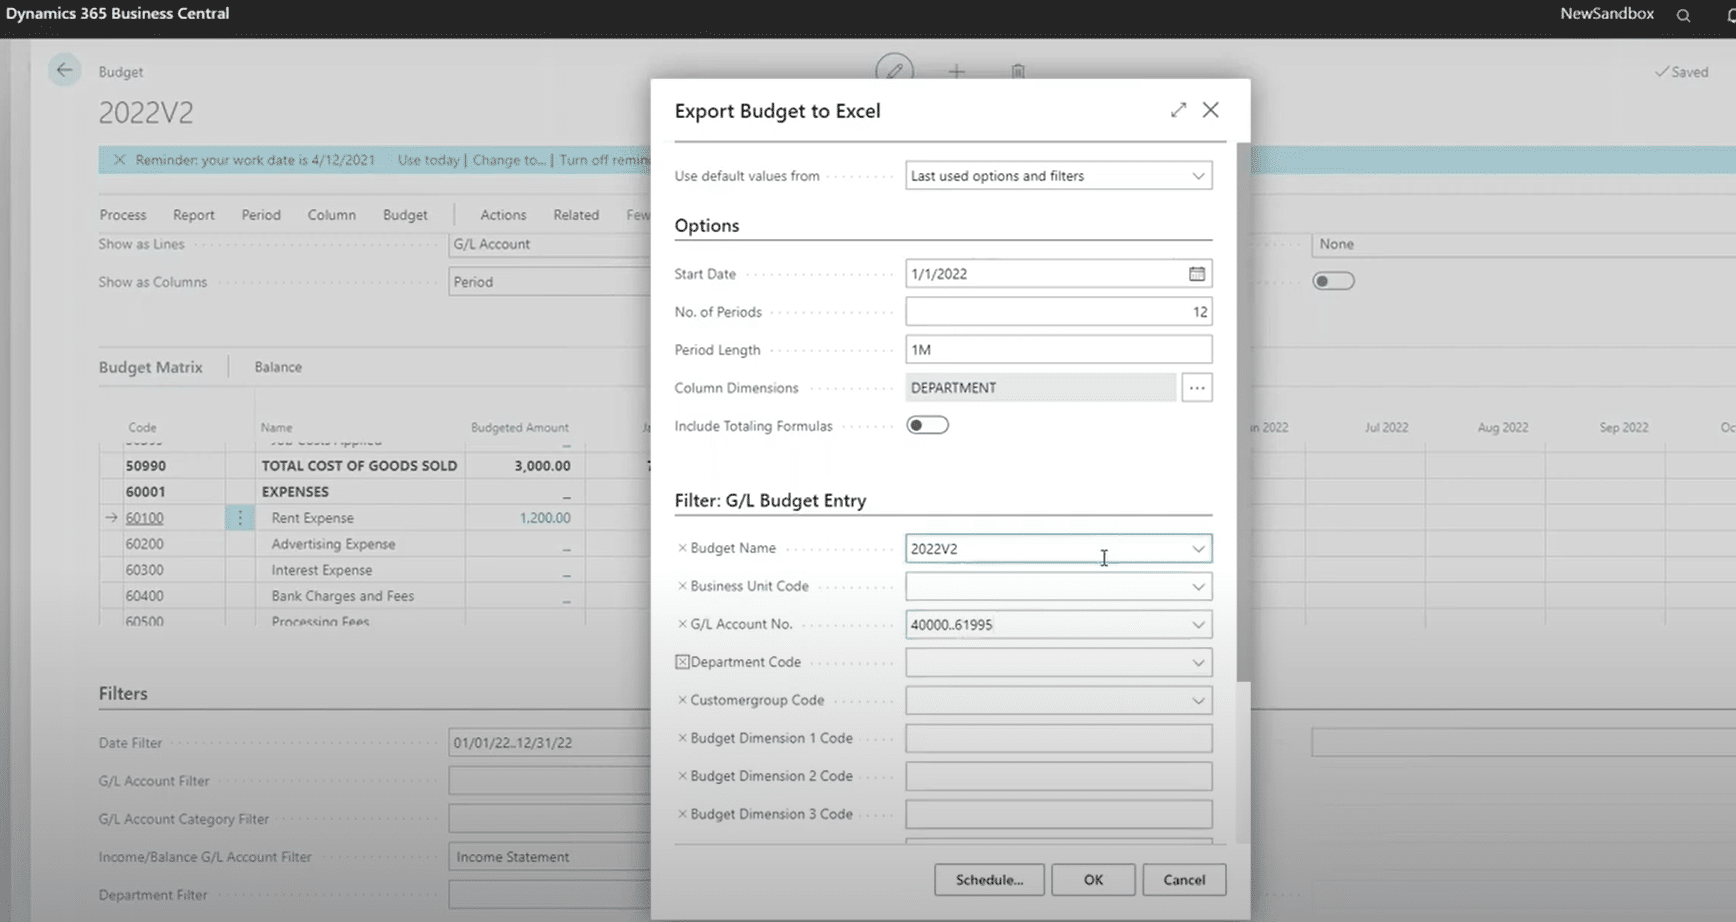
Exporting the Budget to Excel
The first step is to export the budget from Business Central to Excel. Follow these steps:
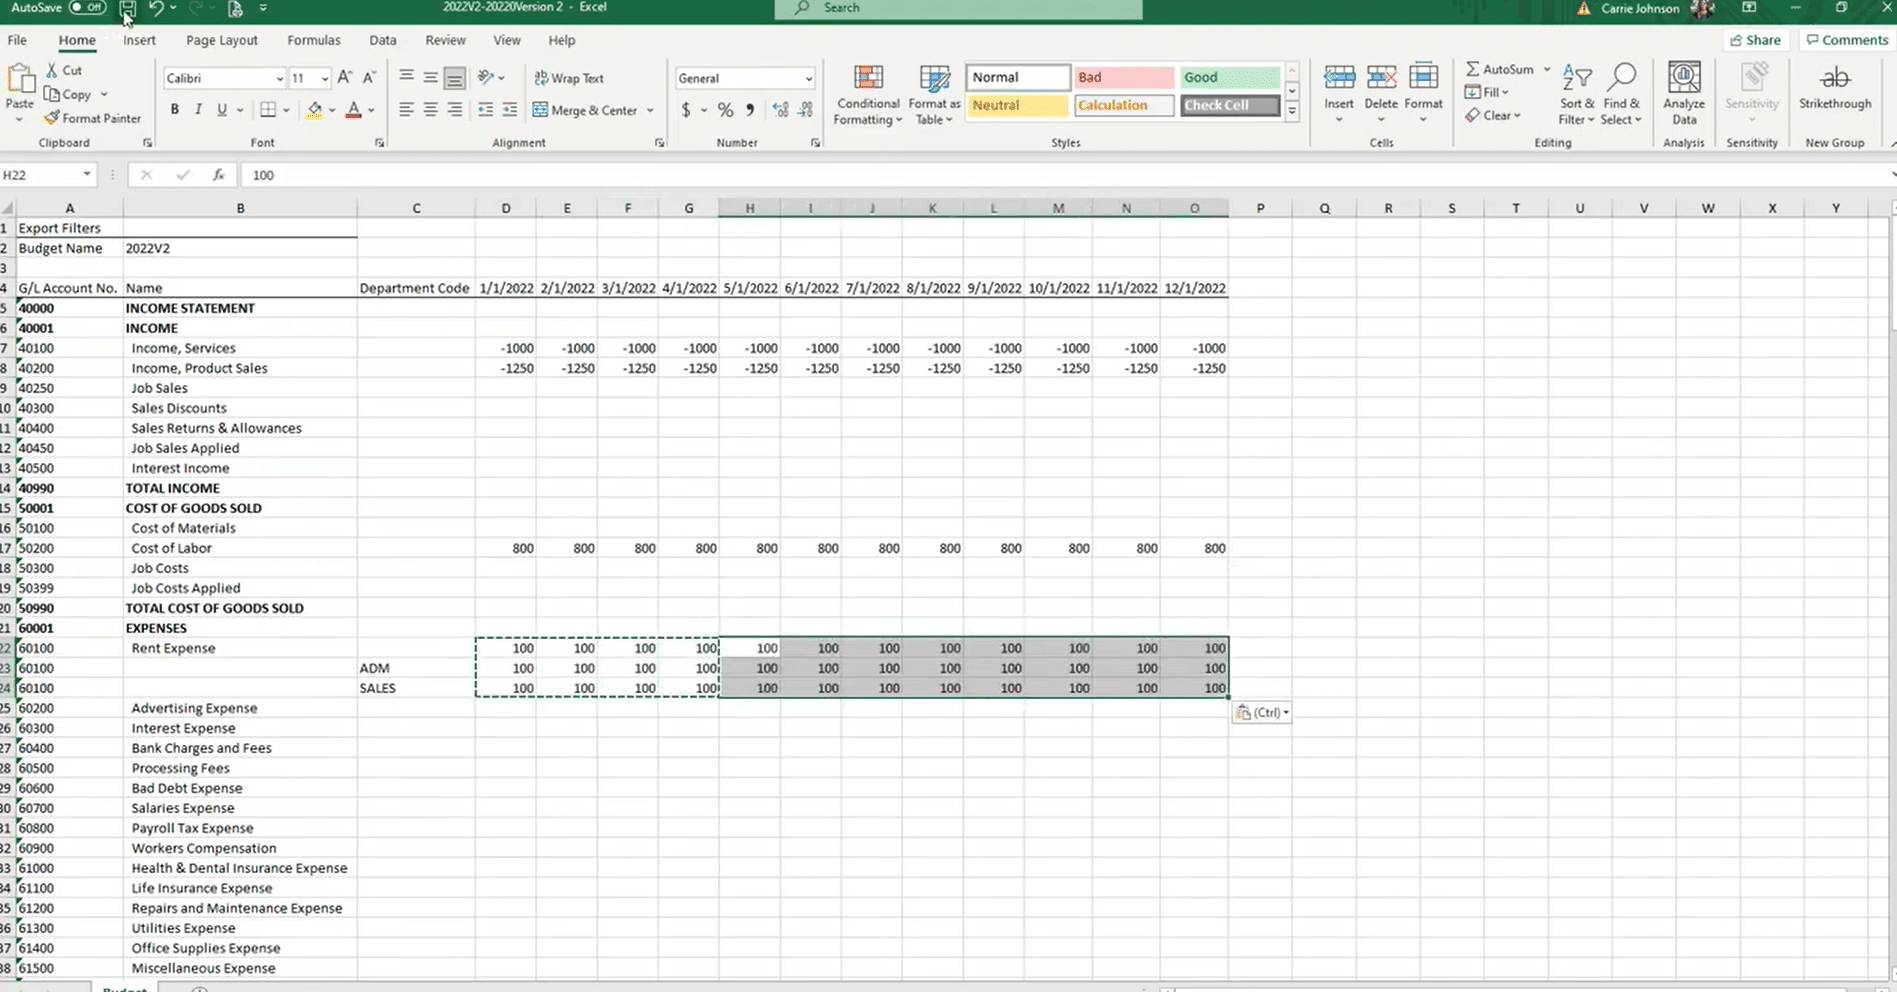
- While in the budget you want to export, navigate to Actions → Functions → Export to Excel.
- Specify the Start Date for your budget (in this example, we use January 1, 2022).
- Set the number of periods to 12 and the period length to one month.
- If your budget includes values for department codes or other dimensions, Business Central will prompt you to include them in the export.
- Finally, apply a filter to only export income statement accounts using the filter criteria option.
Make Adjustments in Excel
Once the export is complete, open the file in Excel file and start making adjustments such as:
- Update income amounts
- Product sales numbers
- Increased or decreased costs
- Values for recurring expenses
Once you make the changes, you can save the file.
Importing the Updated Budget into Business Central
Import the Excel sheet back into Business Central by following these steps:
- Open Business Central and navigate to the budget you want to update
- Go to Actions → Functions → Import from Excel.
- When importing, you can choose whether to replace existing entries or add new entries.
- Select the file you want to import and confirm. The system will notify you of the number of entries updated.
Review and Adjust Entries in Business Central
Once the import is complete, you can review the updated budget within Business Central by drilling down into specific accounts to view details. You can then cross-check it with the information in your spreadsheet.
Copying an Existing Budget
Copying a budget allows you to create different versions and adjust forecasts while maintaining the core elements and fields of your budget.
To copy a budget, follow these steps:
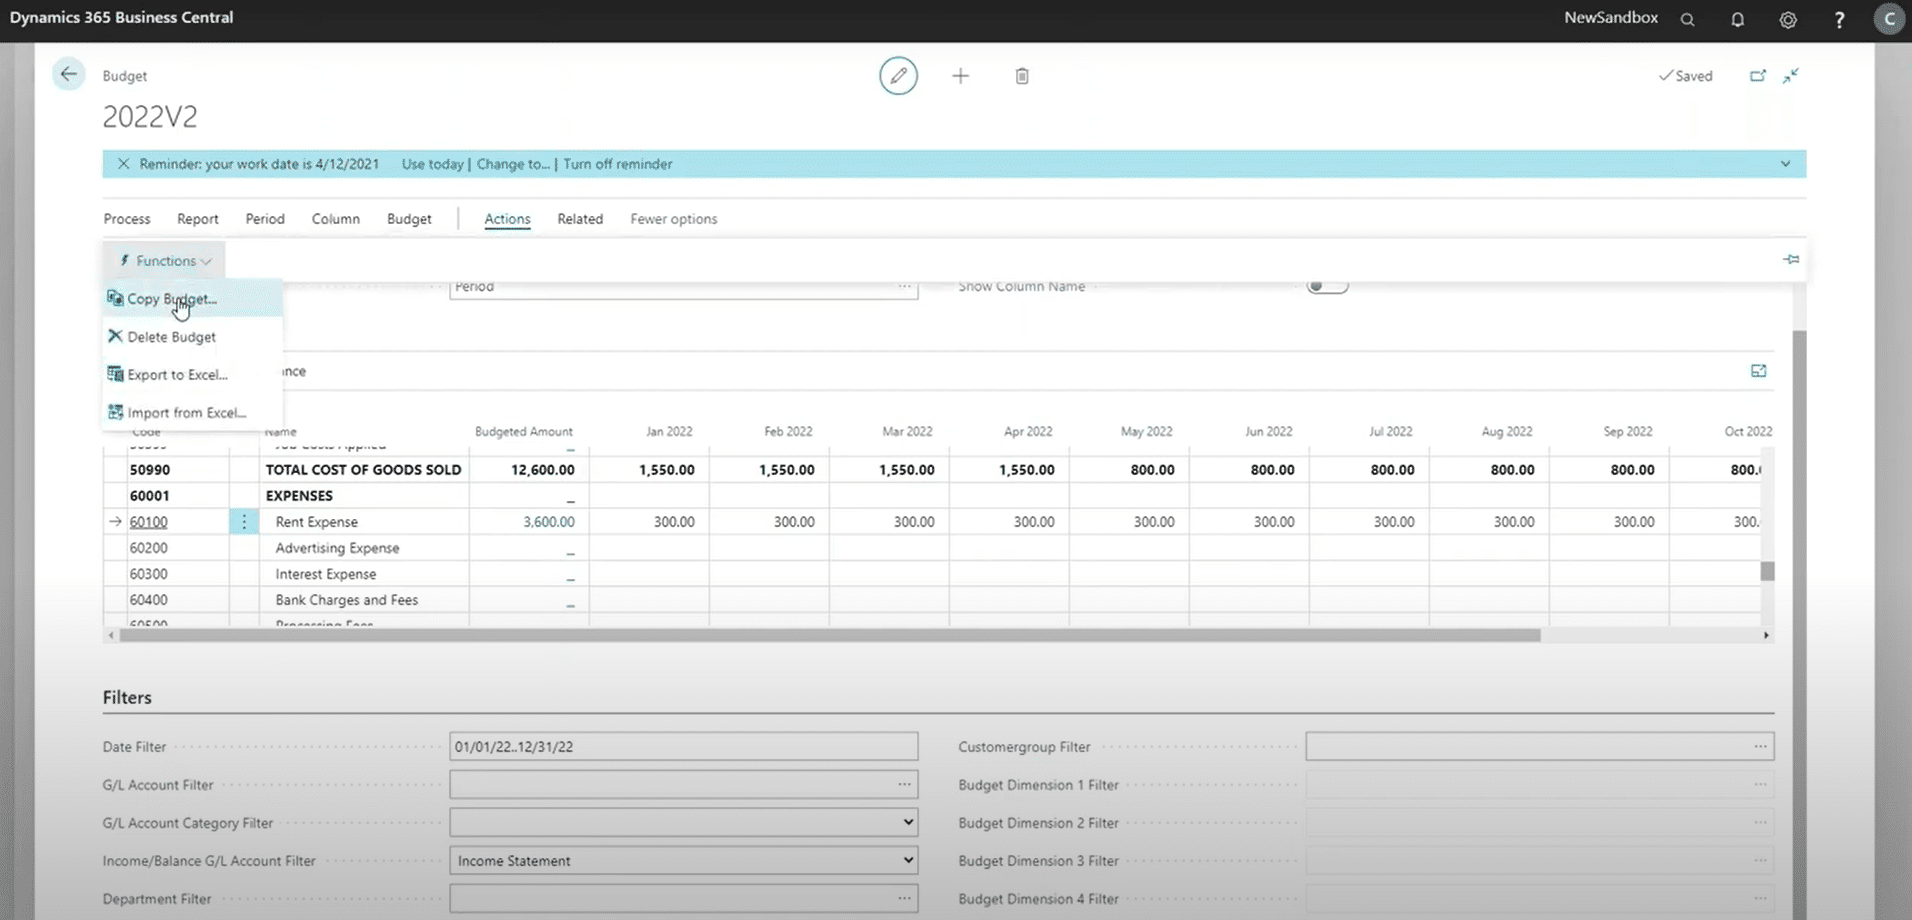
- Navigate to the Budget Module: From your current view in Business Central, go to Actions → Functions → Copy Budget.
- Select the Source and Destination Budgets:
- Choose the budget you want to copy from (e.g., Version 2).
- Specify the budget you are copying to (e.g., create a new budget "2024 Version 3").
- Set Your Parameters:
- Choose the GL accounts to copy (e.g., for income, expenses, or both).
- Select the date range for the copied budget.
- Optionally, include dimensions, such as department codes, to bring over more granular data.
- Adjust the Budget (Optional):
- If needed, you can apply a percentage adjustment to increase or decrease the new budget's values.
- Confirm the Copy: Once the parameters are set, confirm the action by clicking OK, and Business Central will copy the budget. You'll receive a success message once the process is complete.
Once you verify your adjustments, you can then use those copies for different budgeting purposes like replication or forecasting.
Want to Learn More About Streamlining Operations in Dynamics 365 Business Central?
Get in touch with the team at Stoneridge! Our Business Central experts can help you utilize this and many other tools to enhance efficiency at your business and help streamline your operations.

Under the terms of this license, you are authorized to share and redistribute the content across various mediums, subject to adherence to the specified conditions: you must provide proper attribution to Stoneridge as the original creator in a manner that does not imply their endorsement of your use, the material is to be utilized solely for non-commercial purposes, and alterations, modifications, or derivative works based on the original material are strictly prohibited.
Responsibility rests with the licensee to ensure that their use of the material does not violate any other rights.