Part I: Configuring the Dynamics AX 2012 R3 Entity Store
This is part 1 of a 3-part series:
Part 1 - Setting up and Configuring the Dynamics AX 2012 R3 Entity Store
Part 2 – Publishing a Dynamics AX 2012 R3 default entity
Part 3 – Creating and publishing a custom Dynamics AX 2012 R3 entity
Intro
Microsoft's update for Dynamics AX 2012 R3 includes a new feature. This feature is called the entity store. And it is a pretty amazing feature!
So what the heck is a data entity store? It’s just a database really, but in this case it’s being leveraged to store data specifically from AX for analytics and reporting. At a conceptual level think of it as DIXF pushing AX data to another database, this image was taken from here - https://ax.help.dynamics.com/en/wiki/data-importexport-framework-user-guide-dixf-dmf/
There are default entities that come with AX as well as the ability to create custom ones to suit your needs. The data coming from AX can be pushed via an incremental method (by the way of change tracking) into the columnstore table in SQL Server. And with this capability a whole new world of simplified business intelligent reporting can be gained!
Prerequisites
The data entity feature for Dynamics AX 2012 R3 requires the installation of one of the following patches:
AX 2012 R3 Hotfix (KB 3147499) - Provides supports for the Entity DB - https://mbs2.microsoft.com/Knowledgebase/KBDisplay.aspx?scid=kb;EN-US;3147499
AX 2012 R3 CU 11 (KB 3157865) - (2024: this hotfix is no longer available)
The entity database store requires one of the following versions of SQL Server:
- SQL Server 2014
- SQL Server 2016
- Azure SQL database
What you need to know
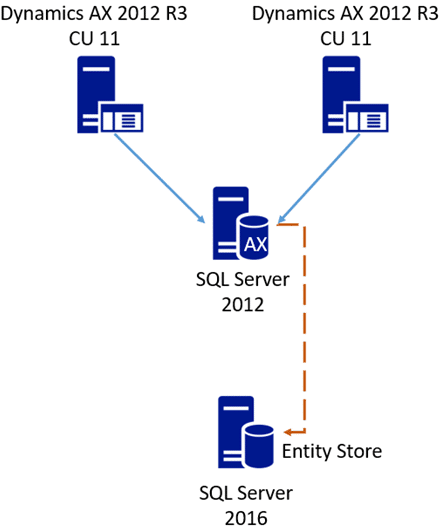
The entity data should be stored on a different server than the AX database server. There is no need to have the same versions of SQL Server between the AX and the entity store server. You can run your production AX instance on say SQL Server 2012 and install SQL Server 2014 on a different server and this is a valid configuration.
Please keep in mind that if you want to upgrade your existing version of SQL Server to SQL Server 2016 for your Dynamics AX instance you will need to install the CU 11 update. This update enables support for Dynamics AX 2012 R3 on SQL Server 2016.
Background
The entity store leverages key SQL Server columnstore index technology. This technology is pretty amazing, it’s an in-memory memory technology with built in compression and batch execution capability (no, not AX batch mode a different type of batch mode). In a nutshell this provides dramatic increases in performance while decreasing space requirements for data storage. To learn more review these little nuggets of information:
SQL Server In-Memory OLTP and Columnstore Feature Comparison
Condensed Version
Now on to the fun stuff, here is the short list of things to do with. To keep this blog shorter, I have already performed steps 1 and 2, I leave that to you to perform. I will be covering step 3 in this blog and 4 and 5 in my next blog.
- Install CU11 or the hotfix
- Stand up a new server with SQL Server 2014 or 2016
- Configure the entity integration
- Create an entity
- Create a report on the entity
Architecture
Here is my current AX architecture for reference:
Entity Store Configuration
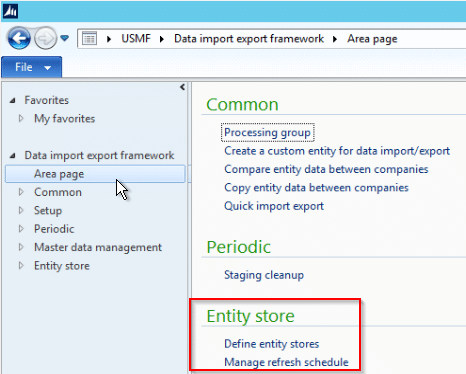
Once you have applied the appropriate update to AX, you will find a new heading on the Data import export framework page aptly named Entity store.
Creating the Entity Database
To create an entity store database on SQL (I’m running 2016 as shown above) here is what I did:
- Create a database (I named mine AXEntityStore)
- Enable access for the AXAdmin (account under which I will be logged in to the AX client as). This account needs to be able access to the SQL Server instance and AXEntityStore database for configuration in addition to the AOS service account (which executes on behalf of the user).
--Create the AX and AOS logins
CREATE LOGIN [TITANBI\AXAdmin] FROM WINDOWS
WITH DEFAULT_DATABASE=[AXEntityStore], DEFAULT_LANGUAGE=[us_english]
GO

CREATE LOGIN [TITANBI\AOSSVC] FROM WINDOWS
WITH DEFAULT_DATABASE=[AXEntityStore], DEFAULT_LANGUAGE=[us_english]
GO

--Assign to users to the entity store database
USE AXEntityStore
GO
CREATE USER [TitanBI\AXAdmin] FOR LOGIN [TITANBI\AXAdmin]
WITH DEFAULT_SCHEMA=[dbo]
GO

CREATE USER [TitanBI\AOSSVC] FOR LOGIN [TITANBI\AOSSVC]
WITH DEFAULT_SCHEMA=[dbo]
GO
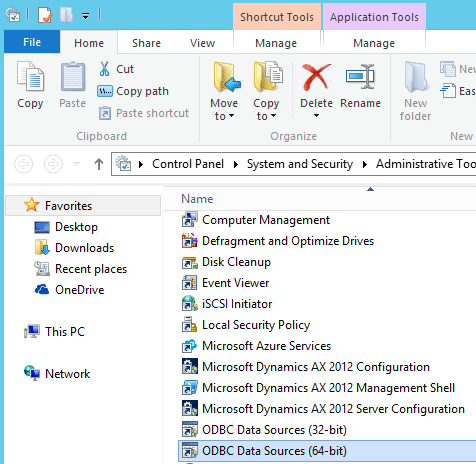
- Create a DSN connection to the SQL database. On the client (in my case I am on an AOS server which has a client installed), I created a DSN entry by doing this: Right click on Start | Control Panel | System and Security | Administrative Tools | ODBC Data Source (64 bit)
-
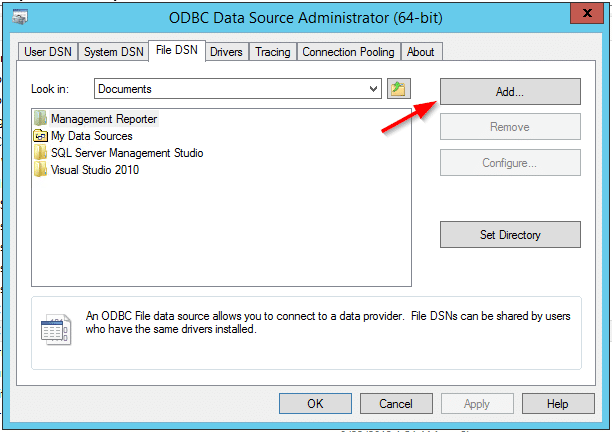
- Select User, System or File DSN. In my case I selected File (you can use whatever is appropriate). I selected file because if I need to make any modifications to the DSN later it doesn’t matter what user I’m logged in as I just modify the file. System will give you almost the same results but you would still need to be logged in to the server where you created the system DSN. By using file I can store this in a central repository and just reference it when needed.
Here is a quick breakdown of the differences between the DSN types:
Click Add.
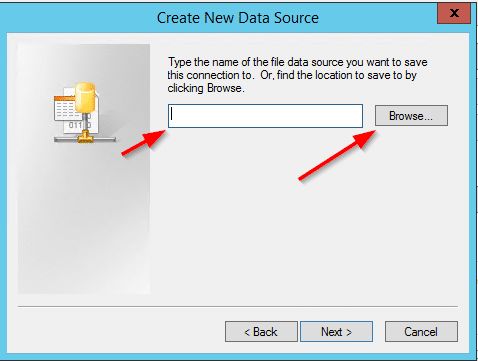
Select the location of a file share.
Then name the file and click Save.
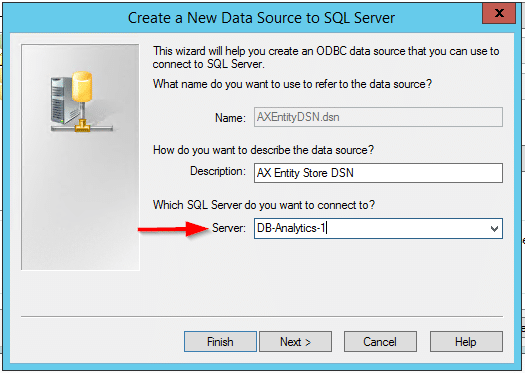
Enter the entity store server name.
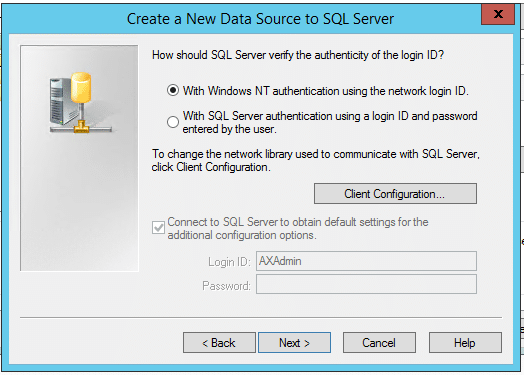
I accepted the defaults since I had already granted access to the credentials under which I was logged in as.
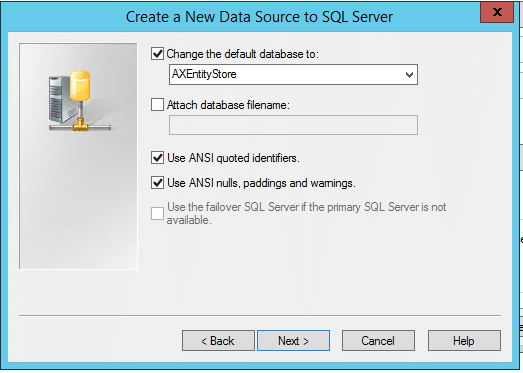
Select the AXEntityStore database already created.
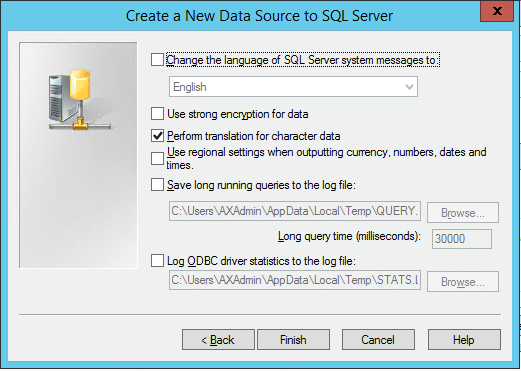
I accepted the defaults and click Finish to complete.
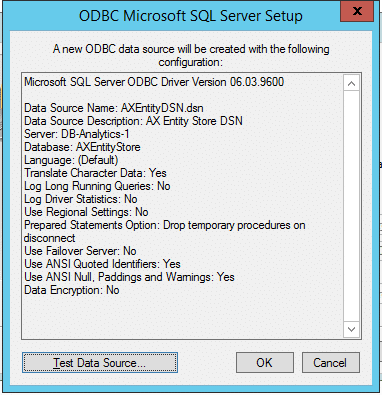
And here is the summary of the settings I ended up with:
- Now it’s time to configure AX. Within the AX client open the Data import export framework page and click on Define entity stores under the heading Entity store. In my setup, I am on the first AOS server in the diagram depicted above (server on the left). This server also happens to have a client installed.
In the Source name column enter a name. You many need to scroll over in the left hand pane to be able to see the Create clustered column store indexes option (checked by default so don’t worry if you miss it).
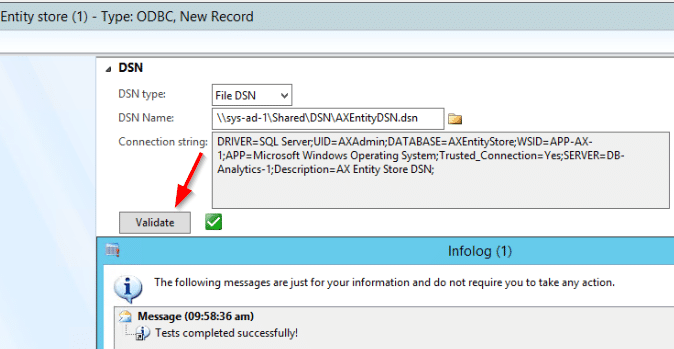
Then in the right-hand pane change the following as appropriate for your environment:
On a side note, I noticed funky symbols appearing in the WSID parameter. This really bugged me so I edited the DSN file and removed the registered trade mark symbol which was causing the funny looking ? mark so that it looks like the screenshot above. This is what it looked like before I made the edits:
We now have the DNS connection configured and pointing to the AXEntityStore database. The next step would be to publish entities and there-in lies the challenge. Initially I thought it would be pretty simple to get going on building reports but here is what I discovered.
To publish an entity (or entities), click the Publish button in the Entity store window.
Here is a small snippet of the entities available for publishing (image cropped to fit):
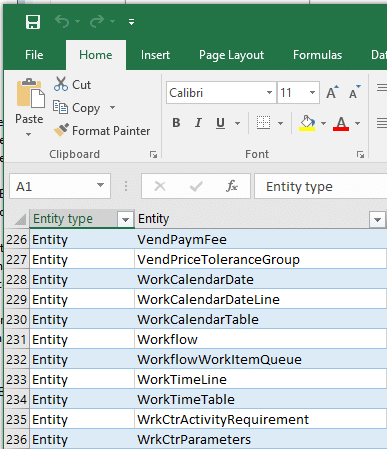
Out of curiosity I exported these to Excel and I see that there are 235 Entities I can currently select from (236 - 1 for the header row):
I was interested in creating reports on customers so I selected the Customer entity and clicked Publish:
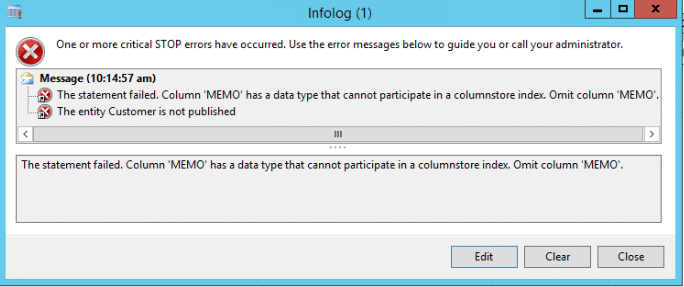
And was greeted with this error:
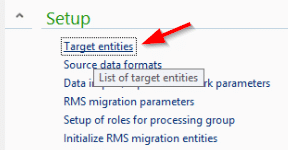
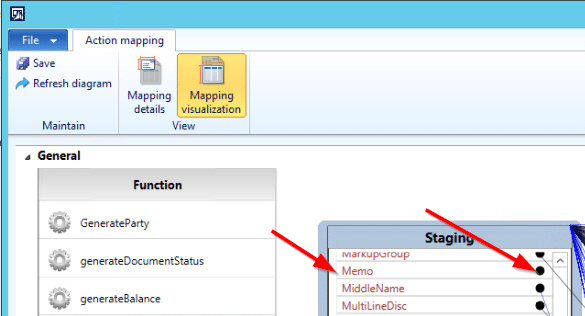
Ok, I thought, so the MEMO column is not a data type that can participate in a columnstore index. “No problem I thought” I’ll just unhook the memo field mapping and publish the entity without the mapping in place that should do it. I opened up the Customer entity mapping by clicking on Target Entities under the heading Setup in Data import and export framework.
I selected Customer again and clicked Modify target mapping.
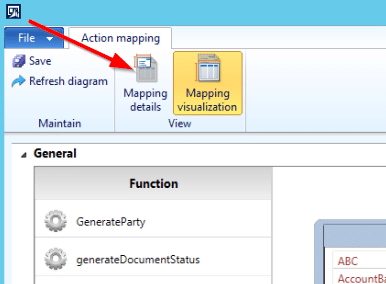
I clicked on Mapping details.
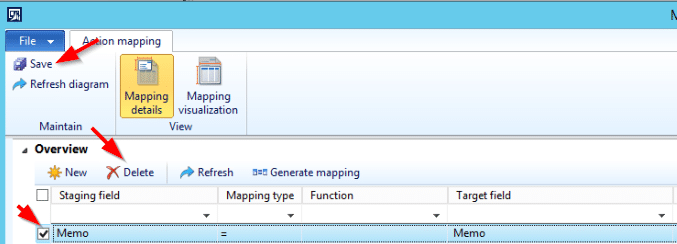
Selected the Memo field and clicked Delete and Save. This removes the mapping but I still need to regenerate the entity with the mapping removed.
If you go back to the target mapping, you’ll see that the memo field has been unmapped:
But even with the Memo mapping removed, no dice:
This means that for any entity that contains the memo field you will need to create a custom entity with that field removed to be able to publish the data over to the entity store. And that my friends will be a blog for another day.
In my upcoming blogs I will cover the remaining topics:
- How to publish an entity (that does not contain a memo field)
- How to create a custom entity based on the Customer Entity (which contains the memo field)
Under the terms of this license, you are authorized to share and redistribute the content across various mediums, subject to adherence to the specified conditions: you must provide proper attribution to Stoneridge as the original creator in a manner that does not imply their endorsement of your use, the material is to be utilized solely for non-commercial purposes, and alterations, modifications, or derivative works based on the original material are strictly prohibited.
Responsibility rests with the licensee to ensure that their use of the material does not violate any other rights.


