


Power Automate Workflows: Mastering Automation and Fostering Efficiency
Power Automate is a fantastic tool that automates workflows between applications and services.
It helps you eliminate repetitive manual tasks without coding, streamlines business processes and is agnostic to several systems, including:
- Dynamics 365 ERP and CRM systems like Business Central, Finance and Operations, and Customer Engagement
- Legacy systems like Dynamics GP, NAV, and AX
- Outlook and Teams
- SharePoint
- And more
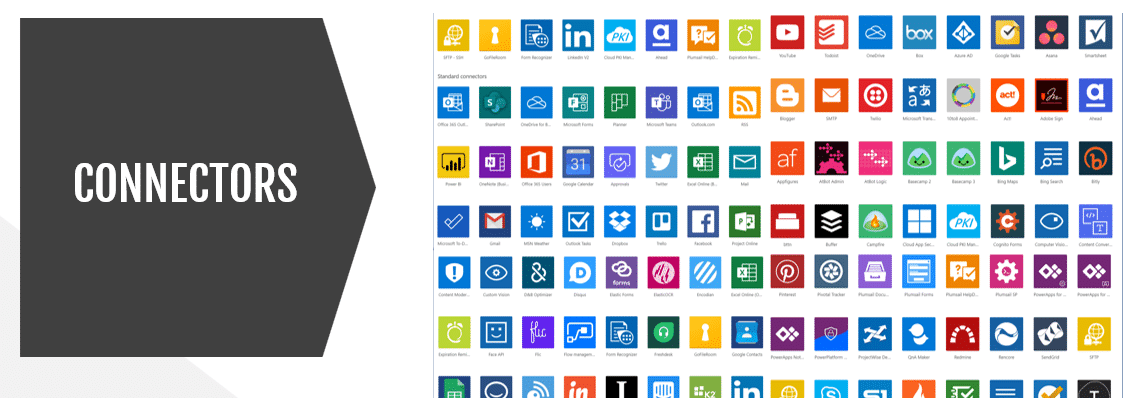
It also connects with many other applications through connectors. Microsoft has several out-of-the-box connectors that you can use to connect to things like social media apps, e-commerce programs, the Microsoft Dataverse, and more.
Power Automate is part of a potent suite of solutions housed in the Microsoft Power Platform.
What are Power Automate Workflows?

Workflows – commonly known as “flows” or “cloud flows” – are automated processes that allow you to trigger certain processes to run without human intervention. This saves your team valuable time and ultimately saves you money because they can then focus on more value-added work.
In this blog, we will break down the core elements of Power Automate and flows to highlight:
- What they are
- How you can set them up
- Who is involved in helping them run within your organization
- Why they can bring tremendous value to your business.
Types of Power Automate Workflows
Common examples of flows in Power Automate include email notifications, creating and updating records in a database, moving, or copying data between systems, and creating approval processes.
There are countless examples, but the large majority of Power Automate cloud flows fall into the following categories:
- Automated Flows: These are triggered by specific events and are typically used in databases, OneDrive, email, and social media.
- Instant Flows: These start automatically with the click of a button.
- Scheduled Flows: You can set these to run on a recurring schedule.
- Desktop Flows: These automate daily, repeatable tasks that you do on your desktop. You can even record your clicks and processes to automate these flows. For example, if at the start of every workday you open your email, Teams, and Internet browser, you can set up a flow that automatically opens all of those for you.
- Business Process Flows: These are visual, guided experiences that lead users through completing a process from start to finish. They are often presented as ribbons at the top of your screen.
How to Set Up Power Automate Workflows
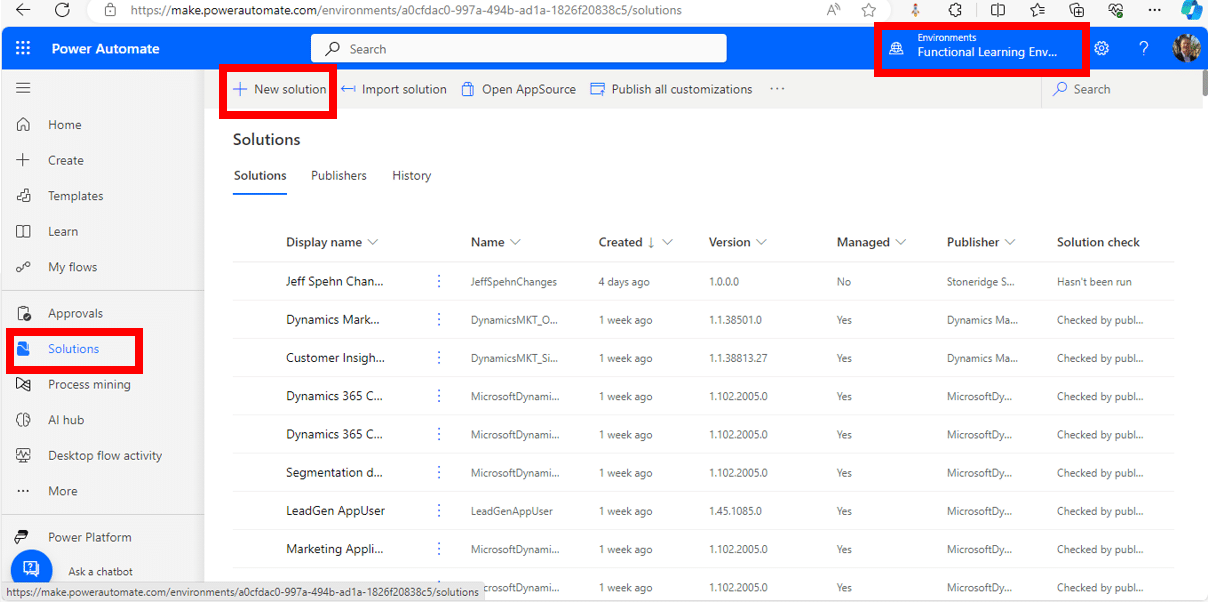
If you log into the Power Automate maker portal, you can go in and select the environment you want to build a flow in, create a solution file, and then save it to that solution file.
Once you do that, you can navigate to the top and click New > Automation > Cloud flow > Automated.
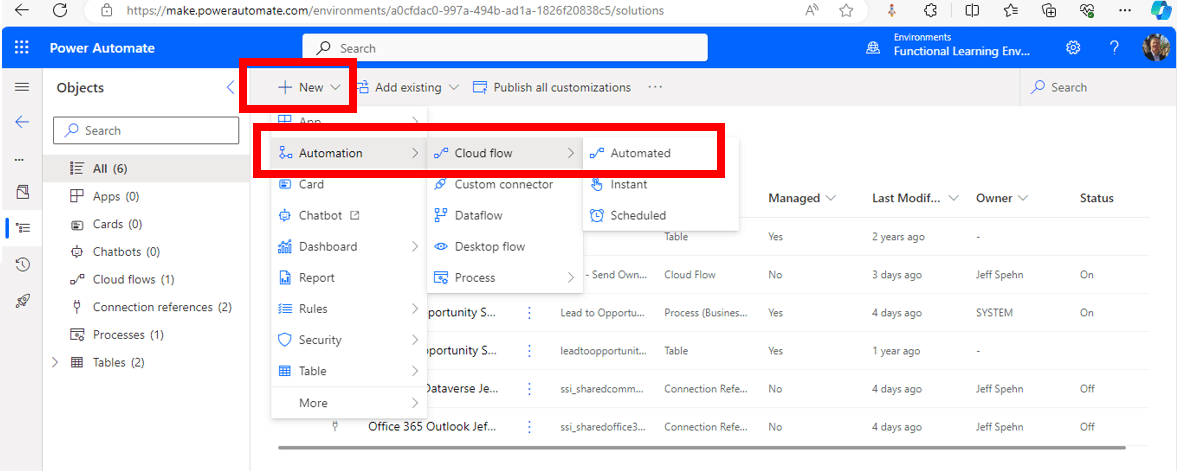
From here, you can start to build and customize your flow. To help lay this out, we will use the example of a sales lead going from the marketing department to a salesperson.
Let’s look at the two main things to set up to create an effective flow:
Triggers
Every flow starts with a trigger. It could be updating a record, sending or receiving an email, or adding files to databases. No matter what it is, you’ll need to establish a way for your flow to start.
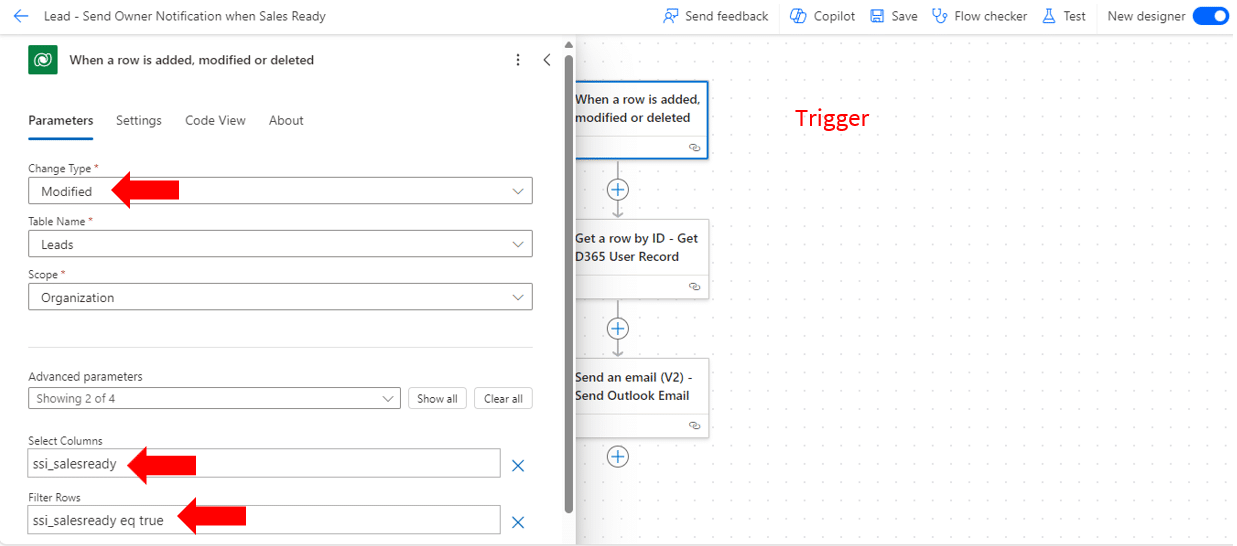
In our example, the marketing department accepts a sales lead. After gathering information from the lead and compiling data on what they expect from your business, they can enact certain triggers that will push the flow to the sales staff. To do this, the marketing person will trigger the flow by marking the record as “Yes” under the “Sales Ready?” tab.

Actions
Actions are the workhorse of Power Automate. Once a flow is triggered, you can define automated actions that the flow will take to complete your process. Every flow has at least one action, but most have several.
One of the main benefits of Power Automate is the thousands of actions available to you through different connectors. If you go in there and don’t see any connectors that suit your needs, you can create one yourself.
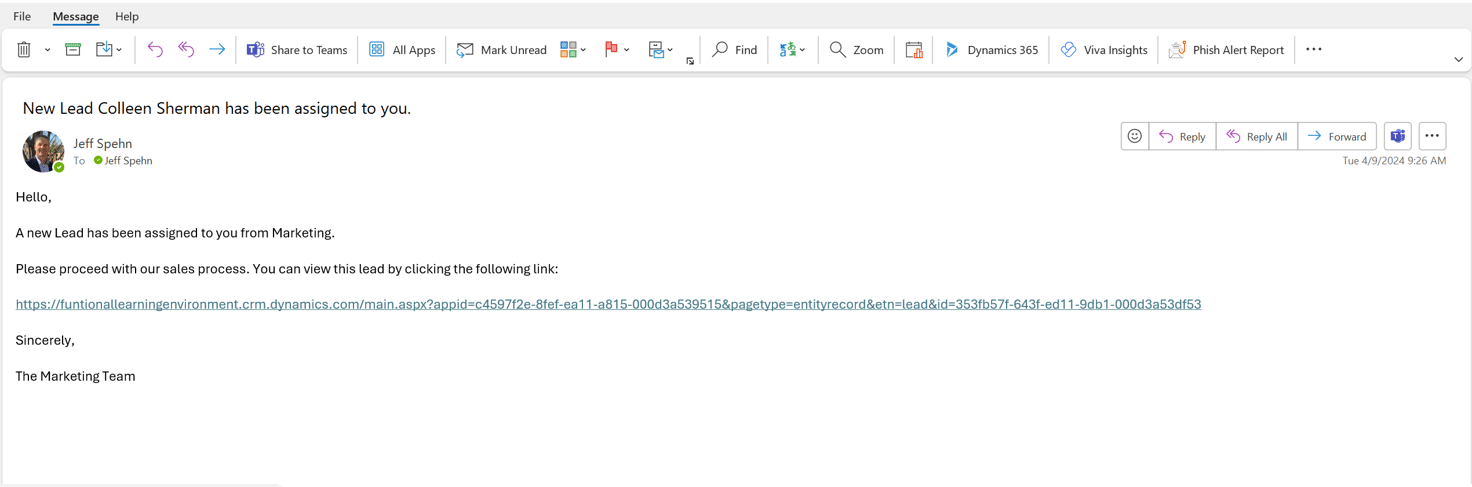
Returning to our example, our current flow has two actions. The first action is acquiring the email address from the sales representative on your team. When marketing marks the records as “Sales Ready”, the flow needs to know to who to send the record.

The second action is sending an email via Outlook. When creating this step, you can define the message and include certain links or actions for the salesperson. Once the flow is triggered, an email will automatically be sent to the salesperson notifying them that a lead has been assigned to them.

From there, your salesperson clicks on the link to the record and has all the information they need to start the sales process.
Be Sure to Test Your Flow
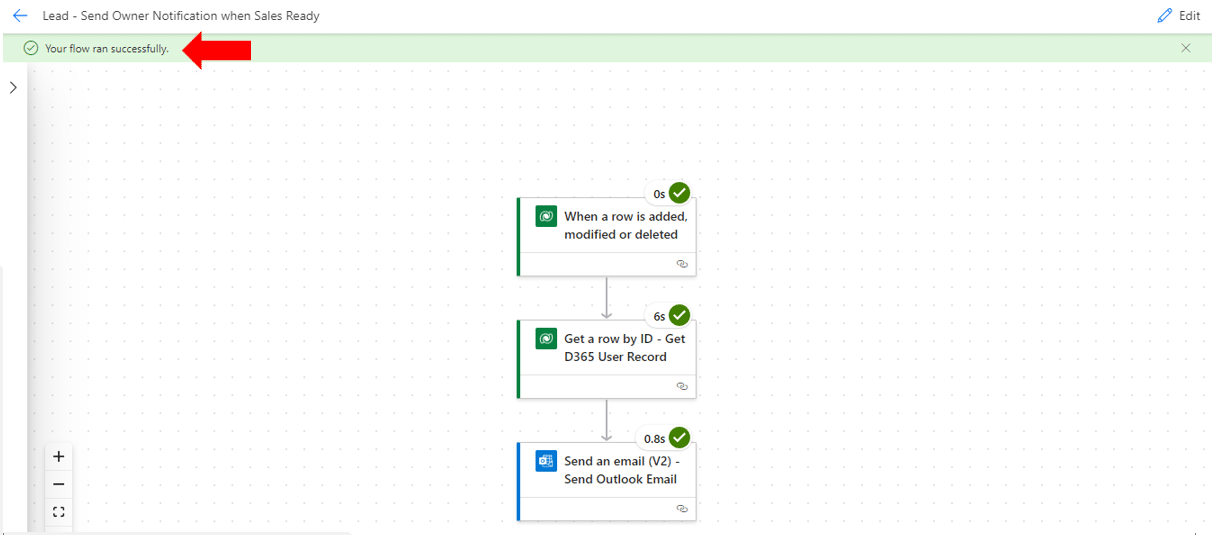
You will want to test your flow before making it live. You can do this from the flow page by clicking the “Test” button in the upper right corner. You should receive a message that your flow ran successfully. If it doesn’t the system will notify you and detail what changes you need to make to ensure it works.
Now that you've created your flow and the marketing department has triggered it by marking the record as ready for sales, the workflow will automatically send this email to the salesperson:
Step-by-Step Guides on How to Build Flows
In the videos below, we walk you through how to set up two common types of flows. While these are just two examples, they will give you a sense of the strength Power Automate brings to the table and how easy it is to automate tasks within your organization.
Email workflow:
Approval Workflow:
Best Practices for Power Automate Workflows
Here are some additional best practices to follow when building flows with Power Automate:
- Utilize solutions: Organize workflows using solutions, especially in different environments, aiding in version control and dependency management.
- Establish ownership: Assign ownership to workflows to a stable entity, such as an automated user, to ensure continuity and accessibility.
- Set up a naming convention: Implement a clear and consistent naming convention for workflows to enhance readability and manageability.
- Have a solid connection strategy: Use connection references instead of user credentials to access connectors, facilitating easier management and transition between environments.
- Use AI Tools: Leverage AI tools like Copilot for assistance in creating connections and workflows. This is especially useful for beginners.
These best practices aim to streamline the development and management of workflows in Power Automate, promoting efficiency and consistency across different projects and environments.
Want More Information About How Power Automate Can Improve Your Business?
Our team of experts is knowledgeable and Power Automate and dedicated to helping you and your team work smarter and more efficiently.
Get in touch with us to learn more.
Co-Author: Jeff Spehn

Under the terms of this license, you are authorized to share and redistribute the content across various mediums, subject to adherence to the specified conditions: you must provide proper attribution to Stoneridge as the original creator in a manner that does not imply their endorsement of your use, the material is to be utilized solely for non-commercial purposes, and alterations, modifications, or derivative works based on the original material are strictly prohibited.
Responsibility rests with the licensee to ensure that their use of the material does not violate any other rights.