


Quick and Easy Security Updates in Dynamics AX
Whether a user has been given a new responsibility or new functionality is being implemented, there are times where a user's security in Dynamics AX needs to be updated. Usually, this means just adding one or two pieces of functionality to their existing security role. However, any type of security modifications can seem like a daunting task – even just providing access to a single menu item. Here are some steps to follow in Dynamics AX which allow you to quickly and easily use out of the box security objects to update an existing role.
-
Determine what menu item is needed.
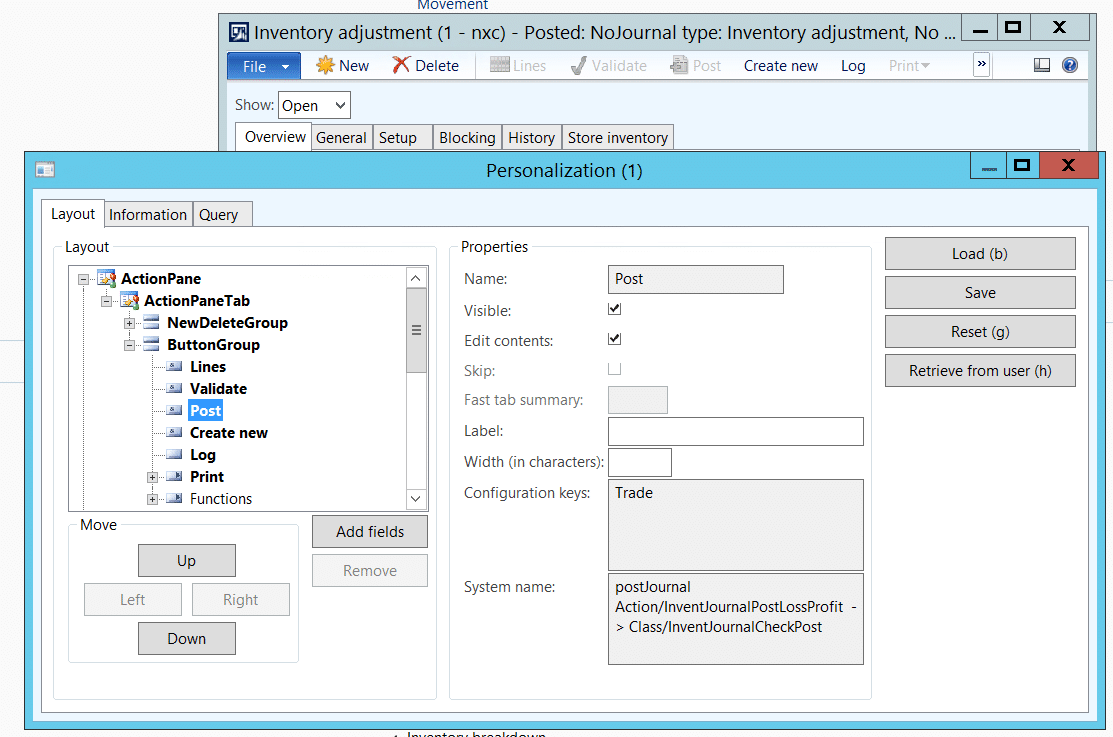
Your first step is to determine what menu item is needed. Usually a user will tell you the label of the form or button they need. For example, if a user has access to view and create an inventory adjustment journal but now needs to be able to post that journal, the user will generally say “I need access to the Post button for the inventory adjustment.” To determine the exact menu item name, go to the form (the inventory adjustment journal in this case), right click and select personalize. In my scenario, since they already have access to the form and just need access to the Post button, I am going to find the Post button in the Layout tree and find the name in the System name field. As you can see below, the menu item that is needed is an Action menu item with a name of InventJournalPostLossProfit.
2. Locate the menu item in the AOT
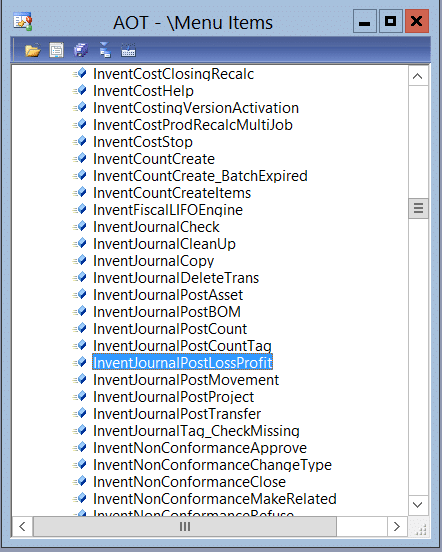
Once you have found the menu item name, the next step is to locate that menu item in the AOT. Press Ctrl+D to open the AOT and then expand the Menu Items node. In my scenario, I’m looking for an Action menu item so I’m going to expand the Action node and find my menu item.
3. See which duty or privilege provides access
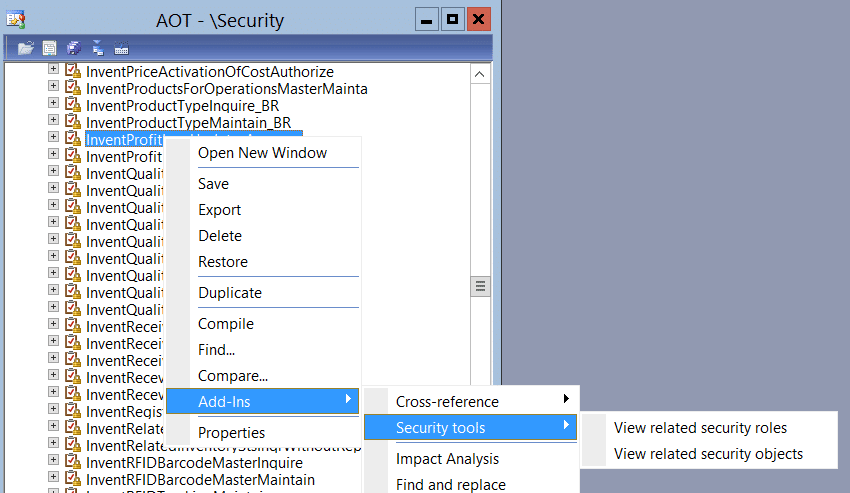
The next step is to see which duty or privilege provides access to this menu item. To do this, right click the menu item and select Add-Ins > Security tools > View related security roles

4. Verify which privilege gives the access you need
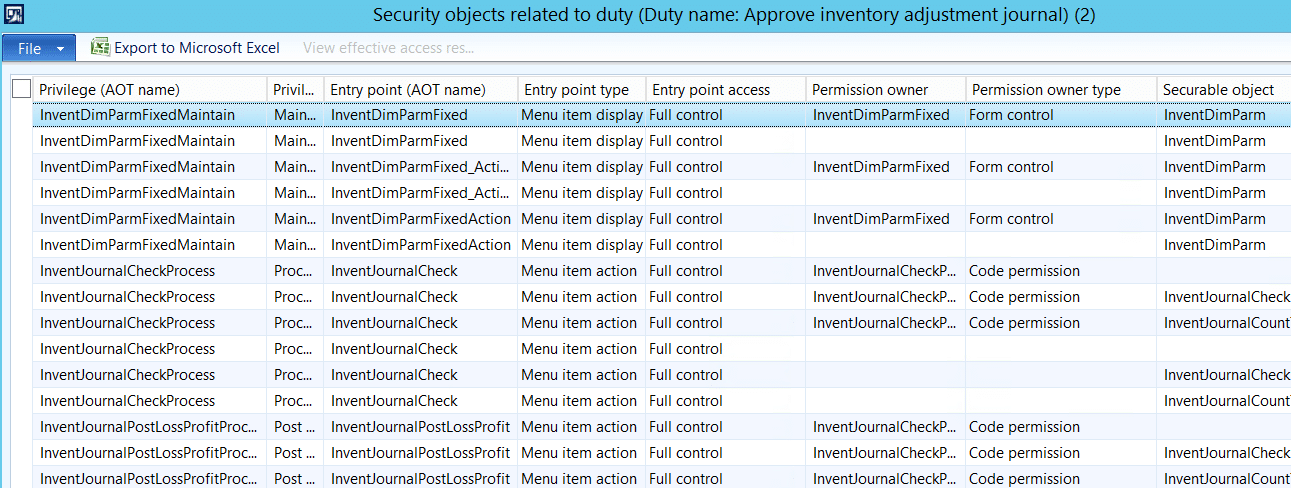
This opens a window which shows all the roles, duties, and privileges which provide access to this menu item. Depending on the menu item, there may be a lot of different roles and duties which can provide access. The main piece you want to be aware of is which privilege gives the level of access you are needing to provide to the user. In my scenario, this menu item only has a single role, duty, and privilege which provide access to it. You can see in the screenshot that the access level (Entry point access) is Full control.

5. Try to work at the 'duty' level if possible
From here, you should be able to determine which duty or privilege you need to assign to the role. I usually try to work at the Duty level if possible so that the security roles are a bit easier to maintain. To determine if you can assign the duty without giving access to a lot of other menu items which could be a security risk, find the applicable duty in the Security > Duties node of the AOT. Right click the duty and select Add-Ins > security tools > View related security objects.
6. View the comprehensive list of security objects related to duty
A window opens which shows every privilege, entry point, and securable object which are contained within the duty and their related access level.
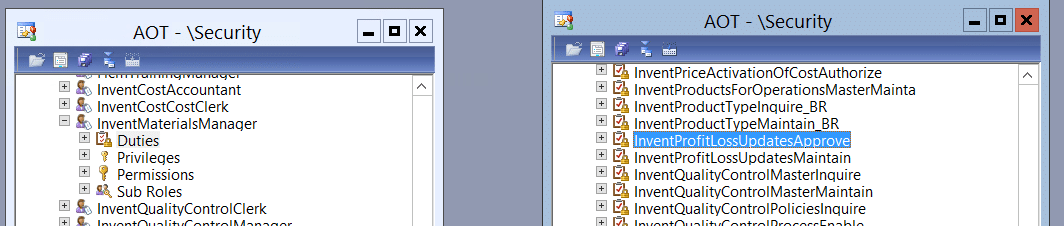
7. Add duty to the security role
After you have verified that the duty won’t provide access to unwanted menu items, the final step is to add that duty to the security role. To do this, open another AOT and find the role you want to modify in the Security > Roles node. Expand that role and then drag the duty from your original AOT window to the Duties node of the role.
Please note – any changes made in the AOT (including security changes) are considered development. Make sure to follow your company’s defined development path which may include making the changes in a development environment and releasing a code build to a test environment before releasing to your production environment.

Under the terms of this license, you are authorized to share and redistribute the content across various mediums, subject to adherence to the specified conditions: you must provide proper attribution to Stoneridge as the original creator in a manner that does not imply their endorsement of your use, the material is to be utilized solely for non-commercial purposes, and alterations, modifications, or derivative works based on the original material are strictly prohibited.
Responsibility rests with the licensee to ensure that their use of the material does not violate any other rights.