


Update Report Formats using Microsoft Word – Dynamics NAV 2017
Reports and documents are generated, electronically or physically, throughout the course of each business day to facilitate your business. Reports help decision makers view important financial details to review trending, complete reconciliations, and make important decisions. Succinct reporting with the pertinent information needed in a streamlined format can save recipients time. Documents sent to clients or vendors are important records for our businesses with real financial impacts. Providing customers & vendors with accurate and clear information on Orders & Invoices reduces inquiries, order errors, and can expedite payment processing.
Updates to existing report formats in NAV 2017 has been simplified and made accessible to the "every day" user through the exposure of Word Report Layouts. Previously, small enhancements to a report to produce a document or report to produce financial information required consultant time & effort. Let's walk through the process to access report layouts, modify an existing layout and then set that new layout as our default layout for the report.
NOTE: I recommend creating a copy of an existing layout and then completing the modification desired to leave the original intact. This blog post will walk through the steps to complete the activity of copying then modifying.
How To Set-Up Word Reports For NAV 2017
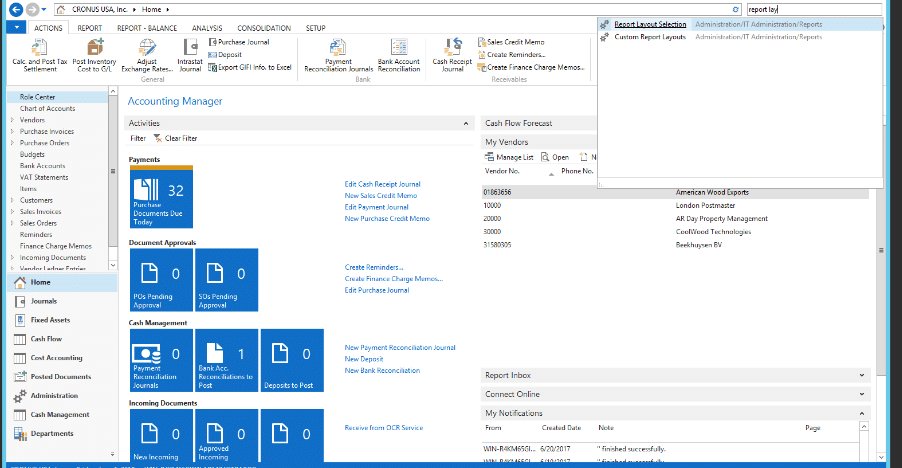
1. Search Report Layout:
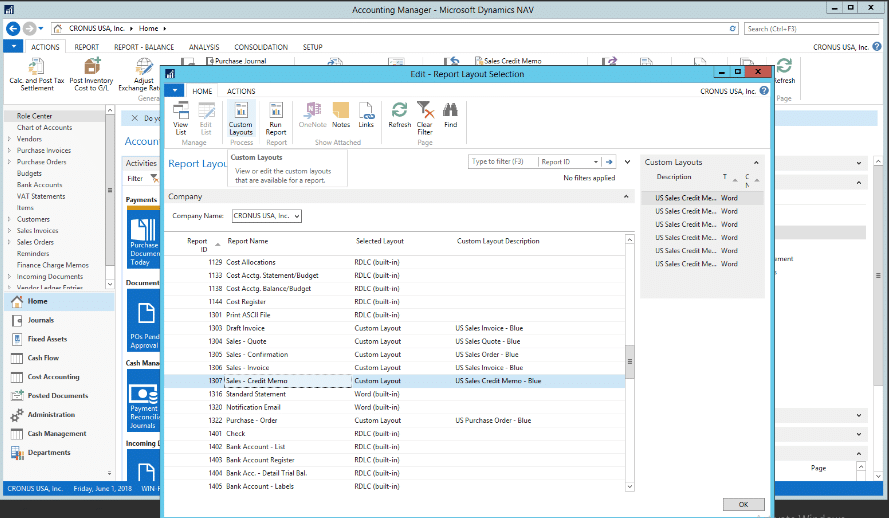
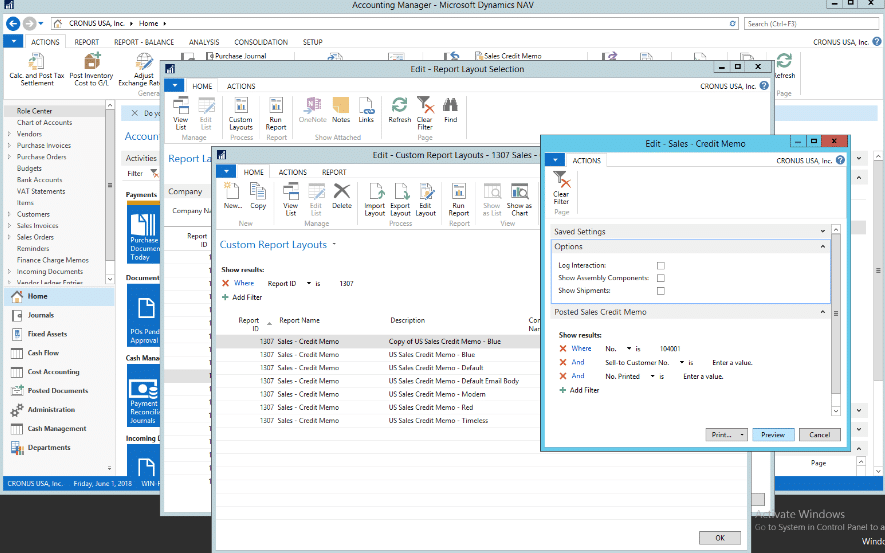
a. To access existing report layouts, search for Report Layout Selection.
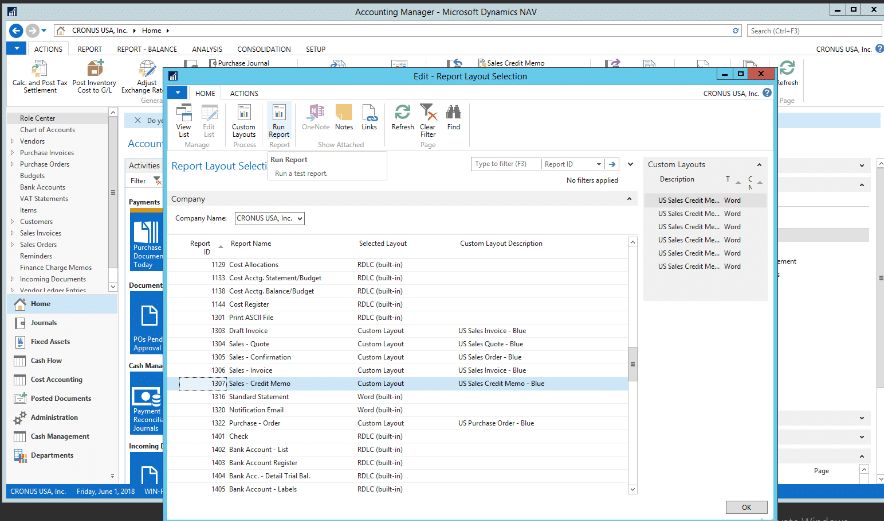
b. The list provides you with the report listing and the current layout selection. To view the current layout, you can run the report from this window by clicking home->Run Report
c. Specify Report criteria and click preview or Print:
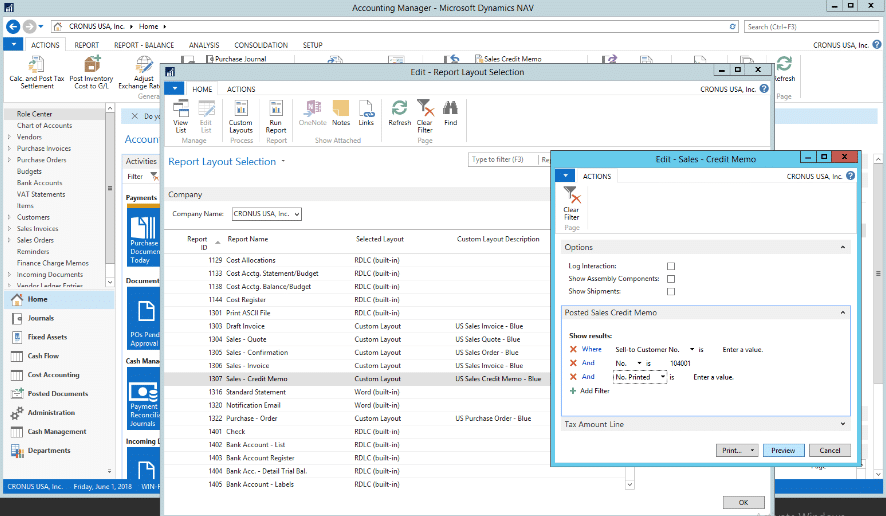
I then saved this report in a PDF format for reference while I work on my customizations/modifications.
Select the Layout to start from:
2. From the Report Layout Selection list, click "Custom Layouts"
a. We are going to modify the existing layout in a new template for use. To do so, we are going to copy the existing template for use by highlighting "US Sales Credit Memo - Blue" and clicking "Copy"
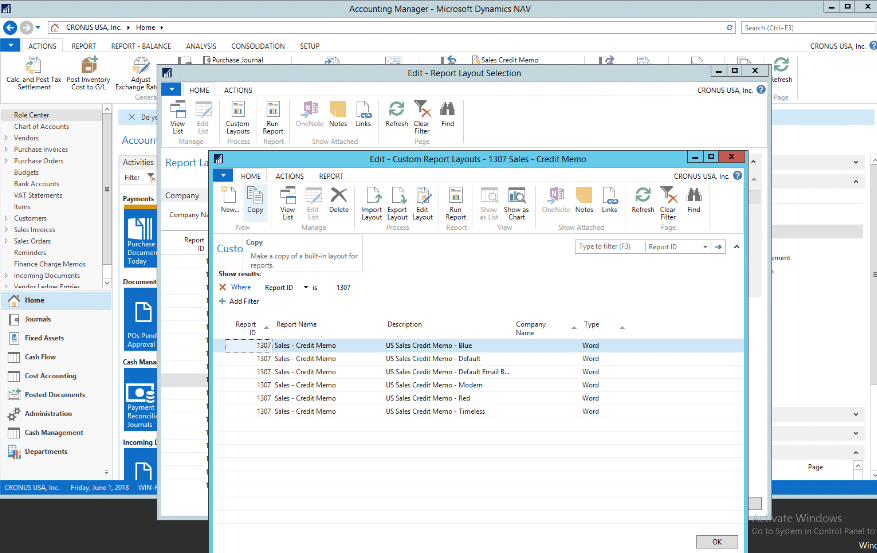
b. Creating a new copy to modify. Then select “Edit the Layout”:
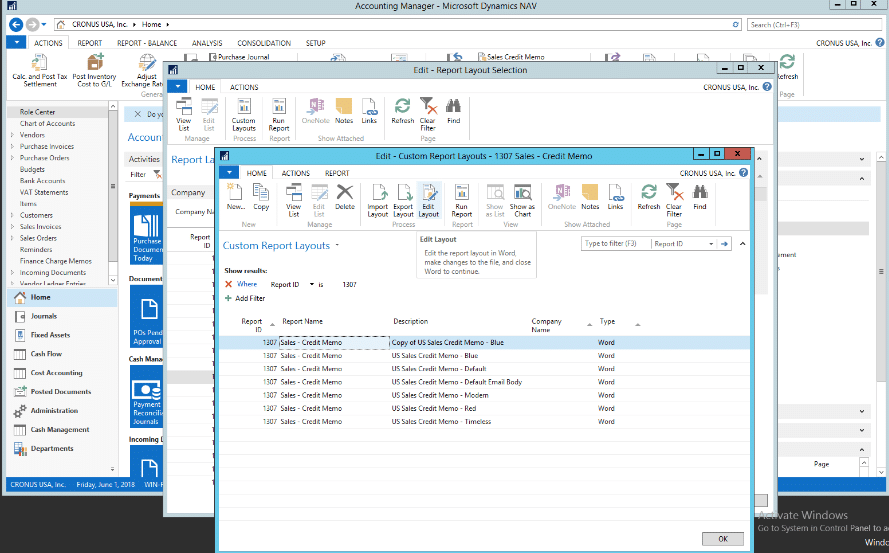
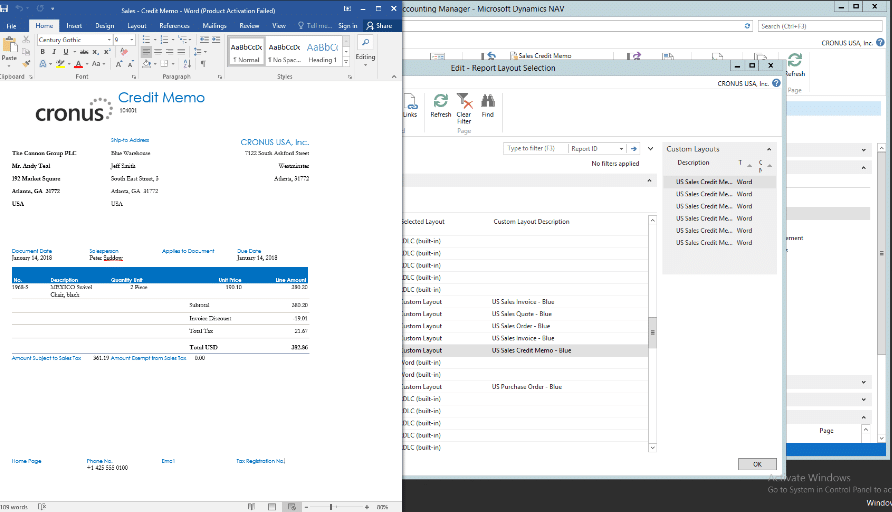
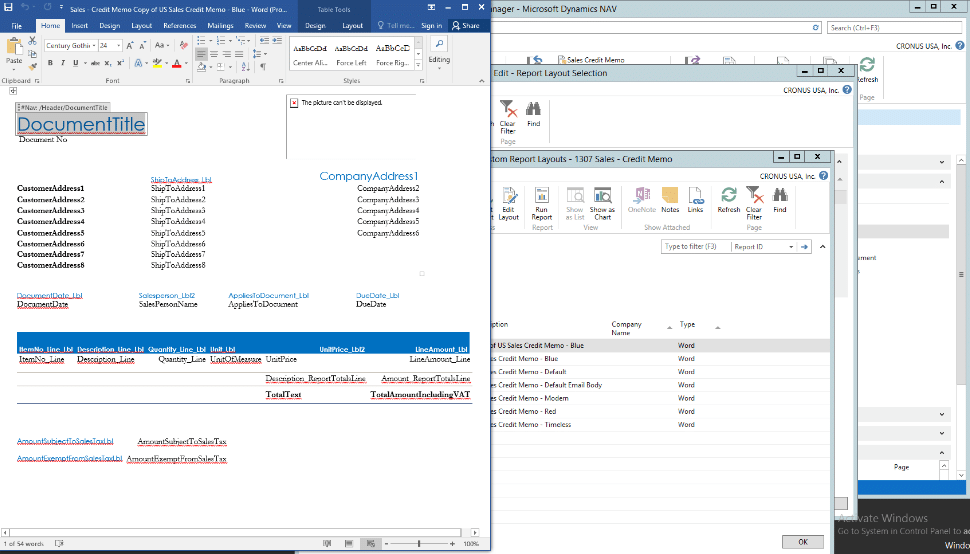
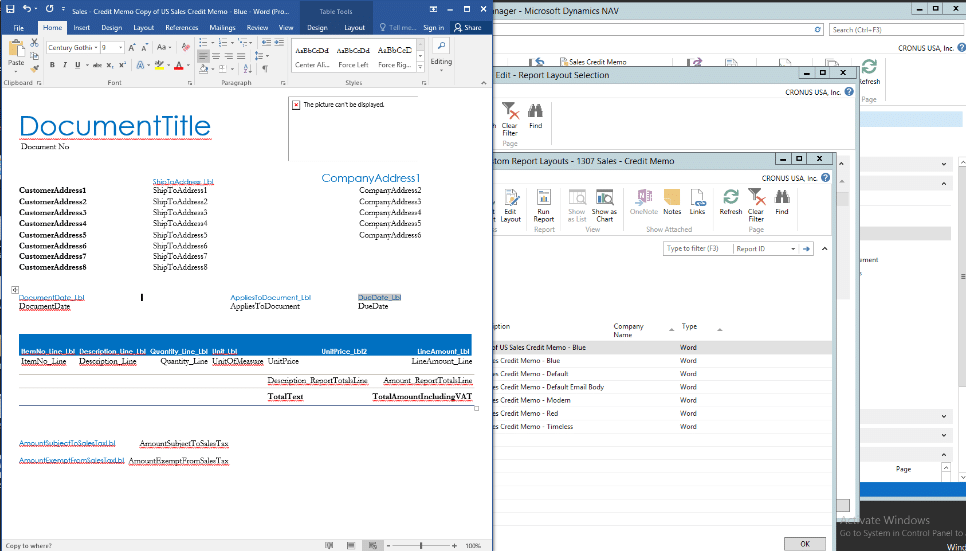
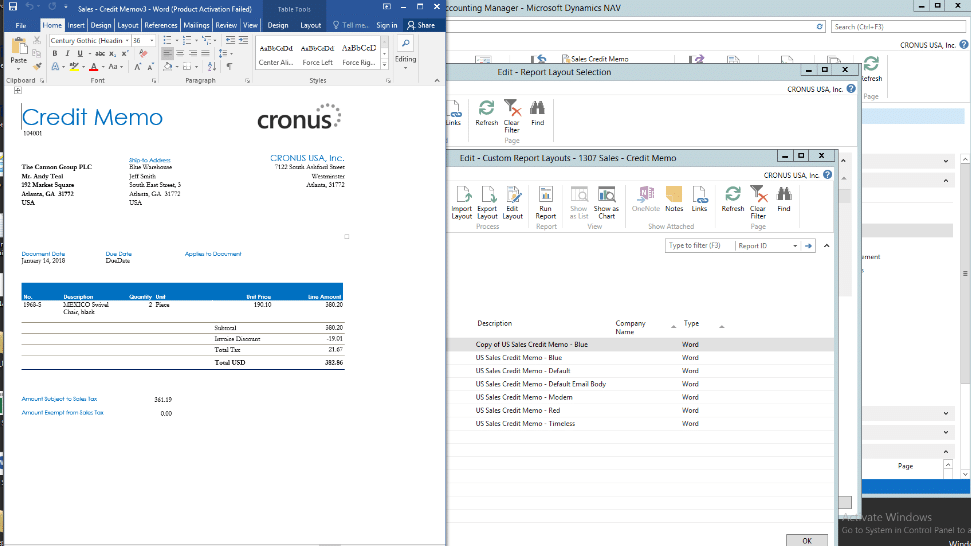
c. Which will open in Word:
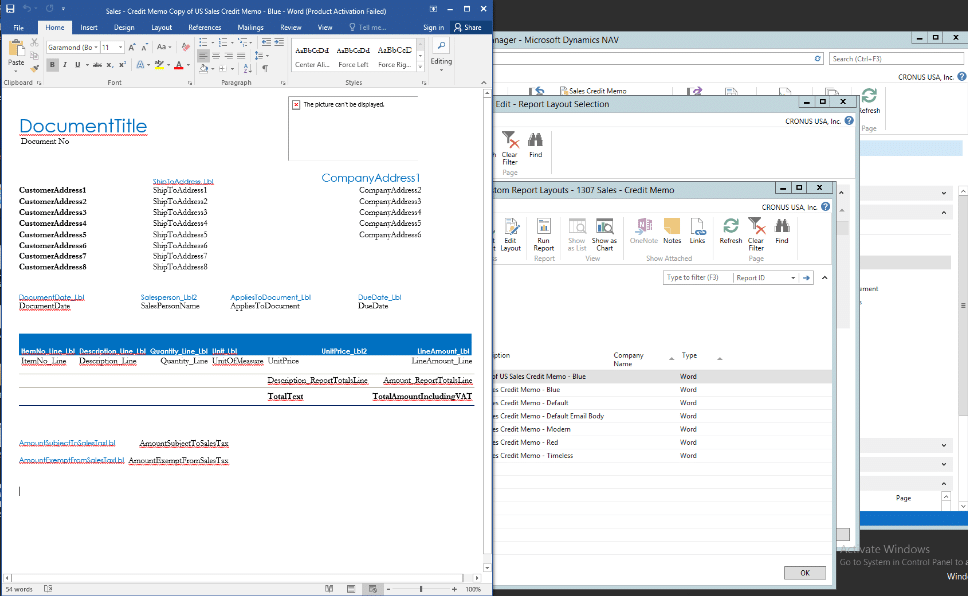
From here we, to show the modifications at a high level, here are 3 updates:
1. Change the font size on the document header
2. Delete the Sales Person Name
3. Move the Due Date
1. How to…Change the Font Size in Word:
a. Highlight the text that you wish to update. Since this is a "report field" a grey header will pop up above the value when selected.
b. Select the new font size. In this example, I am updating the report font size from 24 to 36

c. Any font modifications within the document would result in the same impact to the document as they would in a Word document. This includes changing the font (i.e. Times New Roman _> Arial), Color, Style, etc.
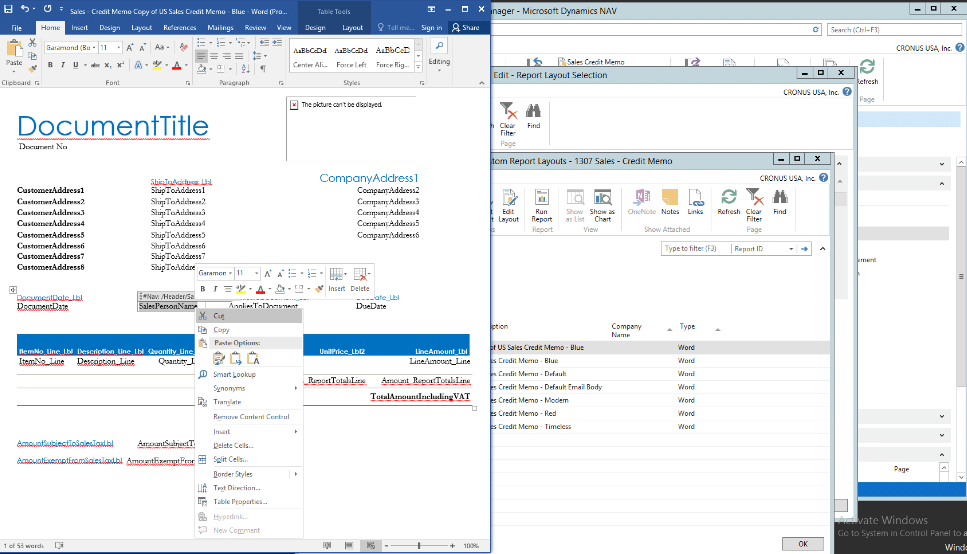
2. Delete the Sales Person Name:
a. Highlight the cell/content you wish to remove. The grey header will pop up above the value. Delete the value
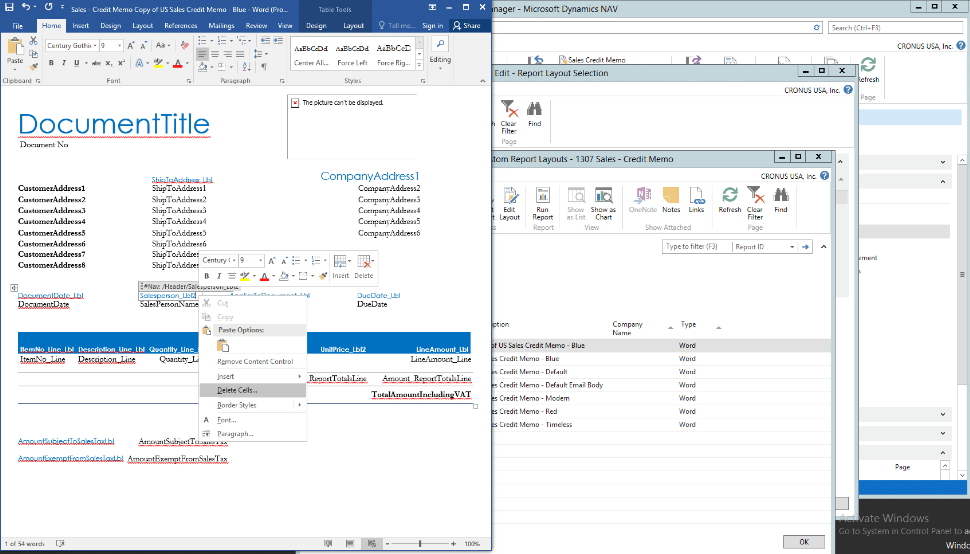
b. In this case, I want to delete both the Sales Person Header AND the Sales Person Name from the report, so I am going to select & delete each one separately:
3. Move the Due Date:
a. Highlight the text to select the header of the field you wish to move, in this case it is the DueDate_Lbl field:
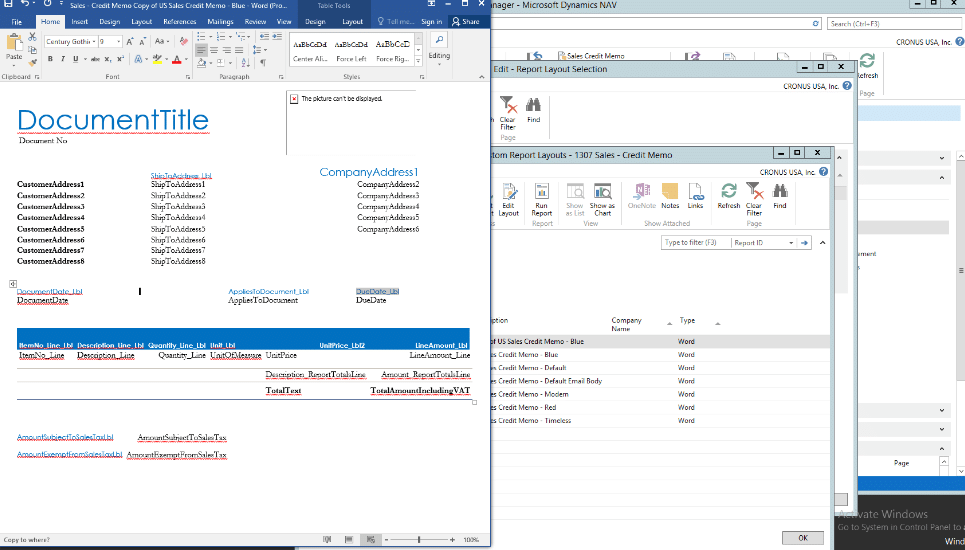
b. Hold down the left mouse key to drag the header to the new location. In this case, I am moving the Due Date Field to the left side of the document next to the Document Date:
c. Once you release the mouse, the field is now in the new location!

d. Additionally, let's move the field value using the same steps. Select the text, drag and drop.

Once complete - I am going to save a copy of this Word Document
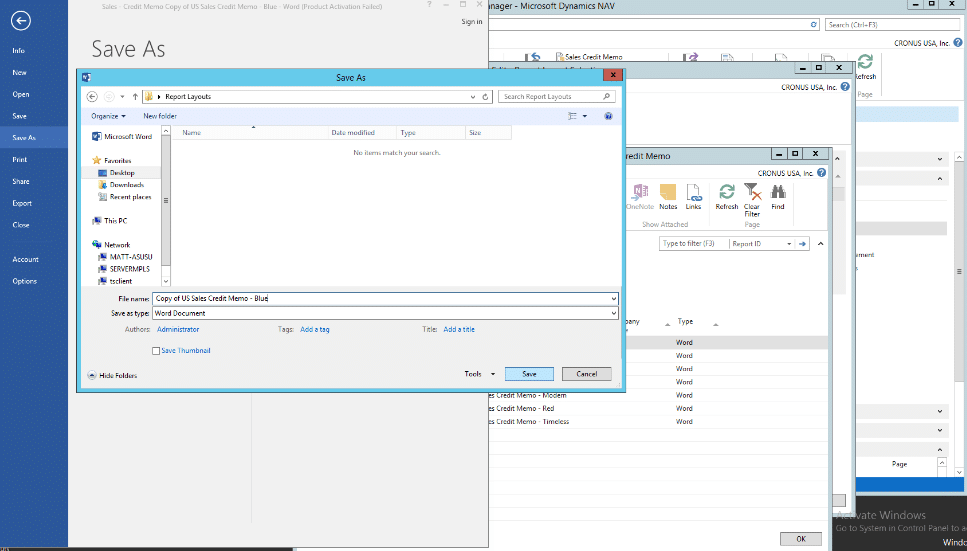
Click Save. Close out of the word document
Next we need to load the layout back into NAV:
1. From the Custom Report Layout screen, highlight the line for the “copy” made and select “Import Layout”:
a.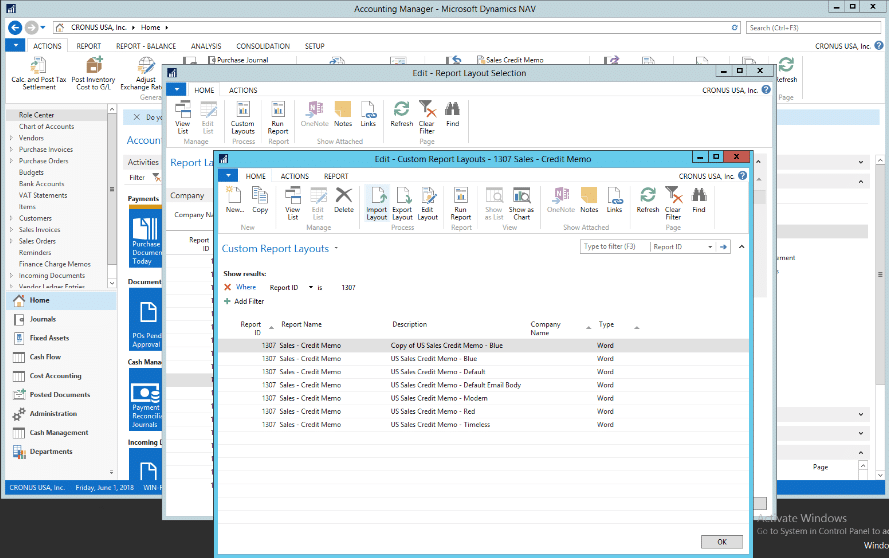
b.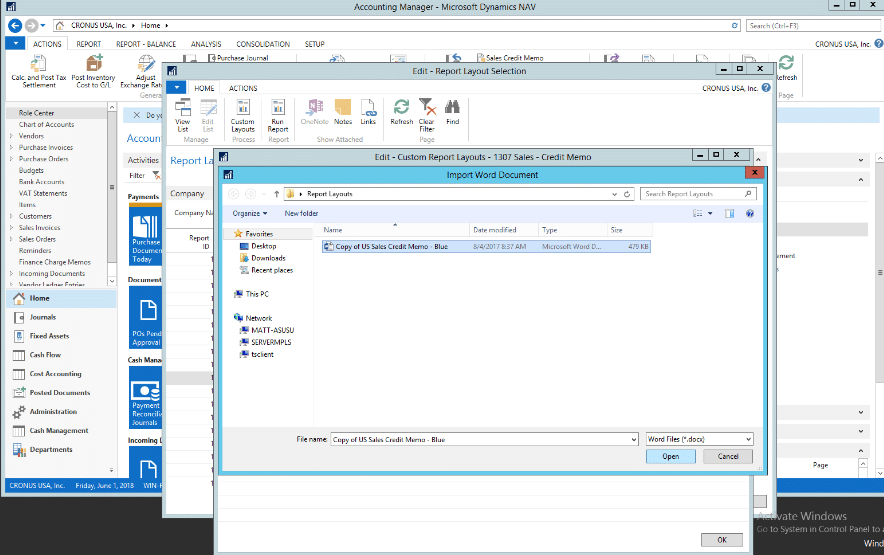
2. Once you click "open" the new format is loaded into NAV. To test-view the new report layout, click run report and specify the report parameters:
Lastly, we need to set the updated report format as the default template for Report ID 1307.
1. Close out of the "Edit - Custom Report Layouts" screen
2. From the Report Layout Selection screen, click on the column headers and select "choose columns" to add the field "Custom Report Layout Code:

3. Close & re-open the Report Layout Selection window to view this new column.
4. Then Click in the "Custom Report Layout Code" Field
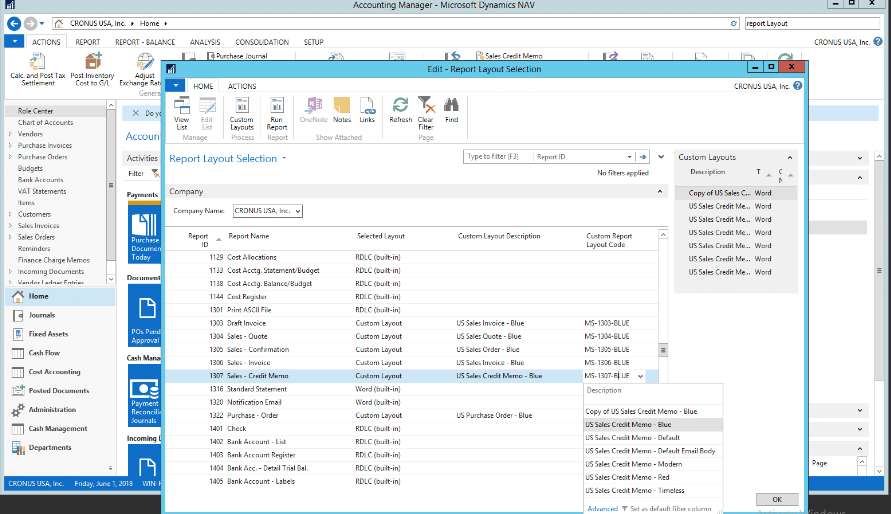
5. Select the new report layout produced.
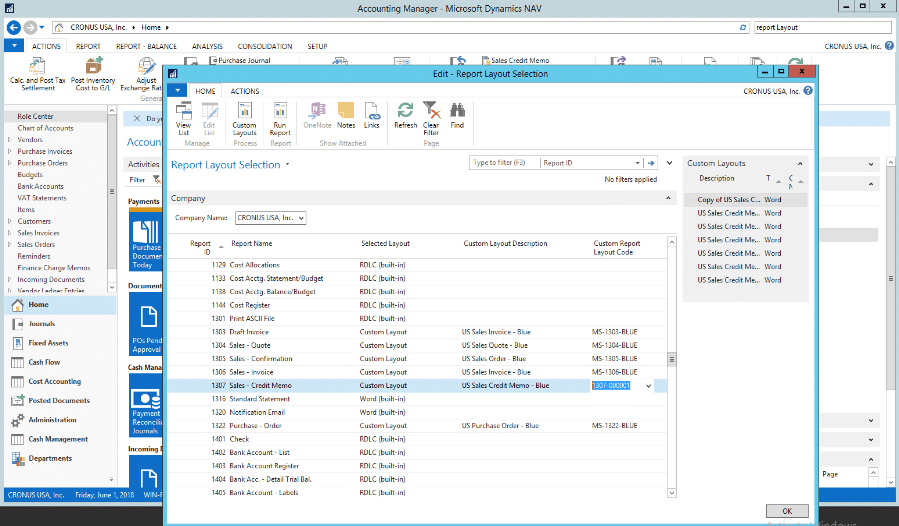
6. This sets the updated report layout as the default report format to be used each time this report is run.

Under the terms of this license, you are authorized to share and redistribute the content across various mediums, subject to adherence to the specified conditions: you must provide proper attribution to Stoneridge as the original creator in a manner that does not imply their endorsement of your use, the material is to be utilized solely for non-commercial purposes, and alterations, modifications, or derivative works based on the original material are strictly prohibited.
Responsibility rests with the licensee to ensure that their use of the material does not violate any other rights.