


User Personalization in Dynamics NAV: Work Smart, Not Hard
User personalization in Dynamics NAV is a free and often under-utilized tool that empowers businesses to improve efficiencies. Personalization allows you and your employees to remove clutter and hide functionality that is not being used, add short cuts for functionality that is used often, and improve the speed of data entry. In the examples below, we will explore three features of personalization on the Windows client.
Remove Clutter
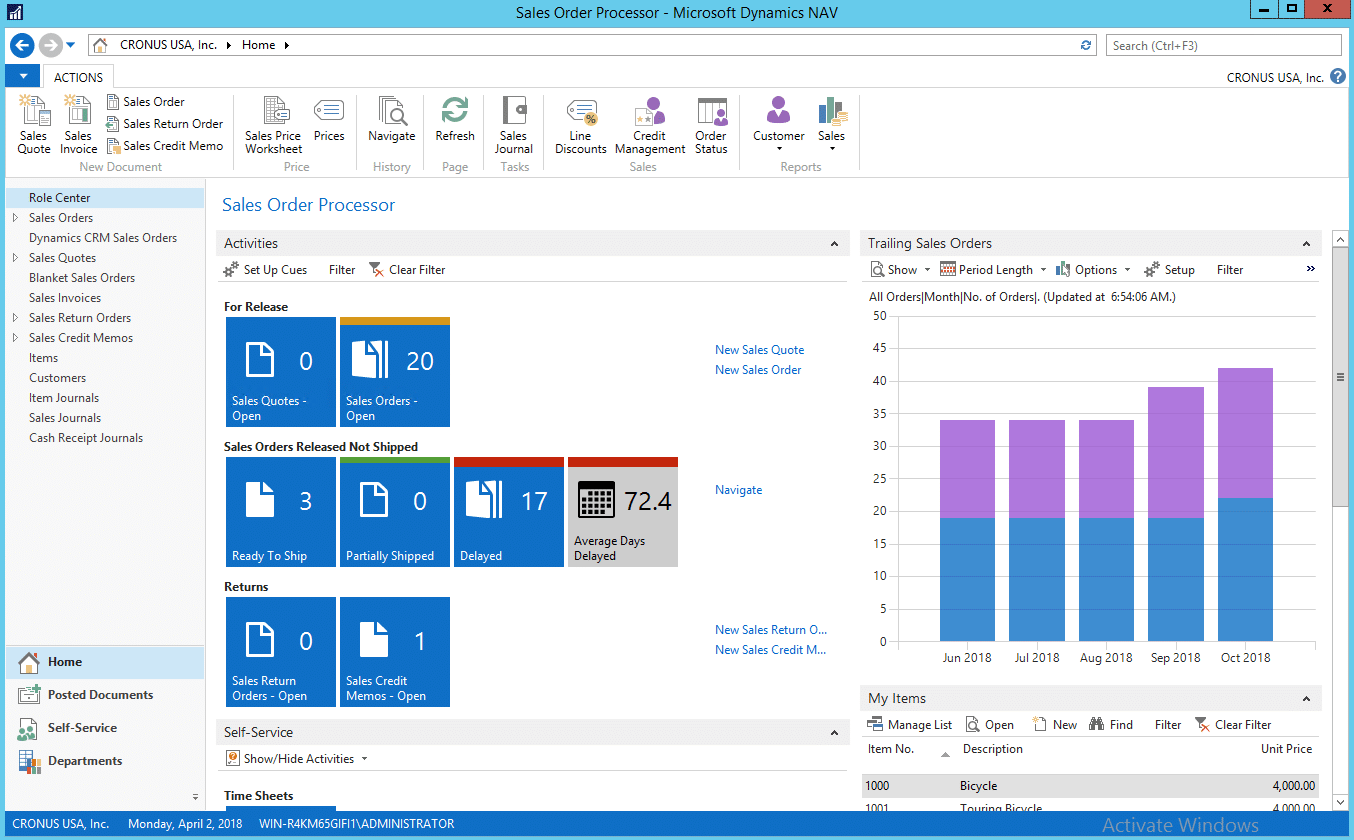
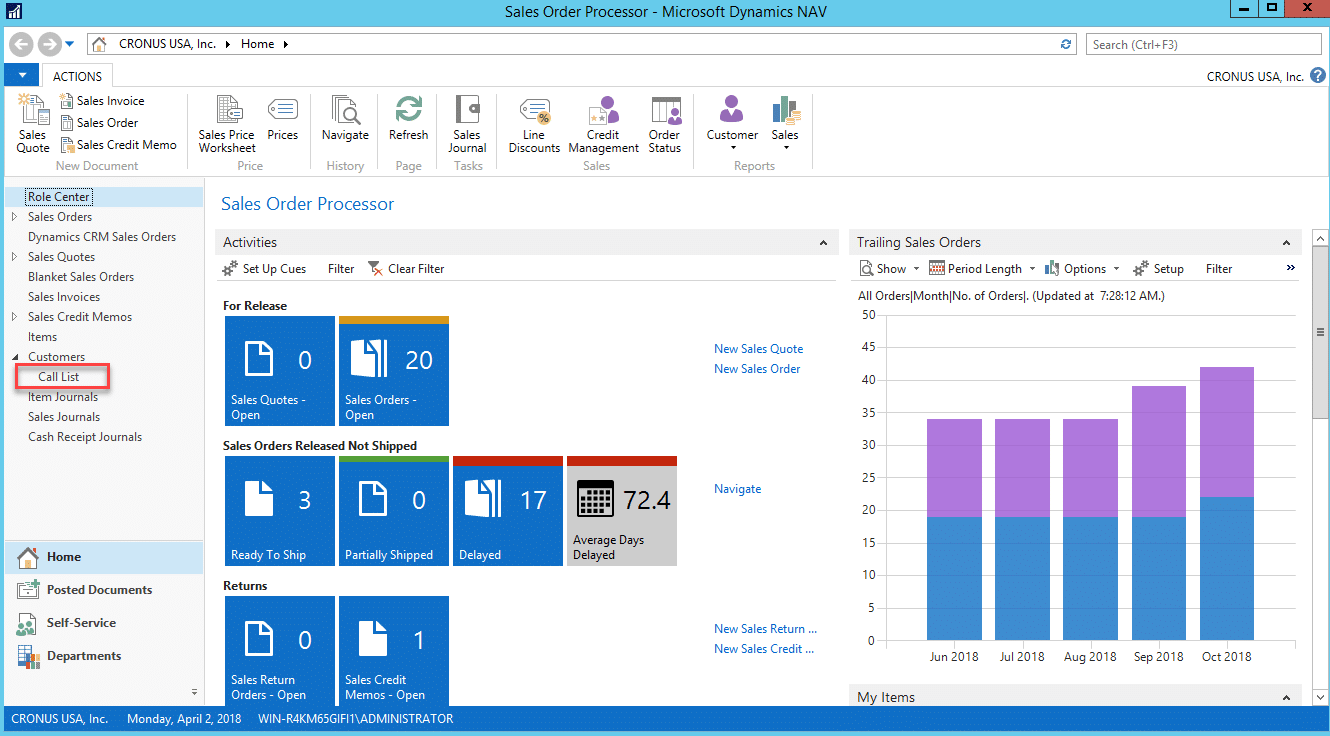
Imagine your company has hired a new part-time sales processor to help manage the demands of your growing business. This employee’s primary responsibility is to answer phones and create sales order documents in NAV for existing clients. The default role center for Sales Order Processor in NAV 2017 looks like this:
Your newly hired sales processor will be assisting with incoming orders only and will not be handling returns. You can remove the Sales Return Orders function from both the ribbon and the navigation pane, by right-clicking into these areas and selecting the customize option.
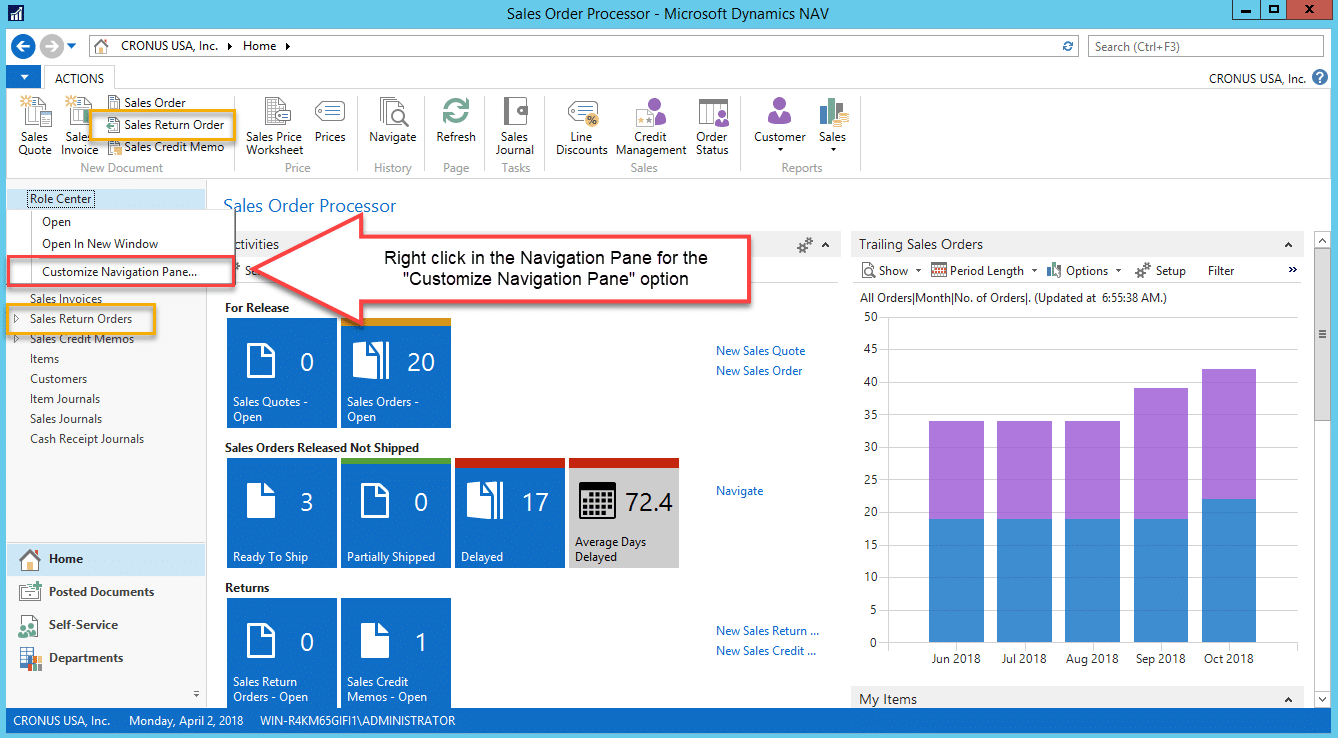
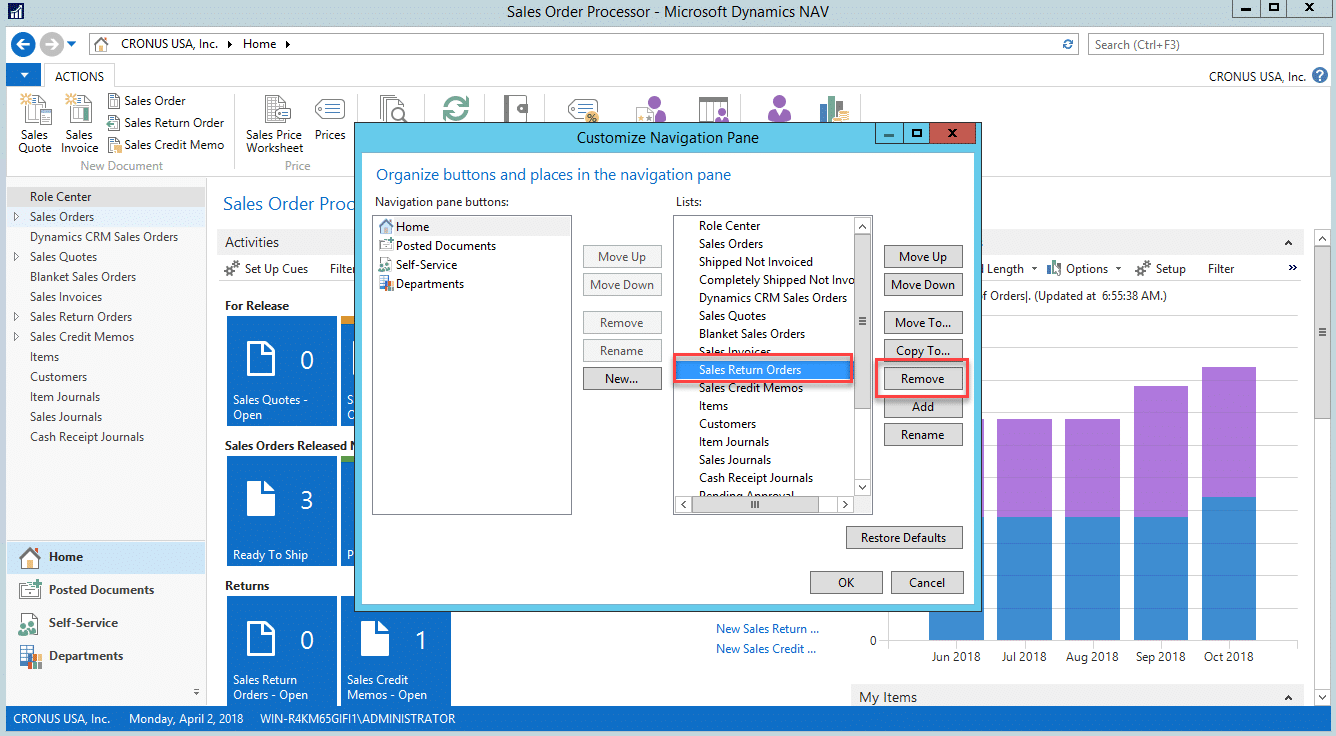
In the Customize screen pop-up, select Sales Return Orders and Remove this feature from the Home screen (note: the user is still able to access this functionality through the search bar or by navigating through departments).
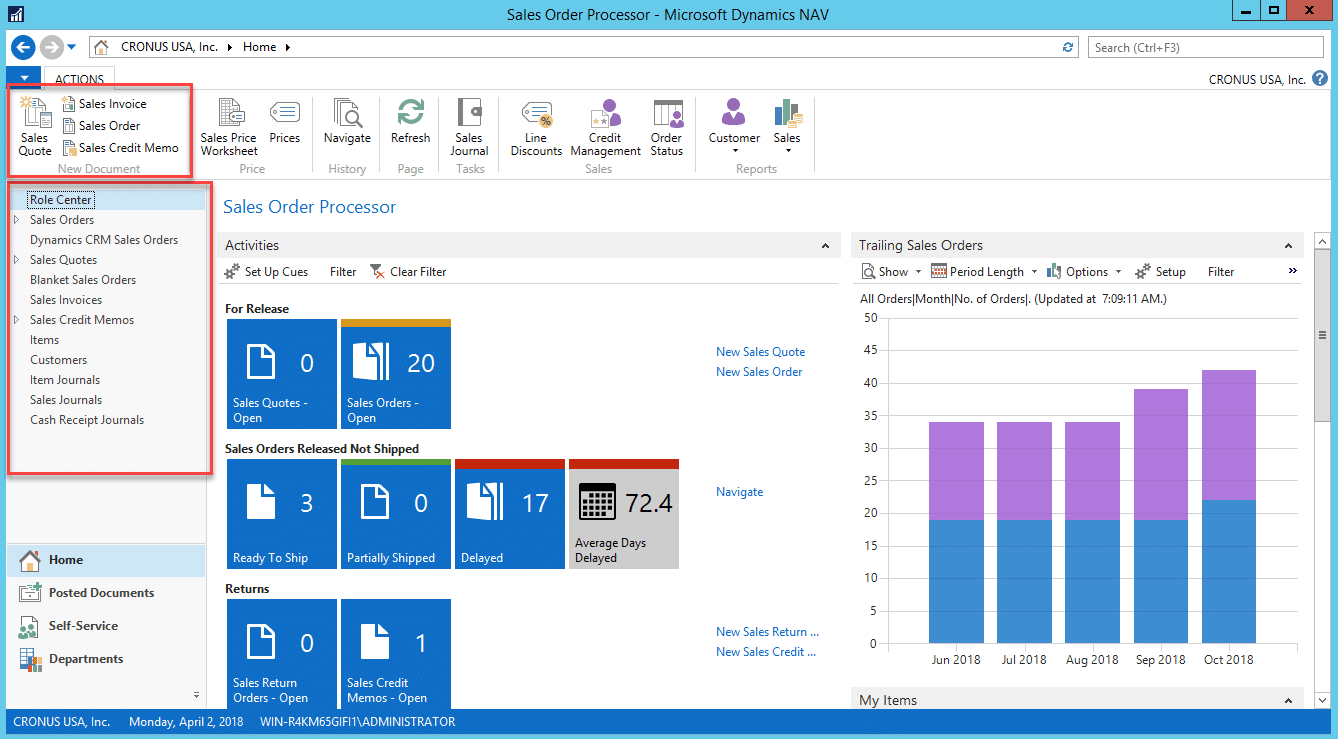
In the example below, Sales Return Orders has been removed from both the ribbon and the navigation pane.
Add Shortcuts
Your busy season has ended, and your Sales Processor has the capacity to assist with other duties. You have decided you need help contacting customers to resolve outstanding AR from your recent spike in sales.
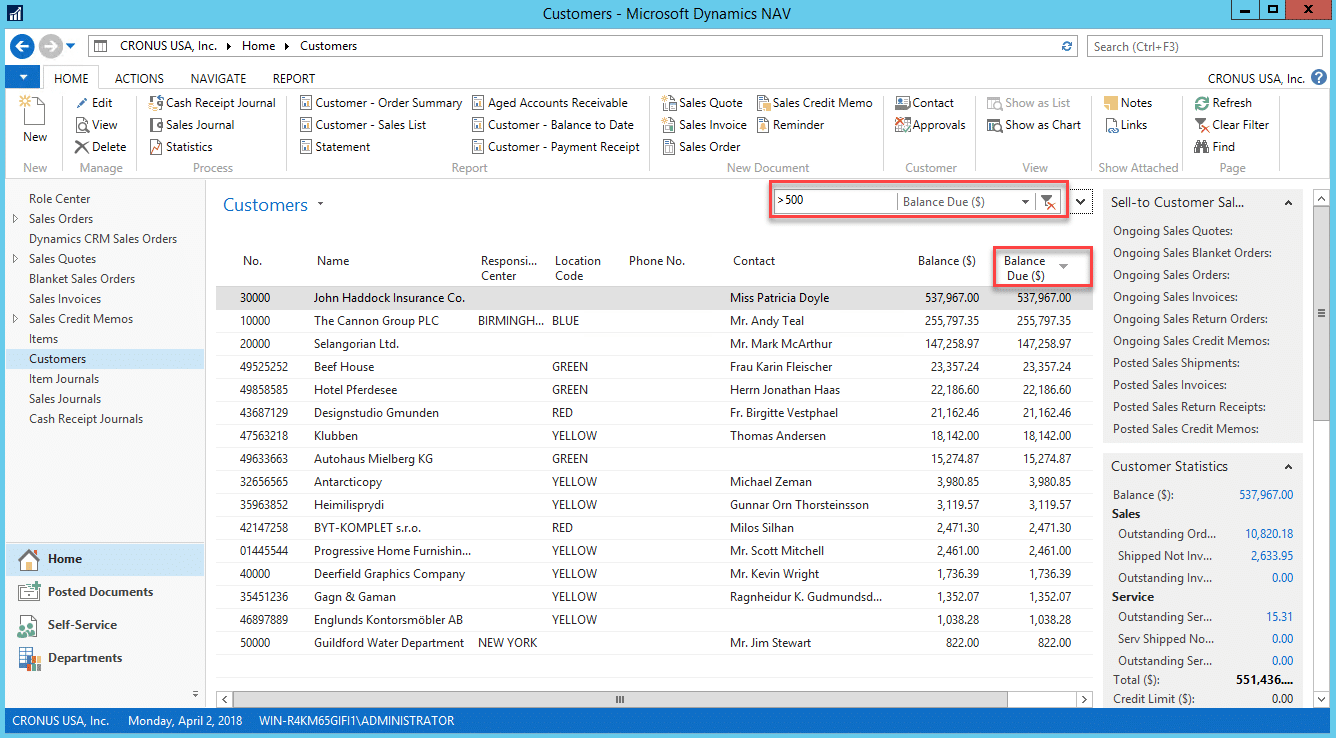
In this example, your priority is to contact customers with an outstanding balance greater than $500. From the customer list, use the filter bar to display customers with the desired criteria. You decide you should contact customers with higher balances first, so you sort the Balance Due ($) column from highest to lowest.
By selecting the drop-down next to Customers in the header, you can save this view to the navigation pane for easy access.
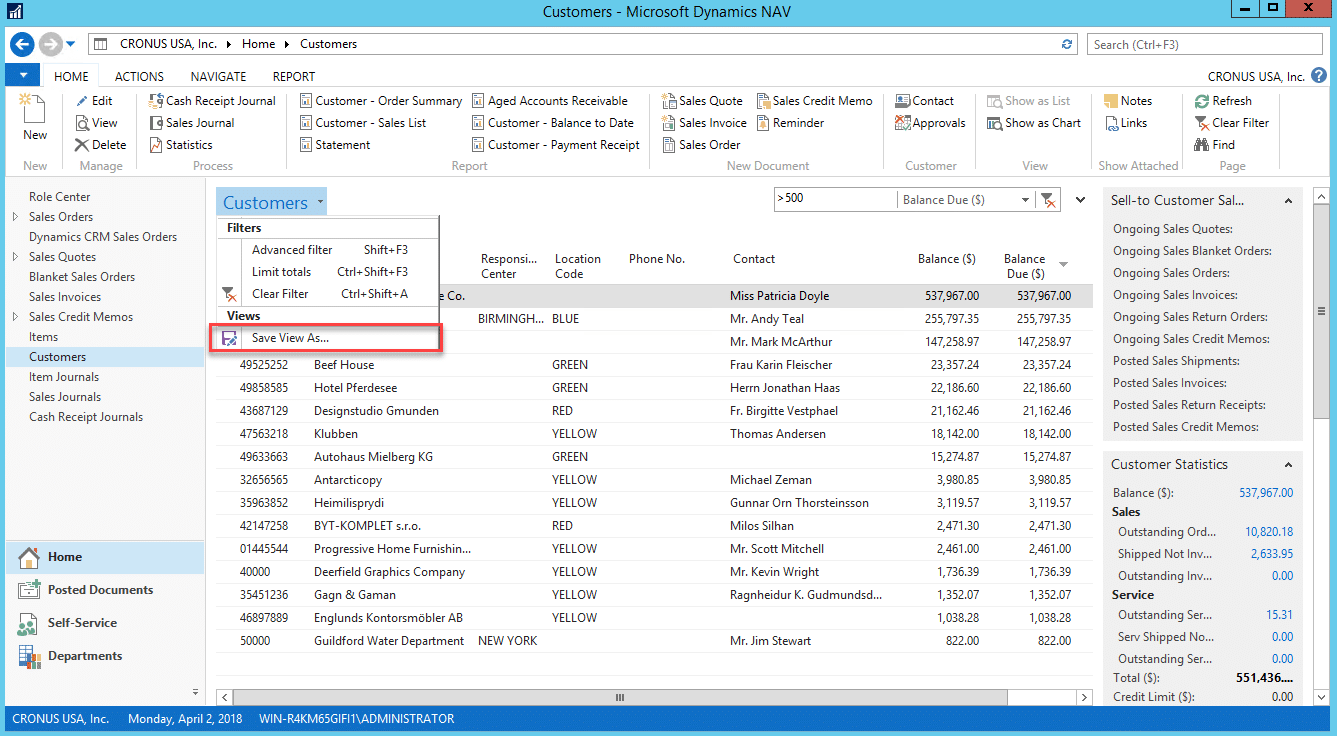
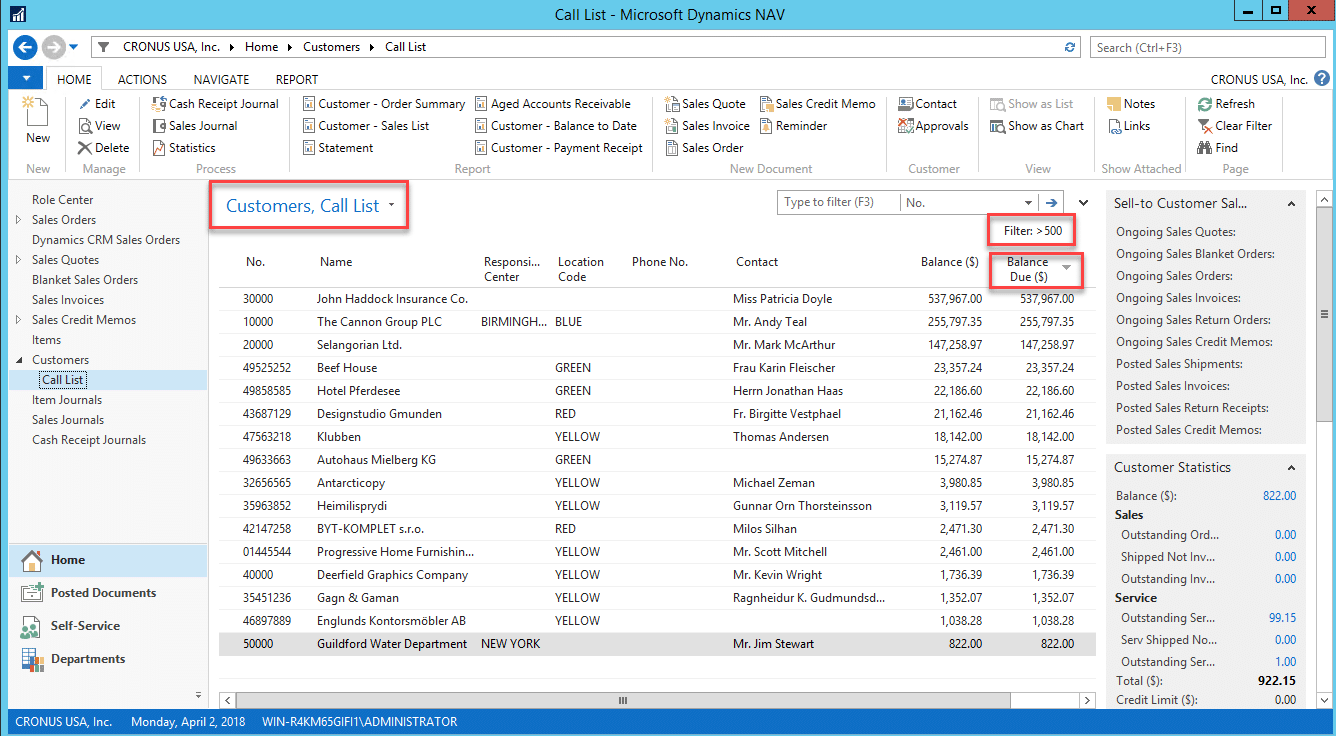
In this example, the view has been saved as “Call List” and added to the Home screen.
When this shortcut is selected, you are automatically returned to this view, with the filters and sorting saved.
Improve Data Entry
User personalization allows you reduce clicks and speed up data entry by customizing the FastTab view, and even allows you to set up sequencing when using the “Tab” key on your keyboard.
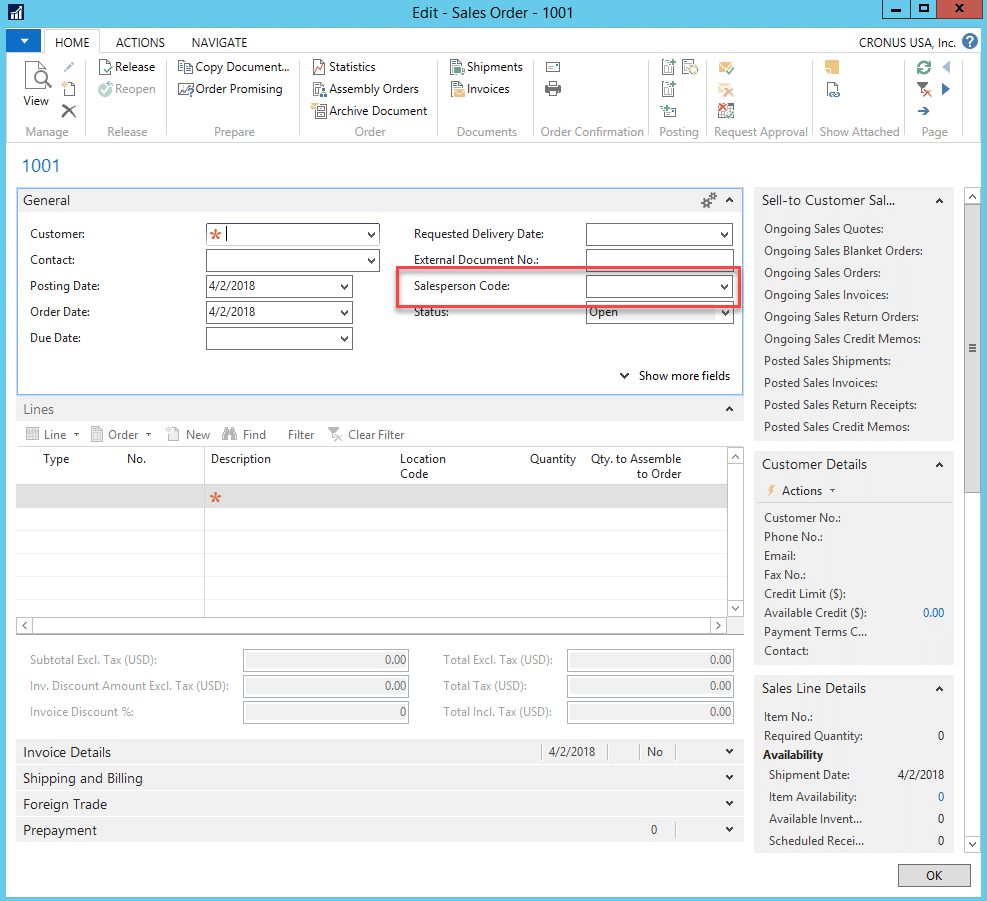
In this example, your company requires a Salesperson Code to be entered with each order. The Salesperson Code field is hidden unless Show more fields is selected in the FastTab.
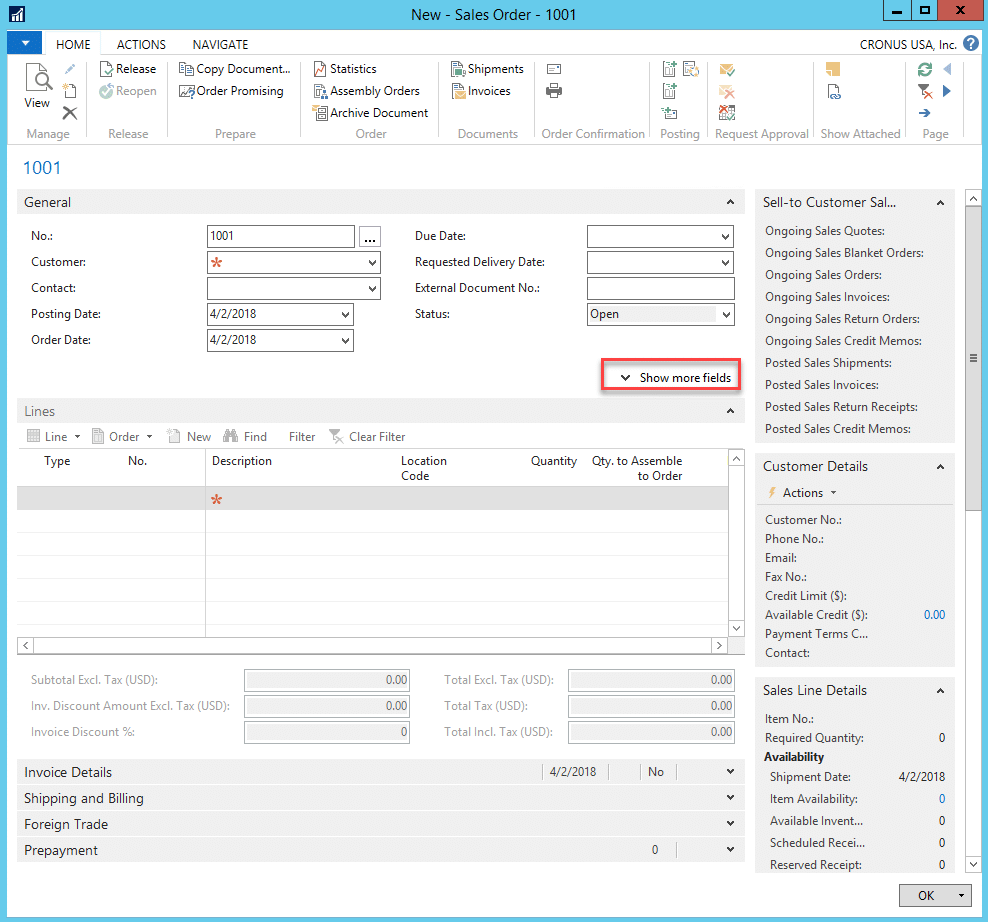
To add this tab to the expanded view, select the blue arrow at the upper right hand of the document and Customize This Page.
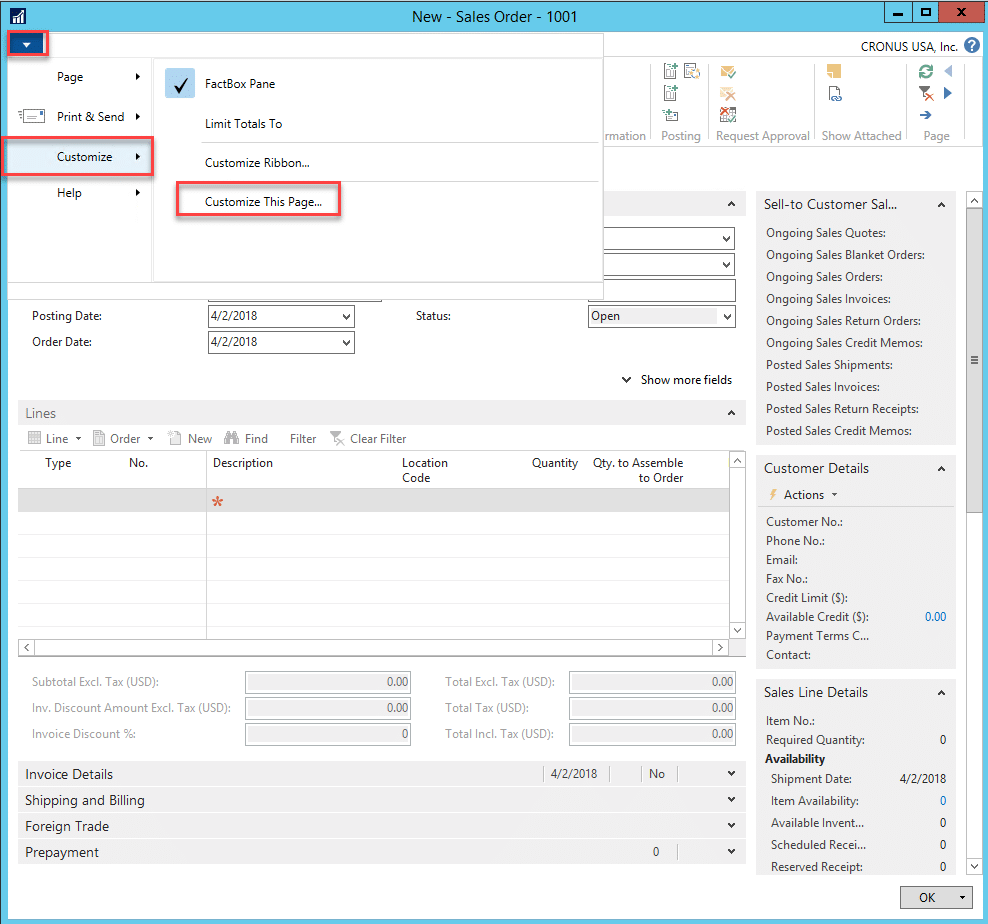
Select FastTabs, highlight the FastTab you wish to personalize, and select Customize FastTab.
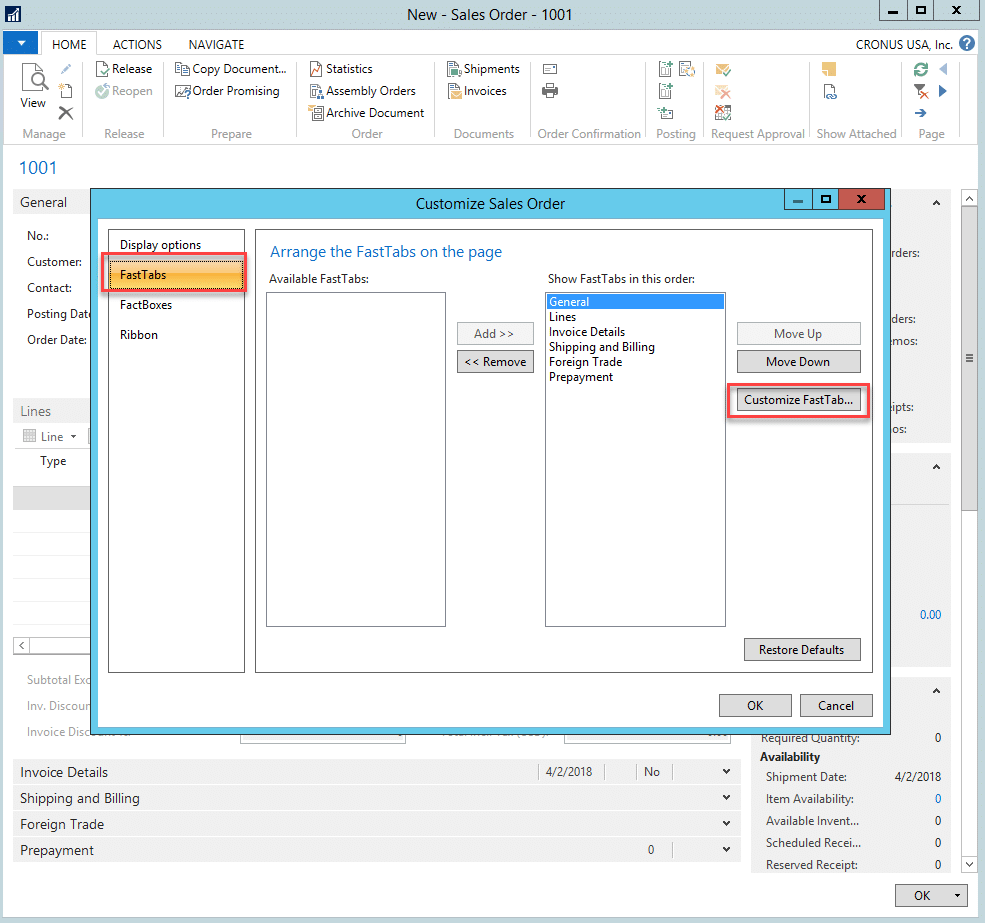
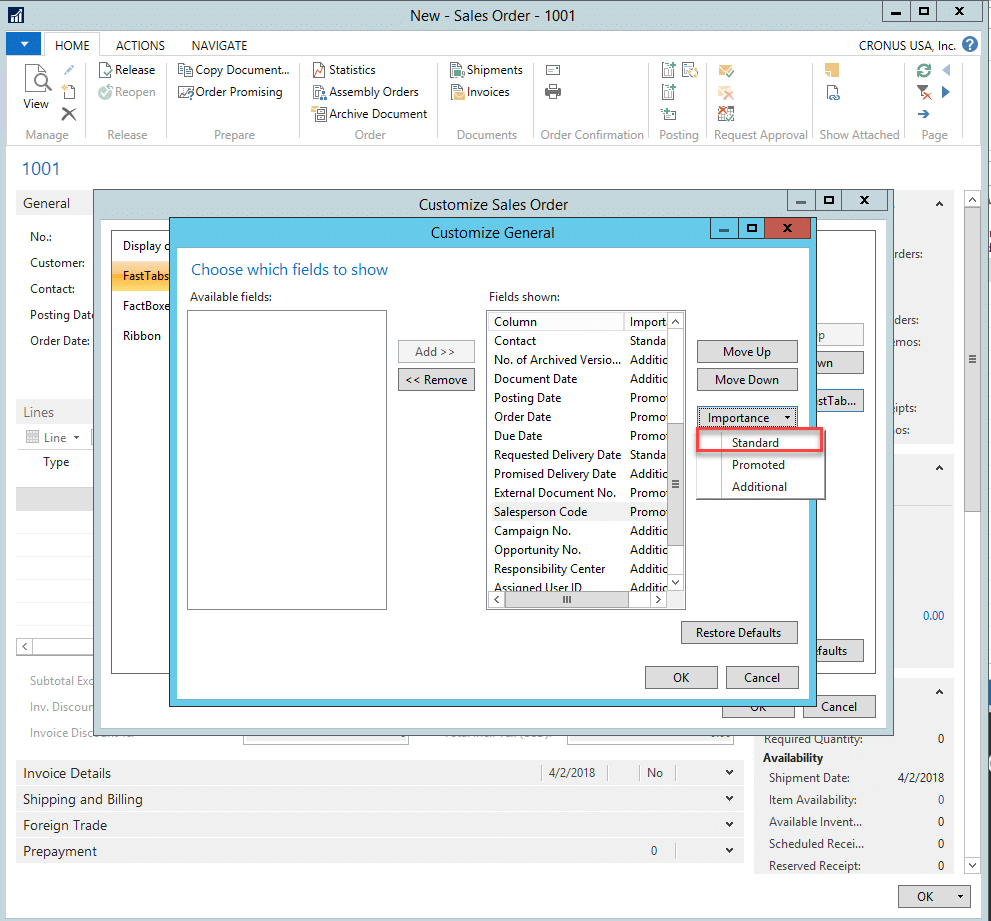
Highlight the field you wish to modify and select Importance.
Promoted: field will display on a collapsed FastTab
Additional: field is hidden but can be viewed in “Show more fields.”
Standard: field will display on expanded FastTab, but not promoted on a collapsed FastTab.
In this example, we will choose Standard.
You will also notice a checkbox in the Customize window called Quick Entry. This checkbox enables data entry sequencing: when selected, you can jump to this field during data entry by selecting the “Tab” key on your keyboard, eliminating the need to use your mouse to enter the field. Likewise, by deselecting this box, fields that are unimportant to you can be skipped.

The Salesperson Code is now located in the expanded FastTab view and Quick Entry has been enabled.
Personalization is an exciting tool that can be leveraged to save time and reduce employee effort. Before implementing personalization changes, I would like to offer a couple considerations:
- Personalization does not change user permissions – in other words, removing an action from a menu pane or ribbon does not change a user’s permissions to perform (or restrict) certain functionality.
- Personalization, as shared here, is applicable to a single user – to enhance personalization and apply those changes to multiple users, a change to the configuration of the user role would be necessary.

Under the terms of this license, you are authorized to share and redistribute the content across various mediums, subject to adherence to the specified conditions: you must provide proper attribution to Stoneridge as the original creator in a manner that does not imply their endorsement of your use, the material is to be utilized solely for non-commercial purposes, and alterations, modifications, or derivative works based on the original material are strictly prohibited.
Responsibility rests with the licensee to ensure that their use of the material does not violate any other rights.