


Configuring Power BI Integration for Dynamics 365 Workspaces
I recently enabled Power BI integration for a Dynamics 365 for Operations customer. And while the following article on Configuring Power BI for Workspaces https://ax.help.dynamics.com/en/wiki/configuring-powerbi-integration/#register-your-dynamics-ax-deployment-as-a-web-app-in-the-azure-portal was instrumental in enabling the integration between Power BI and Dynamics 365 for Operations (D365 from here on out). But, I wanted to include additional information and screenshots to round out the implementation. This blog is the supplement to the link above to help you enable Power BI integration in your D365 environment.
Getting started with Power BI
To enable Power BI integration with Dynamics 365 for Operations, the following criteria must be met:
1. You must have Azure Active Directory (AAD) administrator privileges
2. You must be assigned to the System Administrator role in Dynamics 365 for Operations
3. You must have had at least one user sign-in to PowerBI.com before
4. You must be using the same tenant for both your deployment and the user log on
Example: If Dynamics 365 was deployed under the contoso.com tenant, the user log on for both Dynamics 365 and Power BI should be in the format UserName@contoso.com.
Power BI Integration Steps:
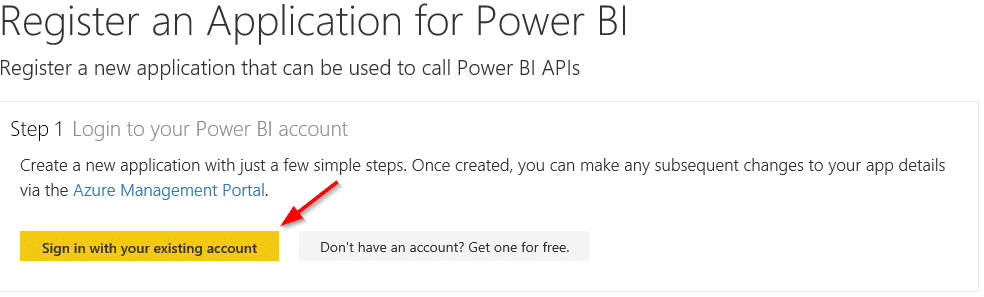
1. Go to https://dev.powerbi.com/apps
2. Sign in with your AAD Admin account and complete Step 1 by clicking Sign in with your existing account.
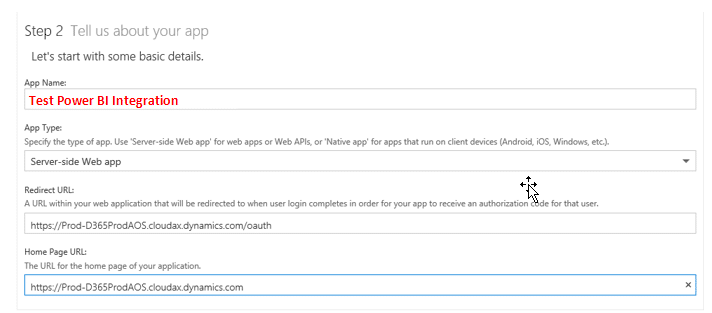
3. Assume my Dynamics 365 Production URL is: https://Prod-D365ProdAOS.cloudax.dynamics.com I would complete Step 2 as follows:
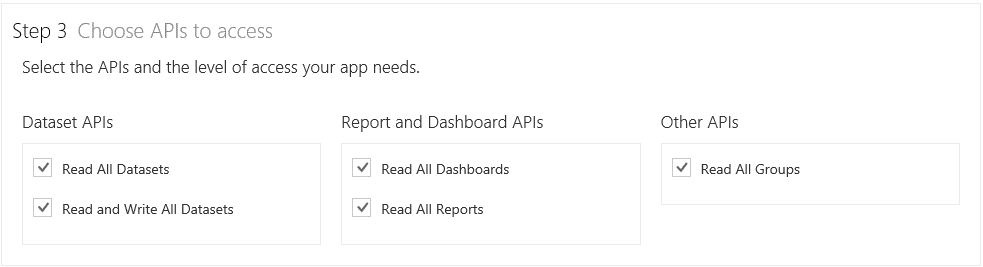
4. Grant access to the Power BI API's in Step 3.
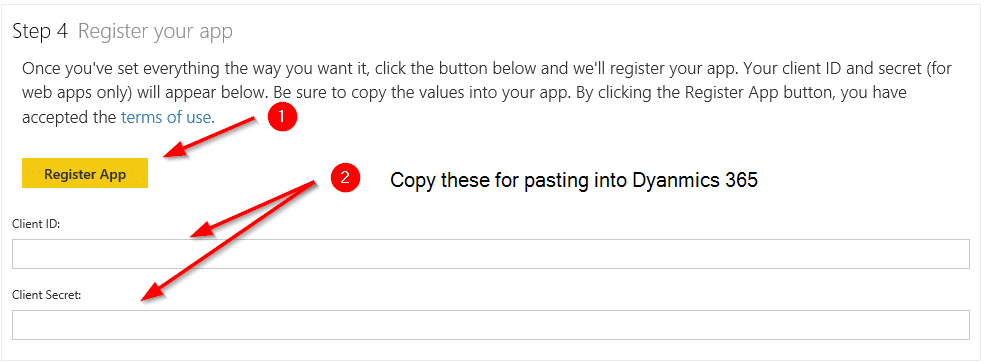
5. Click Register App to retrieve the client ID and client secret which we will paste into Dynamics 365.
NOTE: Be sure copy the client secret and keep it safe until we are done. Once the screen is gone, the key is gone.
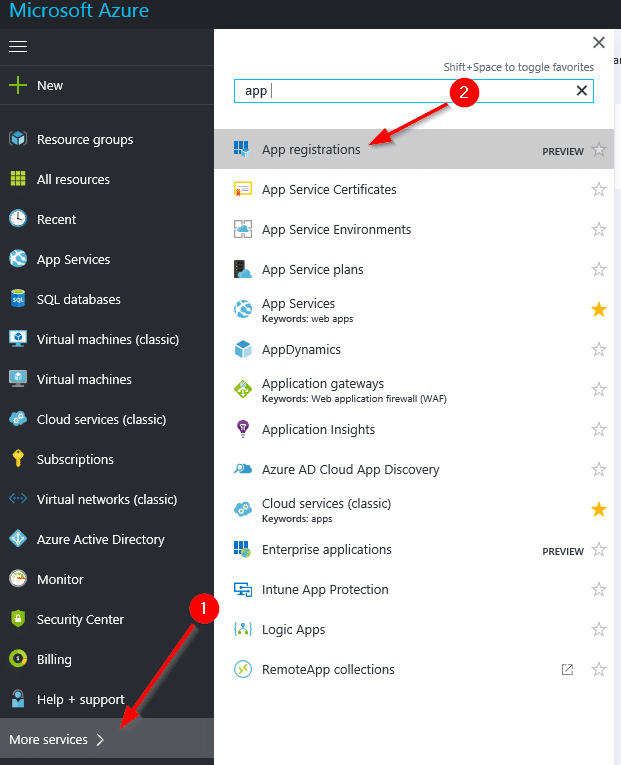
6. If you want to remove this registration or review it you can do so by:
a. Login to https://portal.azure.com with your AAD Admin account
b. Click More services
c. Search for App Registration and click on it
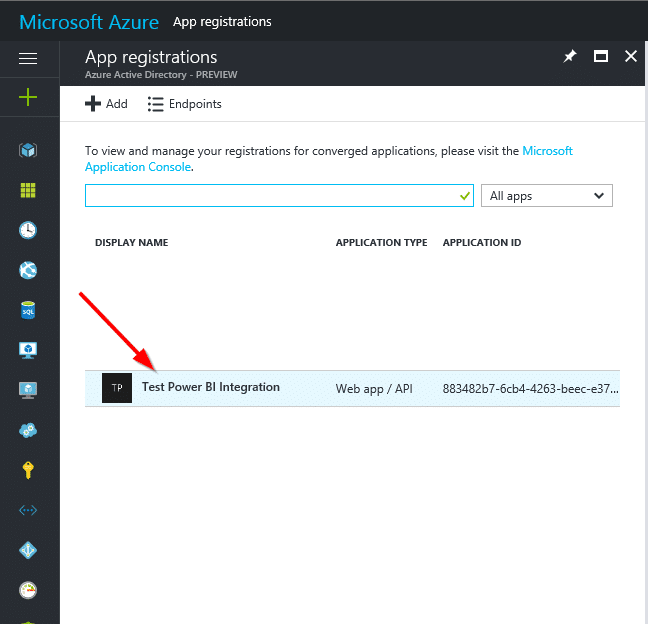
c. Select your App Name for additional details:
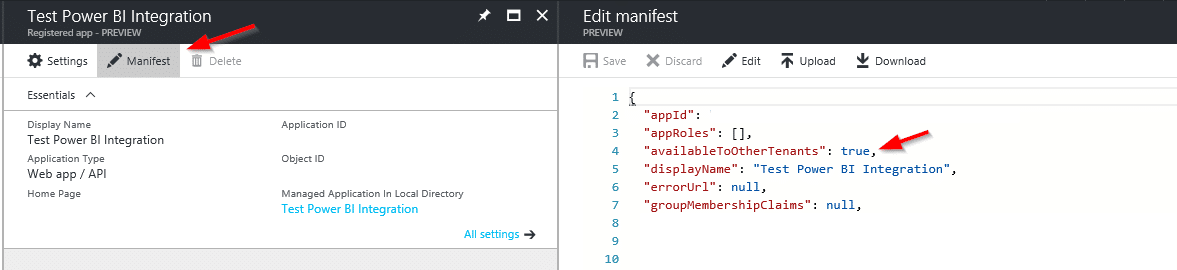
To delete the app registration, I've found that in the Beta portal you need to mark Multi-tenanted as NO before the Delete option becomes available. This is found in the Properties pane after selecting the app from the App registrations pane.

If the option is not there, click Manifest and change "availableToOtherTenants": true to "availableToOtherTenants": false.
Configure Dynamics 365 for Operations Integration
1. Launch Dynamics 365 and navigate to System Administration and click Power BI

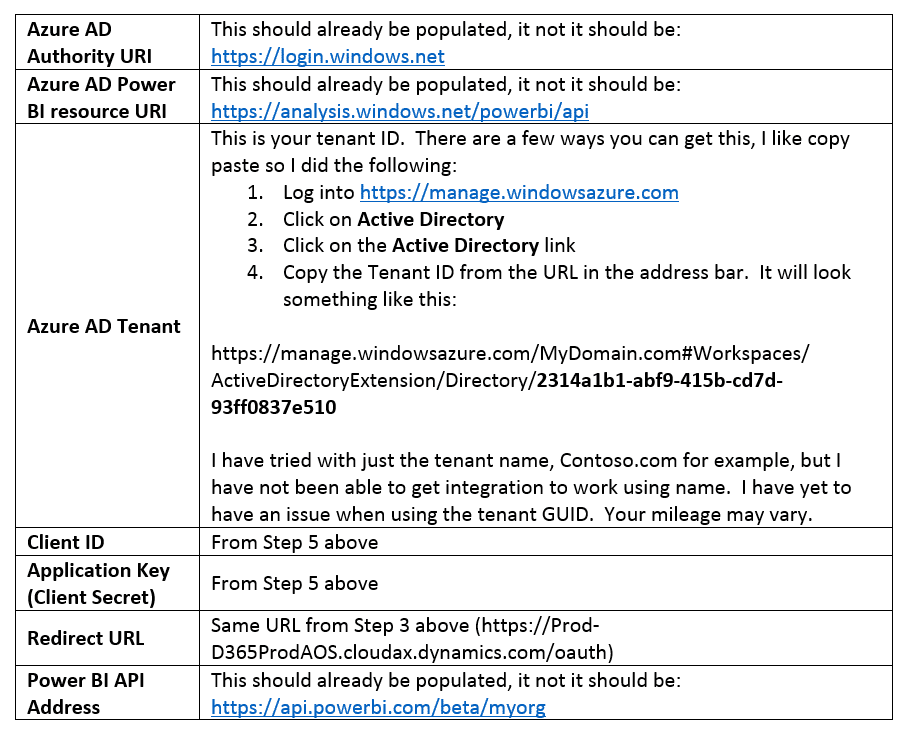
2. Click Edit and enter the following information, be sure to click the slider next to Enabled:
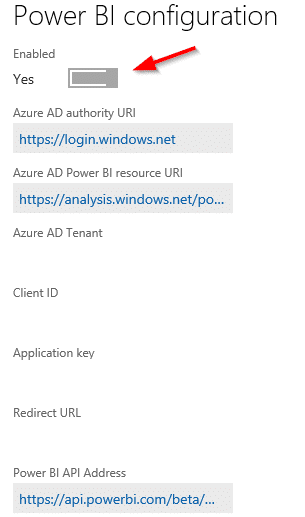
For the fields above, enter the following pieces of information:
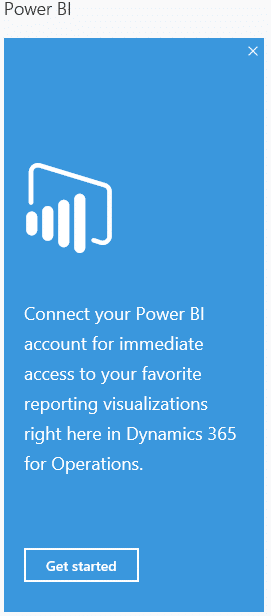
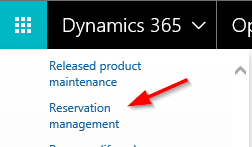
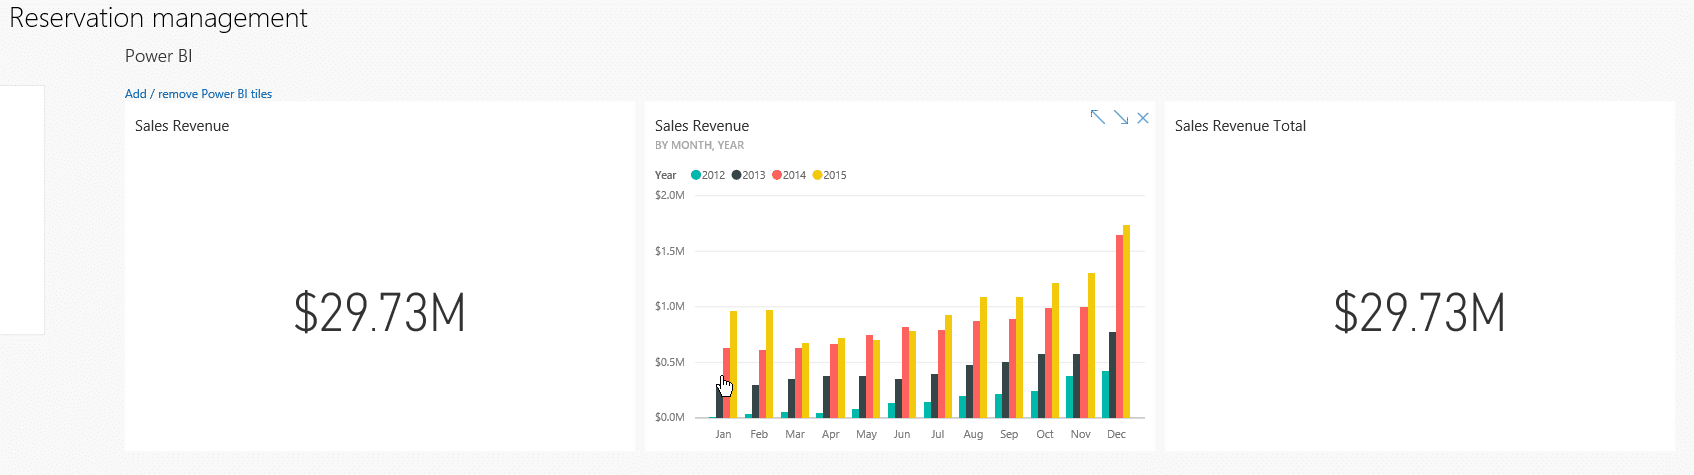
3. Click Save, navigate to Workspaces, Reservation Management, scroll to the right and you should see the following. Click Get started to run through the authorization process.
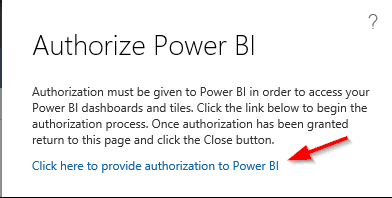
4. Click, Click here to provide authorization to Power BI to begin the authorization process
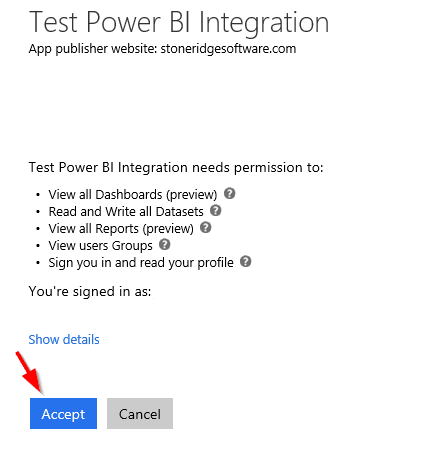
5. Click Accept to grant the required permissions for the integration
6. You should hopefully then see this message:

7. To validate the integration, navigate back to Reservation Management under Workspaces
Again, click on Get started

Hopefully, you’ll then see the Open tile catalog window. In my example below you can see the various dashboards, I have sitting in PowerBI.com.
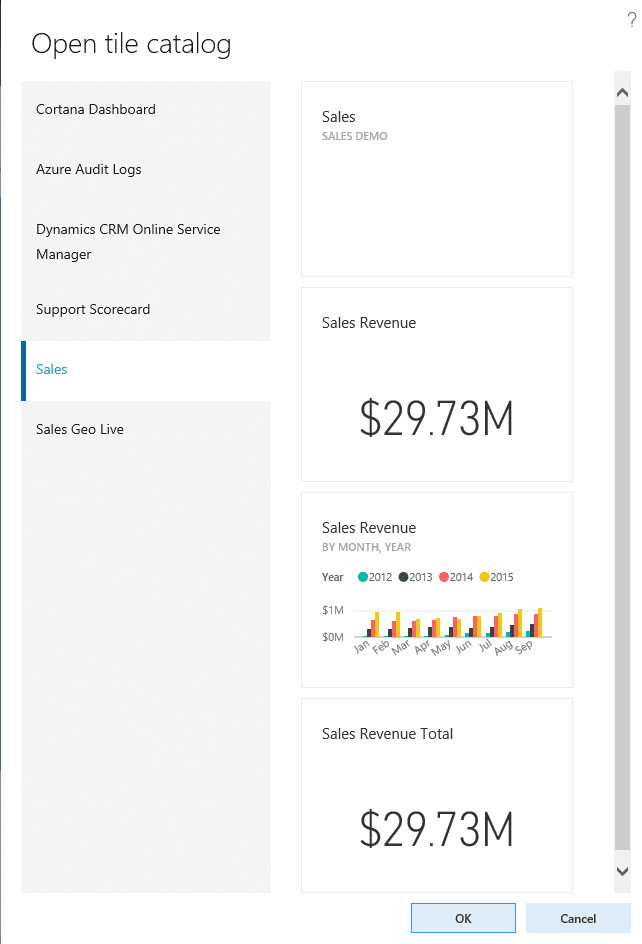
I check the tiles I’m interested in and they get added to the workspace

Under the terms of this license, you are authorized to share and redistribute the content across various mediums, subject to adherence to the specified conditions: you must provide proper attribution to Stoneridge as the original creator in a manner that does not imply their endorsement of your use, the material is to be utilized solely for non-commercial purposes, and alterations, modifications, or derivative works based on the original material are strictly prohibited.
Responsibility rests with the licensee to ensure that their use of the material does not violate any other rights.