


Creating Automatic Forecast Reduction in AX
When managing projects it is important to manage your forecast for the project. Without a forecast, it can become very difficult to analyze how successful you are, as you won’t have anything against which to measure your actuals. Also, when working with fixed price projects that have long durations, forecasts are very helpful for calculating a percentage of completion for revenue recognition. As much benefit as forecasts can be, they can also be very tedious to manage. If you're a Power BI user, check out this article on Power BI Forecasting.
Forecasting Tools in AX
AX offers a few different tools for creating the forecast, including copying from a project quote or copying from estimates entered against the WBS. However, for this post, I just want to focus on a piece of functionality that automatically reduces your forecast as transactions are posted against the project. When reviewing the status of your project and trying to analyze how you are doing compared to what you forecasted, you usually go through a few steps. First you review the transactions that have been posted and get a report on the actuals. Then you decide how much effort and/or costs you have left to complete the project. Finally, you subtract your actuals from your forecast to determine how much of your forecast is left and compare that to your estimated amount to completion. Using the automatic forecast reduction functionality in AX, this process can be streamlined.
Setting Up Automatic Forecast Reduction in AX
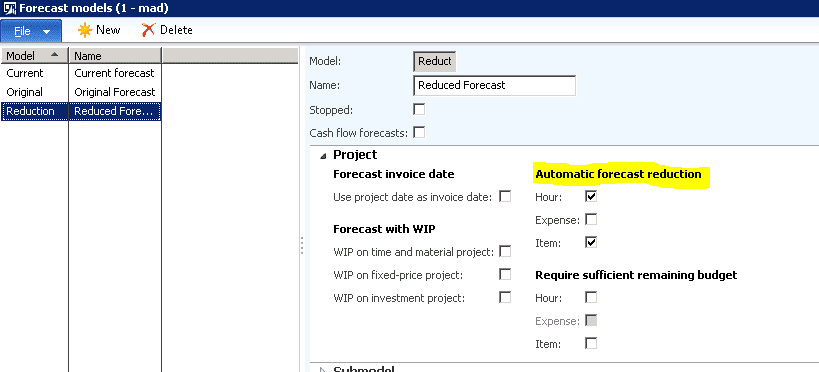
- To setup a forecast to automatically reduce, you first need to setup a forecast model. (Project management and accounting > Setup > Forecasts > Forecast models).
When you create your new forecast model, select the checkboxes in the Automatic forecast reduction section for the types of transactions you want to have automatically reduce your forecasts. In the example below I have selected to have both Hour and Item transactions automatically reduce my forecast.
2. The next step in the setup is to define the rules for which forecast line entry gets reduced when a transactions gets posted. To do this, go to the Forecast reduction section of the Project management and accounting parameters (Project management and accounting > Setup > Project management and accounting parameters).
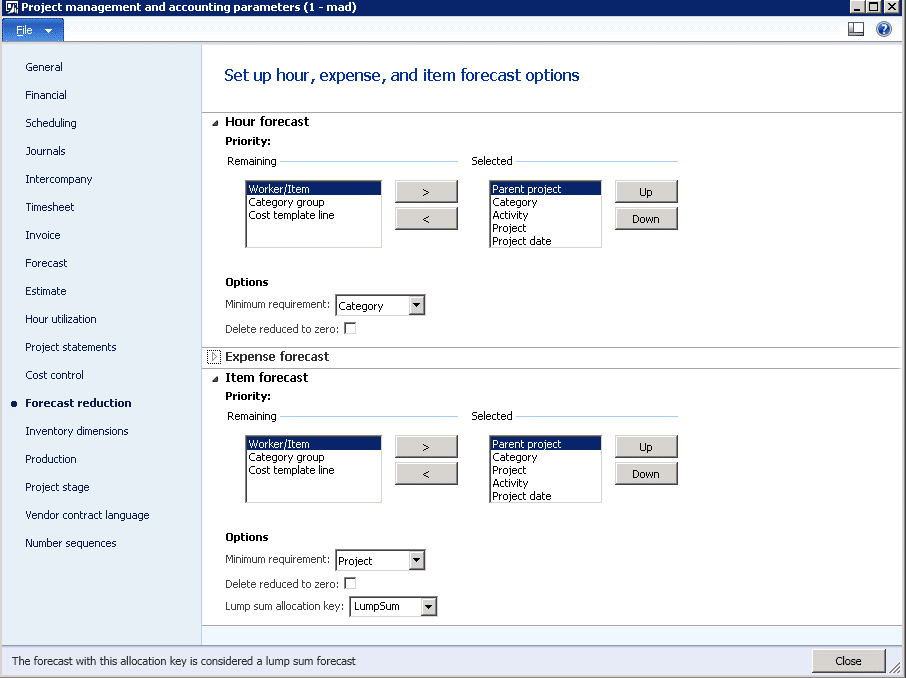
These parameters define the priority of the fields that need to match between the posted transaction and forecast line in order for the forecast to be automatically reduced.
- First, select fields from the Remaining section and click the “>” button to move them to the Selected section. Use the Up and Down arrows to change the priority. The fields at the top of the list will have the highest priority.
- The next piece is to select the Minimum requirement for that transaction type which specifies how many of the fields have to match at a minimum in order for the forecast to be reduced. In the example above I have Category set as my minimum requirement for the Hour forecast which means, based on my selected fields, that both the Parent project and the Category have to match in order for the forecast to be reduced.
Expense & Item Forecasts
For Expense and Item forecasts, there is a final piece of setup which is to specify a Lump sum allocation key. The purpose of this allocation key is to define a lump sum of item or expense costs that is forecasted rather than forecasting specific items or expenses.
- To setup an allocation key for expenses go to Project management and accounting > Setup > Forecasts > Project allocation keys.
- To setup an allocation key for items go to Inventory management > Setup > Forecast > Item allocation keys. Once you create the allocation key, set it as the Lump sum allocation key for the Item forecast or Expense forecast.
Example of Reduction Forecast Model
Now that the setup is complete, all you need to do is create a forecast on your project using your new reduction forecast model. Below is an example hour forecast I setup which has a separate line for each category.
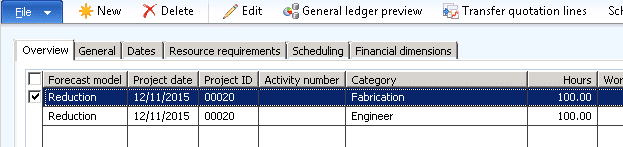
Now when I post a couple of hours transactions, I can see how the reduction forecast is automatically reduced. (Note that the hour transaction with a category of ProjectMngr didn’t reduce the forecast).

Using this automatically reducing forecast I can easily see how much of my forecast I have remaining and compare that to how much effort I expect to be left without doing a lot of manual calculations.

Under the terms of this license, you are authorized to share and redistribute the content across various mediums, subject to adherence to the specified conditions: you must provide proper attribution to Stoneridge as the original creator in a manner that does not imply their endorsement of your use, the material is to be utilized solely for non-commercial purposes, and alterations, modifications, or derivative works based on the original material are strictly prohibited.
Responsibility rests with the licensee to ensure that their use of the material does not violate any other rights.