


Guide to Understanding D365 Business Central User Security and Setup
Here is your guide to understanding D365 Business Central user security and setup. In Dynamics 365 Business Central, there are two different areas related to user security & setup – Profiles (Roles) and Permissions.
User Profiles (Roles) in Business Central
The first area is the User Profiles (Roles). This allows administrators to set up what a user sees across the system from the role center (homepage) to individual pages and lists throughout the system. Navigate to Profiles to see what is available out of the box. Select Profiles (Roles) to open the page.
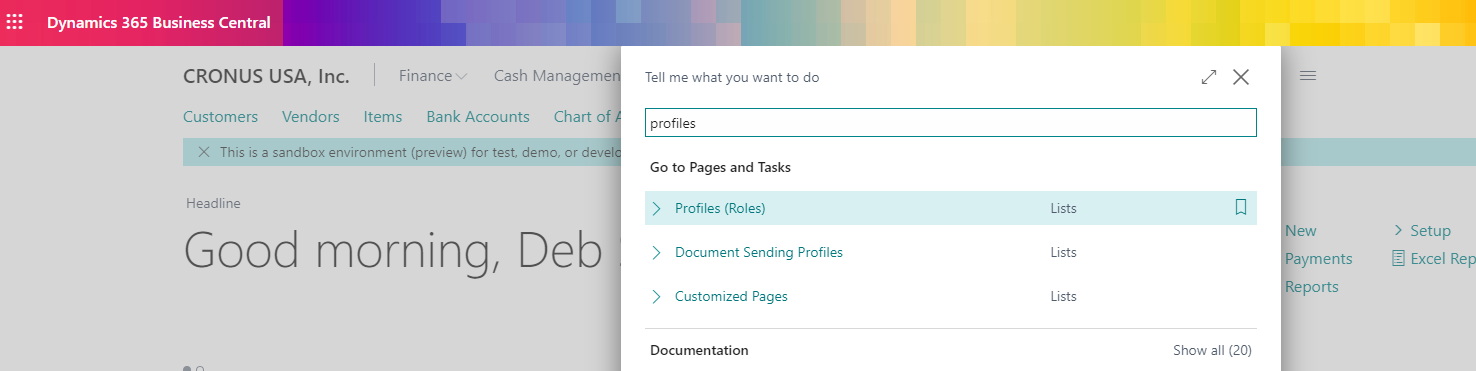
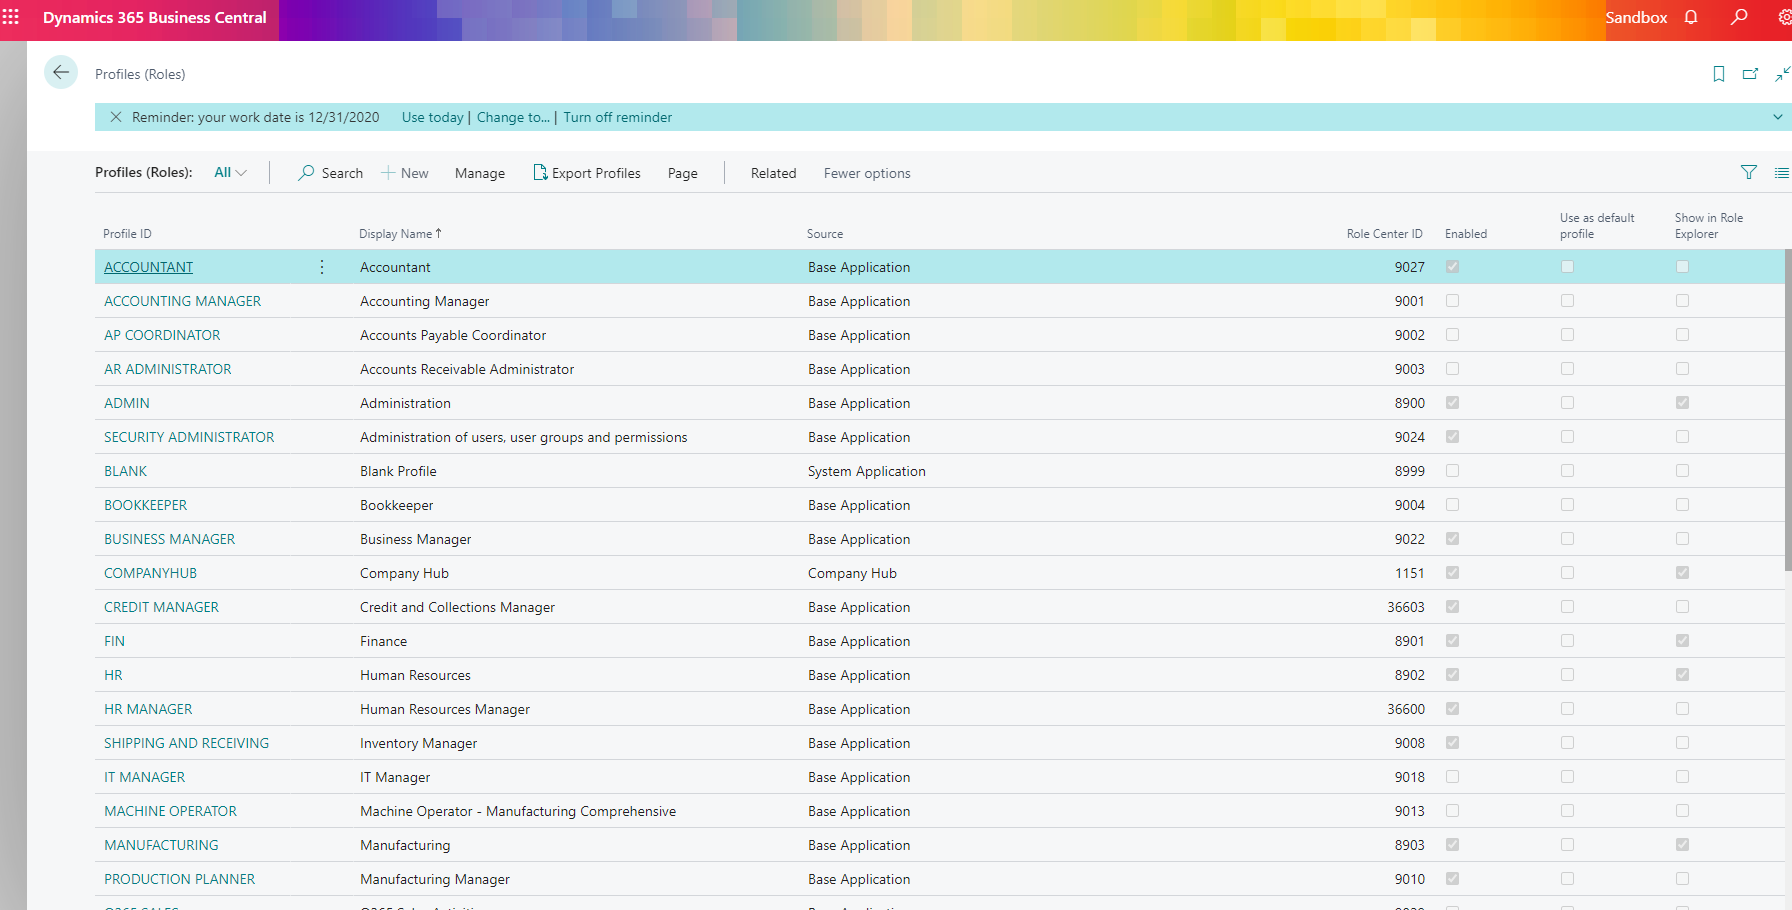
Within the Profiles (Roles) page there are a number of different Profiles available out of the box from Microsoft. Users can also create their own Profiles from scratch or by copying an existing role to start from that. In smaller companies, there may only be a need to have 1 default Profile that is assigned.
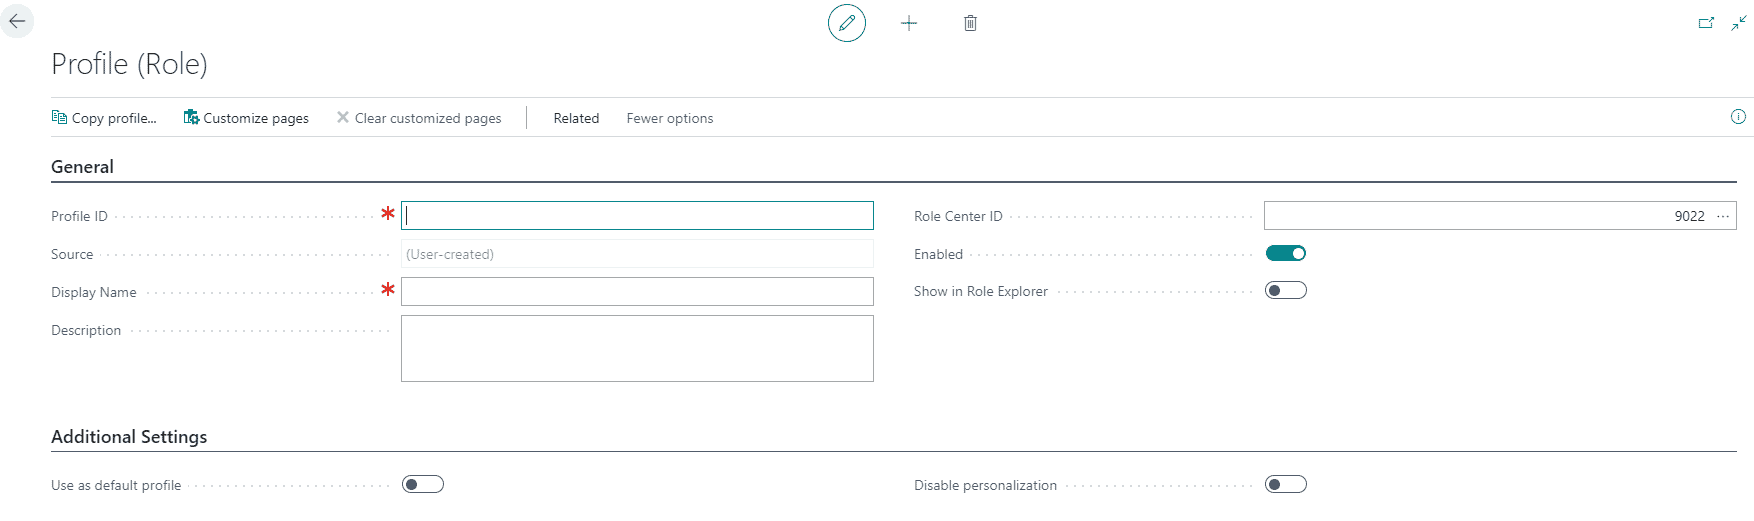
To create and new Profile, click on the +New button on the ribbon or use the actions à copy action to build based on an existing profile. Here you can create the Profile ID and Display Name along with a Description of the Profile. You can also define if this Profile should be used as the default profile when setting up new users.
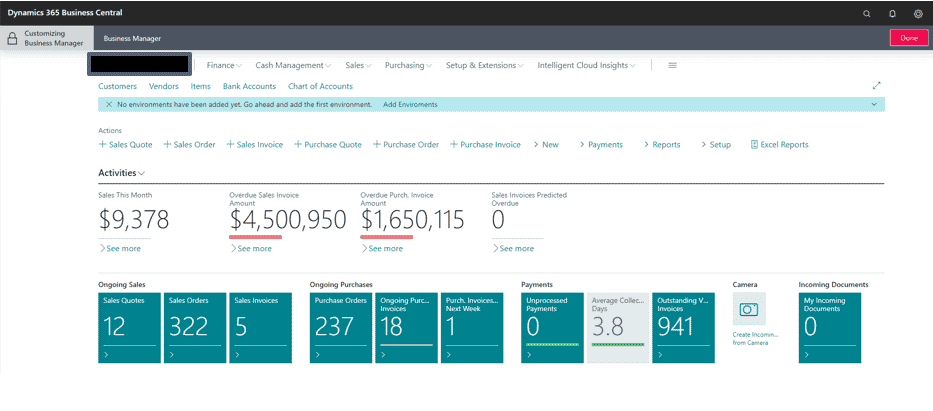
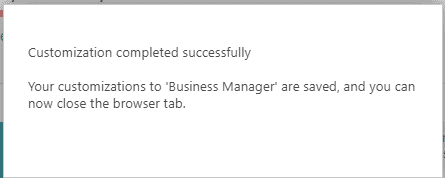
To customize what the users will see, click on the Customize pages button on the ribbon. This will open the home page of your instance in customization mode. In the top left-hand corner after choosing customize pages, you will want to choose unlock to be able to begin making changes. Users can rearrange, remove, and add to the pages/lists across the whole system. The designer can go into each of the pages that require changes and make the subsequent changes or do this piece by piece as the profile (role) will keep track of all changes. When you have completed your changes in this session, click on the Done button for this to save and register those changes in the profile (role).
Once you click on Done, you will receive the message below.
Back on the Profile page, the changes have been saved to the Profile and can be cleared per page if needed in the event of mistakes.
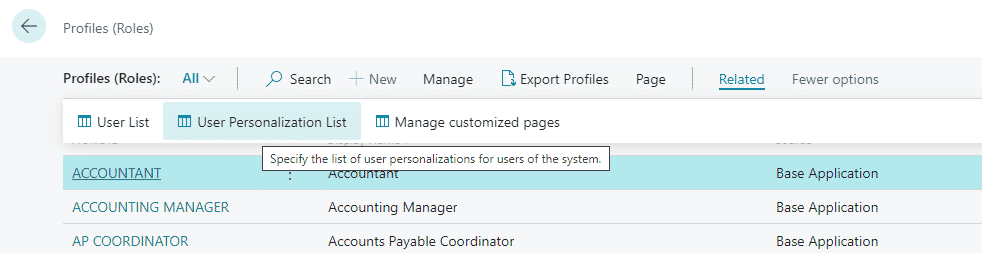
The next step is to assign the Profile to your users. To do this, stay on the Profiles page, click on Related > User Personalization List
This will open the User Personalization page.
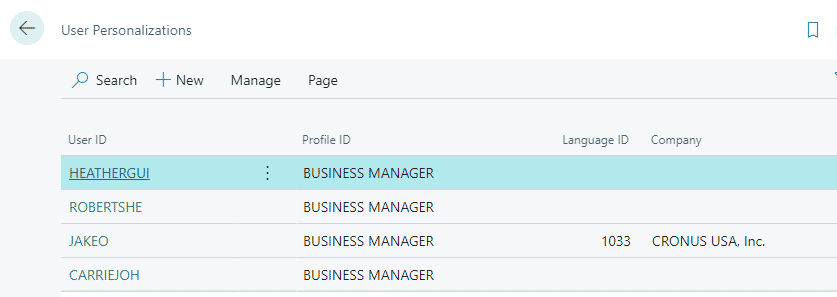
Select the user that you want to assign the Profile to and click on Manage > Edit

This will open the User Personalization Card.
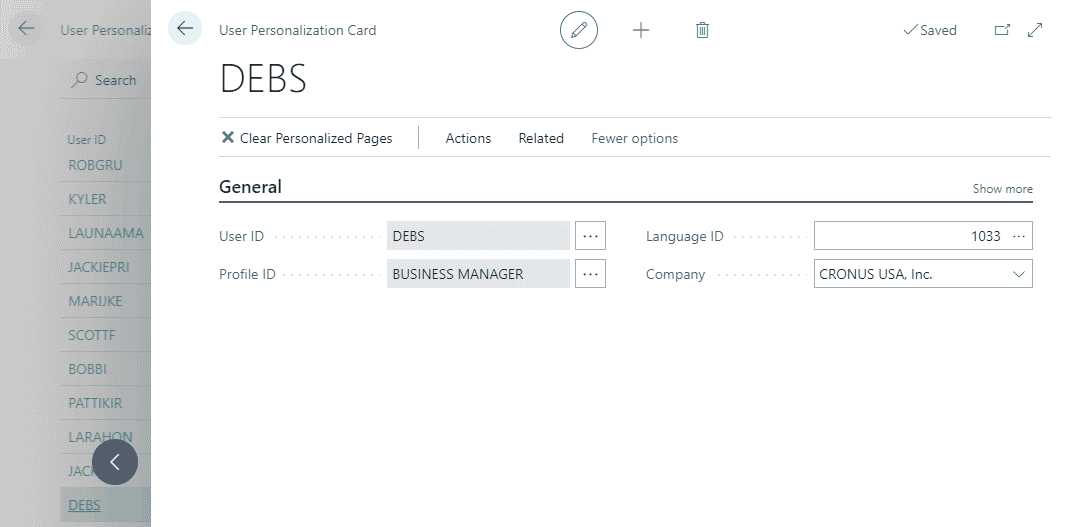
Choose the Profile ID that you want to assign to the user. Then close out of the page.
Permissions in Business Central
Permissions are how you can set up what a user has access to and what actions they can or cannot perform in Business Central.
To look at the out-of-the-box Microsoft Permissions, navigate to Permission Sets as shown below.
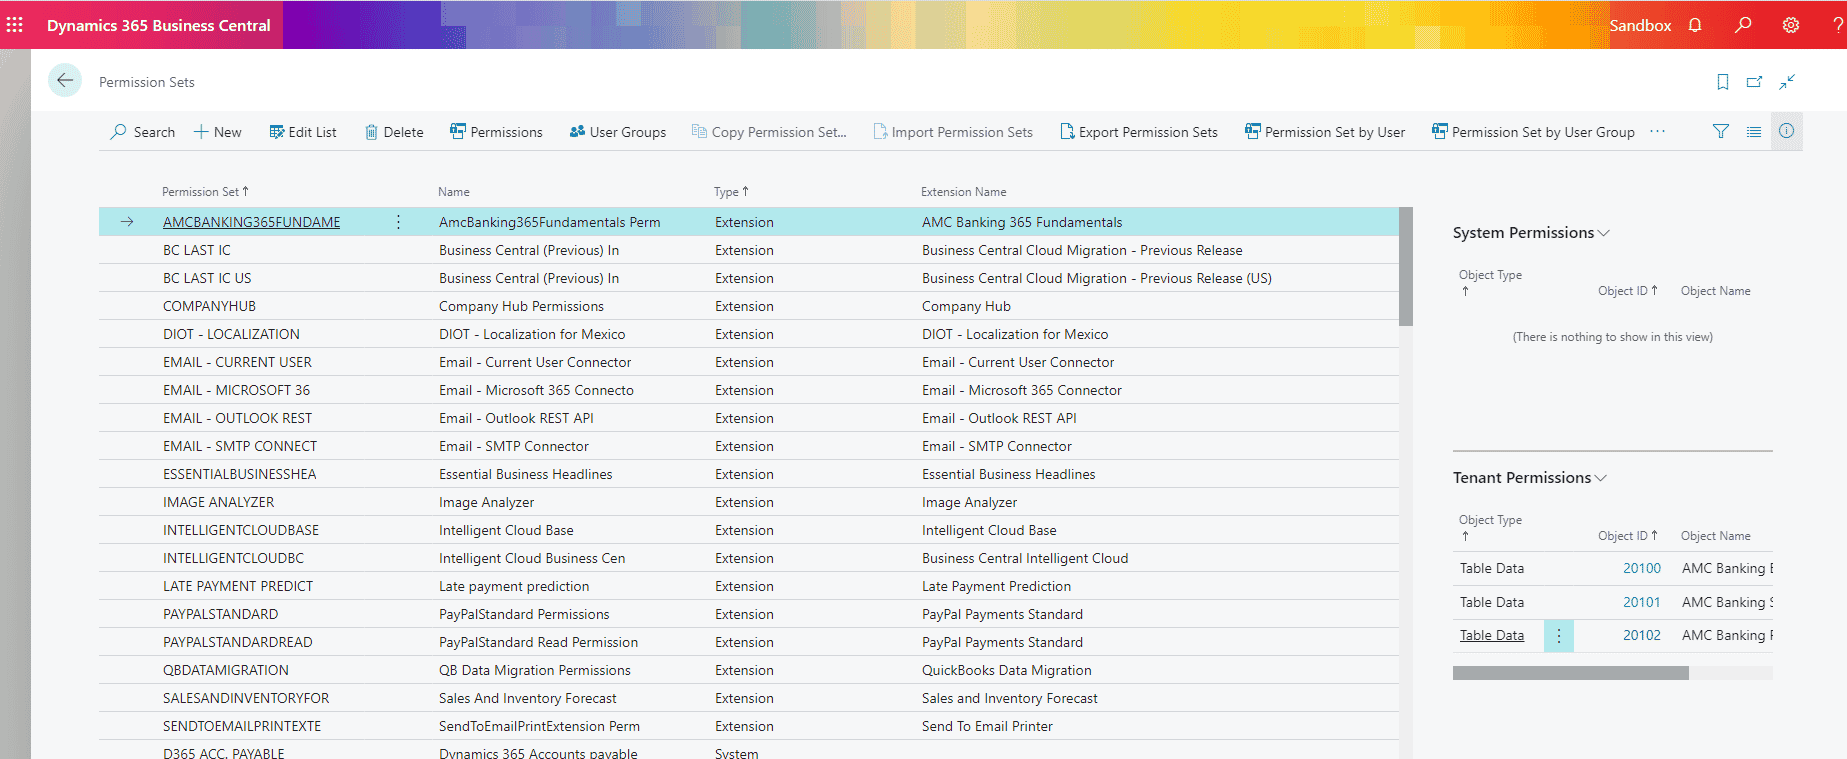
The Permission Sets page allows you to define and assign access and activities down to a granular level.
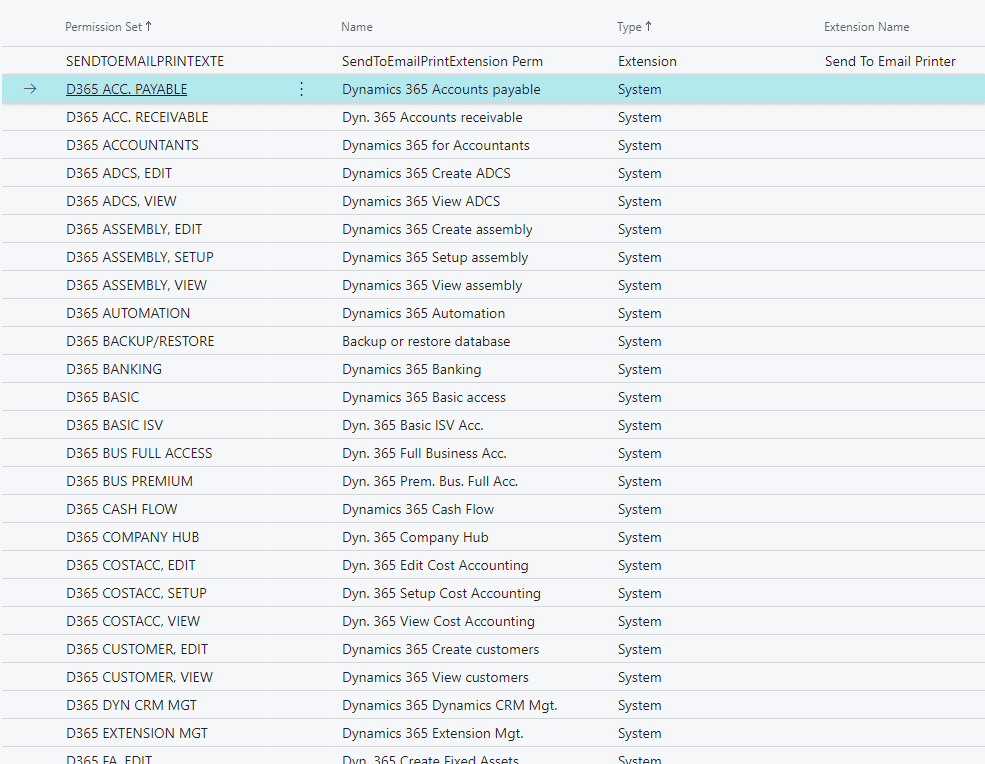
From the top, there are out-of-the-box Permission Sets available based on a particular area like Accounts Payable and Accounts Receivable that cover most of the actions a user would need to do when accessing that module in the system.
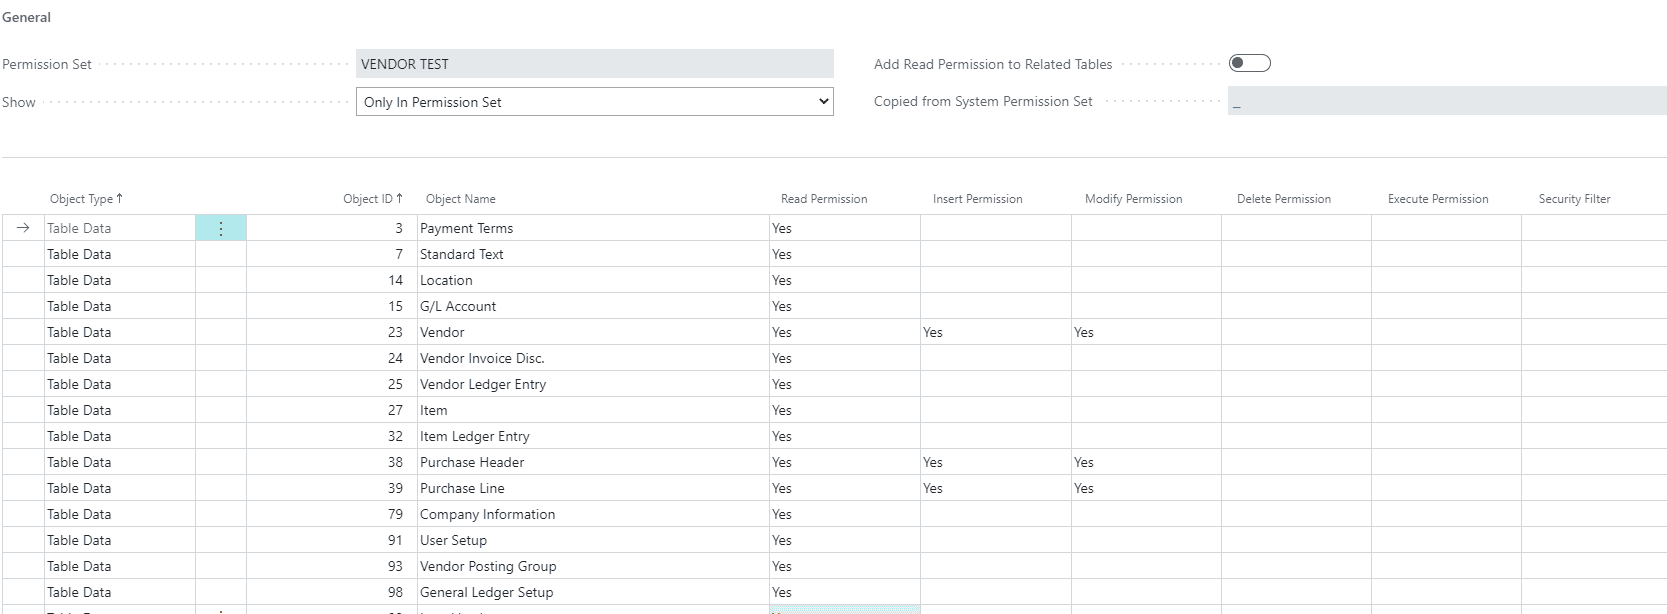
***Please note that only user-defined permission sets can be altered so if you want to adjust an out of the box permission set or create one yourself, you will need to create a permission set using the + icon at the top of the list or by copying an existing permission set and modifying that.
We’ll look at Accounts Payable – I know the screenshot is very small, however, this gives you an idea of how many specific tables there are that users need access to in order to do their jobs.
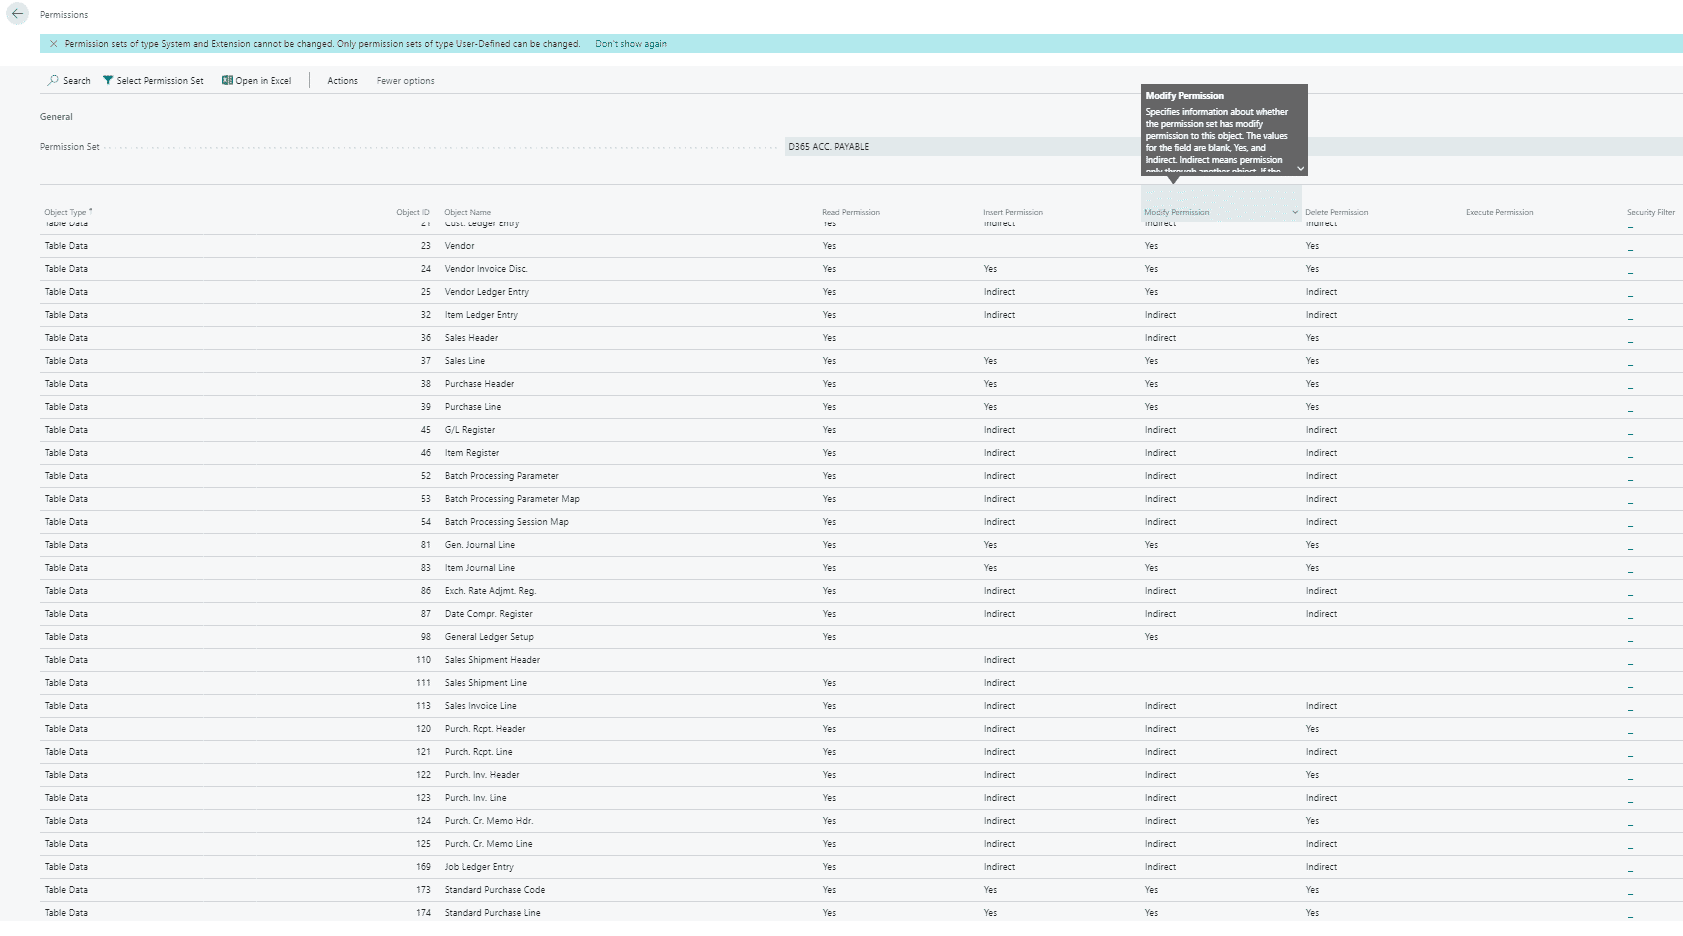
The options for granting different types of access are across the page and include:
- Read – read-only access – the user can view but not make any changes to the data
- Insert – the user can create new records
- Modify – the user can make changes to the existing records
- Delete – the user can delete records
- Execute – the user can run this object
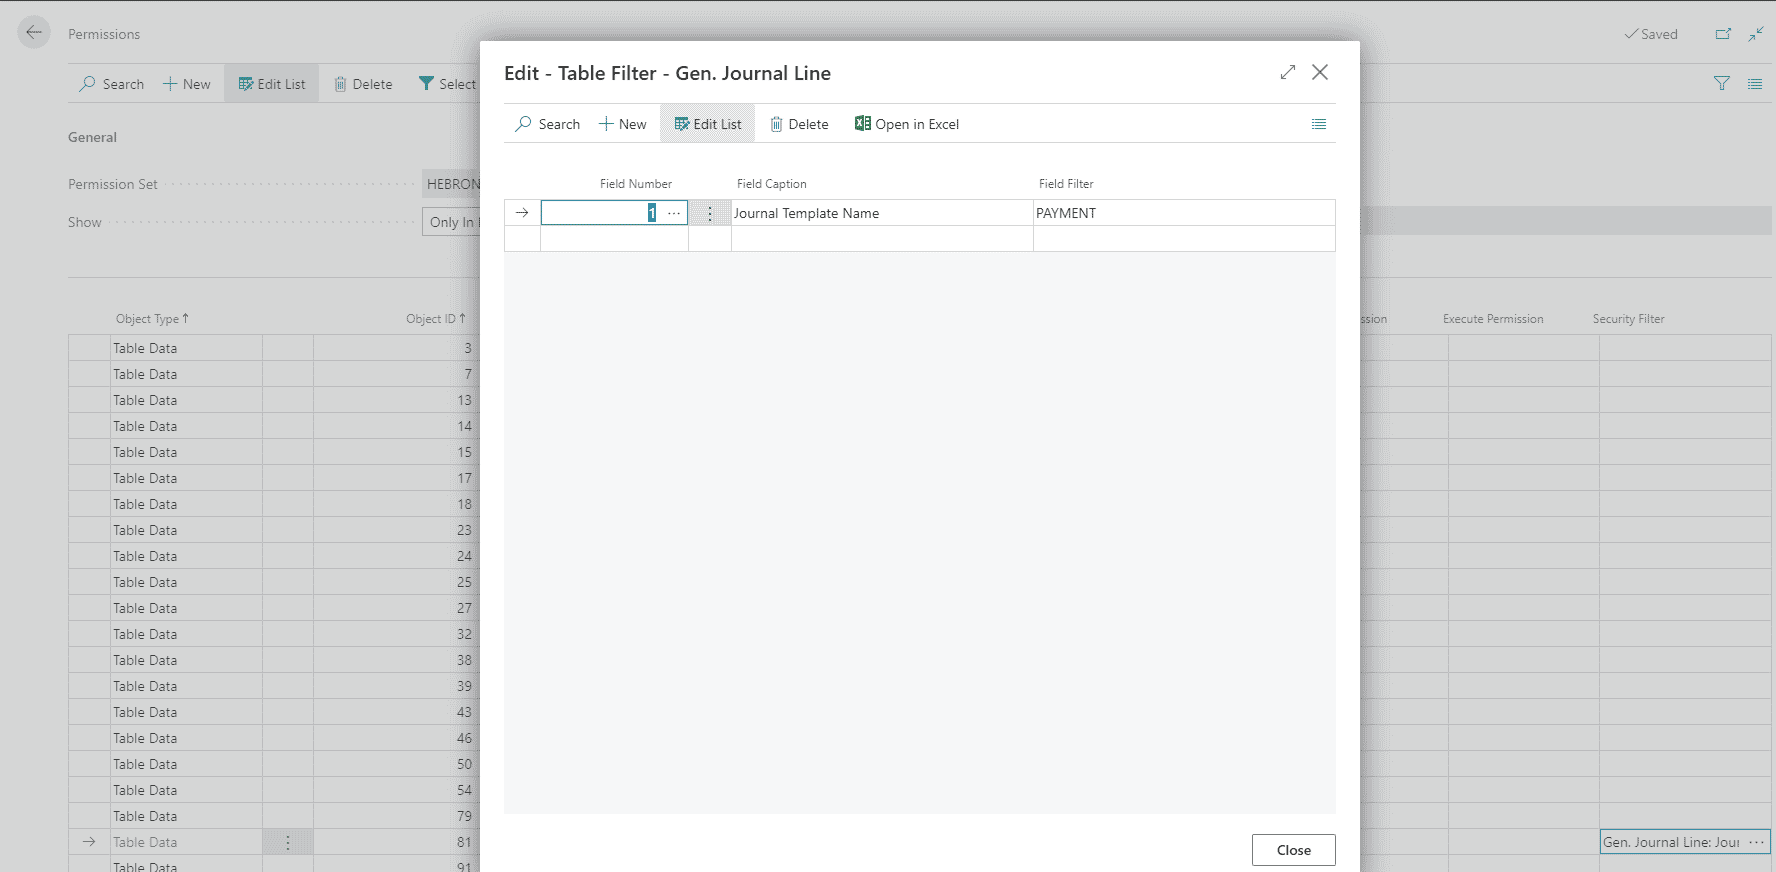
- Security Filter – limit the users access based on a filter – for example, if a user can create a payment journal but cannot create a cash receipts journal – the screenshot below shows that the user is limited to entering Payment Journals
With all of the information needed to grant and restrict access, there must be an easier way to do this. There is – users can record the actions that other users can perform and Business Central will populate the data in this table based on the recording.
Let’s assume that a user can create a new vendor and look at the history of that vendor. The following steps would be followed to create this Permission Set:
- On the Permission Sets page, click the +New button and define the new Permission Set
- Open the Permissions window
- Click on Start and answer Yes to start the recording
- Go to Purchasing > Vendors
- Click on +New and add the new vendor
- Click on Vendor > Ledger Entries
- Navigate back to the Permissions page and click on Stop
- Answer Yes to add the recorded Permissions – this will add all of the needed tables and code units that are required
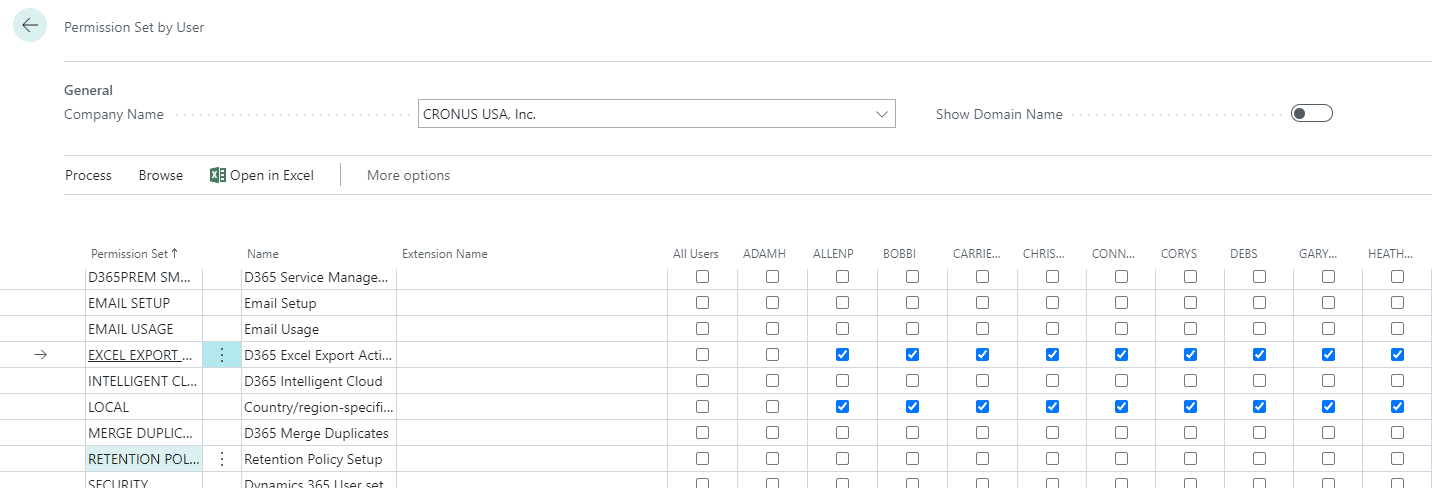
Next, you can assign the Permission Set to the users. Click on Permission Set by User, scroll to the new Permission Set and check the box for each user that should have access to the new permission set.

For additional information on setting up Permissions and Profiles for users, follow the link below: https://docs.microsoft.com/en-us/dynamics365/business-central/ui-define-granular-permissions
This article was co-authored by Jack Peterson, view more blogs by Jack here

Under the terms of this license, you are authorized to share and redistribute the content across various mediums, subject to adherence to the specified conditions: you must provide proper attribution to Stoneridge as the original creator in a manner that does not imply their endorsement of your use, the material is to be utilized solely for non-commercial purposes, and alterations, modifications, or derivative works based on the original material are strictly prohibited.
Responsibility rests with the licensee to ensure that their use of the material does not violate any other rights.