


How to Embed a Power BI Report on Dynamics 365 CE Forms
In a previous blog, we discussed how Power BI reports, tiles and dashboards can natively be integrated into your Dynamics 365 CE (CRM) Dashboards.
There may be some requirements where you may need the Power BI report embedded into a form in Dynamics 365 CE. This article will discuss a fairly simple method of adding an iFrame to expose the report on your Dynamics 365 form. This is the easiest way to accomplish getting a Power BI report on your form. There are some considerations before choosing this method.
- The Power BI report must be published to the web, so the Power BI report is technically exposed (read-only) to anyone that would come across the URL.
- Contextual filtering is not too easy to accomplish using this method. Contextual Filtering is adding an automatic filter to the report based on the record that you are currently viewing in your form. It can be done with this method but would require passing parameters via a JavaScript on your form.
Follow these Steps to Embed a Power BI Report in D365 CE:
1. In Power BI, Publish your report to the Web:
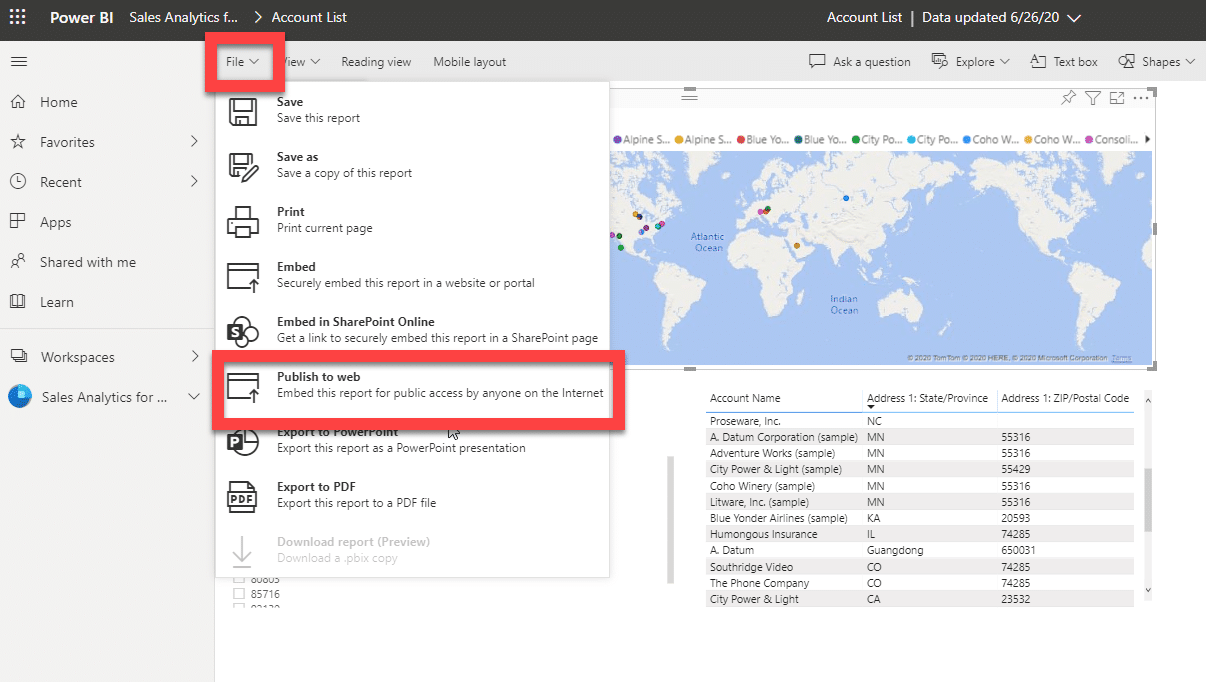
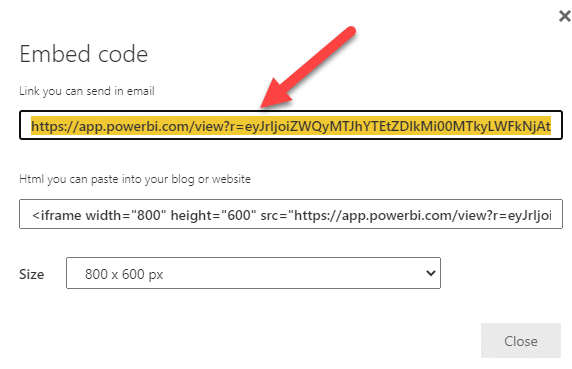
Copy the first URL you see after clicking Publish to Web. We will paste this in step 3 below.
2. Since the report could take up quite a bit of real estate, you may want to add a Tab and/or Section to your form where you would like the report to reside:
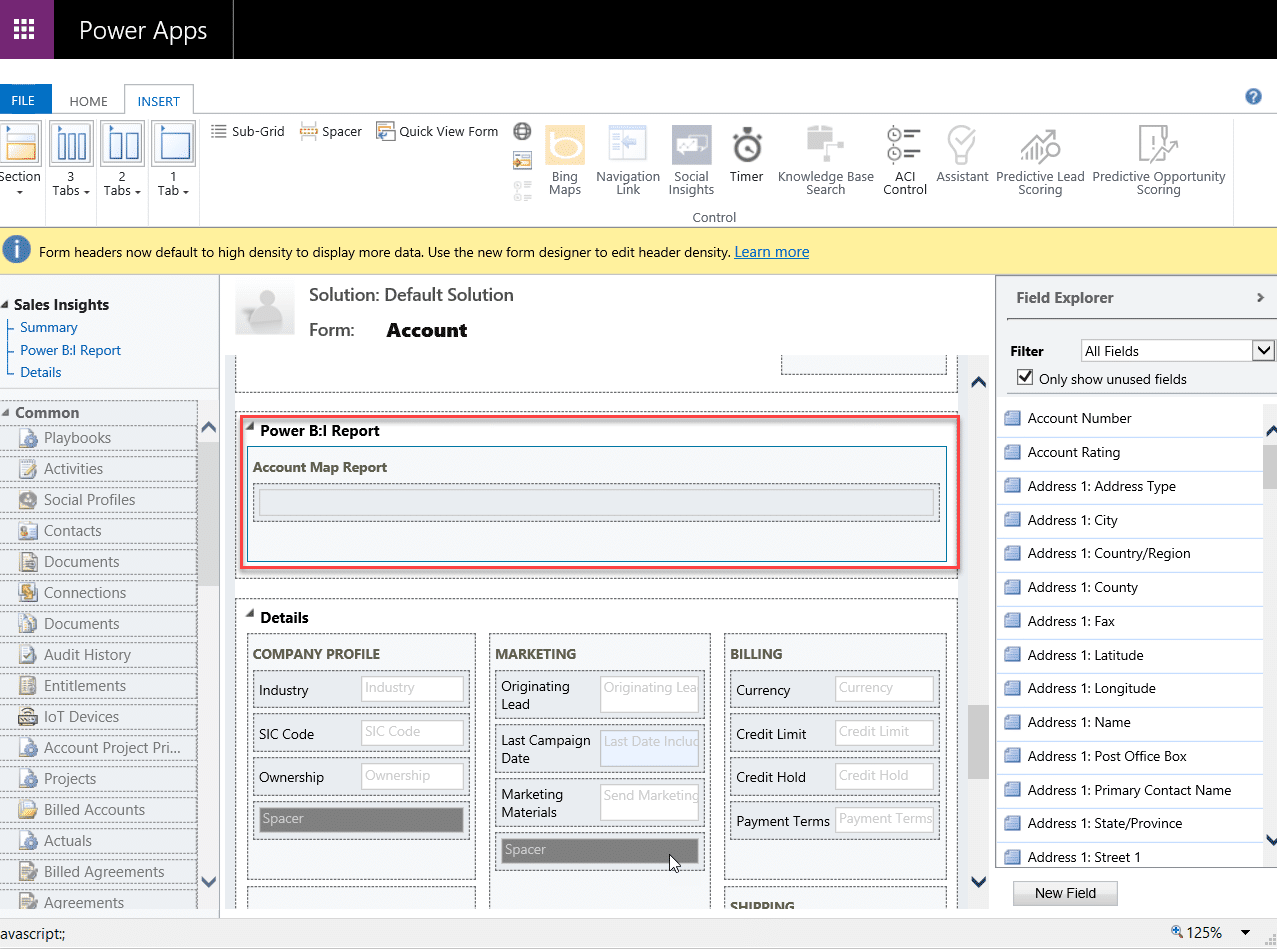
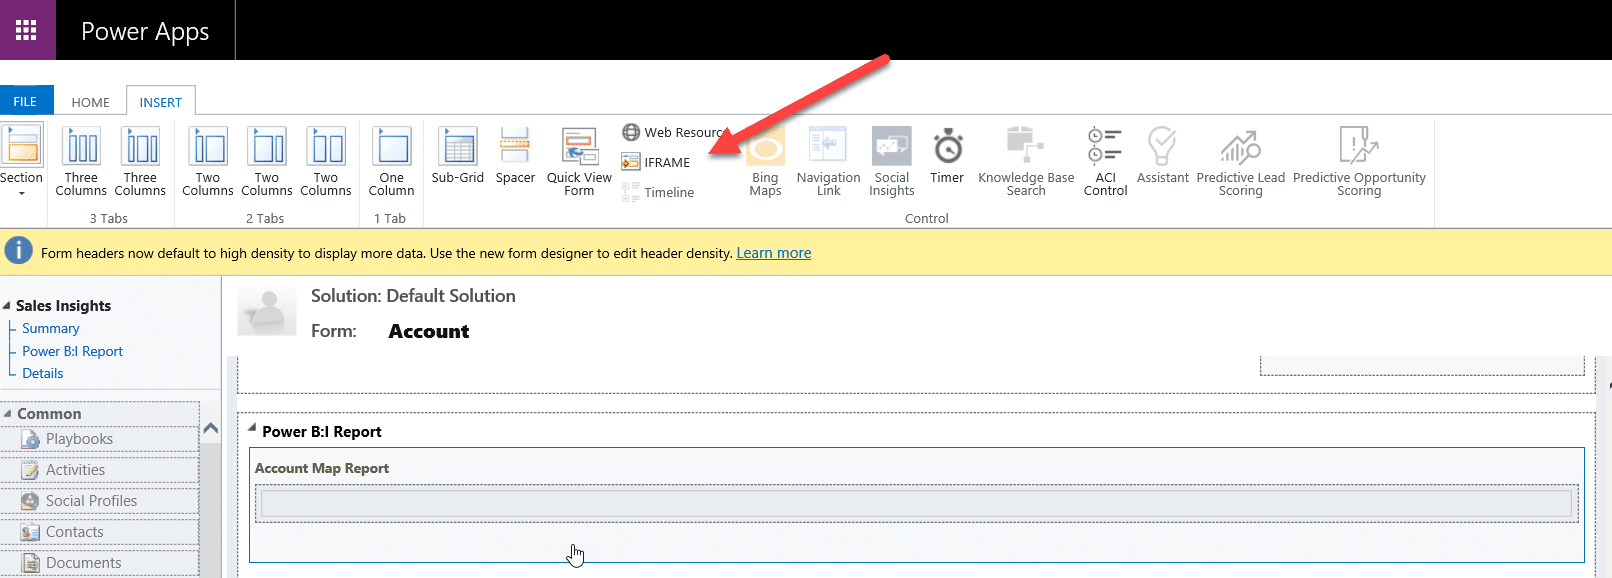
3. Insert an iFrame into your new section. Be sure to be clicked/focused in your new section, then click Insert - iFrame
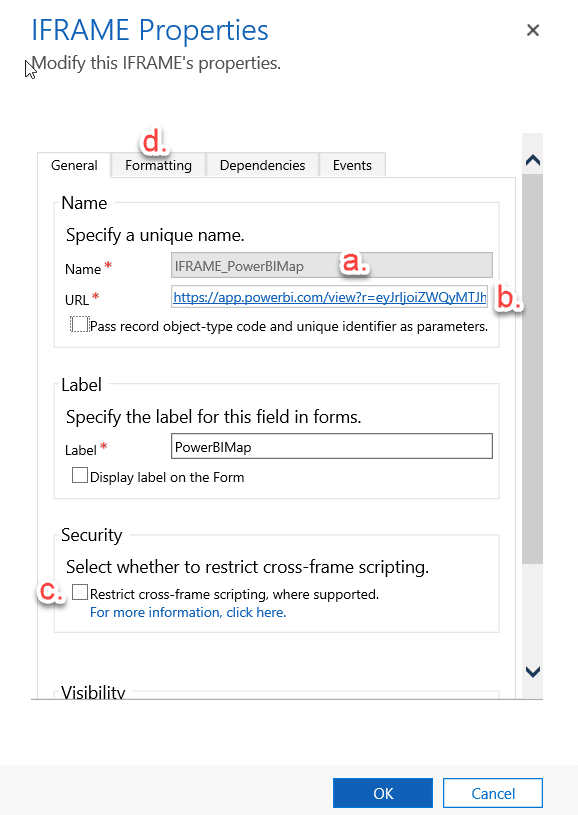
When the IFRAME Properties appear, fill in the following:
- Give your iFrame a name. No spaces.
- Paste in your URL from step #1 above.
- Uncheck the Restrict cross-frame scripting checkbox.
- Go to the Format tab and increase the number of rows. Start with 15, but you may need to adjust this to make the size of your report appear correctly on your form.
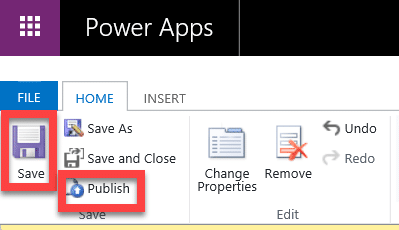
4. Save and Publish your Form.
Results:
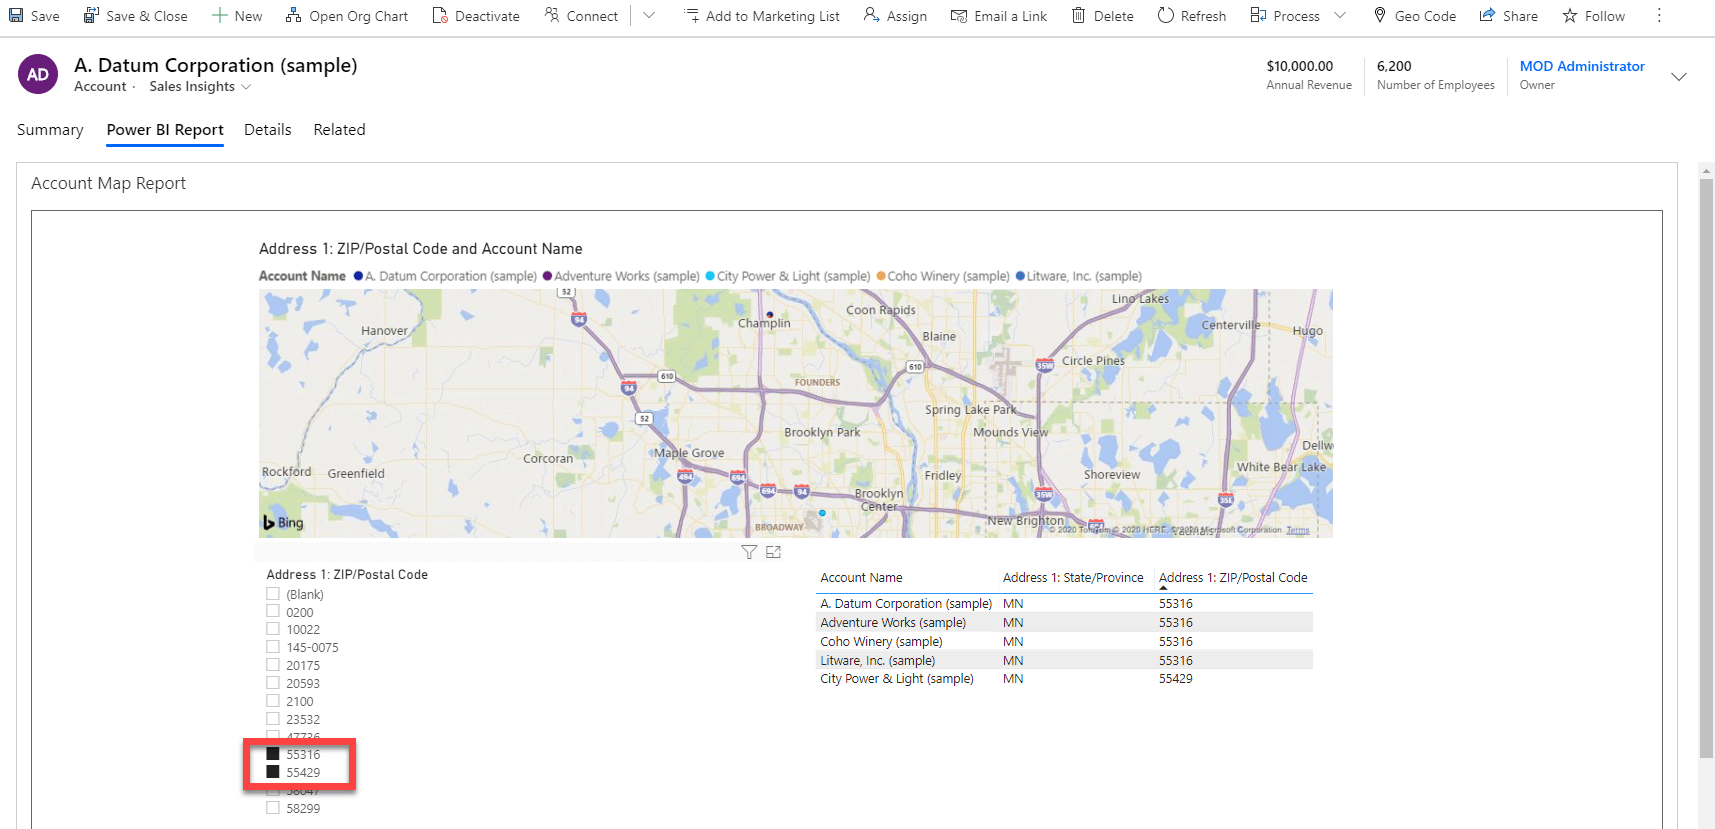
After refreshing our form, you see the results. In this use case, our Power BI report is showing a Map and List of all Dynamics Accounts.
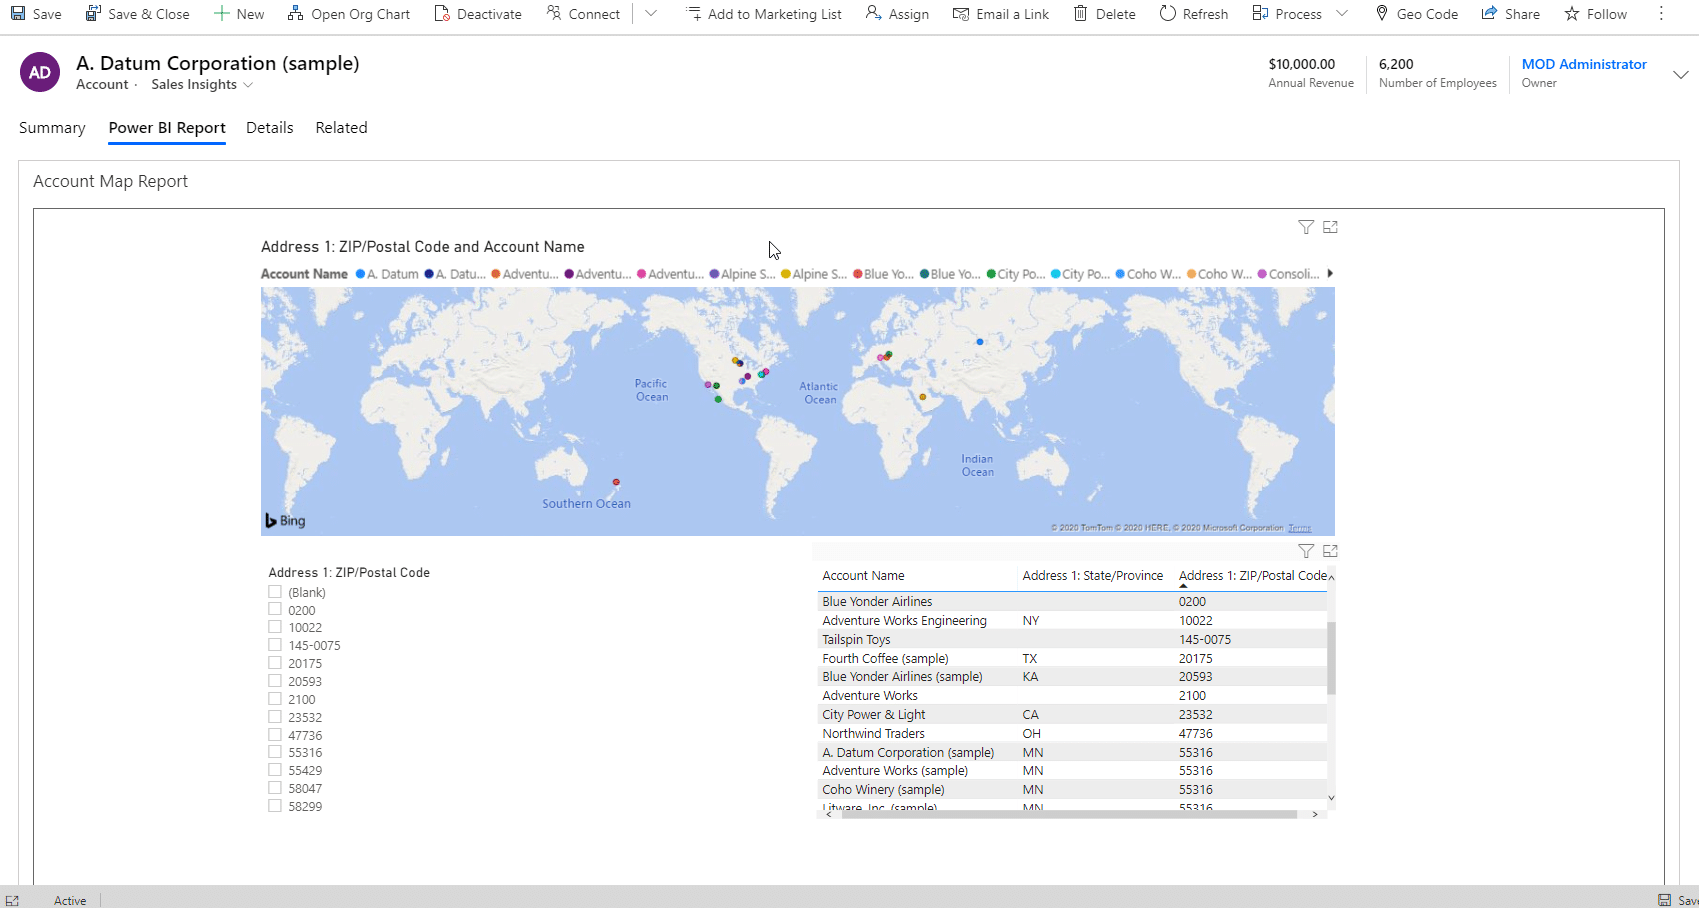
The Power BI Report has a “Slicer” built-in so a user can select one or more Zip Codes to see which Accounts may be in a certain area of the country.
Notes:
There are other ways to accomplish embedding a Power BI Report on your Dynamics 365 CE forms. Microsoft has documented a method in this link: https://docs.microsoft.com/en-us/powerapps/maker/model-driven-apps/embed-powerbi-report-in-system-form
In this method, you are required to put your form in a Solution File, Export your Solution and edit the XML code contained in the solution file. Then you import your modified solution file. This would take some technical skills and familiarity with XML code to accomplish this method. This method does support contextual filtering as described earlier in this article.
But for a relatively simple way to get started embedding Power BI Reports into your Dynamics 365 CE forms, using an iFrame can get the job done!

Under the terms of this license, you are authorized to share and redistribute the content across various mediums, subject to adherence to the specified conditions: you must provide proper attribution to Stoneridge as the original creator in a manner that does not imply their endorsement of your use, the material is to be utilized solely for non-commercial purposes, and alterations, modifications, or derivative works based on the original material are strictly prohibited.
Responsibility rests with the licensee to ensure that their use of the material does not violate any other rights.