


How to Import or Export a Customized Security Configuration Using Data Management in D365 Finance and Supply Chain
Data management and security are key elements for managing and using your data comprehensively. Learn how to export or import data safely and quickly in Dynamics 365 Finance and Supply Chain with this step-by-step guide.
Export Customized Security Configuration
- Go to System administration > Workspaces > Data management.
- Select the Export tile.
- In the Group name field, enter a name for the group.
- Set the Generate data package option to Yes.
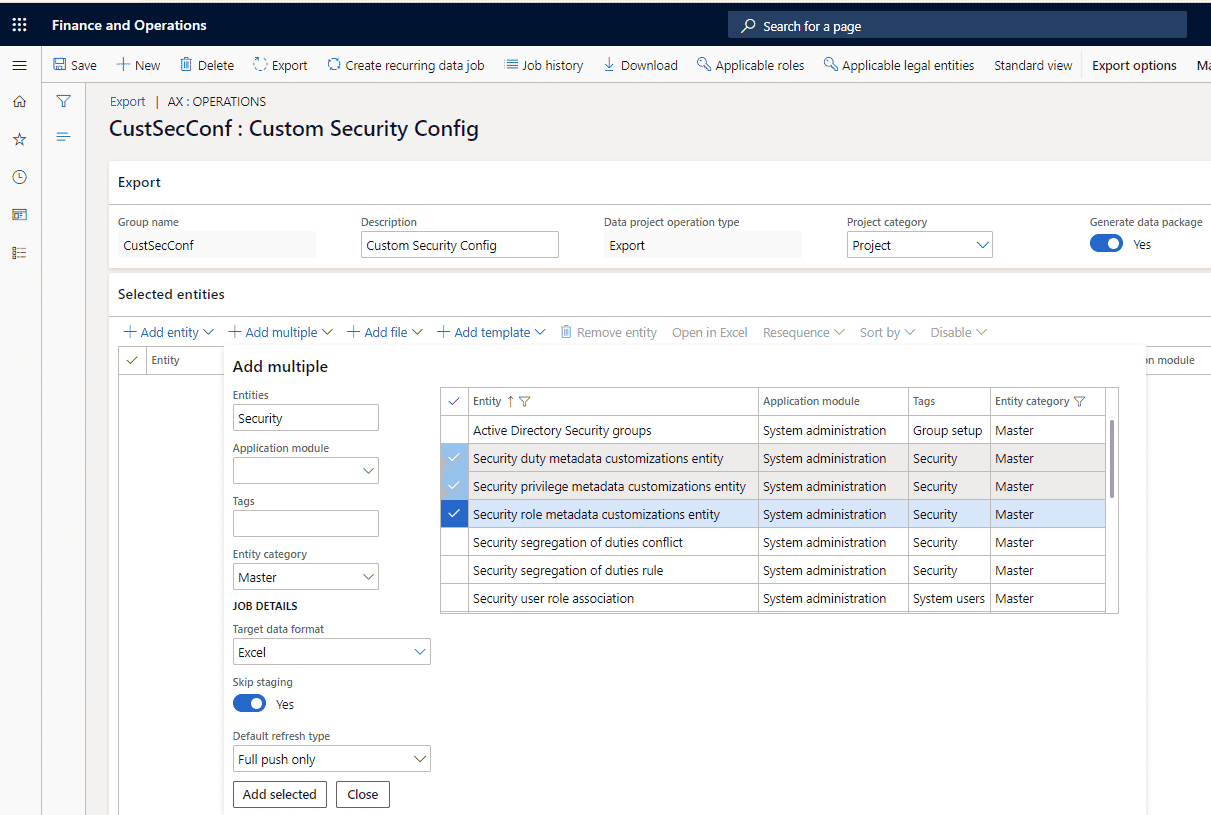
- Select Add multiple to open the drop-down dialog box.
- Filter the entities by setting the following fields:
-
- In the Entities field, enter Security.
- In the Entity category field, select Master.
-
- In the Target data format field, select Excel.
- Select the applicable security customization entities.
-
- SystemSecurityUserRoleOrganizationEntity – Assignment of organizations to security roles.
- Security segregation of duties rule – Segregation of duties rules.
- Security segregation of duties conflict – Segregation of duties conflicts. This entity has unresolved conflicts but also reviewed conflicts.
-
- Select Add selected.
In version 10.0.12 and later, ignore any warning messages about data length. Those messages aren't applicable, because the entities that are included use containers are in data package mode.
- Select Close.
- Make sure that the Sequence field is set in the order of the entity dependencies. Privileges should be first, then duties, and finally roles.
- Select Export.
- Select Close.
- Wait for the job to be completed. Select Refresh to view the status.
- Select Download package.
- Save the package.
Import Customized Security Configuration
- Go to System administration > Workspaces > Data management.
- Select the Import tile.
- In the Group Name field, enter a name for the group.
- Select Add file.
- Select Upload and add.
- Find the exported package, and then select Open.
In version 10.0.12 and later, ignore any warning messages about data length. Those messages aren't applicable, because the entities that are included use containers are in data package mode.
- Select Close.
- Select Import.
- Select Close.
- Wait for the job to be completed. Select Refresh to view the status.
Support Hours of Operation

Locations & Contact Information
Stoneridge Software – Barnesville (HQ)
118 Front St S
Barnesville, MN 56514
Stoneridge Software - Minneapolis
5775 Wayzata Blvd, Suite 690
Minneapolis, MN 55426
Stoneridge Software – Fargo
2000 44th St S
Fargo, ND 58103

Under the terms of this license, you are authorized to share and redistribute the content across various mediums, subject to adherence to the specified conditions: you must provide proper attribution to Stoneridge as the original creator in a manner that does not imply their endorsement of your use, the material is to be utilized solely for non-commercial purposes, and alterations, modifications, or derivative works based on the original material are strictly prohibited.
Responsibility rests with the licensee to ensure that their use of the material does not violate any other rights.