


How to Install PrecisionForms Model into Dynamics AX
In my last blog, I went through the introduction to Bottomline’s PrecisionForms suite of products and guided you through the terminology, architecture, and installation of the PrecisionForms server. This blog will bring you through the installation and configuration of the PrecisionForms model into AX.
Step 3 – Installation and configuration of the PrecisionForms model and AX components
Now we will install the components that integrate into Microsoft Dynamics AX. The AX Components consist of the XPO file, Model file, and Label files for Microsoft Dynamics AX.
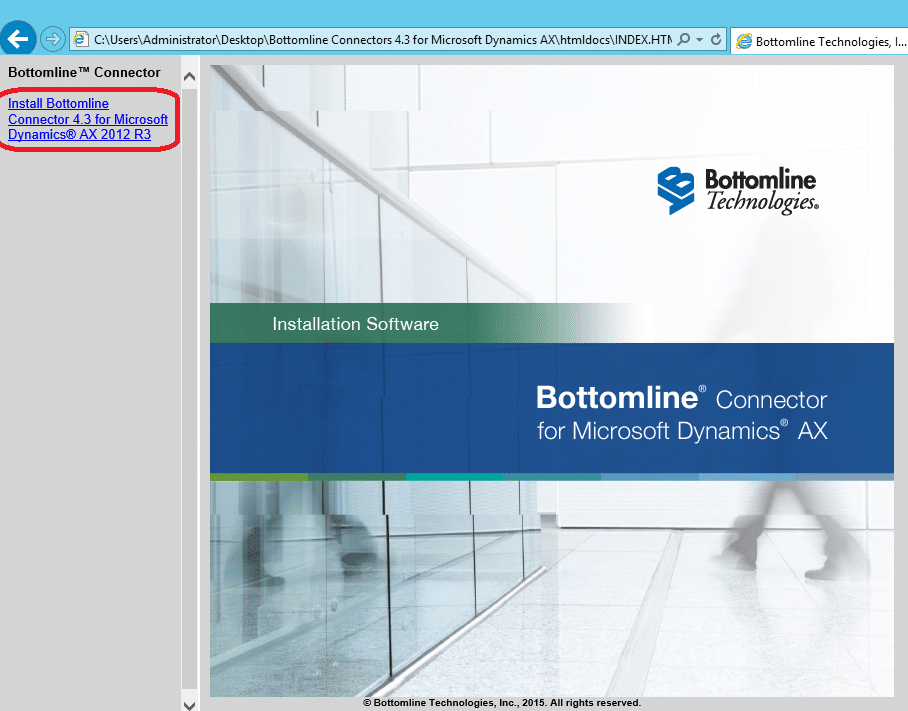
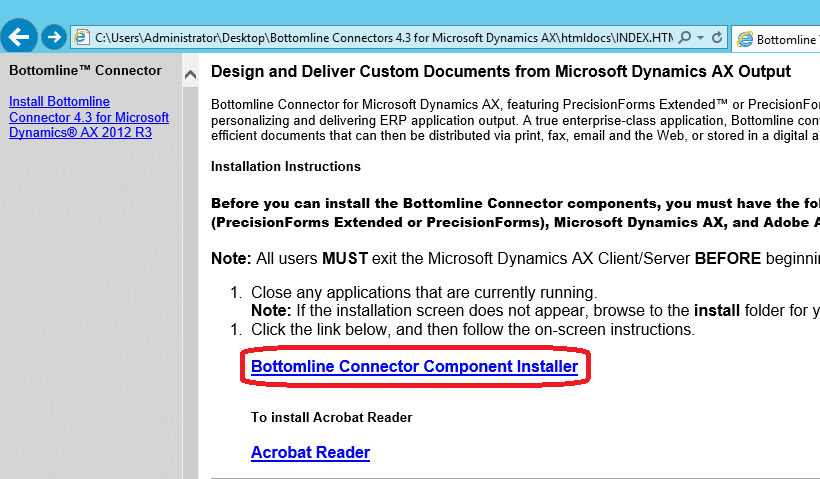
1. From the Bottomline Connectors for Microsoft Dynamics AX installation media, double-click the html document and choose Install:
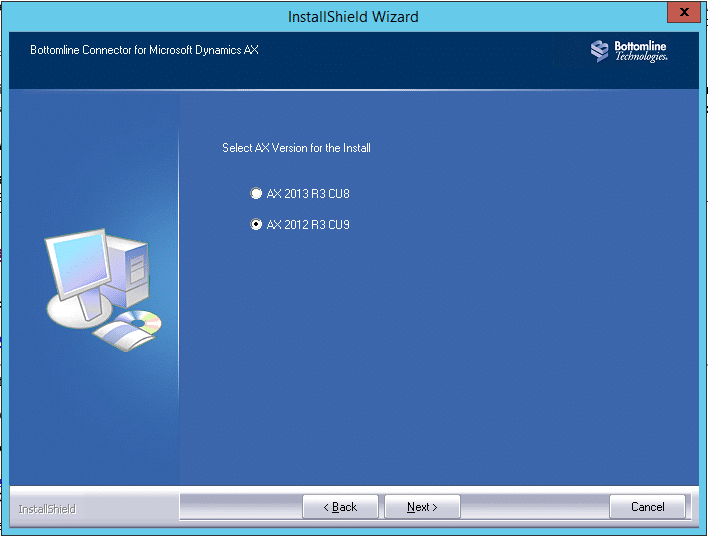
2. One the installer opens, you will be prompted for the version of your Microsoft Dynamics 2012 implementation:
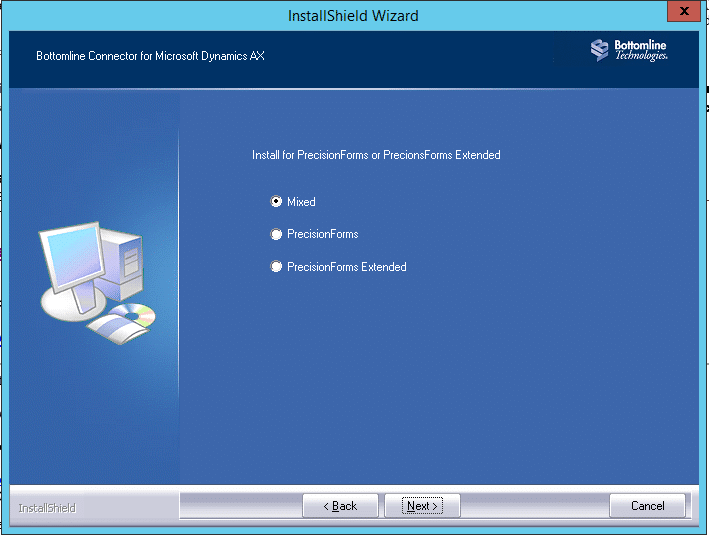
3. Choose the flavor of your PrecisionForms installation. For this example, we are using Mixed.
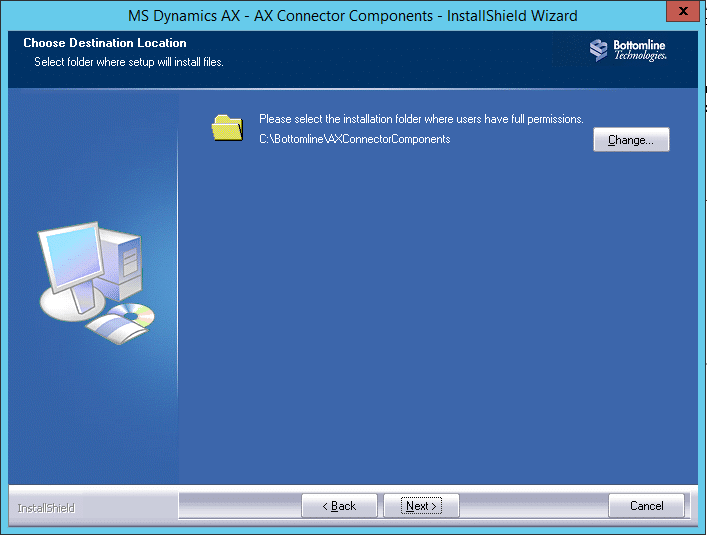
4. Accept the installation path and click Next.
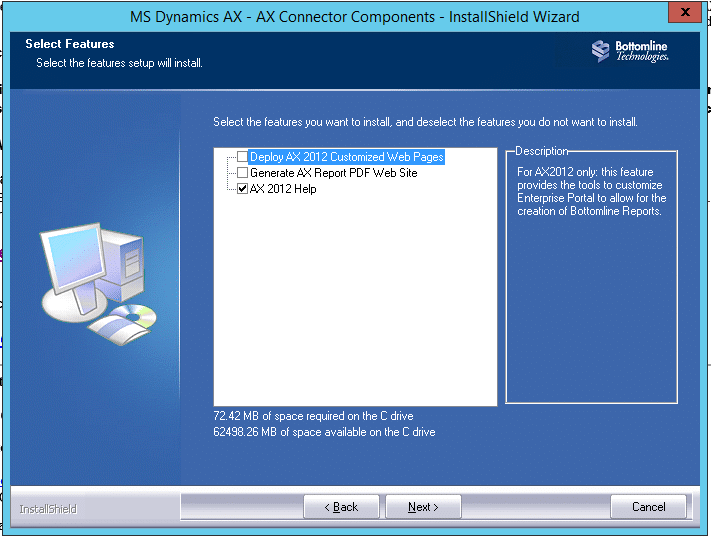
5. This next step is asking if you want to deploy any Enterprise portal functionality or help pages to your existing Microsoft Dynamics implementation. Based on your architecture you can make these setting changes here and click Next and the installation will begin.

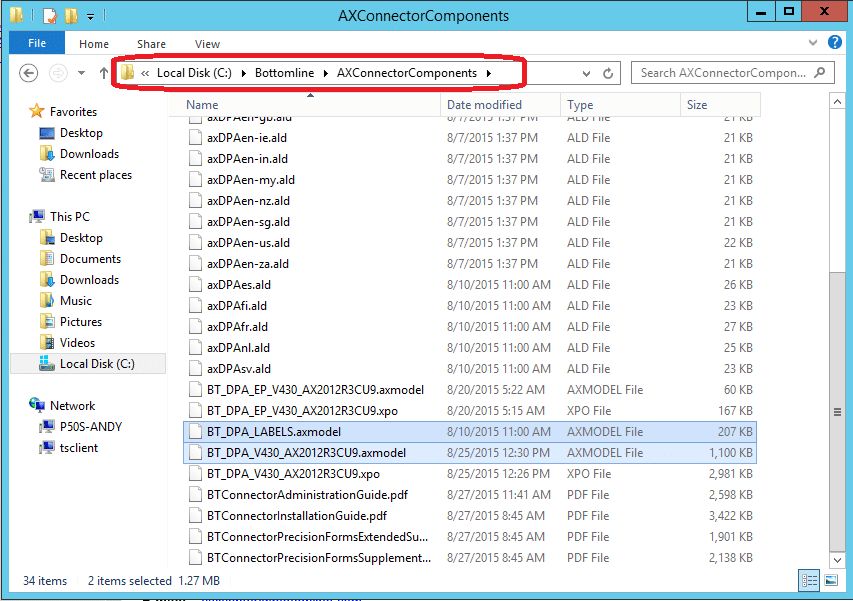
6. When done, you will have a folder located at C:\Bottomline\AXConnectorComponents which will contain the XPOs, labels, and model file(s) needed to install the components into your Microsoft Dynamics AX system. Both variants are provided to you: a full model, or the individual XPOs and associated label files. We recommend installing the model for easier management but this is your choice.
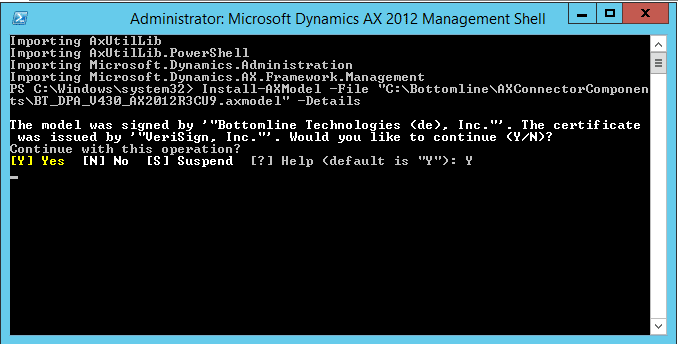
7. To install the label, open an elevated Microsoft Dynamics AX 2012 Management Shell and install the model using the command:
Install-AXModel –File “C:\Bottomline\AXConnectorComponents\BT_DPA_V430_AX2012R3CU9.axmodel” -Details
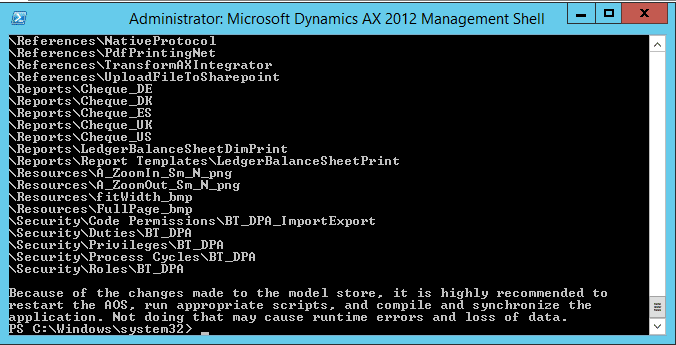
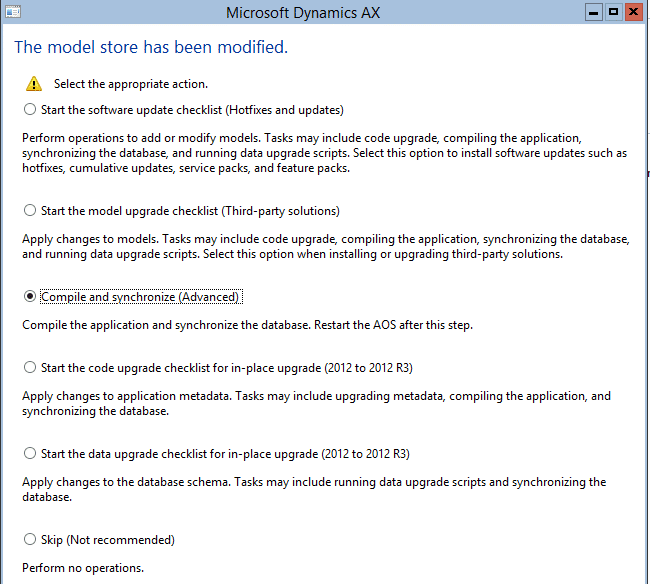
8. Once done, restart the AOS and go into Microsoft Dynamics AX. You will be prompted with a message indicating that the modelstore has changed and whether you want to compile it. Choose the Compile and Synchronize (Advanced) and choose Ok. Once completed you will also need to perform a full CIL.
9. Once completed, the model should be installed and ready.
The next steps will be to configure the PrecisionForms module within AX. You will notice by navigating to System Administration > Setup a new subset of menu items under PrecisionForms is now present.
1. Click Document processes
2. Document processes refers to the Director project or workflow file that we will use to determine how forms are handled after they leave AX. Create a new Process and enter in the following information:
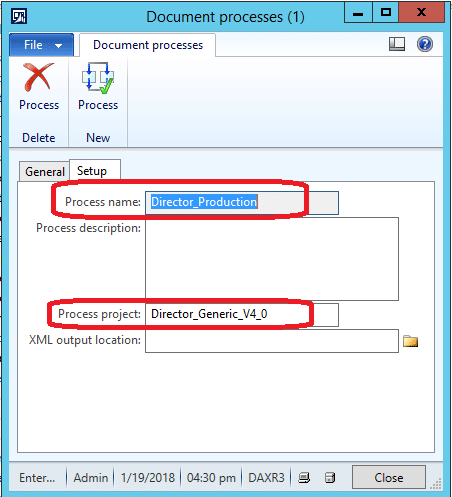
The process project indicated above is the file name of the Director project. As of this writing, Bottomline provides you with a generic workflow named Director_Generic_V4_0 which can be configured later if necessary using PrecisionForms Director. Click Close when done.
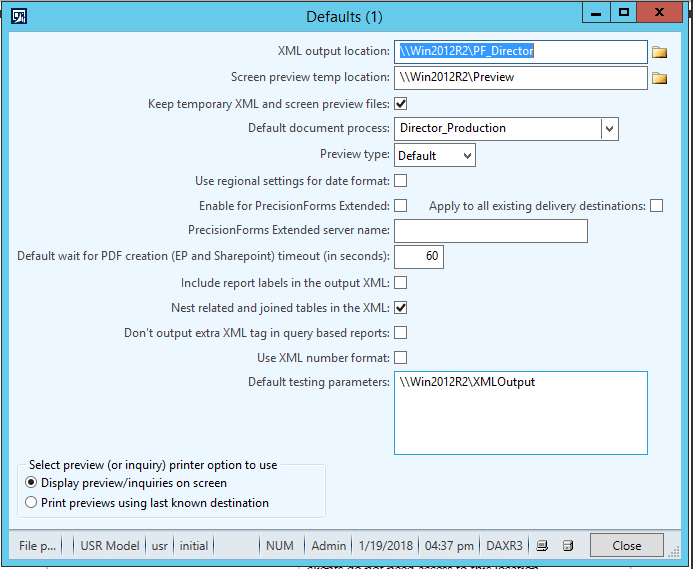
3. Next, navigate to Defaults. This is going to be your bread and butter global settings for PrecisionForms. Some of the important settings I have outlined below:
a. XML Output Location – This it the location that the XML file that is generated by AX will be sent to. Type in PF_Director as this represents the Director printer we created in our prior exercise.
b. Screen preview temp location – When PDF files are created, they get temporarily stored on a file share if a user previews the document to the screen. You can create a file share and specify it here. In our example, we created a file share named Preview.
c. Default document process – This is the process we created in the prior step which we will specify here.
d. Preview Type – You can specify on a global level if you want to either use the internal PDF viewer or use a PDF viewer program installed on the client.
e. Default testing parameters – This option will export an XML file to a shared directory that is very helpful when initially creating forms or troubleshooting issues as it contains everything that was sent to the PF_Director printer during the job export.
4. Next we will specify the Delivery destinations. This is where we create output options for each form (printer, fax, email, etc.). New destinations can be created by clicking the New destination button. Some of the most common destinations you will want to create include:
a. Screen – This will output the form via a PDF file to the screen
b. Printer – This will send print the form to a specified printer. Use the UNC path for the printer in the Printer Network ID field here.
c. E-Mail – This option will email the PDF as an attachment.
d. FAX – if you are using ZetaFax or another Bottomline-integrated fax solution.
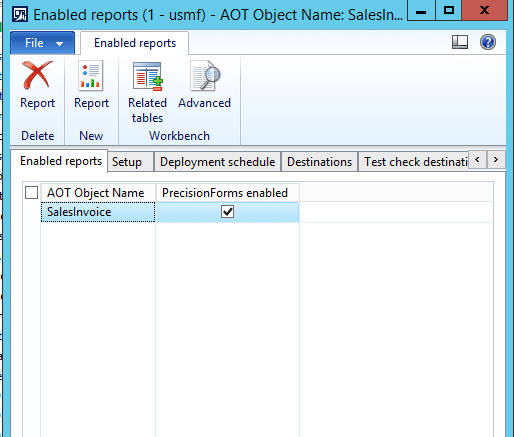
5. The last step is to specify the report(s) in which you want to use PrecisionForms with. It can be many reports, or just a few. In this scenario, I want the SalesInvoice report to be PrecisionForms-enabled. When you create a new record, you can either type in the AOT name of the SSRS report or click the drop-down to find it. The Setup tab will contain the defaults that were created earlier. You will also need to specify which Destinations you want this report to be able to print to on the Destinations tab.
Viola! We have now installed the PrecisionForms model into Dynamics AX, and configured the SalesInvoice report to now use PrecisionForms versus the standard SSRS report design that came with Dynamics. In my next blog, I will guide you down the path of actually starting to build the Sales Invoice form now that we have enabled it and loading it into PrecisionForms Designer. Stay tuned!

Under the terms of this license, you are authorized to share and redistribute the content across various mediums, subject to adherence to the specified conditions: you must provide proper attribution to Stoneridge as the original creator in a manner that does not imply their endorsement of your use, the material is to be utilized solely for non-commercial purposes, and alterations, modifications, or derivative works based on the original material are strictly prohibited.
Responsibility rests with the licensee to ensure that their use of the material does not violate any other rights.