


The Easy Way to Refresh Your Dynamics GP Test Company: Part 1
Backing up and restoring live data on to a test company in Microsoft Dynamics GP can be a challenge if you miss a step or are unfamiliar with the process. The easy way is to automate this task by building a SQL Agent job to do the work for you. Here is the first step to build that job. (no SQL code writing required, SSMS must be loaded and SQL Agent running.) This series assumes you have already created a Dynamics GP test company. Please read the notes in this article which also shows you how to create a test company if you do not have one.
1) Go to the server where your SQL Server and your Dynamics GP installation is located.
2) Launch SQL Server Management Studio and log in as SA or a user with System admin rights.
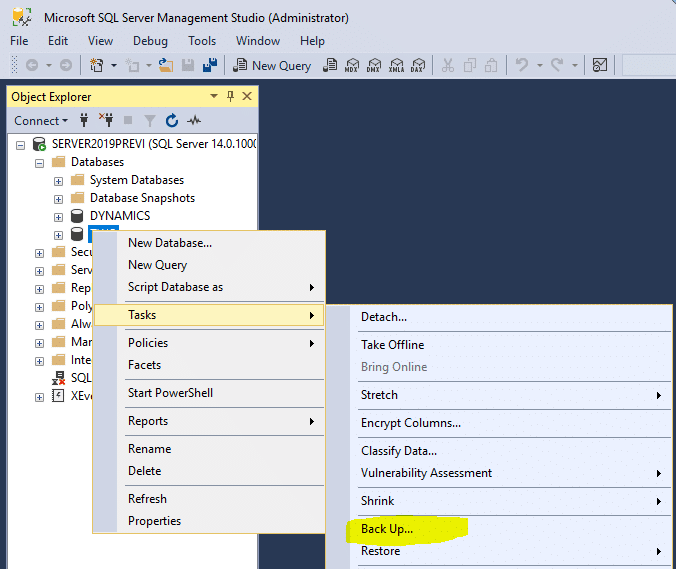
3) Start a manual backup of your live database as shown below but be sure to select your live company in place of TWO shown below.
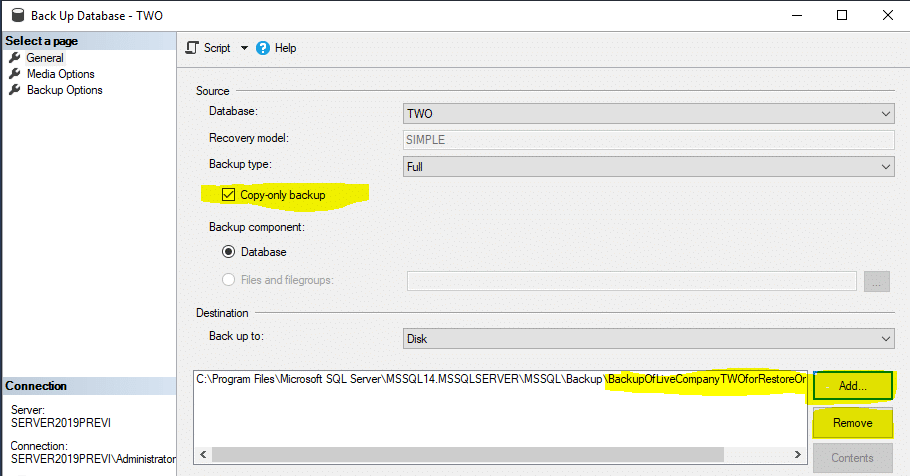
4) When the backup setup screen opens, make the following selections:
- Select General on the left and on the right pane check the Copy-Only backup checkbox so this process will not disrupt the existing SQL backup chain.
- Click Remove to delete the pre-selected backup location
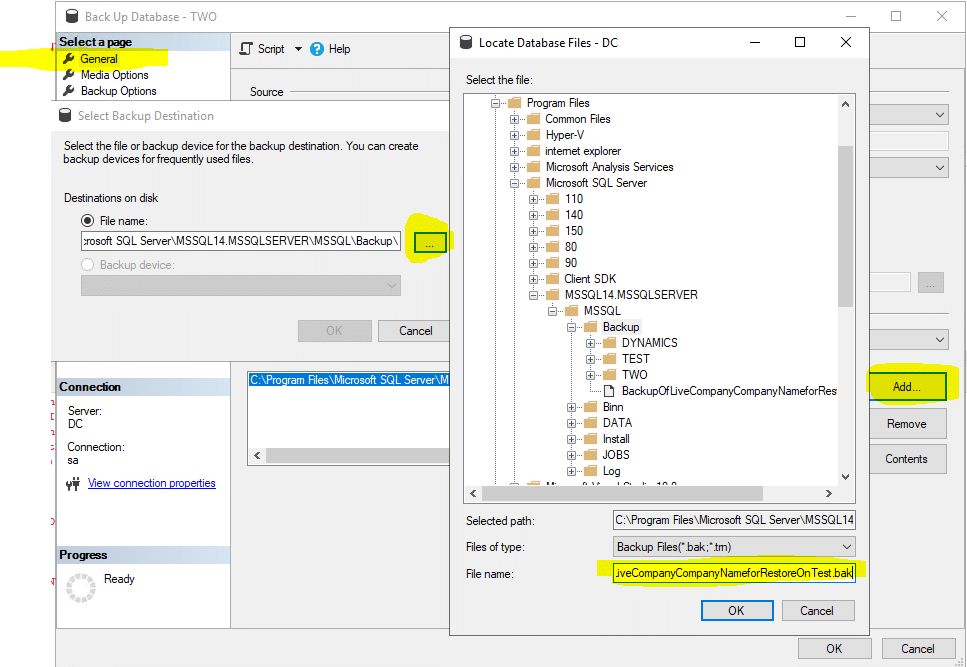
- Click ADD to select a location that will not run out of space and is accessible to the SQL agent job.
- Name the job something that is descriptive and easy to identify. Example: BackupOfLiveCompanyCompanyNameforRestoreOnTest.bak
- Select the Media Options on the left pane and then the Overwrite all existing backup sets so later in the process the restore process will only have one backup to use when running multiple times.

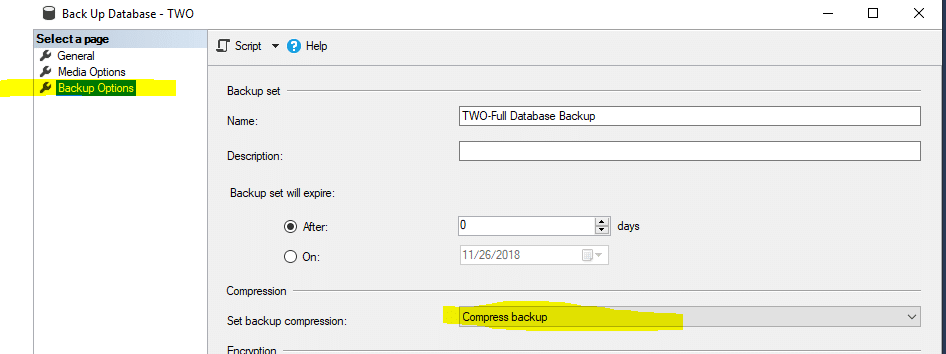
- Select the Backup Options on the left pane and then the compress backup to save space if your version of SQL supports this. Leave the Name as the default.
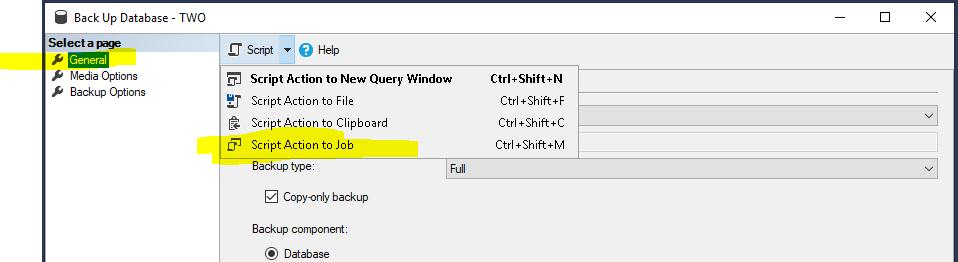
- Now select the General page again and then the script dropdown.
- Select the option to Scrip Action to Job
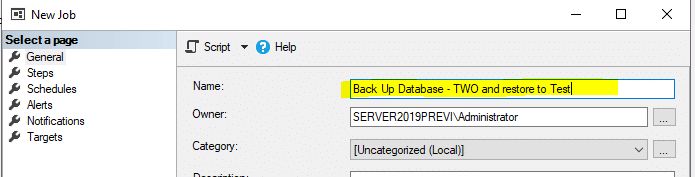
- When the New Job window opens select name and describe the job, so it is easy to find after you save the job. Just leave the job window open when done as we will need it again later in the process.
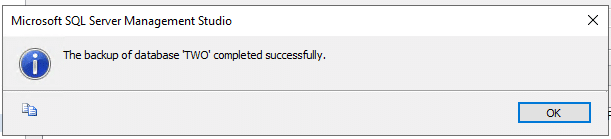
- Now click the ok button on the Backup Job you created as the backup file will need to exist to create the next script in our next session.
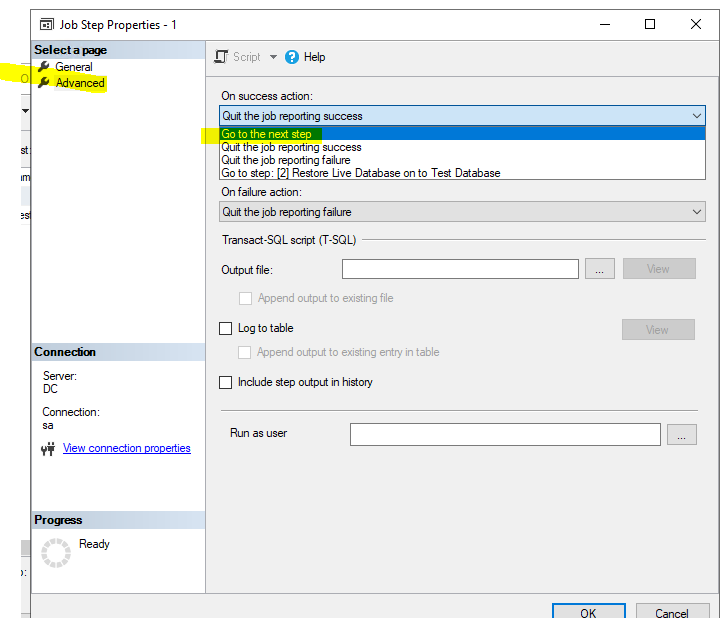
5) The next step is to change the On success action.
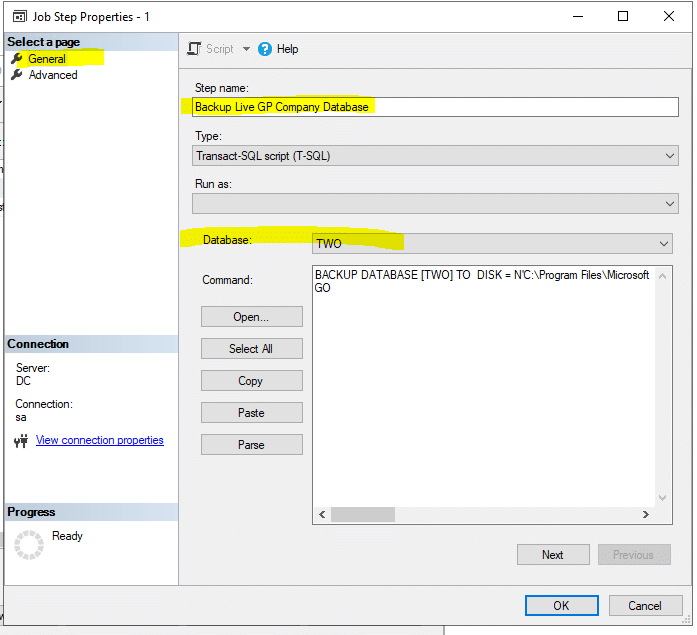
- Select General from the left pane.
- Change the set name to Backup Live GP Company Database or whatever name is appropriate if you have not already done so from above.
- Change the dataset to your live company database, in this case, TWO. (please note this would only have effect if the job script did not name the database)
- Now select Advanced from the left pane
- Select On success Action drop-down and pick the “Go To The Next Step” selection.
- Click ok and ignore any warnings.
In our next session, we will create the restore setup of this SQL job. In the meantime, if you have any other questions, reach out to us at Stoneridge Software.

Under the terms of this license, you are authorized to share and redistribute the content across various mediums, subject to adherence to the specified conditions: you must provide proper attribution to Stoneridge as the original creator in a manner that does not imply their endorsement of your use, the material is to be utilized solely for non-commercial purposes, and alterations, modifications, or derivative works based on the original material are strictly prohibited.
Responsibility rests with the licensee to ensure that their use of the material does not violate any other rights.