


Uncommonly Used Features – Copy-Paste Function in Dynamics GP
In this blog post, we’ll be walking through how to use Copy-Paste function in Dynamics GP in General Ledger, Payables Transactions, and Payroll Transactions areas.
Using the Copy-Paste Function in Dynamics GP for General Ledger Transactions
First, let’s take a look at using Copy-Paste to bring in General Ledger (G/L) transactions.
If you have data that needs to be entered directly into the G/L, such as a payroll transaction if your payroll is outsourced, or transactions that need to be entered monthly, one way to bring these in is to copy-paste.
On your spreadsheet that contains the data that you need to import, create a new tab so that you keep the original file data, and enter the following headers for columns A through D:
- Reference
- Account
- Debit
- Credit
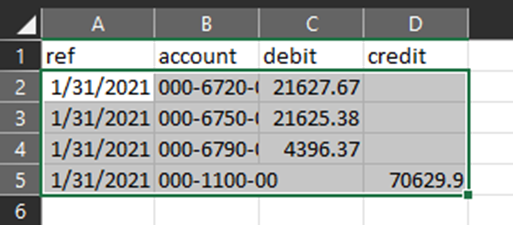
The reference can be whatever you want to use as the line reference on the transaction. Then enter the entire string account number. You do need to split out Debits and Credits separately as I’ve shown in the example below. You cannot combine these by doing a negative to represent a credit type entry.
Go to GP and open the General Ledger Transaction Entry page by navigating to Financial > Transactions > General.
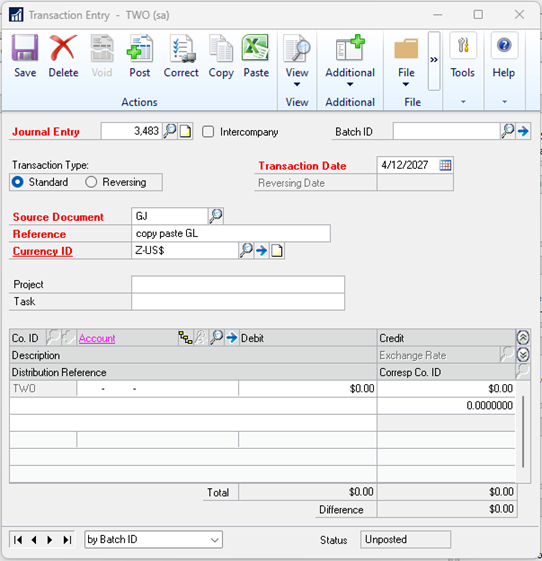
Enter in the header information – Batch ID if needed, Transaction Date, and reference. Then tab to the first segment of the account number.
Back on your spreadsheet, select the data that you want to paste into the transaction. Select only the data, not the column headers.
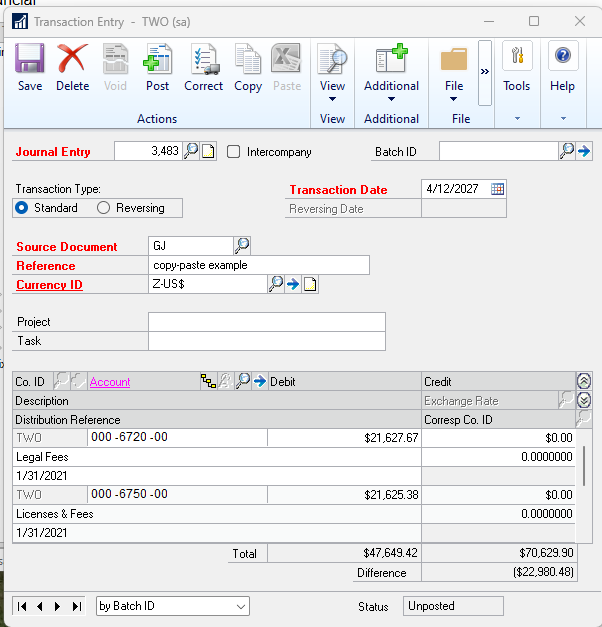
You will still see if your transaction is balanced when you import it, and if there is an account not in GP that is on your data for import, you will get a report that shows the accounts don’t exist.
How to Use the Copy-Paste Function in Dynamics GP for Payables Transactions
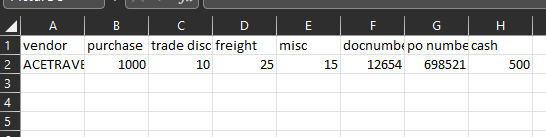
The copy-paste for Payables Transactions is similar. You need to have the data you want to import in the specific format shown below.
Once you have the data, navigate to Purchasing > Transactions > Payables Transaction Entry.
Enter the header information for the transaction including the Vendor ID. Then click on the Paste button.
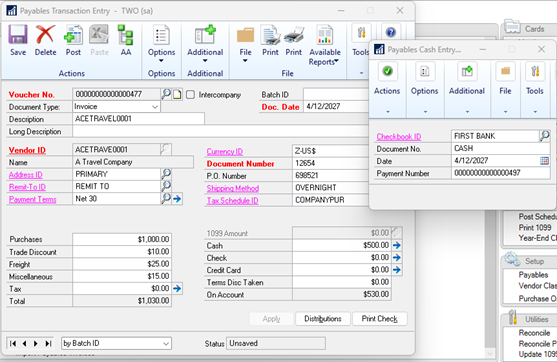
The data will be entered into the transaction. Distributions will default in from the Vendor record unless you paste in the distributions (it is not required to paste these in).
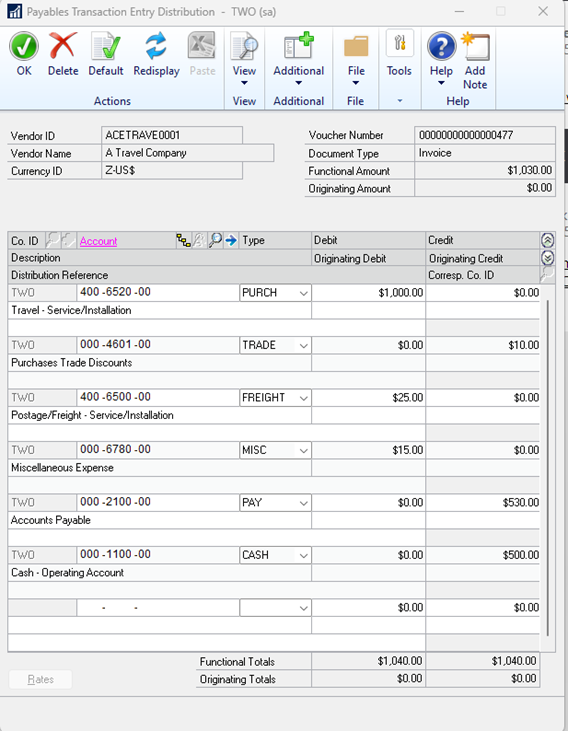
The process is similar to using copy-paste on the distributions. The example of the spreadsheet layout is shown below. Once the transaction is posted, click on the Distributions button, copy your lines from the spreadsheet and click Paste in the Distribution window.
| 400-6520-00 | PURCH | 1000 | ||
| 000-4601-00 | TRADE | 10 | 10 | |
| 400-6500-00 | FREIGHT | 25 | ||
| 000-6780-00 | MISC | 15 | ||
| 000-2100-00 | PAY | 540 | ||
| 000-1100-00 | CASH | 500 |
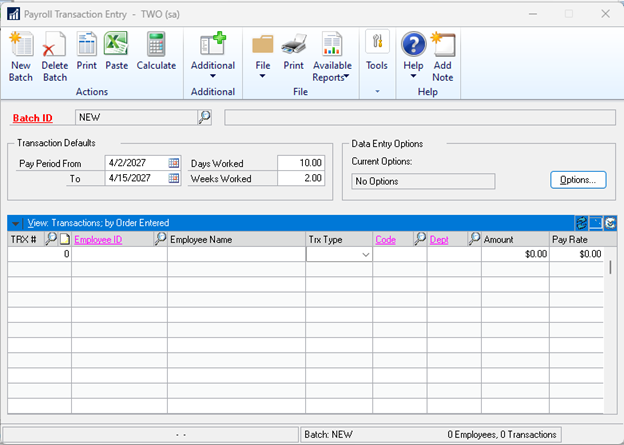
Using Copy-Paste Function in Dynamics GP for Payroll Transactions
The last area where Copy-Paste can be used is in Payroll Transaction Entry. To be able to paste in a group of payroll transactions, you need to be on a “fresh” page, where you have not entered any other lines for this payroll batch. If you need to add additional lines, do that after you paste the file in.
The format for using the Copy/Paste function in Payroll is shown below.

Navigate to the Payroll Transaction Entry window (HR & Payroll > Transactions > Transaction Entry) and enter in the Batch ID and Transaction Defaults.
Then copy the data only (not the column headers) and back in GP, click on the Paste button.
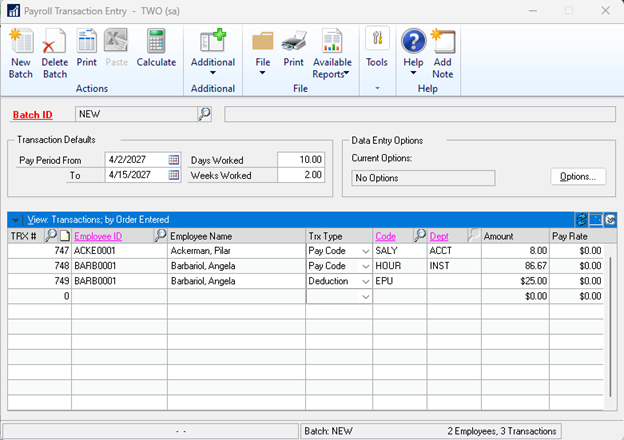
Now if you have any additional lines that need to be entered, you can continue on in the next available row. Then process your payroll as you normally do.
Questions?
If you have any questions, don’t hesitate to reach out – we’re happy to assist you.

Under the terms of this license, you are authorized to share and redistribute the content across various mediums, subject to adherence to the specified conditions: you must provide proper attribution to Stoneridge as the original creator in a manner that does not imply their endorsement of your use, the material is to be utilized solely for non-commercial purposes, and alterations, modifications, or derivative works based on the original material are strictly prohibited.
Responsibility rests with the licensee to ensure that their use of the material does not violate any other rights.