Using Liquid Templates and FetchXML to Retrieve Data in a Dynamics 365 Online Portal
The Dynamics 365 (CRM) portal has many features that are extremely valuable that fly a little (or completely) under the radar. One of those valuable features that I have been working with recently is a feature called liquid templates, which is used to write FetchXML to reach back into my CRM online instance and obtain additional data when I am working on a portal form.
This approach opens up a completely new world of possibilities for many custom solutions that our clients may need to implement on the Dynamics 365 portal. I am going to demonstrate a quick liquid FetchXML example that I hope will help you get started.
Some knowledge of FetchXML and JSON will make this article easier to follow but I will try to demonstrate this example in an approachable way that will point you in the direction of where you would need to go for more information. I have included additional information about the technologies that I will be leveraging below.
What is Liquid?
If you don’t know what liquid is don’t feel too bad, I was in the same boat a few weeks ago and had to do some quick learning. Liquid is an open-source template language created by Shopify in Ruby. Liquid was ported over to .net in 2010 via the open-source license. This version of liquid is known as dotliquid. The syntax between the original liquid and dotliquid are very similar.
The important thing to note is that liquid is supported within the CRM portal and we will be using it from the web template to retrieve data from CRM via FetchXML. I will try to explain the little bit of liquid used for our queries; check out the links below for additional information:
1. The original Liquid (Ruby)
2. Dotliquid
What is FetchXML?
I am going to assume everyone reading this article has some familiarity with FetchXML. The high-level definition is as follows: FetchXML is a proprietary query language that is used in Microsoft Dynamics 365 (online & on-premises). If you are new to FetchXML please refer to the following link for more information: Build queries with FetchXML.
What is JSON?
JSON is the format in which our FetchXML results will return. It stands for JavaScript Object Notation and it is a way to store and transmit data objects in an efficient and readable manner. I won’t go into too much detail on this either but here is a pretty good explanation with additional links: What is JSON and why would I use it?
Let’s Get Down to Business and Fetch Some Data
In our example, we will be pulling the main phone, address and primary contact information associated with an account name. We will be searching for the account by the account name and returning the associated active contacts.
Step 1: Create the FetchXML query.
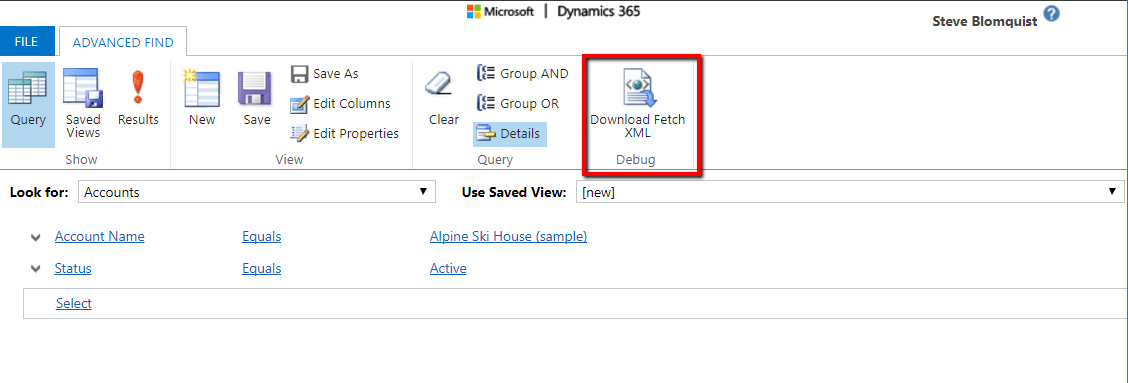
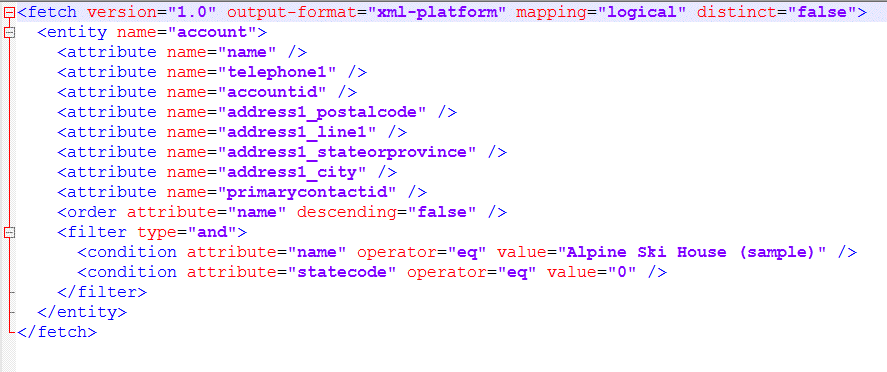
If you are new to FetchXML (or even if you are seasoned), it does not hurt to start creating your query using the Advanced Find in Dynamics 365. You can see my Advanced Find Query and the FetchXML that is generated from it below:
Step 2: Create the Web Template
Under the Portals tab in Dynamics 365, select Web Templates.
Click create new.
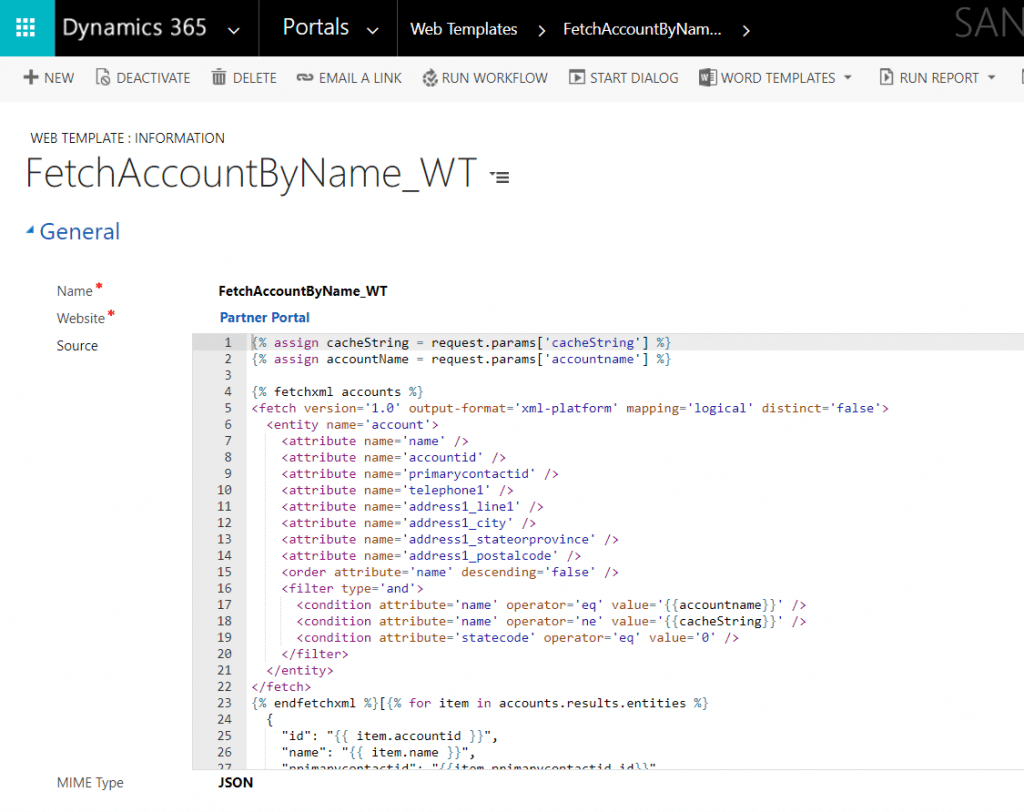
Enter in your Liquid code into the Web Template with your revised XML and save.
Name: This is the name of the Web Template. I try to make mine as descriptive as I can and start each one with Fetch so I know it is a FetchXML template. I also add a “_WT” but this really isn’t necessary.
Website: This pull-down has the list of websites that are active in the portal. Select the website that will be using this FetchXML query.
MIME Type: Enter “JSON” here (no quotes).
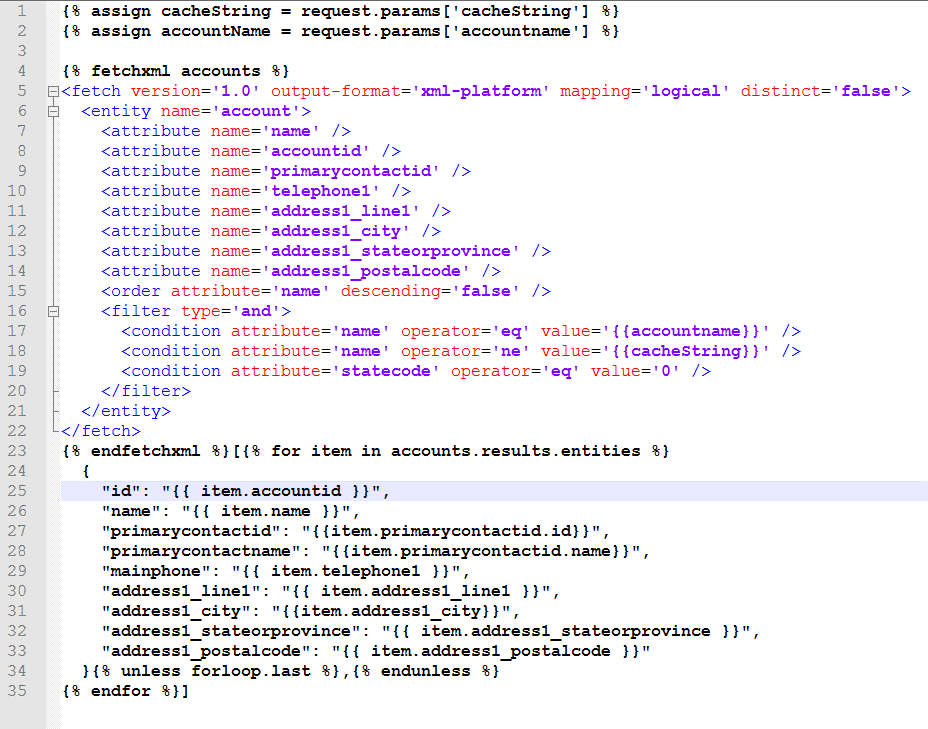
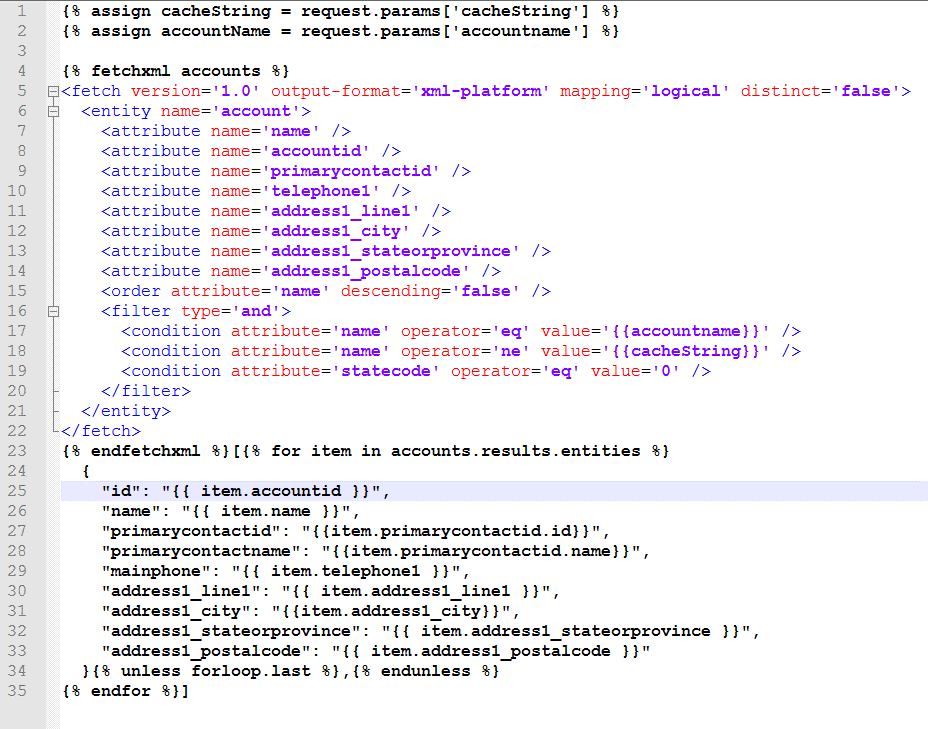
Source: There is a lot here but it’s not as bad as it looks. I will explain each line of code below:
Line 1-2: These are the parameters that are being passed into the Web Template. I will be passing in the parameters cacheString and accountname via the URL when I call this query. You will note that by using Liquid we are assigning these values to variables that we will be using the FetchXML later.
NOTE: cacheString is a random number that I generate and pass to my FetchXML query because Dynamics likes to cache previously-used queries instead of grabbing the most recent data if it sees that the same query is being run again. Dynamics does this for speed reasons but I prefer to make sure I am getting the most current data so I change the query by passing in this random number. You will notice that this number is used in my query condition but in a way that will not affect the results.
Line 4: This is a Liquid statement that names the FetchXML query. You will note that I named this FetchXML query ‘accounts’. This line is stating that FetchXML starts here.
Line 5-22: This is a slightly altered version of the FetchXML. Note that I have updated the FetchXML query that we generated earlier to contain single quotes instead of double quotes. I converted (“) to (‘).
Lines 17-18: These lines were altered to use the variables we assigned in lines 1 and 2. Note that to use a variable in Liquid we use {{ and }}.
Line 23: Close the FetchXML code that we started in line 4.
• Note after that we have an open square bracket ( [ ). We are going to start getting our data from the FetchXML and put it in the JSON format. This open square bracket is the start of that. It will allow us to return an array of objects. In this example, we are only returning one account but the way the code is written above will work for one object and multiple so I always write it this way.
• After the square bracket, we are starting a “for” loop with liquid to get everything returned from the FetchXML query. Notice that we are cycling through the FetchXML query name that we created on line 4 (accounts) and returning each object as an entity named “item”.
o (% for item in accounts.results.entities %} – accounts came from line 4
Line 25-33 is assigning the data that was returned into a JSON object that we create. The format is name:value so on line 29 the name is “mainphone” and the value is the telephone1 returned from our FetchXML and contained in the item entity. Note the quotes and again the liquid double brackets.
Lines 27-28 has something worth pointing out. Because the primarycontactid is a lookup in Dynamics 365, the value returned from the FetchXML needs to define whether we want to have the id or the name returned. In my example, I showed how to retrieve both.
Line 34: Here we are adding a little Liquid logic to add a comma to our JSON format if there is more than one entity (in this case accounts) returned. Again, this is to facilitate a query that will return more than one entity if needed.
Line 35: Ending the Liquid for loop. Also finally closing our square bracket (]).
Step 3: Create a Page Template
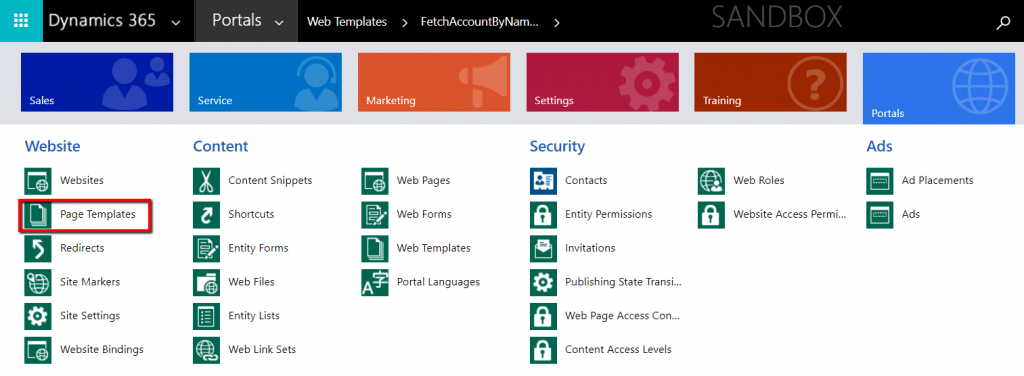
Under the Portals tab in Dynamics 365, select the Page Templates option.
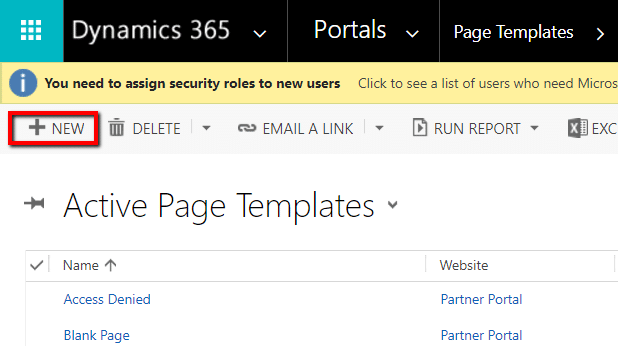
Click create new.
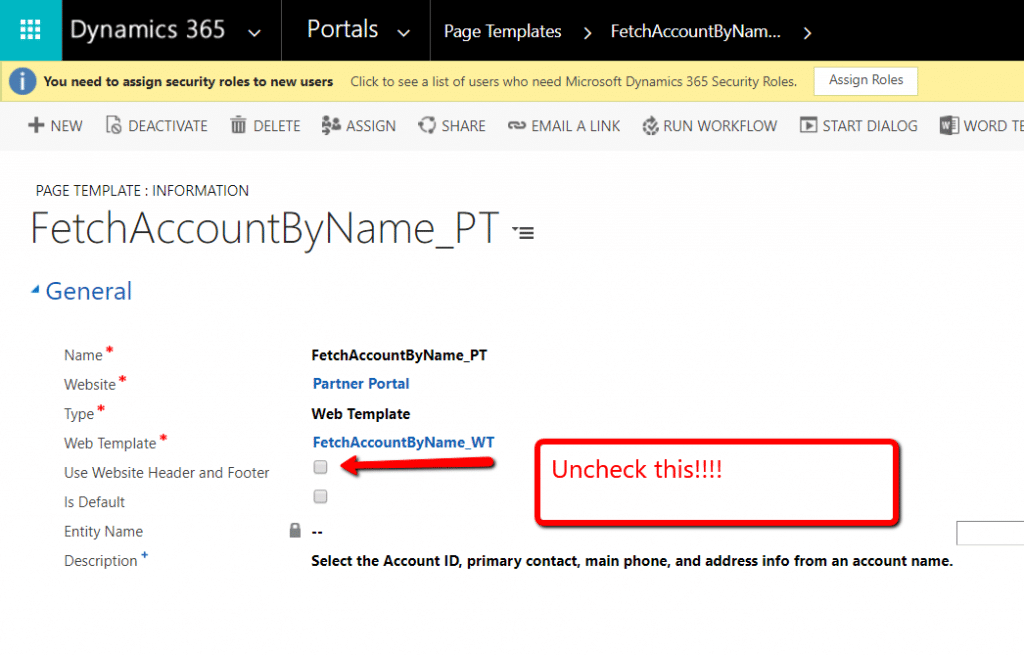
Enter in the following and save.
Name: I use the same name as the web template only I add a _PT at the end. You can make it whatever you want.
Website: This pulldown has the list of websites that are active in the portal. Select the website that will be using this FetchXML query.
Type: In this pulldown list, select the Web Template option. (Doing this will make the Web Template field show that we are filling in next.)
Web Template: Select the web template that we created in step 2.
Use Website Header and Footer: Uncheck this if it is selected. It will add the header and footer to the data returned but we only want the JSON data returned.
Description: Add description.
Step 4: Create the Web Page
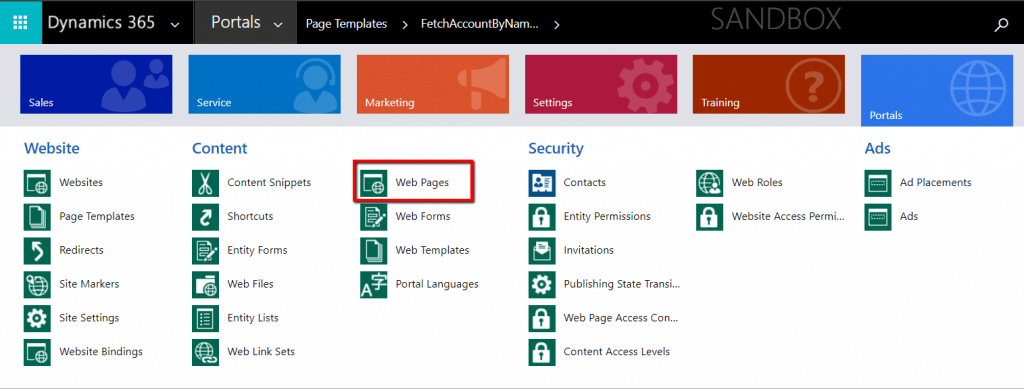
Under the Portals tab in Dynamics 365 select the Web Pages option.
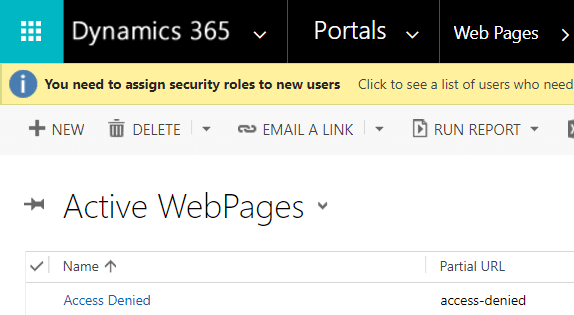
Click create new.
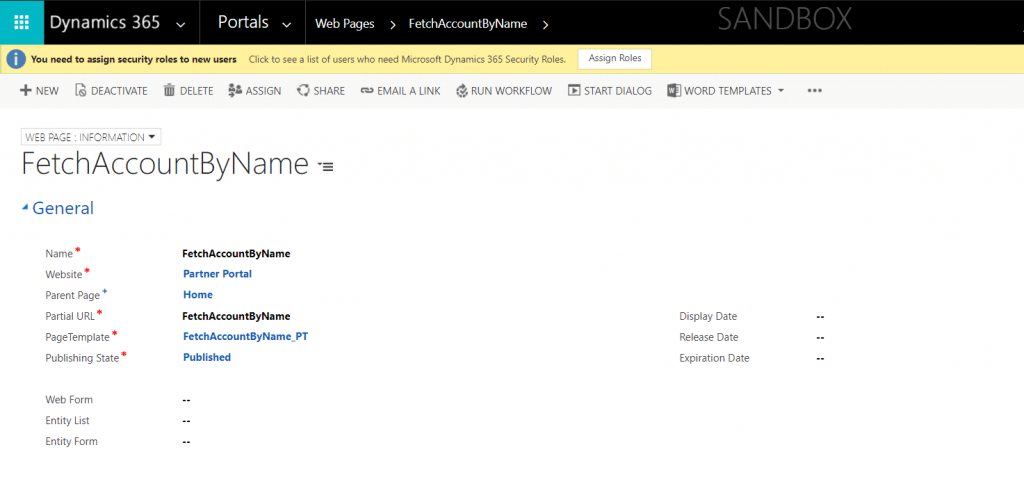
Enter in the following data and save.
Name: I use the same name as the web template and page template without anything at the end. It can be whatever you want.
Website: This pull-down has the list of websites that are active in the portal. Select the website that will be using this FetchXML query.
Parent Page: Normally I just use “Home” since most of the sites I develop for are in flux. This sets the parent page and affects the URL address used to call the fetch XML page.
Partial URL: I always make this the same as the name to avoid confusion.
Page Template: Select the page template that we created in step 3.
Publishing State: Select “Published” from this pull down to activate this page on the portal.
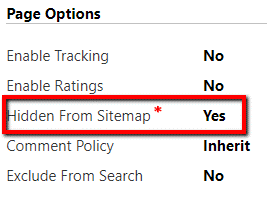
Hidden From Sitemap: This is further down the page. Usually, I hide my Fetch query pages from the sitemap.
Step 5: Test Your Query
Important – To test your query we need to log into the portal. Login and then go to the URL you created and enter the parameters. My example is the following:
Works (sample)
The results can be seen below. It worked, the JSON is returned.
IMPORTANT: If you only see two empty square brackets “ [ ] “ nothing got returned from your query. Double check that the entity you are trying to return is enabled on the portal through security. Check that the person logged in has access to that account. Also, double check your query.
In future articles we will explore:
1. Using this example, I will demonstrate how to call this FetchXML query via a JavaScript ajax call on a portal Entity Form.
2. I will also show some tips and tricks to use FetchXML and Liquid for related entities joins to reduce the number of calls needed.
3. How to expose an entity to the portal to allow it be called by liquid and FetchXML.
4. Leverage this technology to call Plugins and Workflows from the Portal.
5. Much more…
Under the terms of this license, you are authorized to share and redistribute the content across various mediums, subject to adherence to the specified conditions: you must provide proper attribution to Stoneridge as the original creator in a manner that does not imply their endorsement of your use, the material is to be utilized solely for non-commercial purposes, and alterations, modifications, or derivative works based on the original material are strictly prohibited.
Responsibility rests with the licensee to ensure that their use of the material does not violate any other rights.

