


Use Templates Like a Pro – Ensure Smooth Data Imports in Dynamics 365 Sales
Messy data imports can slow down your work and introduce costly errors, but they don’t have to. With the right tools and approach, importing and updating records in Microsoft Dynamics 365 (D365) Sales can be smooth and efficient. In this blog, we’ll highlight key insights and share practical tips on using templates and views to manage data like a pro. We will break down what you need to know to get it right.
Watch the video tutorial on our YouTube channel:
Let’s start with the foundation: using out-of-the-box templates to structure and import your data accurately.
Importing Data Using Templates
When you're looking to bring new data into your D365 Sales environment, or update existing records, using templates is a fast, repeatable, and structured way to do it. This method is especially useful for common entities like Accounts, Contacts, or Leads, and it minimizes mapping errors by giving you a pre-built format straight from the system. Here is a guide to help navigate the process:
Step-by-Step: How to Use a Data Import Template
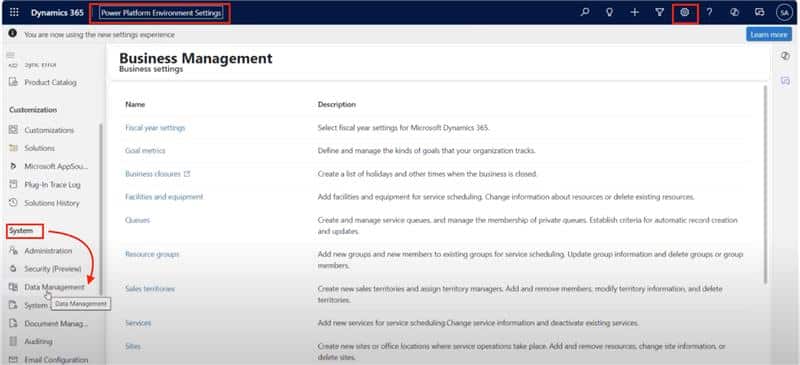
1. Access the Data Management Area
-
- Click the gear icon in the top-right corner of your Sales environment.
- Select Advanced Settings.
- Navigate to the Power Platform admin center view.
- Go to System > Data Management.
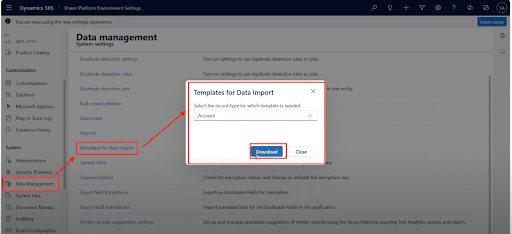
2. Download the Import Template
-
- Click on Templates for Data Import.
- Choose the entity you want to import data into (e.g., Account).
- Click Download to get a pre-formatted Excel file containing all fields in that entity.
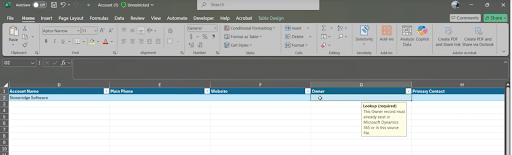
3. Customize the Template
-
- Open the Excel file.
- Remove any unnecessary columns if you plan to reuse the file.
- Enter your data in the relevant fields (e.g., Account Name, Address, Owner).
- Leave the Owner field blank if you want records to be assigned to the person importing the file.
- Save the file locally (e.g., on your desktop).
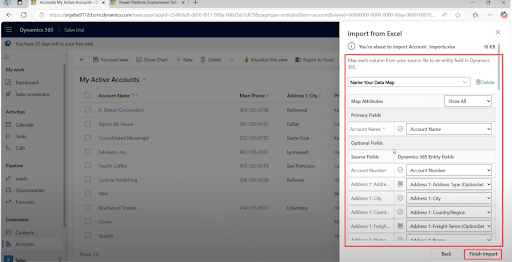
4. Import the Data into D365 Sales
-
- Go to the Accounts view (or your chosen entity).
- Click the three-dot menu and select Import from Excel.
- Upload your saved Excel file.
- Review the import settings:
- Confirm the owner.
- Ensure duplicates are not allowed unless necessary.
- Review field mappings (usually auto-mapped if using a template).
5. Track the Progress
-
- After submitting, click Track Progress to monitor the import stages: Submitted → Parsing → Transforming → Importing → Completed.
- Refresh as needed until you see confirmation that the import is complete.
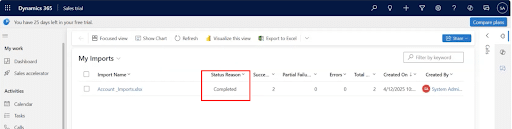
Data Templates in Action:
Let’s say you’re updating account records for two new clients. You download the Account entity template, enter their details (like city, state, and account number), and save the file. After importing the file through the Excel import tool in D365 Sales, both records appear immediately in the system, complete with the fields you populated.
Using templates saves time, ensures consistency, and sets you up to reuse the same cleaned-up format in the future for similar data loads. However, it can leave you with several extraneous fields you either need to leave blank or take the time to remove. This is something to keep in mind and compare to the process of importing data using views, which offers a more streamlined option. Let’s take a look at them next.
Importing Data Using Views
If you’re a consultant or power user managing data in D365 Sales, importing data using a view can be one of the most efficient and controlled methods available. Rather than relying on static templates, this method lets you define exactly which fields matter, streamline the import process, and reuse the view anytime data needs to be updated or appended. It’s fast, flexible, and easy to maintain once you understand how it works.
Why Use a View for Data Import?
Using a personal view to define the structure of your import file ensures that:
- You only include the fields you care about, nothing extra.
- You maintain control over which data is being added or updated.
- You can reuse the same view as a dynamic template for future imports or updates.
- It aligns well with real-world data management needs across projects and clients.
Steps to Import Data Using a View
These high-level steps will help guide anyone setting up and executing a view-based data import in D365 Sales:
1. Create or customize a view
Navigate to the relevant entity (e.g., Accounts) and customize a personal view to include only the fields you need for the import or update, such as Name, Phone, City, State, etc.
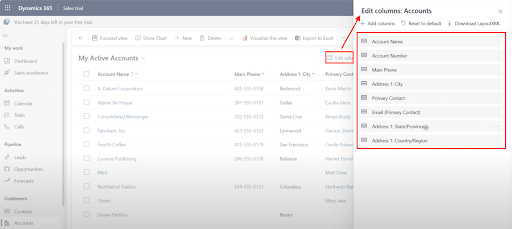
2. Save your view
Save the customized view as a personal view (e.g., "Data Import View"). These are accessible only to you unless explicitly shared.

3. Export to Excel
With your view open, choose Export to Excel. This will create an Excel file that mirrors your selected fields and includes system metadata (including hidden ID columns).
4. Prepare your Excel file
-
- To create new records: Delete all existing rows of data that you do not need (not just the values, remove the rows entirely).
- To update existing records: Keep the rows and make the necessary field-level changes.
- (Optional) You can also delete the hidden metadata columns (A–C), but they won't interfere if you're adding new data.

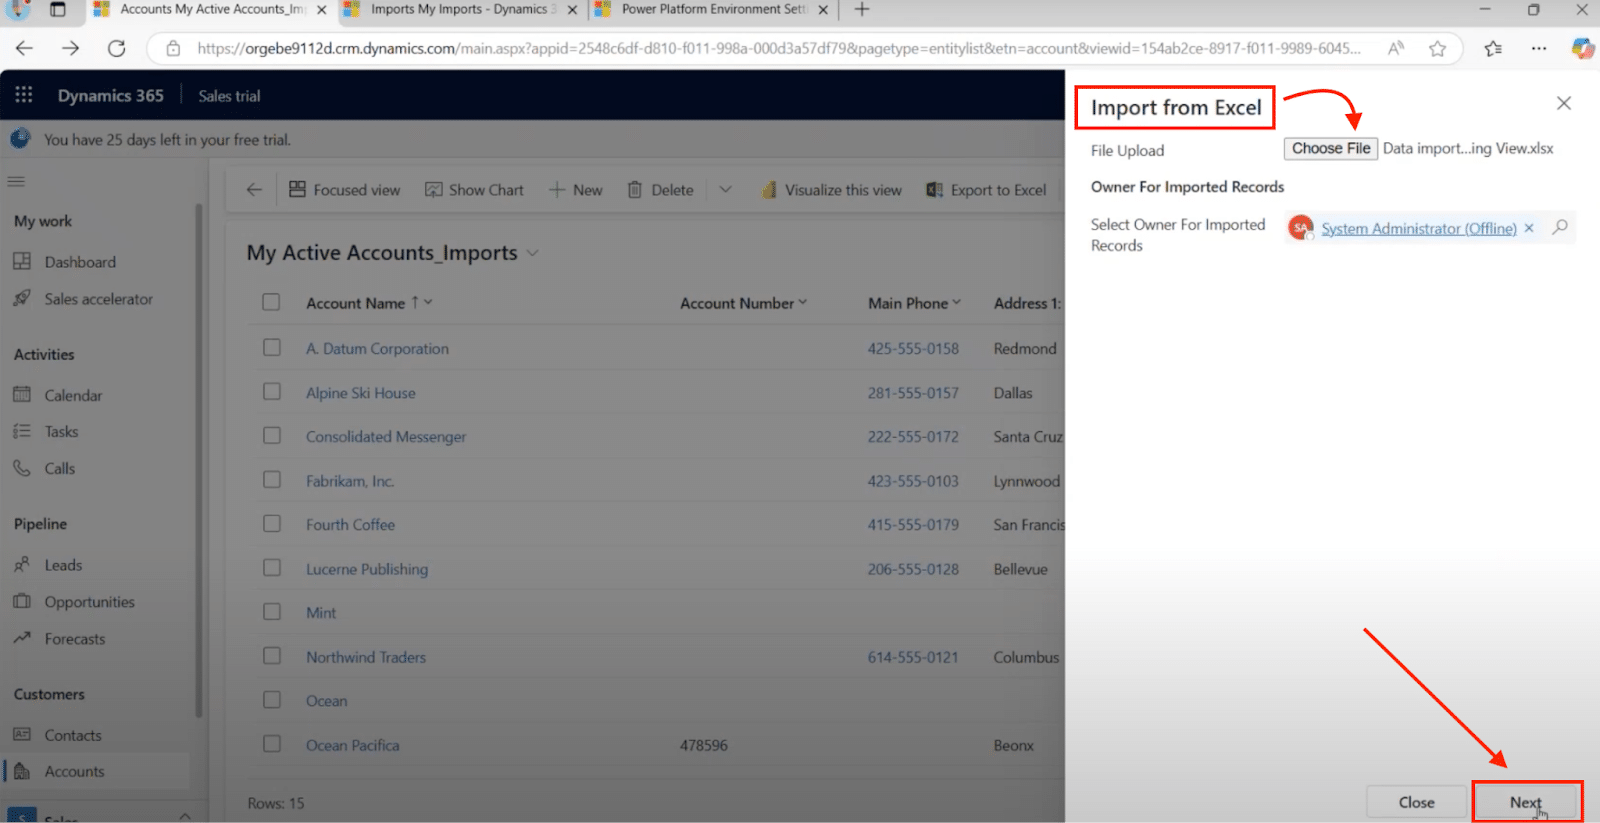
5. Save and import the file
Save your Excel sheet, return to D365 Sales, and use the Import from Excel feature. Follow the prompts to map fields and complete the import.
6. Monitor the import
Use the Imports view to monitor status and confirm completion. Refresh your data view to verify the records were created or updated.
Data Through Views in Action:
Let’s say you need to import a set of account records that only require five fields: Account Name, Phone, City, State, and Country.
Instead of downloading a full system template, you:
- Create a personal view that includes only these five fields.
- Export it to Excel.
- Delete all existing data rows to start fresh.
- Enter a new account:
- Name: Test Account
- Phone: 123-456-7890
- City: Denver
- State: CO
- Country: USA
- Save the file and import it through Dynamics.
After processing, the new record appears in your system exactly as designed, without the clutter or risk of extraneous fields.
Whether you're importing data using system templates or leveraging views for more customized control, D365 Sales gives you powerful tools to manage your data efficiently. Clean, accurate data leads to better decision-making, stronger customer relationships, and less time spent on fixes. By following the steps outlined in this blog, you can confidently take charge of your data imports and keep your system running smoothly.
For More Information
Have questions about importing, updating, or managing data in D365 Sales? The team at Stoneridge Software is here to help. Whether you’re dealing with complex imports, cleaning up legacy data, or planning a broader data strategy, our experts can guide you every step of the way. Contact us today to get started.

Under the terms of this license, you are authorized to share and redistribute the content across various mediums, subject to adherence to the specified conditions: you must provide proper attribution to Stoneridge as the original creator in a manner that does not imply their endorsement of your use, the material is to be utilized solely for non-commercial purposes, and alterations, modifications, or derivative works based on the original material are strictly prohibited.
Responsibility rests with the licensee to ensure that their use of the material does not violate any other rights.