













Create, Apply, and Settle Sales Advances in Dynamics 365 Finance & Operations with Levridge
Does your Ag business require a standardized process for the creation, application, and settlement of sales advances? Are you wishing for a streamlined solution to apply cash against invoiced tickets? Are you unfamiliar with the out-of-box Levridge sales advance framework and are interested in using it in the future?

If you said yes to any of the questions from above, the Sales Advance management tool in Dynamics 365 Finance & Operations with Levridge could be the solution for your business requirements. In this blog, I will demonstrate how to recognize cash received and subsequently generate the customer invoice netting the advances against the outbound ticket amounts.
Lets get started!
Creating the Sales Contract and Ticket
First, we need to go back to the basics of commodity accounting. In order to accomplish that, we’ll need to create an outbound sales contract within Levridge.
(Commodity Accounting module -> Outbound -> Contract -> Sales Contracts)
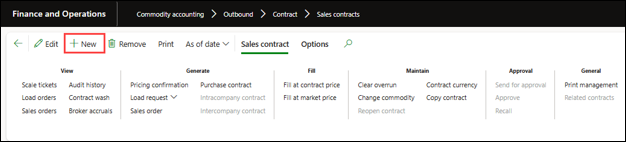
After you click ‘+New,’ enter the sales contract information.
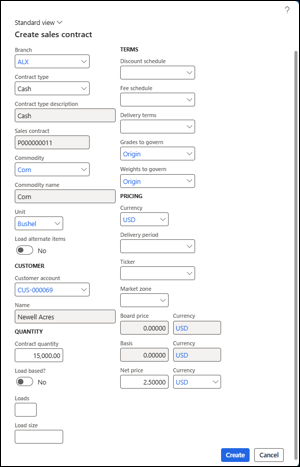
Once you have the sales contract created, you can now start generating outbound tickets against this contract.
(Commodity Accounting Module -> Outbound -> Delivery -> Outbound Tickets)
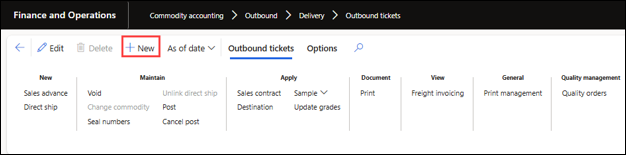
Once you click ‘+New,’ you'll be prompted to enter scale ticket information, such as:
- Commodity
- Branch
- Ticket Number (This may be dependent on if number sequences for scale tickets are automatically generated or not, so your mileage may vary)
- Customer account number
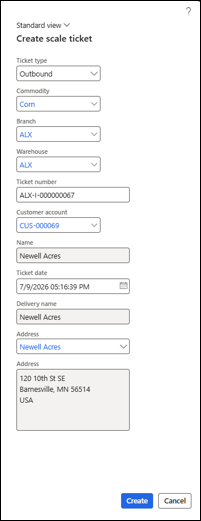
After you select ‘Create,’ you'll be brought to the Outbound tickets page to enter in any weights and grades (if applicable).
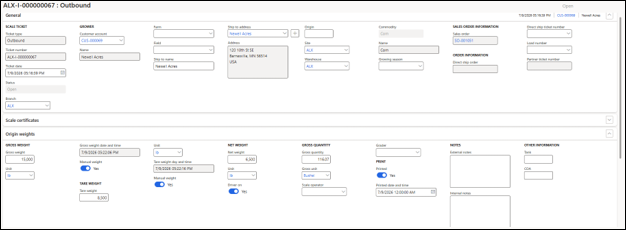
Now that you have an open ticket, it’s time to apply this to the sales contract that you created above. Select ‘Apply -> Sales Contract’ from the action pane.
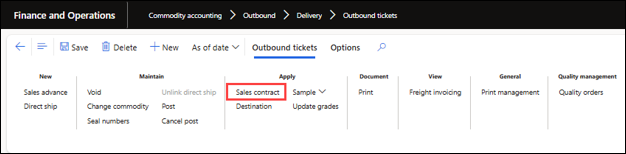
From this screen, mark one or many scale tickets against a priced sales contract. After you've selected a ticket and a contract, you will then select ‘Apply contracts’ from the "Sales Contract" table.
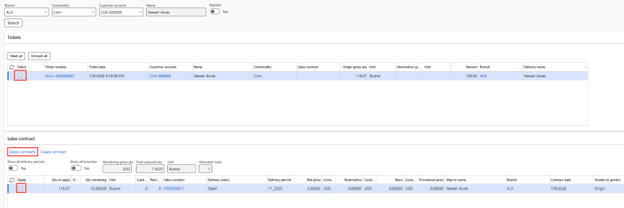
Congratulations - you have successfully created a sales contract and outbound scale ticket, in addition to Applying them together. From this stage, we can easily generate the invoice and send it to our customer.
But wait. Your current business process calls to receive a portion of the invoice amount due from the customer prior to delivery? AND this needs to take fees/discounts into consideration?
Well then… time for a segue into the second stage of this process.
Sales Advance Creation
The processes for recording a sales advance payment and posting invoices involve the following:
- Create a new sales advance
- Record the payment received from the customer
- Apply the Ticket against the advance payment, and lastly,
- Generate the invoice and/or settlement sheet
To start, lets create a sales advance.
Sales Advance – think of the ‘advance’ as the skeleton for the advance payment receipt, wherein we designate which sales contract, and for which tickets we want to calculate the advance request for.
To create the advance, navigate to
‘Commodity Accounting -> Outbound -> Invoicing -> Sales Advances’ and select “+New”
from the action pane
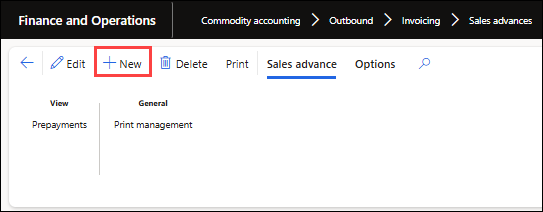
Once you’ve created a new advance, a new window will show that you can use to designate which Customer, Commodity, and Contract you want this request to apply for.
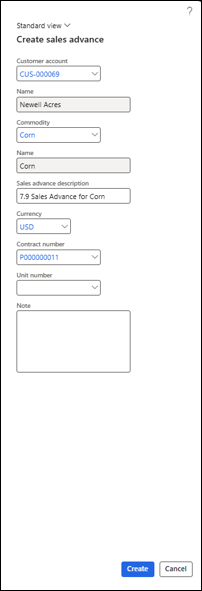
Note that the Customer, Commodity, Currency, and Contract number is a required field. The advance description, Unit Number, and Notes are ancillary information that can be used for future purposes to streamline this process further.
- Sales Advance Description – Descriptor that is present on the sales advance page, also present on the header of the advance
- Unit Number – Useful if the tickets that have been applied to the contract are grouped together (i.e., A unit train with 100 tickets, with each ticket representing a car)
- Note – This is an internal field that can be helpful to other users to see more specific details regarding this advance. Will also be present on the advance header
Once you click ‘Create’ from the sales advance window, it will bring you to the newly created sales advance details screen. We can see header information (Advance number, Description, Customer Account, Contract Number, and commodity), as well as the scale tickets fast tab.
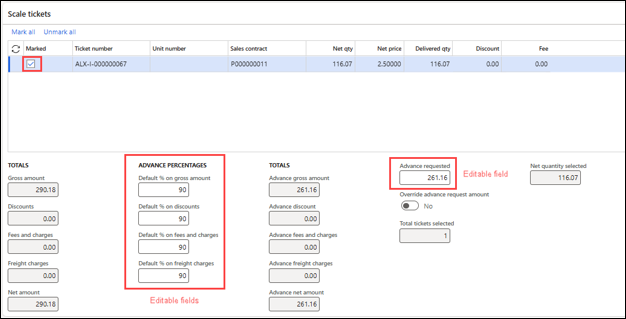
In this example, I have a marked ticket against this advance request. In the ‘Advance Percentages’ table, I can see that Levridge will automatically calculate this advance based on the parameters that I have configured (90% on gross amounts from tickets, discounts, fees & charges, and freight)
Note: these fields highlighted with the red box are editable fields, so you are able to reduce/increase the advance request to whichever amounts are applicable.
Configuration Note:
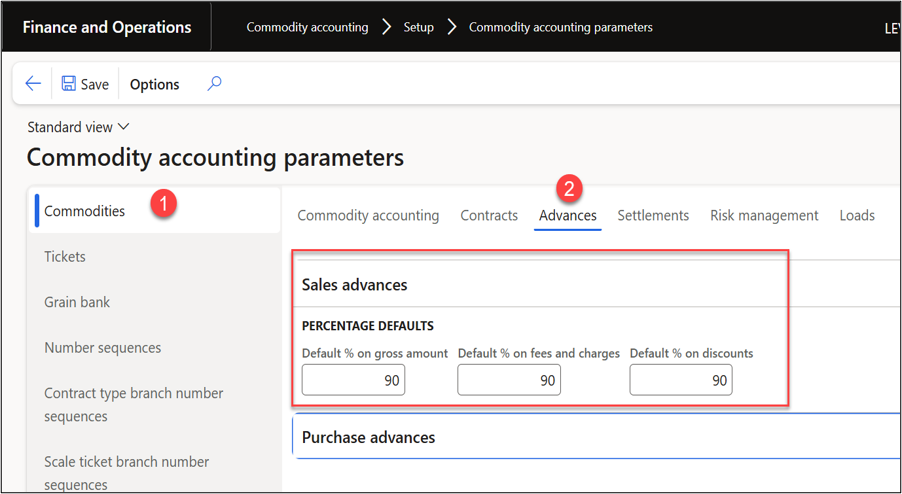
If you would like to configure your default percentages based on Gross amounts, fees/charges, or discounts even further: Navigate to ‘Commodity Accounting -> Setup -> Commodity Accounting parameters’ from there, select ‘Commodities -> Advances’ tab.
After an advance has been completed, you have the option to print out the advance request and send it to my customer. If print management is configured, Levridge can automatically send a copy to our customers instead.
Recording Customer Advance Payments
To record the receipt of customer payment against the sales advance, navigate to ‘Commodity accounting -> Outbound -> Invoicing -> Sales advance payments’ and in the ‘payments’ page, click ‘+New’ and use a customer advance payment journal, along with entering a description for this payment.
Next, click ‘Enter Advances’ in the action pane which will open up the ‘Enter Advances’ screen. If you have worked with the customer payment journals, this screen will look and feel familiar in nature.
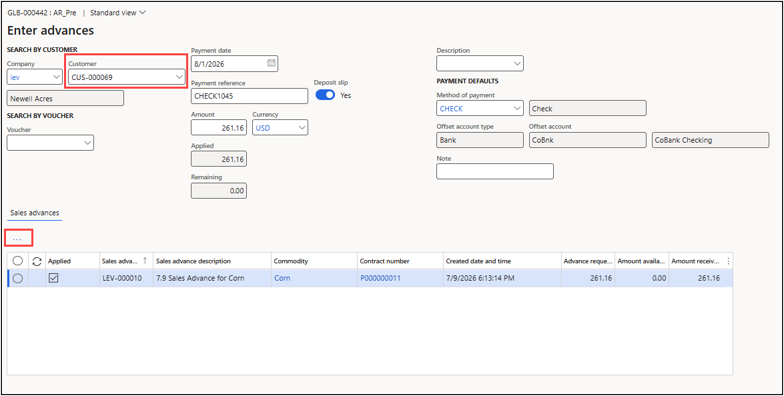
From this screen:
- Enter a customer account number, once a customer is selected, all sales advances will populate in the lower table
- Enter the amount received from the customer for the advance in the ‘Amount’ field in the middle column
Note: Over/Under payments are allowed during this process - Enter the appropriate payment reference if applicable, for this example I will use Check # 1045
- In the lower table, select the 3 dots and click ‘Apply,’ which will apply the payment received against the advance request. You can verify this information by checking the ‘Amount received’ and ‘Amount available to pay’ columns in the lower table
- Once you have entered all applicable details, click ‘Save in journal’ in the action pane, and then go back to the sales advance payment screen.
- Once you're in the ‘Sales Advance Payment’ screen, click on the journal number to the customer payment you want to post.
- In the customer payment journal lines, verify that all information looks correct and then click ‘Post’ in the action pane.
Now, you’ve created the sales advance and recorded the advance payment against the advance request. All that is needed now is to generate the sales invoice for the customer for the applicable scale tickets and the sales advance payments.
Generating Sales Invoice
To process my sales invoice, first navigate to ‘Commodity Accounting -> Outbound -> Invoicing -> Shipped not invoiced’ and select the scale ticket hyperlink associated to my customer, for a specific commodity.
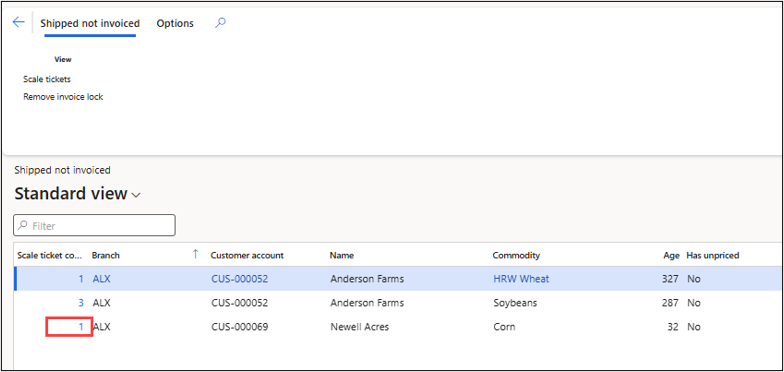
From the ‘Shipped not invoiced’ page on my customer, select any applicable tickets that I want to generate the invoice for. Next, select the ‘Advances’ tab above the tables and manually mark an advance by checking the leftmost toggle on the table.
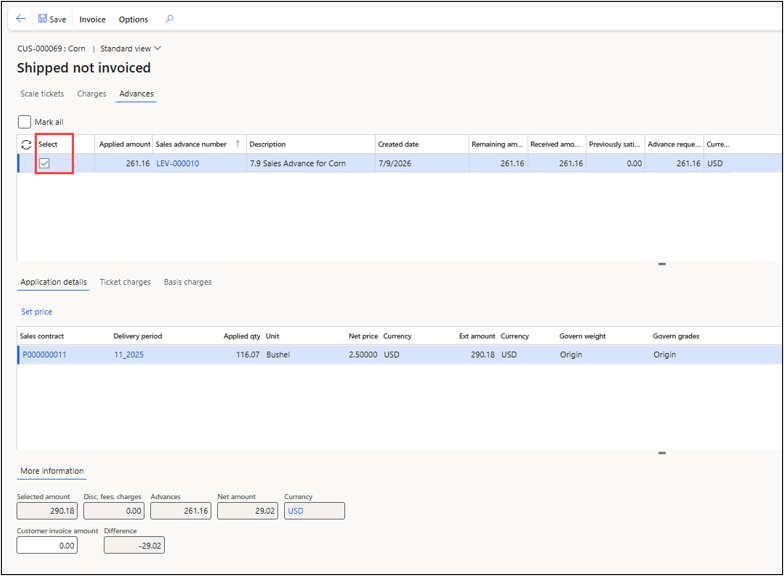
From here, you can verify net amounts from the information fields on the bottom of the page. Once you have decided to generate the invoice, click ‘Invoice -> Generate -> Invoice’ from the action pane.
Next, indicate my invoice parameters, such as if you want to print an invoice and settlement sheet, the invoice date and due dates, and if you would like to summarize all tickets and sales advance payments to one page.
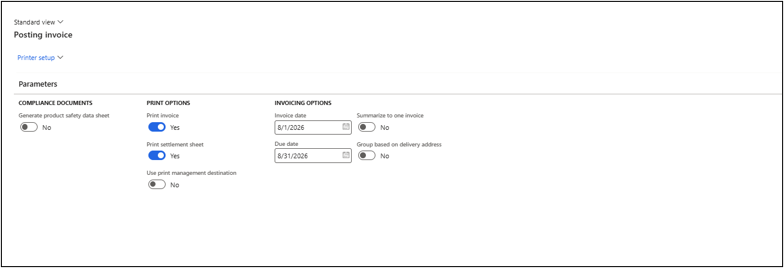
From there, you will post the sales invoice which will include scale ticket information and any advance payments recorded.
Sales Advance Workflow Wrap Up
Learn more about Levridge and its commodity accounting capabilities.
Have questions? Reach out to the Stoneridge team.

Under the terms of this license, you are authorized to share and redistribute the content across various mediums, subject to adherence to the specified conditions: you must provide proper attribution to Stoneridge as the original creator in a manner that does not imply their endorsement of your use, the material is to be utilized solely for non-commercial purposes, and alterations, modifications, or derivative works based on the original material are strictly prohibited.
Responsibility rests with the licensee to ensure that their use of the material does not violate any other rights.