


Dynamics 365 CRM – October 2019 Release Wave 2
Starting in October, Microsoft will begin rolling out its second wave of updates to Dynamics 365 Customer Engagement. There are many exciting new features in the October release that will have an immediate impact on the end-user, as well as other changes that will impact system administrators and maker functionality.
Based on the features included in this release, it’s clear that Microsoft is listening to the feedback from customers, partners, and vendors, as these new features are truly designed to help drive the digital transformation of your business.
Top feature changes that will impact end-users:
Reduction in White Space
-
- The first thing you may notice is the reduction in white space between fields. There are around 50% more records visible in the new view than before, making it quicker to navigate through a large number of records. The new view is even cleaner and more appealing than the last one.
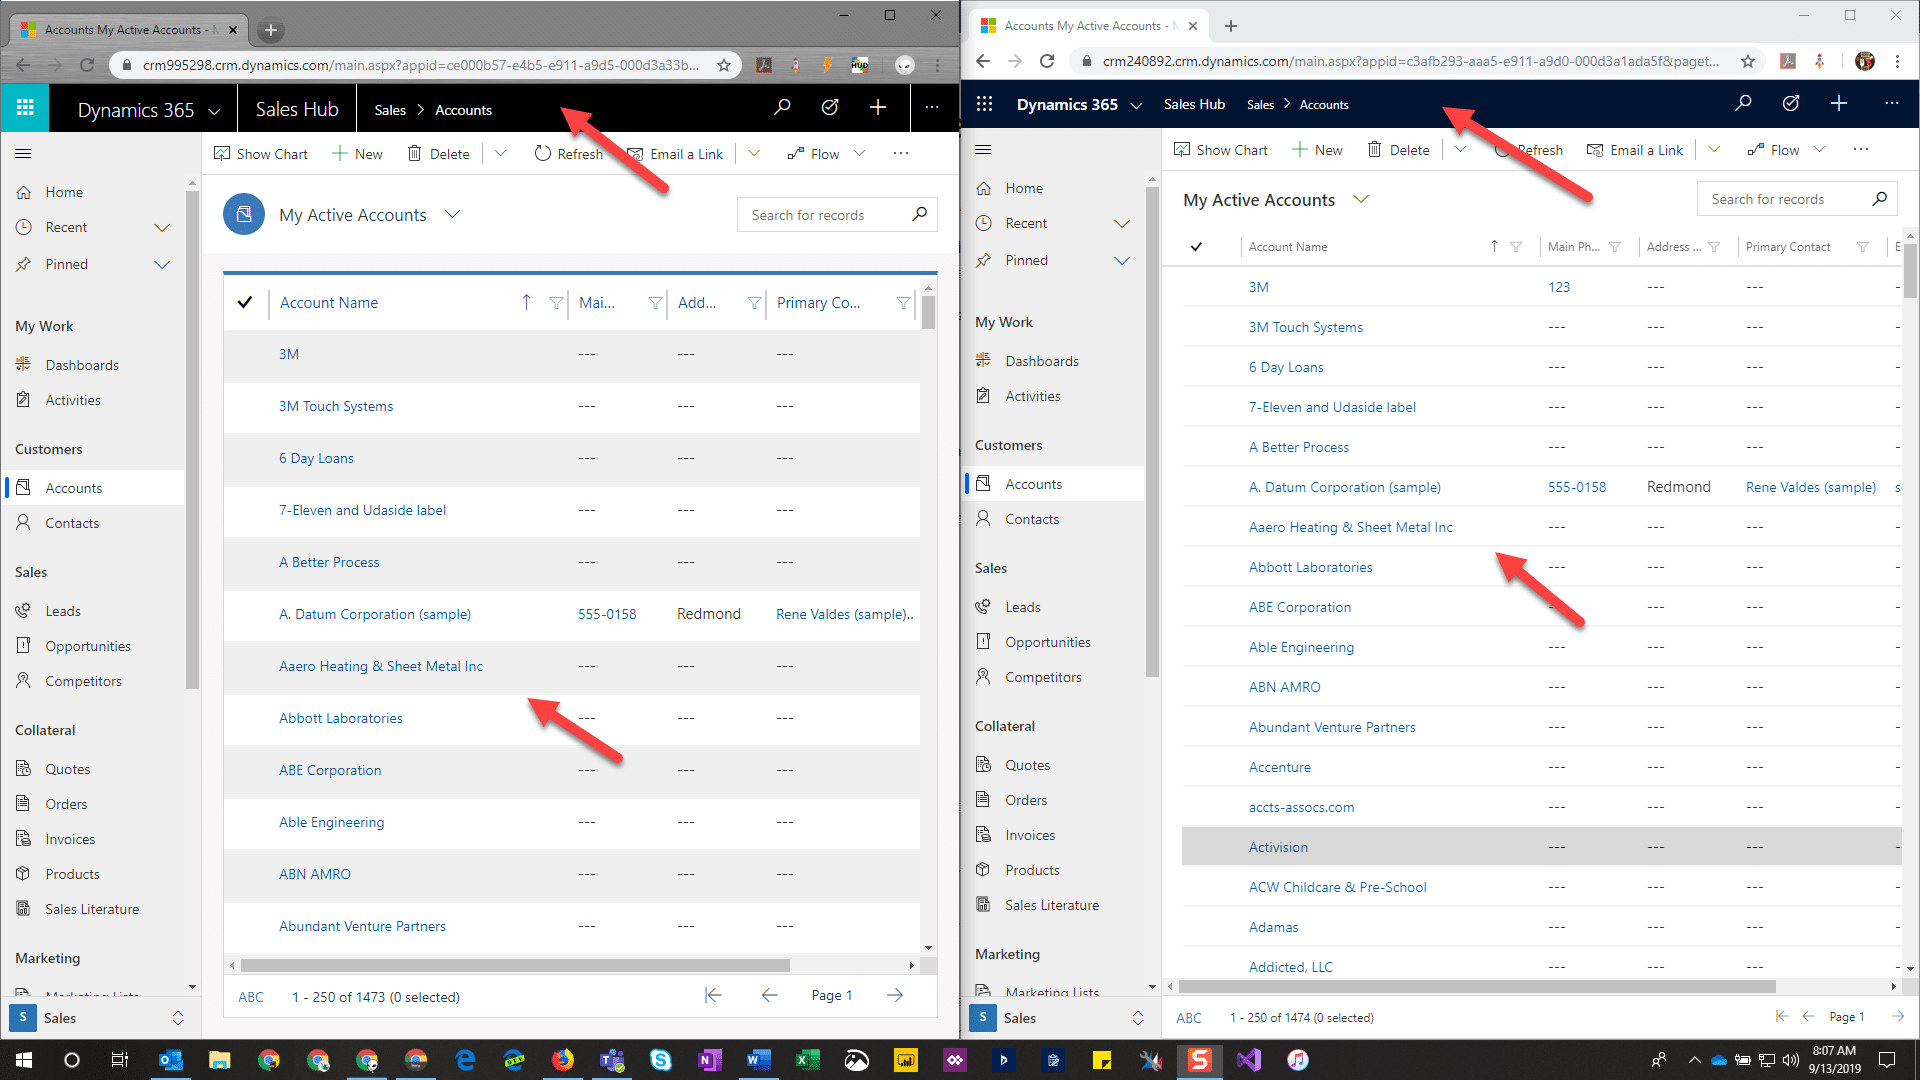
(Left) Previous View; (Right) New View
-
- Notice the top command bar has been condensed slightly and given a sleek new look.
- In the above example, you can see 12 records in the previous view and 18 in the new view due to the reduced white space between records.
High-Density Header
-
- Another visual change is the all-new High-Density Header available on forms. This is a feature exclusive to the new UI. Previously you would edit your header fields by selecting each directly, now you’ll conveniently be able to edit all fields in the header from one dropdown location, as shown in the example below. The behavior of the fields will still depend on whether or not they are editable or read-only.
- In addition, the header is designed to fit the device being used to display the form. So whether you are using a desktop, tablet, or a phone, the header will still show up on your screen. Previously for example, if you were to shrink your browser window on your desktop you may not see the header, whereas now it will form to the screen size.
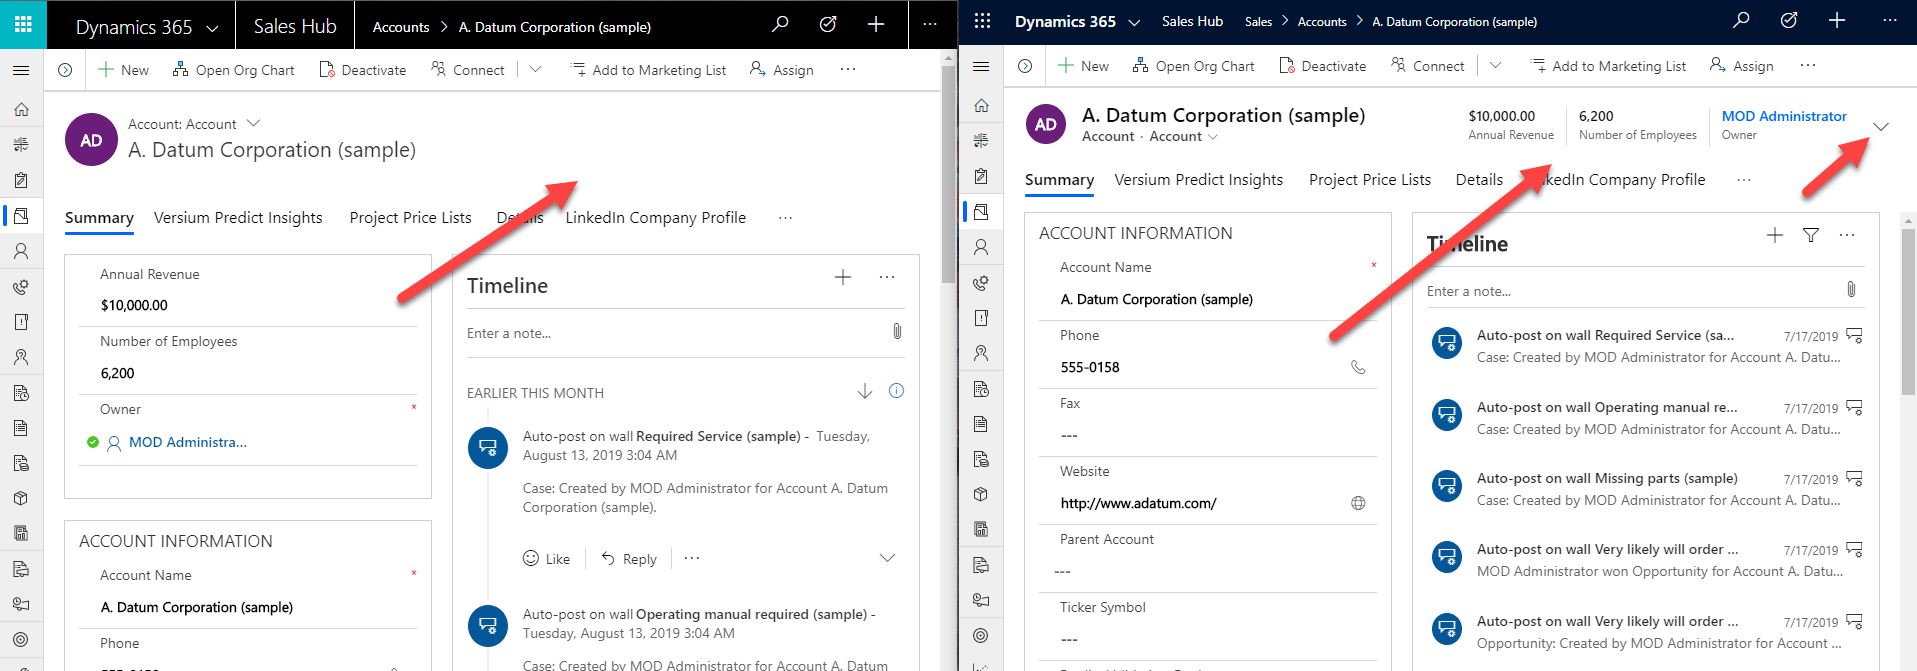
(Left) Previous View; (Right) New View
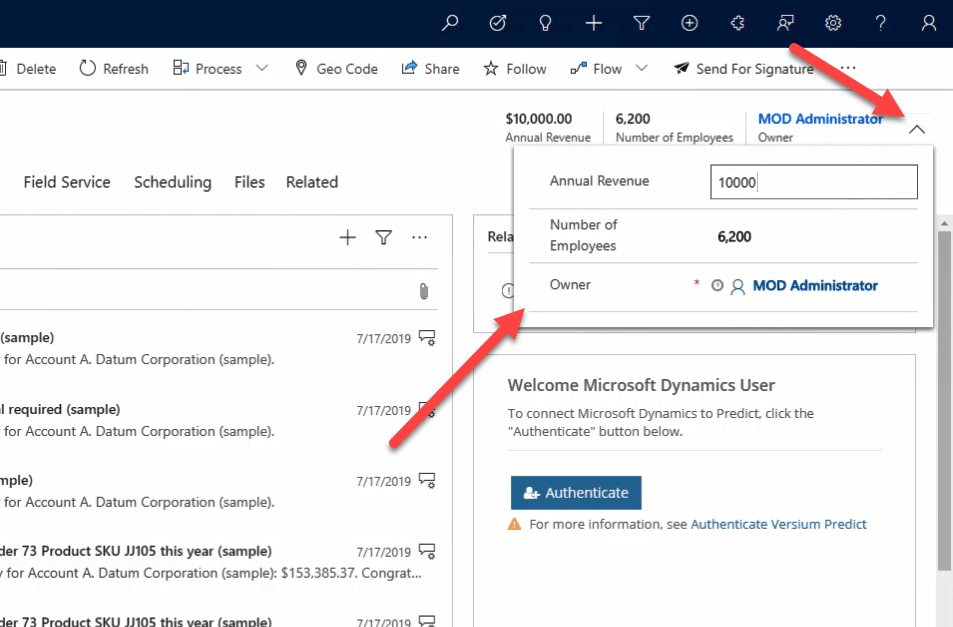
Accessing the header fields
-
-
- To enable this feature on a form, a system admin will need to apply it using the new form designer in the Maker Portal.
-
Scan Business Cards
-
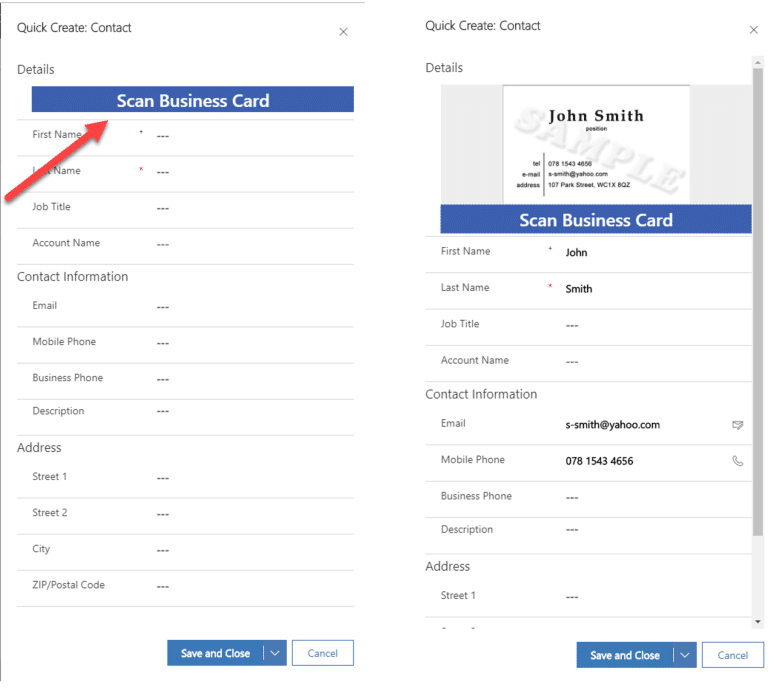
- An exciting new feature that has been in development using PowerApps is now going to be built into CE, scanning a business card to create a new contact.
- You’ll have the power to use your mobile Dynamics 365 app from your phone or tablet to scan it with your camera, or if you have a copy of the business card saved to your computer you can simply import it. If using from your desktop, simply use Quick Create to access this feature. Having tested it out I will confirm that it’s not perfect, but it will typically grab the name, email, and phone number if the layout of the card isn’t too complicated.
-
- This handy feature will be great for those on the go to quickly create a new contact versus going through the process of filling in each field individually. To use on your mobile device, you must also select Quick Create to see the option to Scan Business Card.
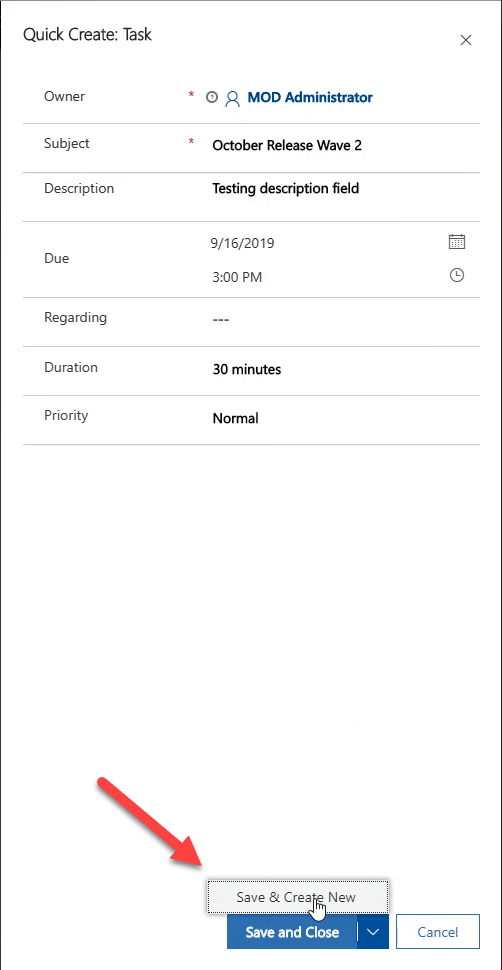
Save & Create New (Quick Create)
-
- This is a feature that was available in CRM several versions ago, and now it’s back! When you are using the Quick Create feature, you now have the option to choose Save and Create New, so that you don’t have to close the window and open a new one. This feature is a big time saver when having to enter multiple records.
- To access Save & Create New, select the caret next to the Save and Close button.
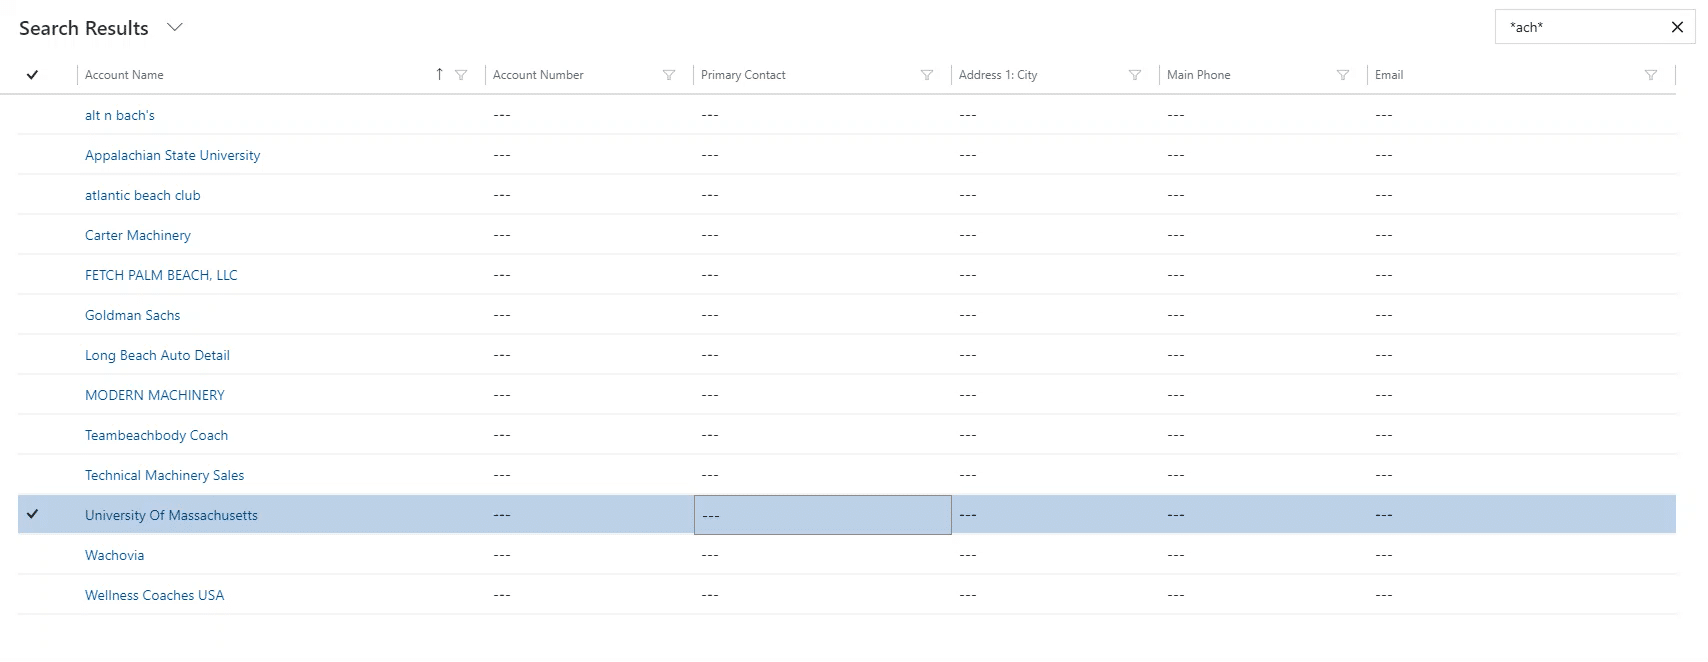
Quick search results saved
-
- So you need to look for an account and you’ve decided to use the quick search box, but after selecting a record you want to go back to your search results….but they’re gone. Well not anymore. This small feature change will be well received by those that want to quickly refer back to their search results.
- In the example below, I used *ach* to find accounts with an ‘ach’ in the searchable fields. After selecting Carter Machinery, I can use the back button on the browser and my search results will still be there. In previous versions, your search results would be wiped out.
‘Regarding’ Lookup Field Filter
-
- This feature will now allow you to better filter search results using the Regarding lookup field. After putting data into the field, a search view will show up indicating how many different types of records are available. You can then click on the hyperlink for ‘types of records’ and it will let you choose which record type you want to search.
![]()
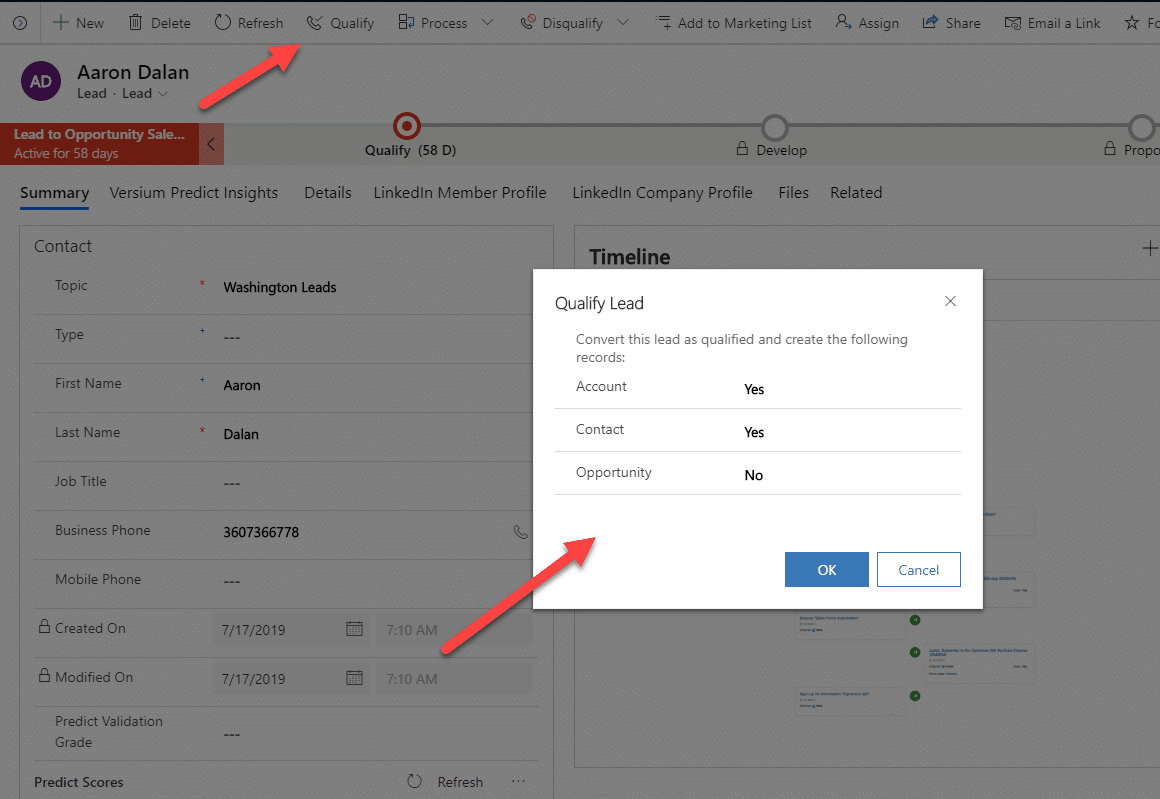
Simplified Lead Management Experience
-
- When you select an existing contact or account at the creation of a new lead, related fields will auto-populate.
- You now have the option of allowing your team to choose whether they create an Account, Contact, and/or Opportunity from a Lead when they select Qualify. A new window will pop up to let you choose which records to create. See the screenshot below.
-
- This feature must be enabled by a system admin in the system settings.
Opportunity Close Dialog Box
-
- There is now an option to add custom fields to the Close dialog box for Opportunities. In the example below I added the field ‘Custom Field Test’. You will likely have one or more fields that are important to your business that could be added.

-
-
- This feature must be enabled by a system admin in the system settings.
-
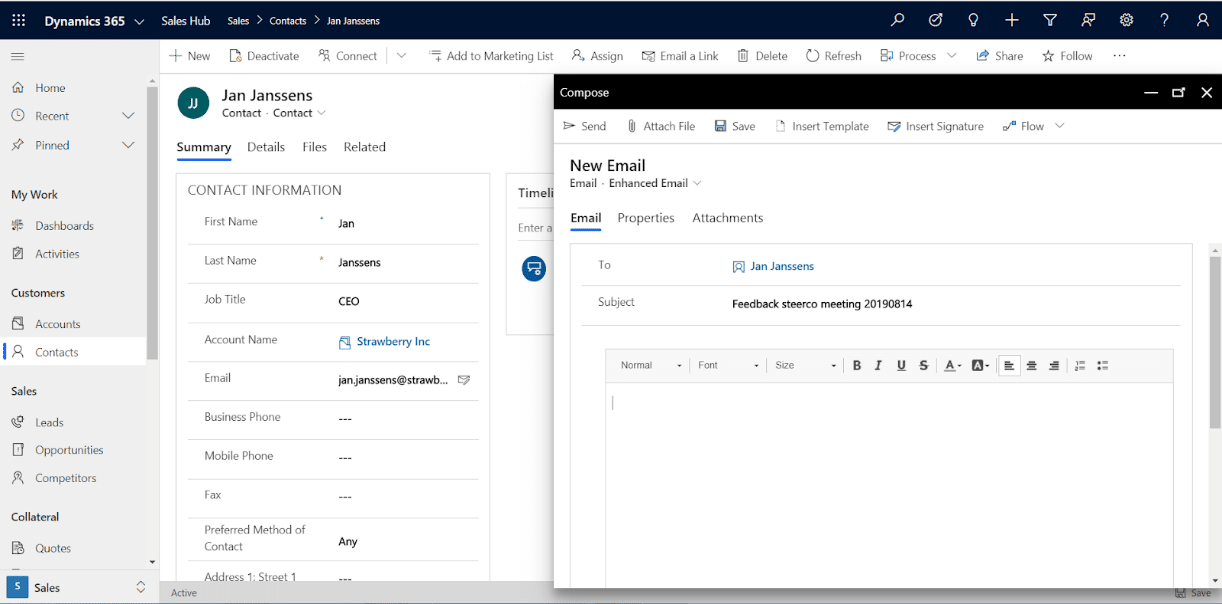
Contextual Email Communication
-
- Email is a central component to most salespeople, as you are in constant contact with your customer base. To enable you to be more efficient and not feel the need to navigate out of CE to use Outlook or whatever your email client may be, Microsoft has added new features to Email within the system.
- The look and feel of the Enhanced Email form is clean and easy to use. You can easily attach documents, and also leave drafts open so that you can navigate between other records before coming back to the Email window, while still leaving it open.
-
- Enhanced Email must be enabled in the App Settings.
Timeline Usability Enhancements
-
- The Timeline component was given a nice facelift in the new release. The previous version had a lot of unnecessary whitespace and lacked information density.
- The new and improved Timeline will enable users to see much more information without scrolling, as well as provide improved filtering.

-
- As you can see in the above screenshot, the new Timeline is much cleaner and allows you to see more records than in the Timeline than before.
- You’ll also notice that in the new Timeline there is a filter next to the + icon, allowing you to easier search for a specific record type.
Record Hierarchy
-
- Many of you take advantage of the Org Chart available in CE to create a visualization of the structure within an account, such as in the example below. This helps you quickly understand the structure and relationships between multiple contacts or users.
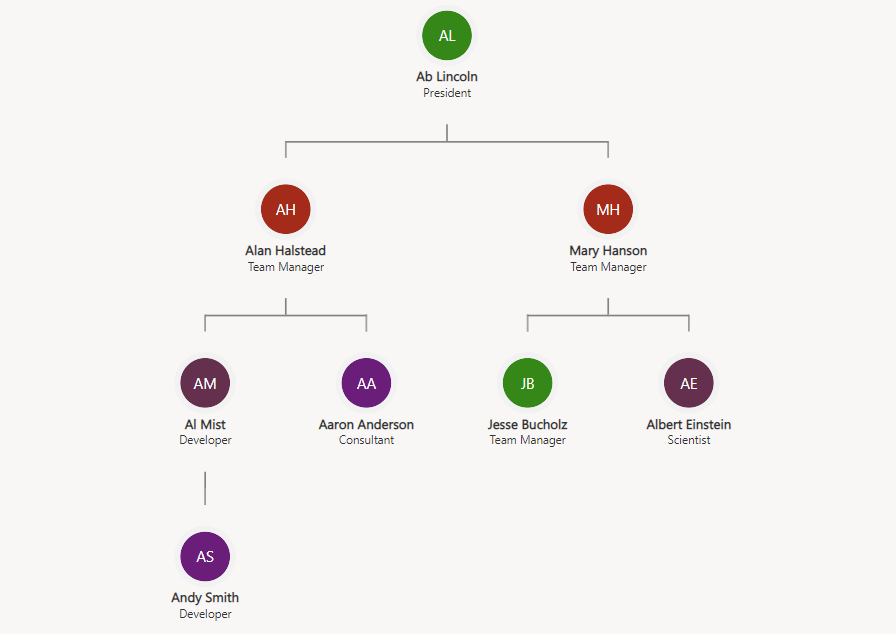
-
- Now you have the ability to create a visual hierarchy that exists between records within an entity. For example, if you have a parent company account that also has multiple companies underneath them. Now you can easily create that relationship and see it in a new interactive hierarchy form.
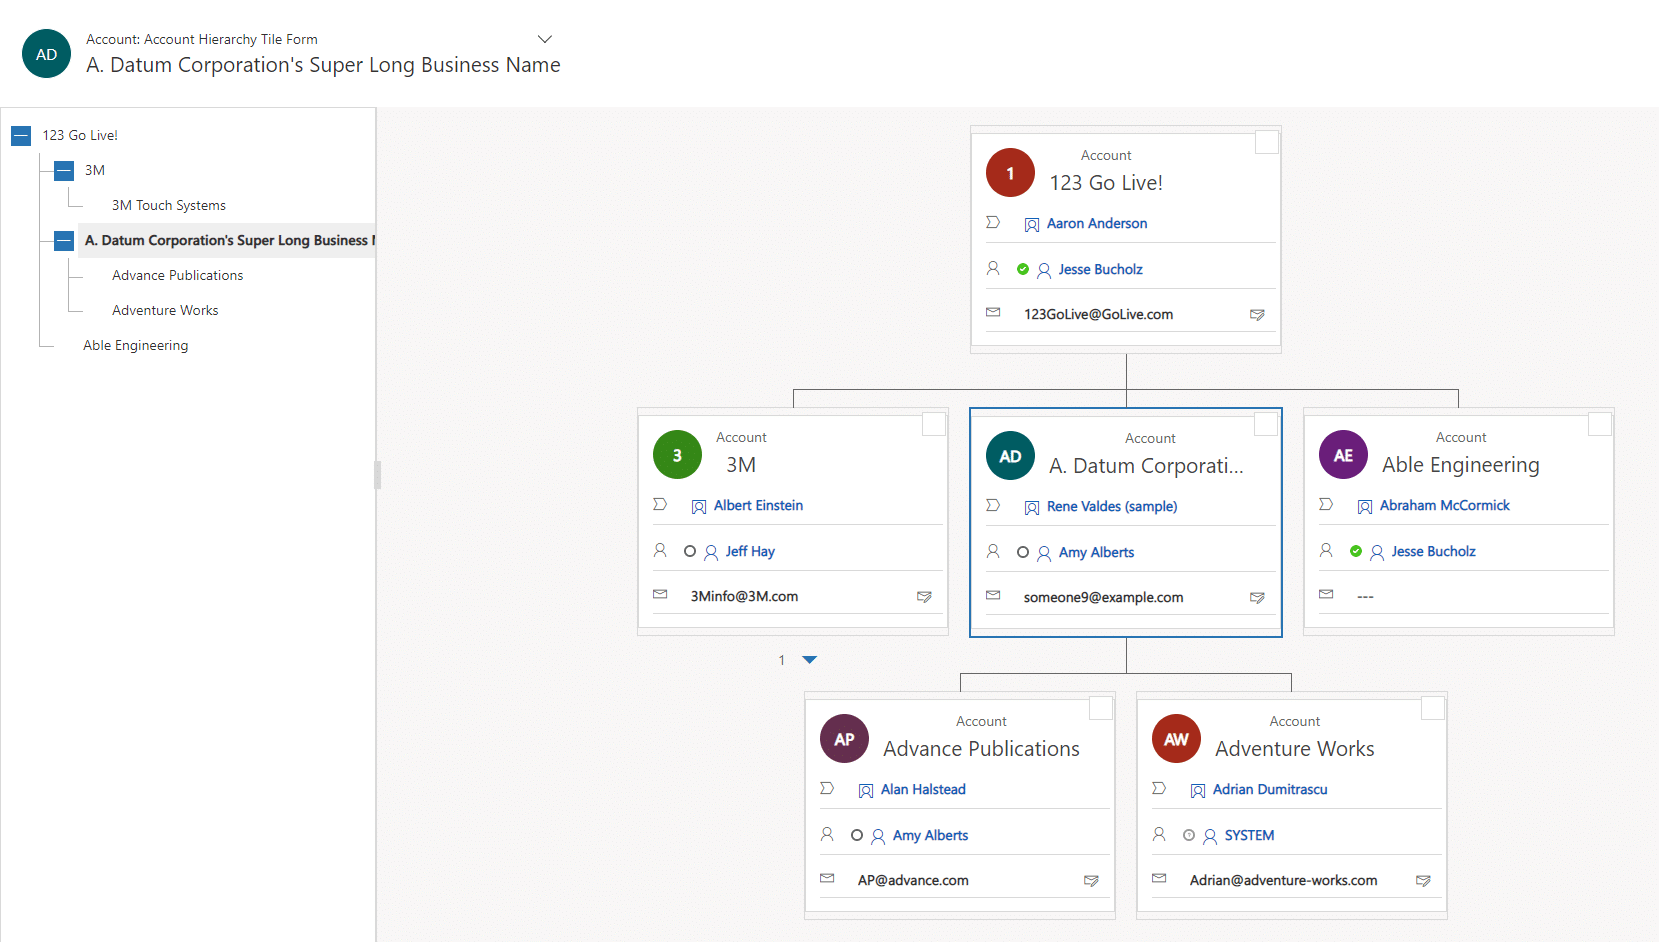
-
- On the left of the form, you have a tree view of the records, and the right will provide you will cards for each record. You can add or remove fields from these cards to give you the information that best fits your needs. By clicking into one of the cards it will open the records form.
- This feature is available for custom entities as well.
- To identify records that have a parent/child relationship with another record, you’ll notice a new hierarchy icon on the entity grid view. Then you can simply click the icon, or if you open the record, you’ll also have a new Hierarchy button on the form’s command bar.
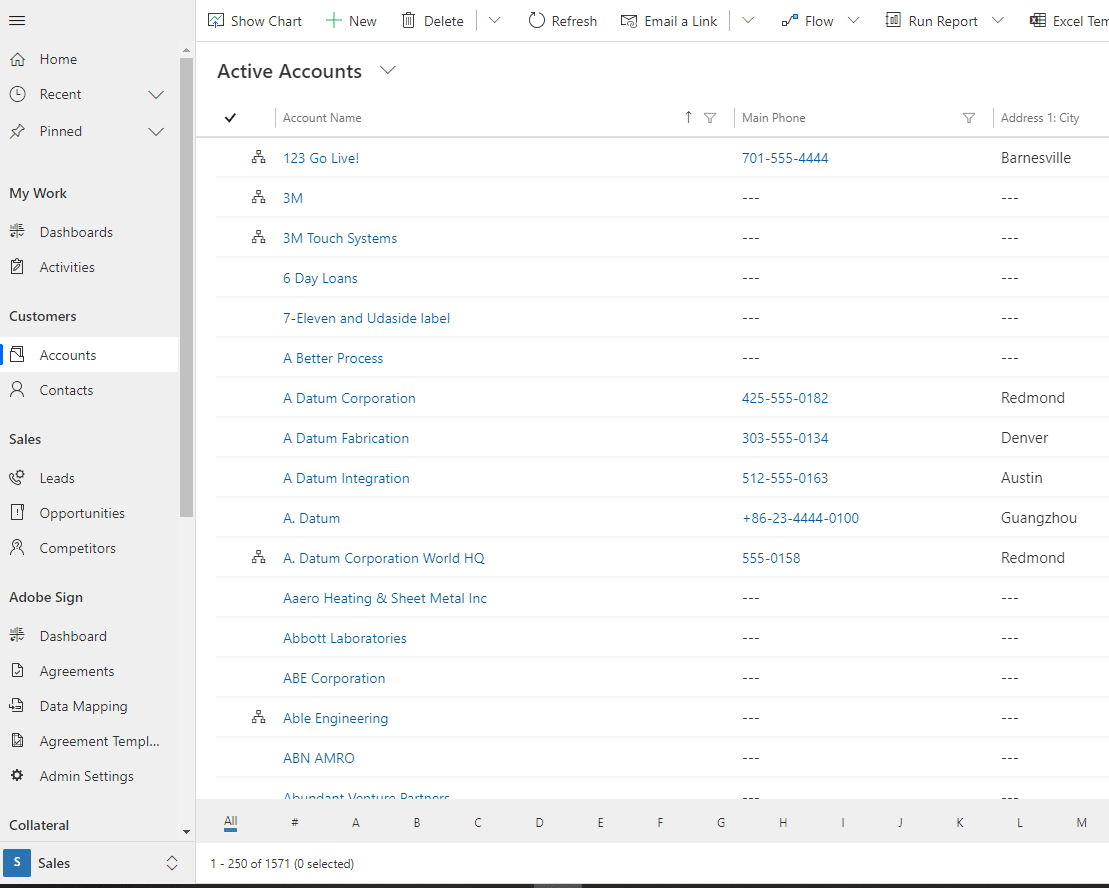
-
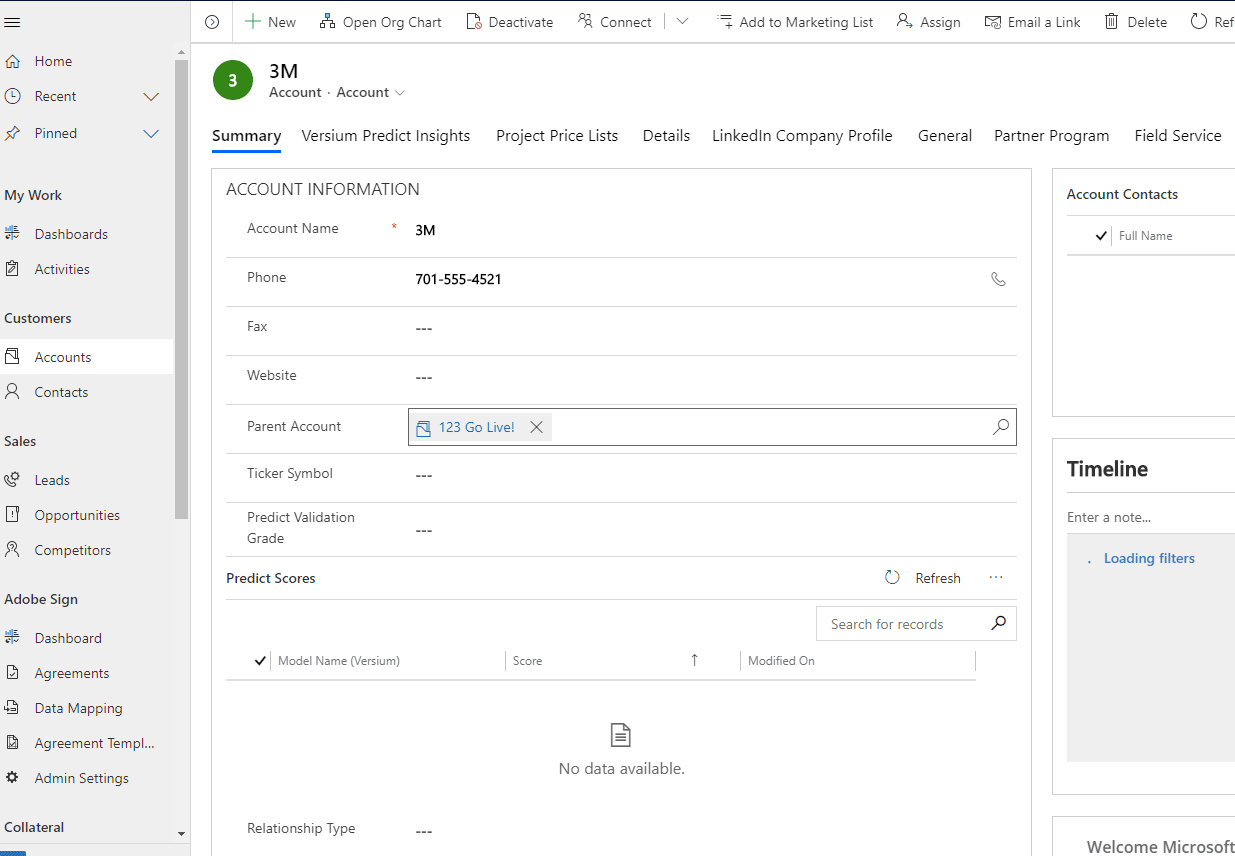
- To create this relationship, simply add the Parent entity field to the form. This is a lookup field and will create the relationship once filled in.
Lookup Field Behavior
-
- Last, but not least! I wanted to talk about the behavior of the lookup field on forms.
- The lookup field is there to allow you to select existing records and add them to a form. This field contains a ‘spyglass’ icon on the right. As you start to type in the field, your search results will begin to filter and you will have the ability to select a record to populate the field. One change with this field is the behavior of the ‘spyglass’ icon. Moving forward, if you have not entered any text into the field, you will hit the ‘enter’ key to bring up search results, instead of clicking the ‘spyglass’ icon.
We’ve highlighted several of the new features rolling out in the October Release Wave 2 and are excited to see how they will impact users moving forward. Be sure to follow the Stoneridge Software blog for other important feature release notes as they become available.

Under the terms of this license, you are authorized to share and redistribute the content across various mediums, subject to adherence to the specified conditions: you must provide proper attribution to Stoneridge as the original creator in a manner that does not imply their endorsement of your use, the material is to be utilized solely for non-commercial purposes, and alterations, modifications, or derivative works based on the original material are strictly prohibited.
Responsibility rests with the licensee to ensure that their use of the material does not violate any other rights.